Ingredients
Equipment
Method
- Step 1: First things first, preheat your oven to 350°F (175°C). Then, grab your donut pan and give it a light grease. This helps those beautiful donuts pop right out after baking.
- Step 2: In a nice big bowl, whisk together your dry ingredients: the flour, sugar, baking powder, baking soda, and salt. Just a quick whisk to make sure everything is combined.
- Step 3: In a separate bowl, whisk together your wet ingredients: the milk, yogurt (or sour cream), egg, melted butter, and vanilla. Once that's smooth, gently stir in your finely chopped strawberries. It's going to look so pretty already!
- Step 4: Now, add the wet ingredients to the dry ingredients. Stir everything together until it's just combined. Seriously, stop stirring as soon as you don't see any dry streaks of flour. Overmixing can make cake donuts tough, and we want these to be wonderfully tender.
- Step 5: Spoon or pipe the batter into your prepared donut pan. I like to use a piping bag with the end snipped off, or even just a zip-top bag, but two spoons work just fine too! Fill each cavity about 3/4 full. Don't overfill, or you'll lose that perfect donut shape.
- Step 6: Pop the pan into your preheated oven. Bake for about 12–14 minutes. You'll know they're ready when they look golden around the edges and spring back a little when you gently touch them.
- Step 7: Let the donuts hang out in the pan for about 5 minutes after you pull them out of the oven. This helps them set up. Then, carefully transfer them to a wire rack to cool completely. This step is important before glazing!
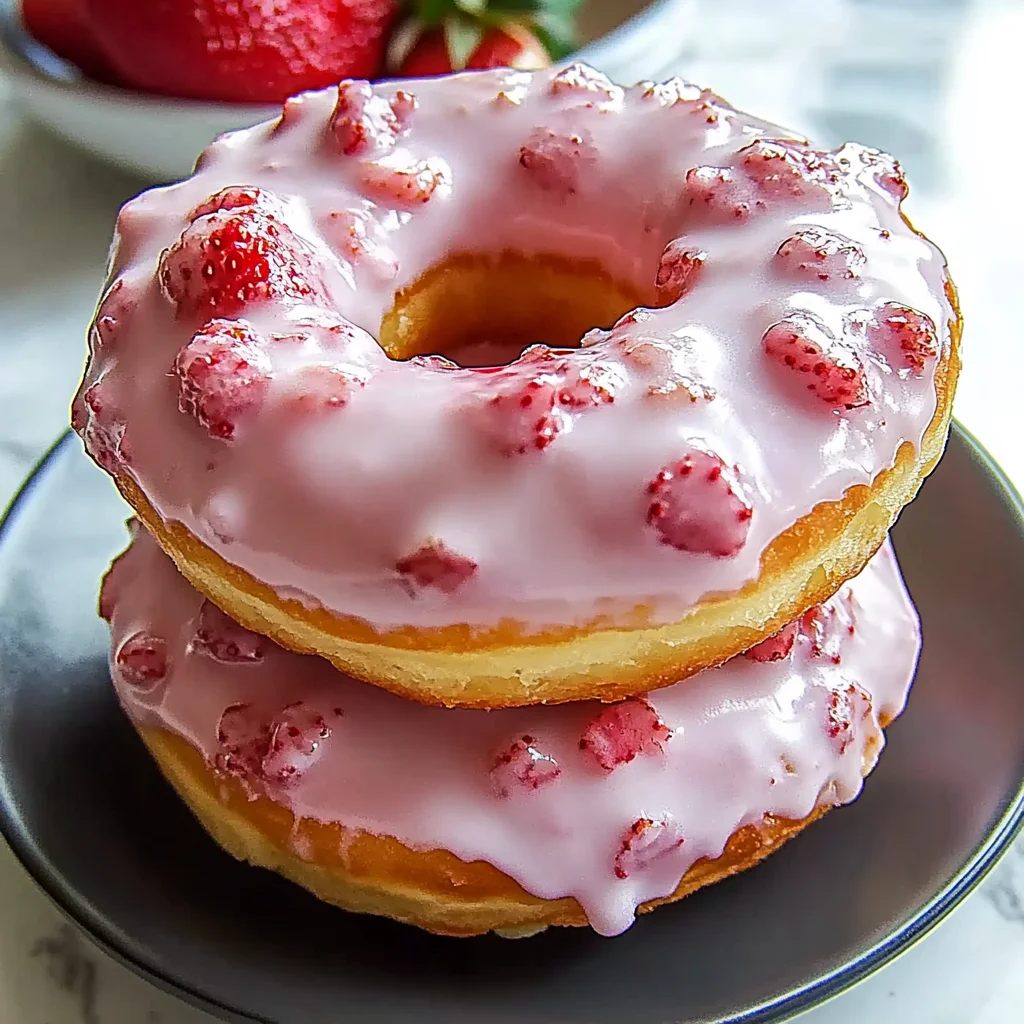
- Step 8: While the donuts are cooling, whip up that gorgeous glaze. In a small bowl, whisk together the powdered sugar, strawberry puree, and vanilla extract until it's nice and smooth. If it seems a little thick, add another tiny drop of strawberry puree or milk. If it's too thin, add a little more powdered sugar. If you want that bright bakery pink, add a tiny drop of food coloring now.
- Step 9: Once the donuts are completely cool (seriously, wait until they're cool!), dip the top of each donut into the glaze. Let the excess drip off back into the bowl.
- Step 10: Place the glazed donuts back on the wire rack to let the glaze set. If you love a thicker glaze (like I do!), wait a few minutes for the first layer to slightly firm up, then give them a second dip.
Notes
Tips for Success: Don't overmix the batter! Stirring until just combined is key for tender donuts. Finely chop the strawberries. Larger chunks can sink or make the batter uneven. Grease your pan well. Even if it's non-stick, a little grease is extra insurance. Don't overfill the cavities. About 3/4 full gives them room to rise without losing shape. Cool completely before glazing. Glazing warm donuts will result in a messy, runny glaze that doesn't set properly. Make smooth strawberry puree. Ensure there are no chunks for a smooth glaze. You might even strain it if you like it extra smooth.
How to Store It: These donuts are best enjoyed fresh, but they'll keep! Store them in an airtight container at room temperature for a day or two. If you need them to last longer, pop them in the fridge for up to 4-5 days. They might lose a little bit of moisture in the fridge, but they'll still be delicious!