Ingredients
Equipment
Method
- Step 1: Get things ready: Preheat your oven to 350°F (175°C). This gives it plenty of time to heat up evenly. Then, grab two 8-inch round cake pans. Give them a good grease (shortening or baking spray works well) and then dust them with flour. This is key to making sure your beautiful cakes don't stick! Tap out any excess flour.
- Step 2: Mix the dry stuff: In your biggest mixing bowl, pour in the box of vanilla cake mix and the little box of orange gelatin mix. Give them a quick whisk together just to combine.
- Step 3: Add the wet stuff: Now, add the orange juice, vegetable oil, those three large eggs, the vanilla extract, and that lovely orange zest. Using an electric mixer (handheld or stand mixer), start on low speed to get everything incorporated without making a flour cloud. Then, increase the speed to medium and beat for about 2 minutes. You want the batter to be smooth and well combined, but don't overmix!
- Step 4: Divide and bake: Pour the batter evenly into your two prepared cake pans. I like to use a kitchen scale for this to make sure they're exactly even, but eyeballing it is totally fine too! Pop them into the preheated oven. Bake for 25–30 minutes. How do you know they're done? A toothpick inserted into the center should come out clean.
- Step 5: Cool down: Let the cakes hang out in their pans for about 10 minutes after taking them out of the oven. This helps them firm up slightly. Then, carefully invert them onto wire racks to cool completely. Make sure they are totally cool before you even think about frosting them, or you'll have a melty mess!
- Step 6: Whip up the frosting: While the cakes cool, let's make that dreamy frosting! In a large bowl, beat your softened butter until it's light and fluffy. Gradually add the powdered sugar, about a cup at a time, beating well after each addition. The mixture will get pretty thick. Now, add the heavy cream and the optional orange extract. Beat again until the frosting is smooth and spreadable. If it's too thick, add another splash of cream. If it's too thin, add a little more powdered sugar.
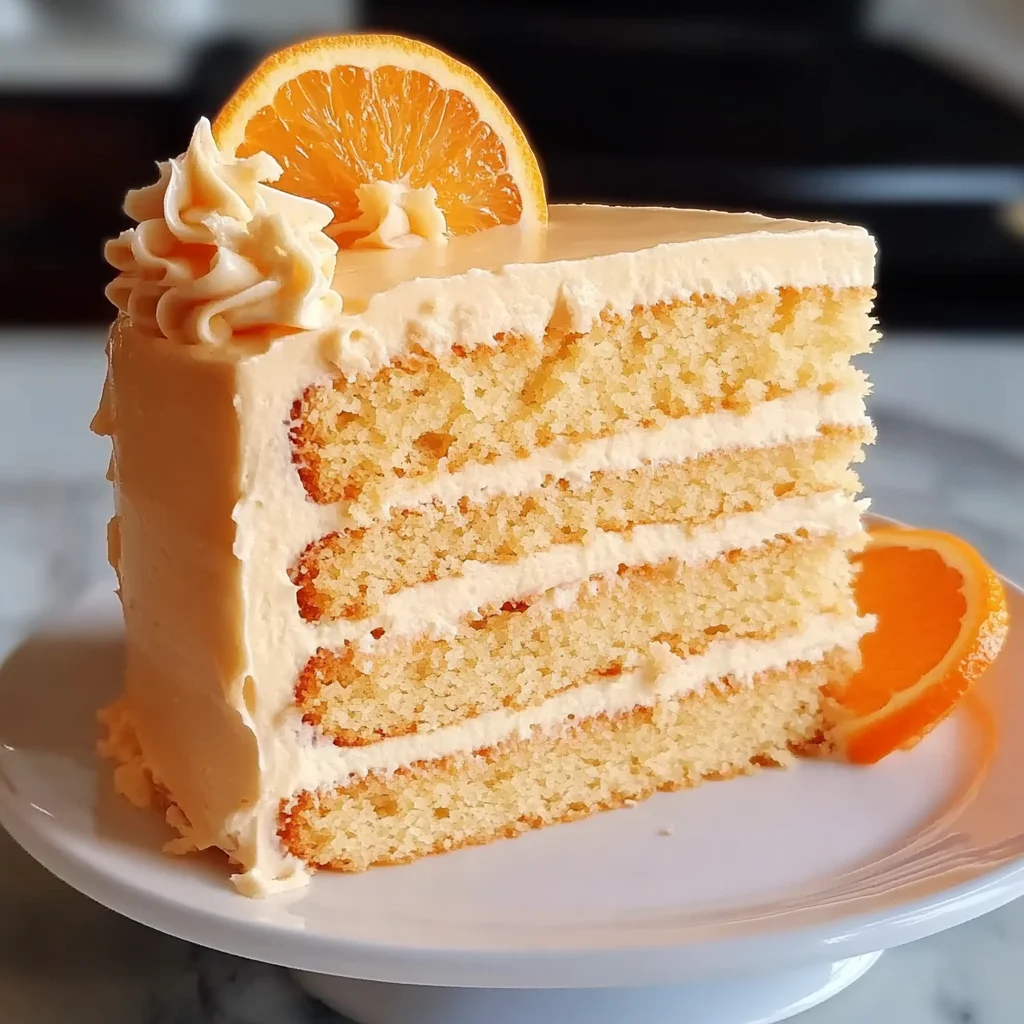
- Step 7: Assemble the cake: Place one cooled cake layer on your serving plate or cake stand. Spread a generous layer of frosting on top. Carefully place the second cake layer on top. Now, use an offset spatula or knife to frost the top and sides of the entire cake. Don't worry about perfection; a rustic look is lovely!
- Step 8: Slice and serve: And just like that, your Orange Creamsicle masterpiece is ready! Slice it up and watch those happy faces appear.
Notes
Substitutions & Additions: Want to play around? Here are some fun ideas! Change the Flavor: Not a huge orange fan? Try lemon gelatin and lemon juice/zest! Or maybe lime? Get creative with your favorite citrus. Add Color: Want a more vibrant orange hue? Add a drop or two of orange food coloring (gel works best!) to the batter and/or the frosting. Make it Swirly: You could try swirling a little extra orange gelatin powder into the frosting for a marbled effect! Extra Texture: Sprinkle the top with crushed Nilla wafers, white chocolate curls, or even some orange sanding sugar. Cream Cheese Frosting: If you prefer, you could make a cream cheese frosting and add orange zest or extract to it for a slightly tangy twist.
Tips for Success: Even though this cake is easy, here are a few little pointers I've picked up along the way to make sure yours is absolutely perfect: Use Room Temperature Ingredients: For the frosting especially, make sure your butter is softened. It helps everything cream together beautifully. Don't Overmix the Batter: Mixing cake batter too much can develop the gluten and lead to a tougher cake. Mix just until everything is combined and smooth. Cool Cakes Completely: I know, I know, it's tempting to frost warm cakes, but trust me, it's not worth the melty mess! Patience is key here. Grease & Flour Well: Taking the time to properly prepare your pans ensures your cakes release easily. Nothing's more frustrating than a stuck cake layer! Make Ahead: You can bake the cake layers the day before and wrap them tightly in plastic wrap once completely cool. You can also make the frosting ahead of time and store it in the fridge; just let it come to room temperature and re-whip it before frosting.
How to Store It: This cake is best enjoyed within a few days, but here’s how to keep it fresh: Counter: If your kitchen isn't too warm, you can store the frosted cake loosely covered (a cake dome is great!) at room temperature for 1-2 days. Refrigerator: For longer storage, or if it's warm, store the cake in an airtight container in the refrigerator for up to 4-5 days. The frosting will firm up slightly when chilled. Freezing: You can freeze unfrosted cake layers wrapped tightly in plastic wrap and then foil for up to 3 months. Thaw in the refrigerator overnight before frosting. Frosted cake can also be frozen; freeze until the frosting is firm, then wrap well and freeze for up to 1 month. Thaw in the fridge.
FAQs: Got questions? I've got answers! Q: Can I use a different size pan? A: Yes! You could make cupcakes (reduce baking time) or use a 9x13 inch pan (increase baking time slightly). Keep an eye on the baking time as it will vary. Q: Do I have to use the orange extract in the frosting? A: Nope, it's optional! The gelatin and orange juice in the cake give you plenty of creamsicle flavor. The extract just boosts it even more. Q: Can I use fresh orange juice instead of bottled? A: Absolutely! Fresh juice is always a great option if you have it. Just make sure it's pulp-free. Q: Why use gelatin in the cake? A: It adds amazing flavor and color, but it also helps retain moisture, giving you a super tender and moist cake!