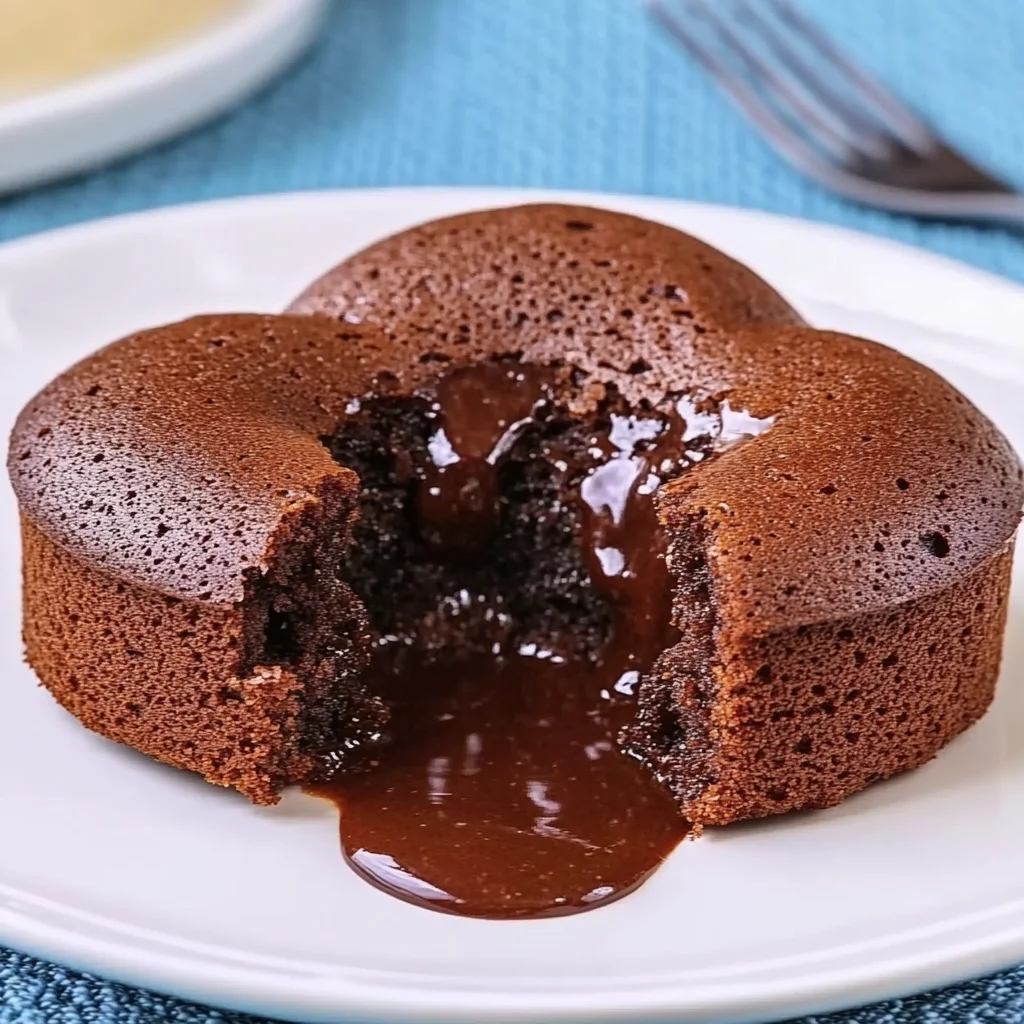
There’s something magical about the moment when you cut into a warm, gooey lava cake and rich, molten chocolate oozes out onto your plate. It instantly takes me back to cozy evenings spent with friends and family, sharing laughter and decadent desserts. If you’ve ever wished you could recreate that restaurant-style indulgence at home without hours of fuss, this Air Fryer Lava Cake recipe is going to be your new best friend.
Not only is this dessert incredibly quick and simple to make, but using an air fryer gives you perfectly baked edges with a delectably soft, molten center every single time. Whether you’re surprising a loved one or just treating yourself after a long day, this lava cake feels like a warm hug in dessert form. So grab your favorite chocolate and let’s get started on this unforgettable treat!
Why You’ll Love Air Fryer Lava Cake
- Fast: Ready in under 20 minutes, including prep and cooking time.
- Easy: Minimal ingredients and straightforward steps—no fancy tools needed.
- Giftable: Perfect for sharing or gifting because it feels so special yet is simple to make.
- Crowd-pleasing: Everyone loves that rich molten chocolate center—great for impressing guests!
Ingredients
Let’s talk about what goes into this luscious lava cake. The ingredients are simple but powerful in flavor, and they come together beautifully to create that classic molten texture.
- 160 g dark chocolate (70%): Using good quality dark chocolate is key here—it brings depth and richness. I prefer 70% because it’s perfectly bittersweet without being too sharp.
- 100 g butter: Butter adds a creamy texture and helps give the cake that tender crumb.
- 25 g brown sugar: Brown sugar adds a subtle molasses note and balances the bitterness of dark chocolate.
- 3 eggs: Eggs provide structure and a silky texture.
- 30 g all-purpose flour: Just enough flour to hold the cake together without weighing it down.
- A pinch of salt: Enhances all the flavors and balances the sweetness.
- 1 teaspoon vanilla extract: Adds warmth and a lovely aroma to the batter.
These ingredients might seem basic, but combined just right, they create something extraordinary. I like to use fresh eggs and real vanilla extract whenever possible—those little touches make a big difference!
How to Make Air Fryer Lava Cake
Ready to dive in? Here’s a step-by-step guide to help you make the most delicious lava cakes in your air fryer.
- Melt the dark chocolate: Use a double boiler or microwave in short bursts (about 20 seconds at a time). Stir between each burst until the chocolate is smooth and glossy. This step is crucial because burnt chocolate can ruin the whole cake.
- Stir in the butter: Add the butter to the warm chocolate and stir until it’s completely melted and combined. The mixture should be silky and uniform.
- Add the brown sugar: Whisk the sugar into the chocolate-butter mixture thoroughly. This helps dissolve the sugar for a smooth batter.
- Beat in the eggs: Add the eggs one at a time, whisking well after each addition. This ensures the batter is smooth and well-emulsified. Then stir in the vanilla extract.
- Sift in flour and salt: This helps avoid lumps. Gently fold the flour into the batter using a spatula. Be careful not to overmix—just fold until combined. The batter should be thick, shiny, and luscious.
- Prepare ramekins: Generously butter three ramekins and dust them lightly with sugar. Tap out any excess sugar. This prevents sticking and gives a beautiful caramelized crust.
- Fill the ramekins: Divide the batter evenly between the ramekins, filling each about three-quarters full. Don’t overfill or the lava cake might spill over during cooking.
- Air fry: Place the ramekins in your air fryer basket and cook at 180°C (356°F) for approximately 9 minutes. You want the edges to be set but the centers still soft and jiggly. It’s okay if the center looks slightly undercooked—that’s what makes it molten!
- Rest and invert: Let the cakes rest for 1–2 minutes. Then carefully run a knife around the edges to loosen them. Invert each ramekin onto a plate. The cakes should release easily, revealing that stunning molten center.
- Serve: Dust with icing sugar for a pretty finish and serve immediately while warm and gooey. For an extra touch, add a scoop of vanilla ice cream or a few fresh berries.
If you’ve never tried an air fryer for desserts before, this recipe might just convert you! The air fryer’s even heat creates a perfectly baked cake with a molten chocolate core faster than you’d expect. It’s a fun alternative to the traditional oven method, especially when you want to whip up something impressive on a whim.
Substitutions & Additions
Feel free to get creative with this recipe! Here are some substitutions and additions to make your lava cake truly your own.
- Chocolate: Swap dark chocolate for semi-sweet or bittersweet if you prefer a sweeter cake. You can even try milk chocolate for a creamier, milder flavor.
- Butter: Unsalted butter is best, but if you only have salted, reduce or skip the added salt in the recipe.
- Sugar: White granulated sugar can be used instead of brown sugar, but you’ll miss out on that rich molasses flavor.
- Flour: For a gluten-free version, try almond flour or a gluten-free all-purpose blend, but keep in mind the texture will be slightly different.
- Fillings: Add a surprise center like a piece of caramel, a raspberry, or even a square of your favorite chocolate bar for an extra gooey surprise.
- Flavor twists: A pinch of cinnamon or a splash of coffee extract can enhance the chocolate flavor beautifully.
- Toppings: Serve with whipped cream, fresh berries, or a drizzle of caramel or raspberry sauce.
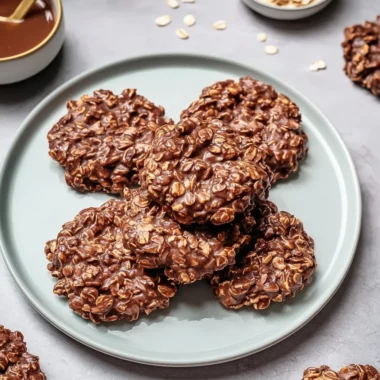
I love trying out different flavor combos, and sometimes I even make mini lava cakes with a dollop of Nutella inside for an extra indulgent twist. If you’re interested in other decadent chocolate treats, you might enjoy my recipe for No Bake Peanut Butter Brownie Cookies—another quick and easy chocolate fix!
Tips for Success
To make sure your lava cakes come out perfect every time, here are some tips from my own kitchen experiments.
- Don’t overbake: The key to lava cake magic is that molten center. If you cook it too long, the center will set and you lose that gooey effect. Start checking around 8 minutes if your air fryer runs hot.
- Use fresh eggs: They help the batter emulsify and rise nicely.
- Butter and sugar the ramekins well: This makes releasing the cakes a breeze and adds a lovely crust.
- Be gentle folding in flour: Overmixing can make the cake dense instead of tender.
- Prep ahead: You can melt the chocolate and butter mixture and prepare the batter in advance. Keep it covered in the fridge and air fry when ready. Just bring it to room temperature before cooking for best results.
- Don’t skip the rest time: Letting the cakes sit briefly after air frying helps them firm up enough to invert without breaking.
If you’re an air fryer fan and want more inspiration for easy, cozy recipes, be sure to check out the full collection of recipes on Crispy Kitchens. They have everything from savory dinners to sweet treats that you can make with minimal fuss!
How to Store Air Fryer Lava Cake
Since lava cakes are best enjoyed warm and fresh, I recommend serving them right away. However, if you have leftovers (lucky you!), here’s how to store them properly:
- Refrigerate: Place the lava cakes in an airtight container and store in the fridge for up to 2 days. The molten center will firm up, so they won’t have quite the same gooey texture.
- Reheat: Warm them gently in the microwave for 20-30 seconds or in a low oven (about 300°F) until just warmed through. This helps soften the center again.
- Freeze: You can freeze unbaked batter in the ramekins (wrapped tightly) for up to 1 month. Thaw overnight in the fridge before air frying as usual.
For the freshest, most indulgent experience, though, I always recommend making just enough for immediate enjoyment. And if you want to try a twist on this chocolatey goodness, you might like my Easy Chocolate Covered Strawberry Pie—it’s a showstopper and just as simple!
FAQs
Can I use a regular oven instead of an air fryer?
Absolutely! Bake the lava cakes in a preheated oven at 425°F (220°C) for about 12-14 minutes. Keep an eye on them—the edges should be set but the center still soft.
What if my lava cake doesn’t have a molten center?
This usually means it’s overbaked. Try reducing the cooking time by a minute or two and check again. Every air fryer is different, so you might need a little trial and error to find the perfect timing.
Can I make these vegan or dairy-free?
Yes! Use dairy-free butter and vegan dark chocolate. Replace eggs with flax eggs (1 tablespoon flaxseed meal + 3 tablespoons water per egg) and adjust the batter consistency as needed.
How do I prevent the lava cake from sticking to the ramekins?
Make sure to butter the ramekins generously and dust with sugar. This creates a barrier and adds a slight caramelized crust that helps the cakes release easily.
If you’re craving more quick and comforting recipes, don’t miss my Creamy Lemon Chicken—a family favorite that’s just as easy and satisfying as this lava cake!
Thanks for spending time in the kitchen with me today! I hope this air fryer lava cake becomes your go-to dessert when you want something impressive but effortless. Remember, the best recipes are the ones that bring joy and warmth to your table.
For more delicious ideas and inspiration, follow my Pinterest account and keep the cozy cooking vibes going!
Air Fryer Lava Cake
Ingredients
Equipment
Method
- Step 1: Melt the dark chocolate using a double boiler or microwave in short 20-second bursts, stirring until smooth and glossy to avoid burning.
- Step 2: Stir the butter into the warm melted chocolate until fully combined and silky.
- Step 3: Whisk in the brown sugar thoroughly until dissolved and smooth.
- Step 4: Add the eggs one at a time, whisking well after each addition for a smooth, emulsified batter, then stir in the vanilla extract.
- Step 5: Sift in the flour and salt, then gently fold using a spatula until just combined, being careful not to overmix. The batter should be thick and luscious.
- Step 6: Butter three ramekins generously and dust lightly with sugar, tapping out the excess to create a caramelized crust and prevent sticking.
- Step 7: Divide the batter evenly among the ramekins, filling each about three-quarters full.
- Step 8: Air fry the ramekins at 180°C (356°F) for approximately 9 minutes, until edges are set but centers remain soft and jiggly for the molten core.
- Step 9: Let the cakes rest for 1–2 minutes, then run a knife around the edges to loosen. Invert each ramekin onto a plate to release the lava cake.
- Step 10: Dust with icing sugar and serve immediately while warm and gooey. Optionally, add a scoop of vanilla ice cream or fresh berries.