There’s something truly comforting about desserts that remind us of childhood celebrations, family gatherings, and those special moments when life felt just a little sweeter. The Boston Cream Pie has long held a place of honor in American dessert history, with its creamy custard and rich chocolate glaze. Now, imagine that classic flavor transformed into a luscious, velvety cheesecake that’s just as nostalgic but even easier to share and enjoy. This Boston Cream Pie Cheesecake is one of my absolute favorites to bake when I want to impress guests or treat myself to a cozy, decadent dessert without the fuss of custard layers and multiple components.
If you love cheesecake but crave something with a little twist and a whole lot of charm, this recipe is for you. It’s straightforward, quick to whip up, and yields a crowd-pleasing dessert that feels both familiar and special. Plus, it’s perfect for gifting to friends or bringing to potlucks because, let’s be honest, who can say no to cheesecake with a chocolate drizzle?
Why You’ll Love Boston Cream Pie Cheesecake
- Fast: This cheesecake comes together quickly, especially compared to traditional Boston Cream Pie recipes.
- Easy: With just a few simple ingredients and no complicated custard layers, it’s a beginner-friendly dessert.
- Giftable: Its elegant look and rich flavor make it a perfect homemade gift for holidays, birthdays, or just because.
- Crowd-pleasing: Everyone loves a creamy cheesecake topped with luscious chocolate—it’s a guaranteed hit!
Ingredients
Let’s take a close look at the ingredients that make this cheesecake so irresistible:
- 2 cups graham cracker crumbs: This forms the buttery, crunchy crust that’s the perfect base for the creamy filling.
- 1/2 cup unsalted butter, melted: Butter binds the crust together and adds richness without overpowering.
- 1/4 cup granulated sugar: Just enough sweetness to balance the crust’s texture.
- 4 packages (8 oz each) cream cheese, softened: The star of the show, providing that classic cheesecake texture and flavor.
- 1 cup powdered sugar: For smooth sweetness that blends effortlessly into the cream cheese.
- 1 tsp vanilla extract: Adds warm, aromatic depth to the cheesecake layer.
- 1 cup heavy whipping cream: Whipped to stiff peaks, it lightens the filling, making it airy yet creamy.
- 1 cup chocolate ganache or melted chocolate: The crowning glory—rich, glossy chocolate drizzled on top.
Each ingredient is straightforward and easy to find at your local grocery store. I love that this recipe doesn’t call for any strange additives or specialty items. It’s all about classic flavors coming together to create something extraordinary. If you want to explore more cheesecake recipes with a fresh twist, you might also enjoy my Grandma’s Easy Blackberry White Chocolate Cheesecake for a fruity, creamy delight.
How to Make Boston Cream Pie Cheesecake
Now, let’s get into the heart of the matter—the step-by-step process that will walk you through making this cheesecake like a pro, even if you’re a kitchen newbie.
Step 1: Prep Your Oven and Crust
Start by preheating your oven to 325°F (160°C). This moderate temperature helps the cheesecake bake evenly without cracking. While the oven is warming, combine your graham cracker crumbs, melted butter, and granulated sugar in a mixing bowl. Press this mixture firmly into the bottom of a springform pan. You want an even, compact crust that will hold your creamy filling perfectly. A helpful trick I use is to wrap the bottom of the pan with aluminum foil to prevent leakage during baking. This little step saves you from a gooey mess in your oven!
Step 2: Make the Cream Cheese Filling
In a large bowl, beat the softened cream cheese with powdered sugar and vanilla extract until the mixture is smooth and silky. This part is all about getting rid of lumps and making sure your filling is creamy. I like to use a stand mixer for this, but a hand mixer works just as well. Just be sure the cream cheese is properly softened to room temperature to avoid any clumps.
Step 3: Whip the Cream
In a separate bowl, whip the heavy cream until stiff peaks form. This means when you lift your whisk or beaters, the cream holds its shape firmly without drooping. Gently fold the whipped cream into the cream cheese mixture to keep the filling light and airy. This folding step is important — it incorporates air without deflating the whipped cream, giving your cheesecake that melt-in-your-mouth texture.
Step 4: Assemble and Bake
Pour the creamy filling over your prepared crust, smoothing the surface with a spatula. Pop it into the oven and bake for 50 to 60 minutes. You’re aiming for a set cheesecake with a slight jiggle in the center—that’s a sign it’s perfectly baked and won’t crack or dry out. After baking, let it cool to room temperature on the counter before refrigerating for at least 4 hours, preferably overnight. This chilling step is key to achieving the creamy firmness you expect from a great cheesecake.
Step 5: Add the Chocolate Topping
Just before serving, drizzle the top with your chocolate ganache or melted chocolate. If you want to make your own ganache, simply heat equal parts heavy cream and chopped chocolate until smooth and glossy. The chocolate layer adds that signature Boston Cream Pie flair, balancing the creamy filling with a rich, decadent finish.
If you’re looking for another chocolatey treat that’s quick and easy, definitely check out my Easy No-Bake Chocolate Cherry Pie for a delightful dessert that pairs wonderfully with coffee or tea.
Substitutions & Additions
One of the things I love about this recipe is its flexibility. Whether you’re tweaking for dietary preferences or just want to get creative, here are some ideas to make it your own:
- Crust Variations: Swap graham cracker crumbs for crushed vanilla wafers, digestive biscuits, or even Oreo crumbs (just remove the filling). Each gives a unique flavor and texture to your crust.
- Dairy Alternatives: For a lighter version, you can use reduced-fat cream cheese and a lighter whipping cream, though this may affect the richness slightly.
- Chocolate Options: Use dark chocolate for a more intense flavor or milk chocolate for a sweeter finish. You can also sprinkle chopped nuts or toasted coconut on top of the ganache for added crunch.
- Add a Custard Layer: If you want to get closer to the traditional Boston Cream Pie, try adding a thin layer of vanilla pudding or custard between the crust and the cheesecake filling. This would make for a show-stopping dessert!
- Fruit Toppings: Fresh berries like raspberries or strawberries add a lovely tart contrast to the rich cheesecake and chocolate. You can find inspiration for berry toppings in my Easy Mini Raspberry Cheesecake Bites.
Tips for Success
Making a cheesecake can seem intimidating, but I’ve picked up a few tricks over the years that make this recipe foolproof:
- Use room temperature cream cheese: This ensures a smooth, lump-free filling and helps everything blend together beautifully.
- Don’t overmix the batter: Once you add the whipped cream, fold gently to maintain the airiness.
- Wrap your springform pan: If you’re worried about leaks, especially when baking in a water bath, wrap the bottom with foil to keep the oven clean.
- Let it cool gradually: Rapid temperature changes can cause cracks. Let your cheesecake cool on the counter before chilling in the fridge.
- Chill thoroughly: Refrigerate for at least 4 hours, but overnight is best. This helps the cheesecake set perfectly and makes slicing easier.
- Prep ahead: This cheesecake tastes even better the next day, making it a great make-ahead dessert for parties or holidays.
How to Store Boston Cream Pie Cheesecake
Storing your cheesecake properly will keep it fresh and delicious for days. After baking and cooling, wrap the cheesecake tightly with plastic wrap or store it in an airtight container. It will keep well in the refrigerator for up to 4-5 days. If you want to keep it longer, you can freeze the cheesecake (without the chocolate topping) for up to 2 months. When you’re ready to serve, thaw it overnight in the fridge and add the chocolate drizzle fresh before slicing.
One of my favorite things about cheesecakes is how well they hold up, so you can make them ahead of time for stress-free entertaining. If you’re new to baking cheesecakes, you might appreciate some additional tips on storing and handling in my comprehensive guide on other creamy desserts found in the recipe collection.
FAQs
Can I use a regular cake pan instead of a springform pan?
You can, but a springform pan is highly recommended because it makes removing the delicate cheesecake much easier without cracking or breaking.
Why did my cheesecake crack on top?
Common causes are overbaking, rapid cooling, or overmixing the batter. To avoid cracks, bake until just set with a slight jiggle, and cool it gradually at room temperature before refrigerating.
Can I use whipped topping instead of heavy cream?
For best results, use real heavy whipping cream because it whips better and adds a rich, creamy texture. Whipped topping usually doesn’t hold up as well in baking.
How do I make chocolate ganache at home?
Heat equal parts heavy cream and chopped chocolate until smooth and glossy. Let it cool slightly before drizzling over your cheesecake. It’s easy and tastes so much better than store-bought sauces!
If you’re a fan of classic desserts with a twist, feel free to explore more comforting and creative recipes like my Grandma’s Secret Easy Blueberry Biscuits, which bring a little Southern charm to your kitchen.
Thanks for stopping by the kitchen today! I hope this Boston Cream Pie Cheesecake recipe brings you as much joy making it as I do eating it. Don’t forget to share your cheesecake moments with friends and family—there’s nothing like a delicious homemade dessert to create memories.
For more inspiring recipes and kitchen tips, be sure to follow me on Pinterest where I pin all my favorite dishes and baking ideas!

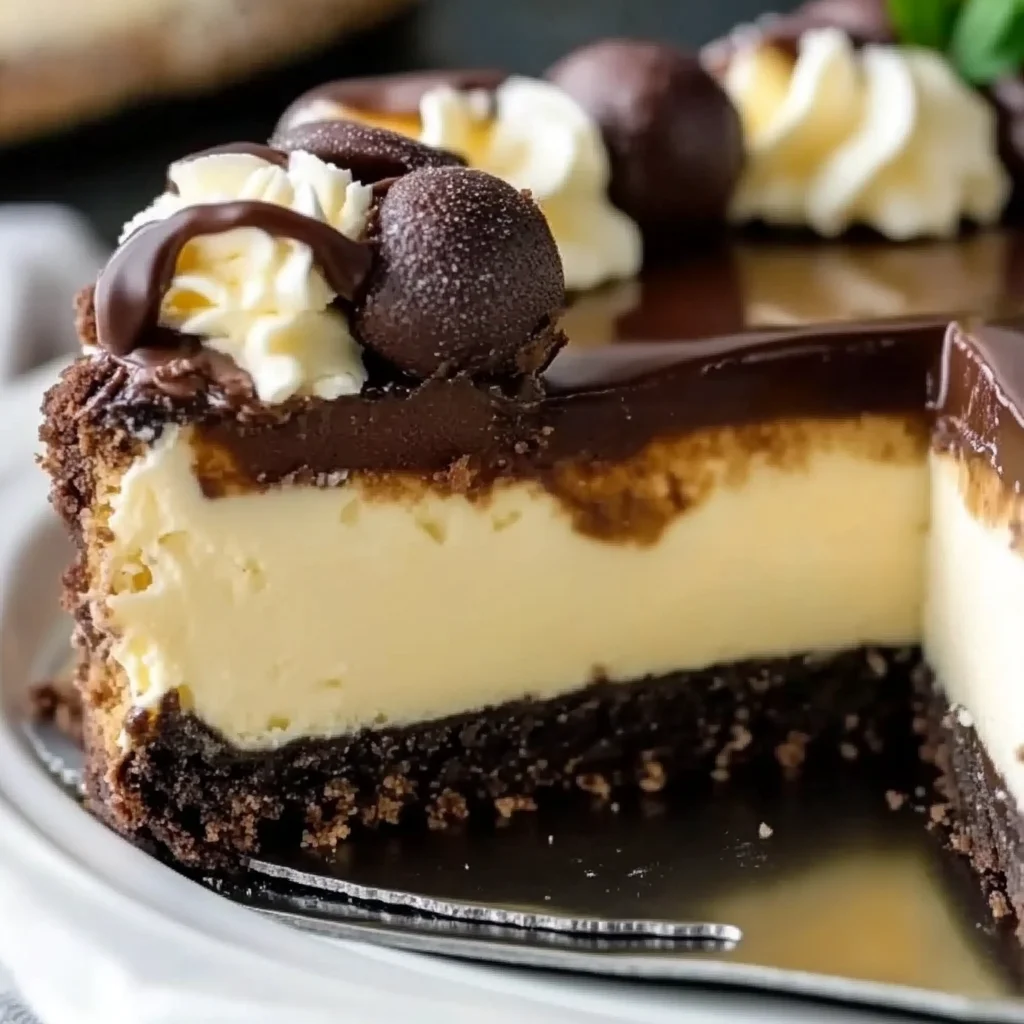
Indulgent Boston Cream Pie Cheesecake
Ingredients
Equipment
Method
- Step 1: Preheat oven to 325°F (160°C). Combine graham cracker crumbs, melted butter, and granulated sugar in a bowl. Press mixture firmly into the bottom of a springform pan. Wrap the bottom with foil to prevent leakage.
- Step 2: In a large bowl, beat softened cream cheese with powdered sugar and vanilla extract until smooth and silky.
- Step 3: In a separate bowl, whip heavy cream until stiff peaks form. Gently fold into the cream cheese mixture to keep it light and airy.
- Step 4: Pour filling over crust and smooth the surface with a spatula. Bake for 50 to 60 minutes until set with a slight jiggle in the center.
- Step 5: Let cheesecake cool to room temperature on the counter before refrigerating for at least 4 hours or overnight to set.
- Step 6: Just before serving, drizzle with chocolate ganache or melted chocolate. Serve chilled.