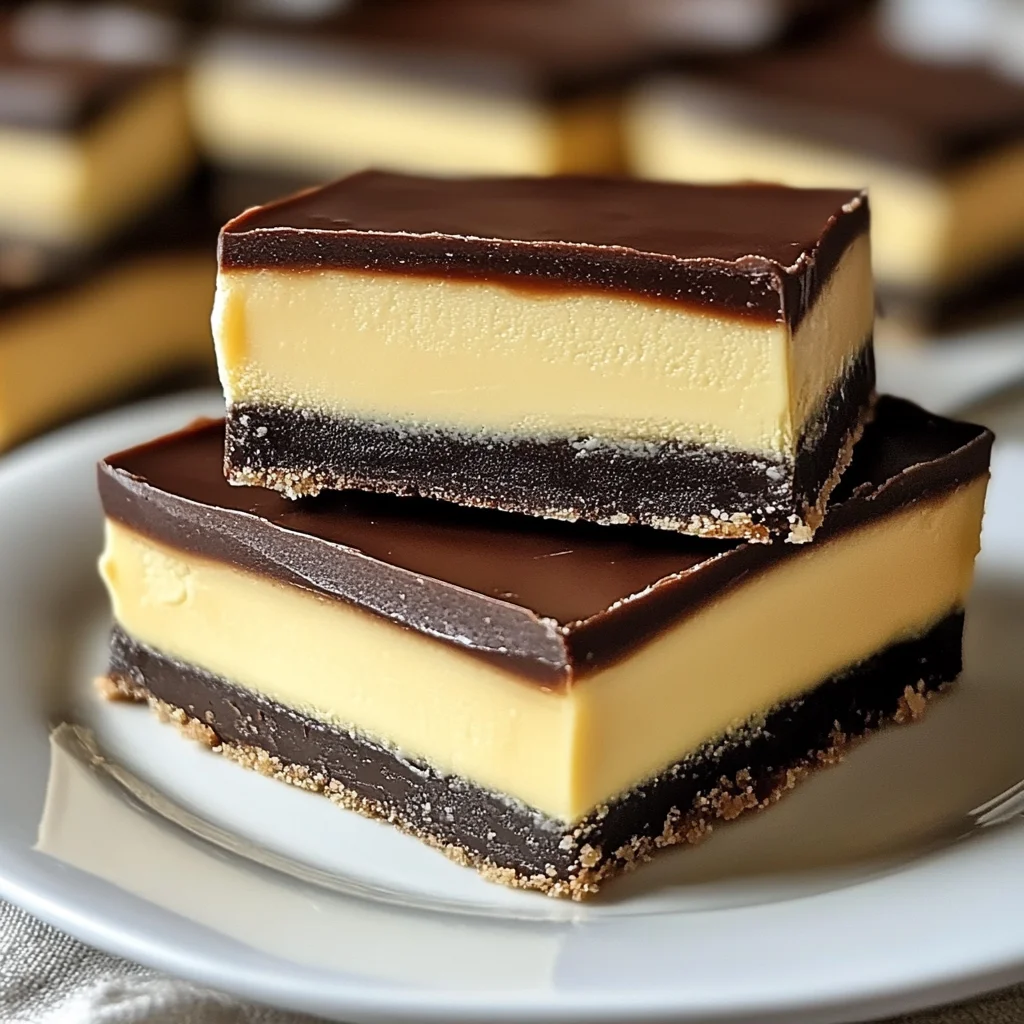
Do you remember the first time you tasted Boston Cream Pie? That perfect harmony of fluffy cake, creamy custard, and rich chocolate glaze always brings a warm smile and a sweet memory. Now, imagine capturing all those delicious layers in one luscious, creamy fudge. That’s exactly what this Boston Cream Pie Fudge brings to your kitchen—a nostalgic flavor packed into easy-to-make, melt-in-your-mouth squares. Whether you’re craving a cozy treat on a chilly afternoon or looking for a show-stopping gift, this fudge is a delightful way to enjoy the classic dessert reinvented.
What I love most about this recipe is just how approachable it is. You don’t need to bake a cake or whip up custard from scratch. Instead, you get all those familiar flavors in a quick fudge that’s perfect for sharing or savoring solo. If you’ve ever enjoyed the creamy lemon chicken from this site, you know I’m all about simple recipes with big flavors, and this fudge fits right into that philosophy!
Why You’ll Love Boston Cream Pie Fudge
- Fast: This fudge takes about 15 minutes of active prep time and a few hours to set—perfect for making ahead.
- Easy: No complicated steps or hard-to-find ingredients. Just a few pantry staples and some simple candy-making techniques.
- Giftable: Wrapped up in a pretty box, these fudge squares make a wonderful homemade gift for friends, family, or coworkers.
- Crowd-pleasing: The rich vanilla custard flavor swirled with chocolate glaze appeals to all ages and tastes—an instant classic twist everyone will adore.
Ingredients
Let’s break down the ingredients so you know exactly what you’re working with and why each one is important.
- Granulated Sugar: The base of the fudge, providing sweetness and structure.
- Heavy Whipping Cream: Adds richness and creaminess, making the fudge smooth and luscious.
- Unsalted Butter: Brings a velvety texture and helps the fudge set perfectly.
- White Chocolate Chips: These melt beautifully and contribute to the classic custard flavor.
- Marshmallow Creme (or Fluff): Gives the fudge a light, airy texture and helps it set with that perfect chew.
- Instant Vanilla Pudding Mix: This is the secret superstar that gives the fudge its unmistakable custard flavor and creamy consistency.
- Pure Vanilla Extract: Enhances the vanilla notes and deepens the flavor.
- Unsweetened Cocoa Powder: Used for the chocolate swirl, providing a rich, slightly bitter balance to the sweetness.
- Neutral Oil (Vegetable or Coconut): Helps the chocolate glaze remain smooth and shiny.
- Semi-Sweet Chocolate Chips: Melted for the glaze, adding that glossy chocolate finish reminiscent of the original pie’s top layer.
Each ingredient plays a role in recreating the flavors and textures of Boston Cream Pie in fudge form. If you’re curious about other easy-to-make sweets, you might enjoy browsing the full collection of recipes on the site for more inspiration.
How to Make Boston Cream Pie Fudge
Now, let’s get into the heart of it—making this fudge. Don’t worry if you haven’t made fudge before; I’ll guide you through every step like we’re cooking side-by-side.
- Prepare Your Pan: Line an 8×8-inch baking pan with parchment paper, leaving a little extra hanging over two opposite sides. This makes it so much easier to lift the fudge out once it’s set. Set the pan aside.
- Cook the Sugar Mixture: In a heavy-bottomed saucepan, combine the granulated sugar, heavy cream, and butter. Place over medium heat and stir constantly until the butter melts fully and the sugar dissolves. This is important so your fudge will be smooth and not grainy.
- Bring to Soft-Ball Stage: Attach a candy thermometer to the side of the pan. Let the mixture boil without stirring until it reaches 234°F – 239°F (112°C – 115°C). This soft-ball stage is crucial—it ensures your fudge will set up perfectly. It usually takes about 7 to 10 minutes, so keep a close eye on it.
- Mix in White Chocolate: Remove the pan from heat. Add the white chocolate chips and stir vigorously until the chocolate melts completely and the mixture is smooth and glossy.
- Add Marshmallow Creme and Flavorings: Stir in the marshmallow creme, instant vanilla pudding mix, and vanilla extract. Use a sturdy spoon or a hand mixer to beat the mixture until it thickens and becomes glossy. This step adds that signature custard flavor and texture.
- Create the Vanilla Layer: Pour about two-thirds of the fudge mixture into your prepared pan and spread it evenly. This will be the creamy vanilla base of your fudge.
- Make the Chocolate Swirl: To the remaining fudge in the saucepan, fold in the sifted cocoa powder until fully combined. This rich chocolate fudge is what gives the marbled swirl effect.
- Swirl It Up: Drop spoonfuls of the chocolate fudge over the vanilla layer. Then, take a knife or skewer and gently swirl the two layers together to create a beautiful marbled pattern. Don’t over-swirl—you want clear, distinct swirls.
- Cool and Set: Let the fudge cool at room temperature for about 1 hour. Then cover it and refrigerate for 3 to 4 hours until it firms up nicely.
- Cut and Glaze: Use the parchment paper to lift the set fudge out of the pan. Cut into 1-inch squares with a clean, sharp knife.
- Prepare the Chocolate Glaze: Melt the semi-sweet chocolate chips with the neutral oil in a microwave-safe bowl. Heat in 20-second intervals, stirring in between until smooth. Let it cool for 5 minutes so it’s not too hot when dipping.
- Dip and Set: Dip the top of each fudge square into the glaze, letting any excess drip off. Place the dipped fudge on parchment paper with the glaze side up. Let them set at room temperature for about 30 minutes before serving.
And voilà! You’ve got yourself a batch of irresistibly rich Boston Cream Pie Fudge that’s just waiting to be enjoyed. Making fudge might sound intimidating, but once you get the hang of it, it’s such a rewarding process. Plus, you’ll have a homemade treat that’s way better than anything store-bought.
Substitutions & Additions
Feel like putting your own spin on this fudge? I love experimenting with ingredients, and here are some of my favorite swaps and creative ideas to make this recipe uniquely yours.
- Marshmallow Creme Alternative: If you can’t find marshmallow fluff, you can substitute with homemade marshmallow cream or even a good-quality store-bought marshmallow spread. It helps give that chewy texture and lightness.
- Vanilla Pudding Mix: If you prefer a dairy-free version, look for a non-dairy vanilla pudding mix or use a homemade custard powder alternative.
- White Chocolate Chips: For a more intense vanilla flavor, use white chocolate bark or couverture. Just make sure it melts smoothly.
- Chocolate Swirl: Swap the unsweetened cocoa powder for dark cocoa powder for a deeper chocolate flavor. You could also add a pinch of espresso powder to the chocolate fudge for a mocha twist.
- Glaze Variations: Instead of semi-sweet chocolate, try bittersweet or milk chocolate for the glaze. You can also stir in a teaspoon of bourbon or rum extract for an adult-friendly version.
- Add Crunch: Fold in chopped toasted pecans or almonds into the vanilla layer before swirling for a delightful texture contrast.
- Color Fun: For a festive touch, add a few drops of food coloring to the vanilla fudge before setting, or sprinkle edible gold dust on the glaze once set.
These swaps and additions let you tailor the fudge to your taste or occasion. If you enjoy delightful no-bake treats, you might also want to check out the No-Bake Peanut Butter Brownie Cookies for another quick sweet fix.
Tips for Success
Fudge is as much science as it is art, so here are some tips I’ve learned to help you get the perfect batch every time.
- Use a Candy Thermometer: This is key for hitting the soft-ball stage accurately. If you don’t have one, test by dropping a bit of syrup into cold water—it should form a soft, pliable ball.
- Don’t Skip the Parchment Paper: Lining your pan with parchment that extends over the sides makes removing the fudge so much easier and neater.
- Beat Until Glossy: When you add the marshmallow creme and pudding mix, beating the fudge until thick and glossy is crucial for that smooth, creamy texture.
- Don’t Over-Swirl: The swirl effect looks best when you gently create irregular marbled patterns. Over-mixing will blend the colors and lose the visual appeal.
- Cut with a Warm Knife: For clean edges, dip your knife in hot water and wipe it dry before slicing each time.
- Prep Ahead: Fudge is a fantastic make-ahead dessert. You can prepare it a day or two in advance and keep it refrigerated for a quick sweet treat whenever you want. Just bring to room temperature briefly before serving for the best texture.
If you want to expand your dessert repertoire with easy, crowd-pleasing treats, try making some Easy Mini Raspberry Cheesecake Bites next. They’re just as simple and perfect for sharing!
How to Store Boston Cream Pie Fudge
Proper storage will keep your fudge tasting fresh and creamy, so here’s what I recommend:
- Room Temperature: If your kitchen is cool (below 70°F or 21°C), you can store fudge in an airtight container for up to 3 days. Just keep it away from direct sunlight and heat sources.
- Refrigeration: For longer storage, place the fudge in an airtight container or wrap tightly in plastic wrap and store it in the fridge for up to 2 weeks. Let it sit at room temperature for 10-15 minutes before serving so the texture softens slightly.
- Freezing: Fudge freezes beautifully! Wrap individual squares tightly in plastic wrap and place them in a freezer-safe container or ziplock bag. Freeze for up to 3 months. Thaw in the fridge overnight or at room temperature for about an hour.
Keeping your fudge well-covered is the best way to avoid it absorbing any fridge odors or drying out. If you like, you can layer parchment paper between fudge squares for easier handling and presentation.
FAQs
Can I make this fudge without a candy thermometer?
While a candy thermometer is the most reliable way to get the right texture, you can use the cold water test to check the soft-ball stage. Drop a small spoonful of the hot syrup into a bowl of cold water; if it forms a soft, pliable ball you can shape with your fingers, it’s ready.
What if my fudge turns out grainy?
Grainy fudge usually means the sugar crystals didn’t dissolve properly or the mixture was stirred too much while boiling. Make sure to stir only until the sugar dissolves, then let it boil undisturbed. Also, beating the fudge after removing from heat helps smooth it out.
Can I use marshmallows instead of marshmallow creme?
You can, but marshmallow creme gives a smoother texture and is easier to incorporate. If using marshmallows, melt them gently before adding, but expect a slightly different consistency.
How do I get a perfect chocolate glaze without it getting thick?
Adding a small amount of neutral oil like vegetable or coconut oil keeps the glaze shiny and smooth. Be careful not to overheat the chocolate in the microwave—heat in short bursts and stir well.
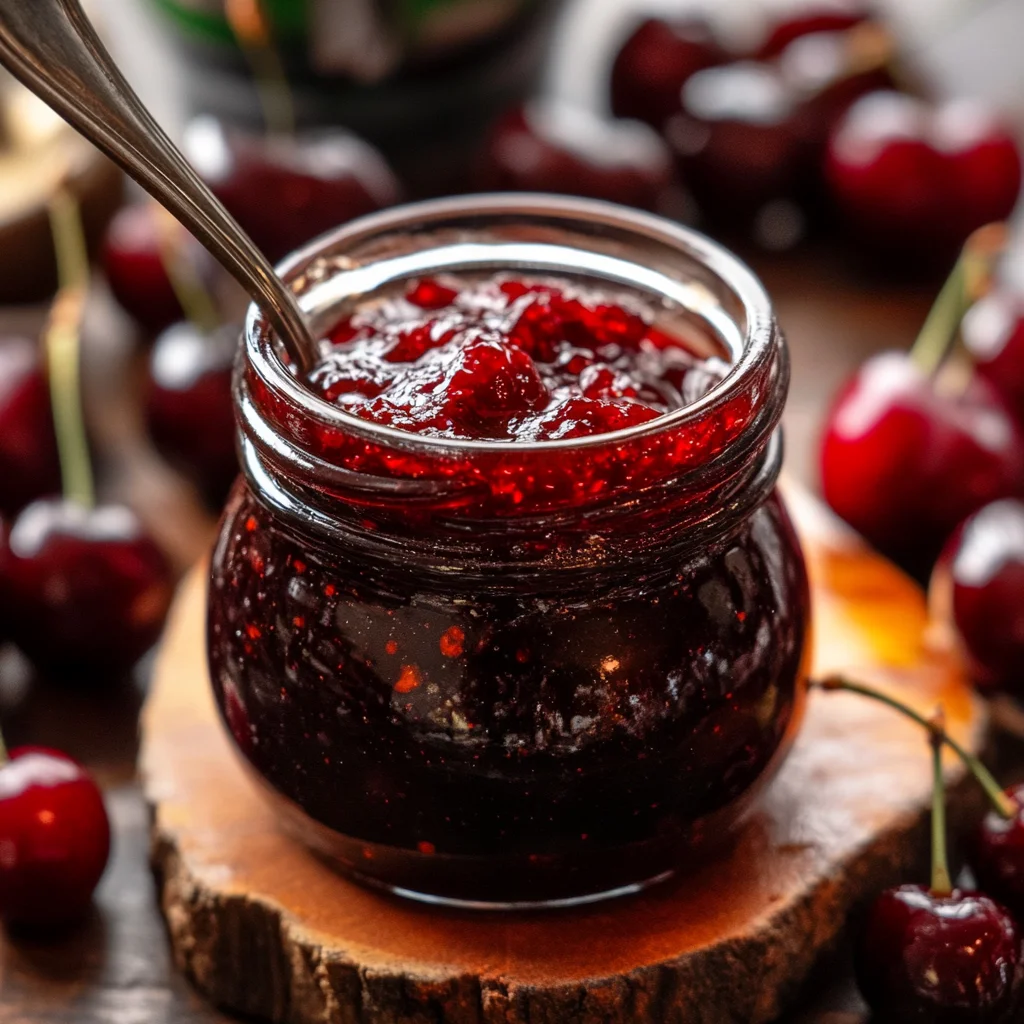
Once you’ve mastered this fudge, it becomes a fun base for all kinds of flavor experiments. For example, I recently paired a rich chocolate glaze with a fruity raspberry swirl to create a decadent treat, inspired by other favorites like the Raspberry Chocolate Mousse Cake.
Thanks for stopping by the kitchen today! If you enjoyed this recipe and want to save it for later or discover more delicious ideas, don’t forget to follow me on Pinterest. There’s always plenty of inspiration waiting for you.

Boston Cream Pie Fudge
Ingredients
Equipment
Method
- Step 1: Line an 8x8-inch baking pan with parchment paper, leaving extra over two opposite sides for easy lifting. Set aside.
- Step 2: In a heavy-bottomed saucepan, combine granulated sugar, heavy cream, and butter over medium heat. Stir constantly until butter melts and sugar dissolves.
- Step 3: Attach a candy thermometer and let mixture boil without stirring until it reaches 234°F - 239°F (112°C - 115°C), the soft-ball stage, about 7-10 minutes.
- Step 4: Remove from heat. Add white chocolate chips and stir vigorously until fully melted and smooth.
- Step 5: Stir in marshmallow creme, instant vanilla pudding mix, and vanilla extract. Beat with a sturdy spoon or hand mixer until mixture thickens and becomes glossy.
- Step 6: Pour about two-thirds of the fudge mixture into the prepared pan and spread evenly to create the vanilla base layer.
- Step 7: To the remaining fudge in the saucepan, sift in the unsweetened cocoa powder and fold until fully combined to form the chocolate swirl.
- Step 8: Drop spoonfuls of the chocolate fudge over the vanilla layer. Use a knife or skewer to gently swirl the two layers to create a marbled pattern. Avoid over-swisting.
- Step 9: Let fudge cool at room temperature for about 1 hour, then cover and refrigerate for 3 to 4 hours until firm.
- Step 10: Lift set fudge out using parchment paper and cut into 1-inch squares using a warm, clean knife.
- Step 11: Melt semi-sweet chocolate chips with neutral oil in a microwave-safe bowl in 20-second intervals, stirring until smooth. Cool for 5 minutes.
- Step 12: Dip top of each fudge square into chocolate glaze, letting excess drip off. Place on parchment paper glaze-side up and let set at room temperature for about 30 minutes before serving.