Hey there, friend! Have you ever walked into a bakery and just been hit with that amazing aroma of freshly baked bread? Maybe you have a memory tied to a specific treat from your childhood or a family gathering? For me, one of those special treats is Ensaymada. This isn’t just any bread; it’s a little cloud of sweet, buttery goodness that brings a smile to your face with every bite. It reminds me of cozy afternoons and happy times.
Now, I know what you might be thinking – baking bread can sound intimidating. But trust me, this Classic Ensaymada recipe is surprisingly simple and so incredibly rewarding. It’s a little bit of effort for a whole lot of deliciousness, and the results are absolutely worth it. Get ready to fill your kitchen with the most wonderful smells and create some sweet memories right at home!
Why You’ll Love This Recipe
Seriously, what’s not to love? Here’s why I keep coming back to this Ensaymada recipe:
- Fast(ish): For a yeasted bread, the active time is pretty minimal. Most of the waiting is for the dough to rise, which gives you time to put your feet up or get other things done!
- Easy: No complicated techniques here. If you can mix, knead (or let a mixer do it!), and coil, you can make these!
- Giftable: These make the most thoughtful homemade gift. Package a few up, and you’ll make someone’s day!
- Crowd-Pleasing: Who doesn’t love a soft, sweet, buttery roll? These disappear fast whenever I make them!
Ingredients
Gathering your ingredients is the first step to baking happiness. Here’s what you’ll need, with a few little notes:
- 3 1/4 cups all-purpose flour: Sifting is key here! It helps make the dough lighter and the final bread super soft. Plus extra for dusting your work surface – you don’t need much.
- 7g (1 packet) instant yeast: Make sure your yeast isn’t expired! This is the magic ingredient that makes our bread rise and get all fluffy.
- 4 tablespoons granulated sugar: Just enough sweetness to feed the yeast and give our dough a lovely flavor.
- 1/2 teaspoon salt: Balances the sweetness and brings out all the other flavors. Don’t skip it!
- 2 large eggs: Adds richness and helps make the bread tender. Make sure they’re room temperature if you can!
- 1/4 cup fresh warm milk: Milk adds softness to the crumb. Make sure it’s warm, but not hot!
- 1/3 cup warm water (around 110°F): This is the perfect temperature to wake up our yeast and get it going. Use a thermometer if you’re unsure!
- 3 tablespoons melted butter or margarine: Adds flavor and tenderness to the dough itself.
- Softened butter or margarine for brushing: For that glorious coating before baking that helps them brown beautifully and adds more buttery goodness.
How to Make It
Alright, apron on? Let’s get baking! Just follow these steps, and you’ll have warm Ensaymada ready before you know it.
Step 1: Wake Up the Yeast. In a nice big bowl, pour in that warm water and sprinkle in the sugar. Give it a little stir, then sprinkle the instant yeast right over the top. Don’t mix it in completely just yet. Let it sit there for about 5 to 10 minutes. You’re looking for it to get nice and foamy or bubbly on top. That means your yeast is alive and ready to party! If nothing happens, sadly, your yeast might be sleepy (or expired). Time to get a new packet and start this step over.
Step 2: Mix the Wet Ingredients. Once your yeast is looking happy and foamy, whisk in the beaten eggs, the melted butter (make sure it’s not too hot!), and the warm milk. Give it a good whisk until everything is nicely combined. It will look like a cloudy yellow liquid – that’s perfect!
Step 3: Add the Dry Stuff. Now it’s time for the flour and salt. Gradually add the sifted flour and the salt to your wet mixture. I usually add about half the flour and mix, then add the rest. Use a wooden spoon or a sturdy spatula to mix it all together. It will start to come together into what looks like a rough, shaggy dough. That’s exactly what you want!
Step 4: Knead That Dough. Turn the shaggy dough out onto a lightly floured surface. Now comes the fun part: kneading! Knead the dough for about 8 to 10 minutes. You can do this by hand, pushing the dough away from you with the heels of your hands, folding it over, and repeating. Or, if you have a stand mixer with a dough hook, that works too – mix on medium speed for about 6-8 minutes. You’ll know it’s ready when it’s smooth, elastic, and springs back slowly when you gently poke it. If it feels too sticky to handle, add just a tablespoon of flour at a time, incorporating it fully before adding more. Avoid adding too much flour, as that can make your bread tough.
Step 5: First Rise (The Magical Part!). Lightly oil a clean bowl (just a little bit is fine). Place your smooth dough ball into the bowl, turning it around so it gets coated in the oil. This prevents it from sticking. Cover the bowl tightly with plastic wrap. Find a warm spot in your kitchen – maybe near a sunny window, or even in a slightly warm (but turned off!) oven. Let it rise for about 1 to 1.5 hours, or until it has beautifully doubled in size. This is where the yeast does its work and creates that lovely airy structure.
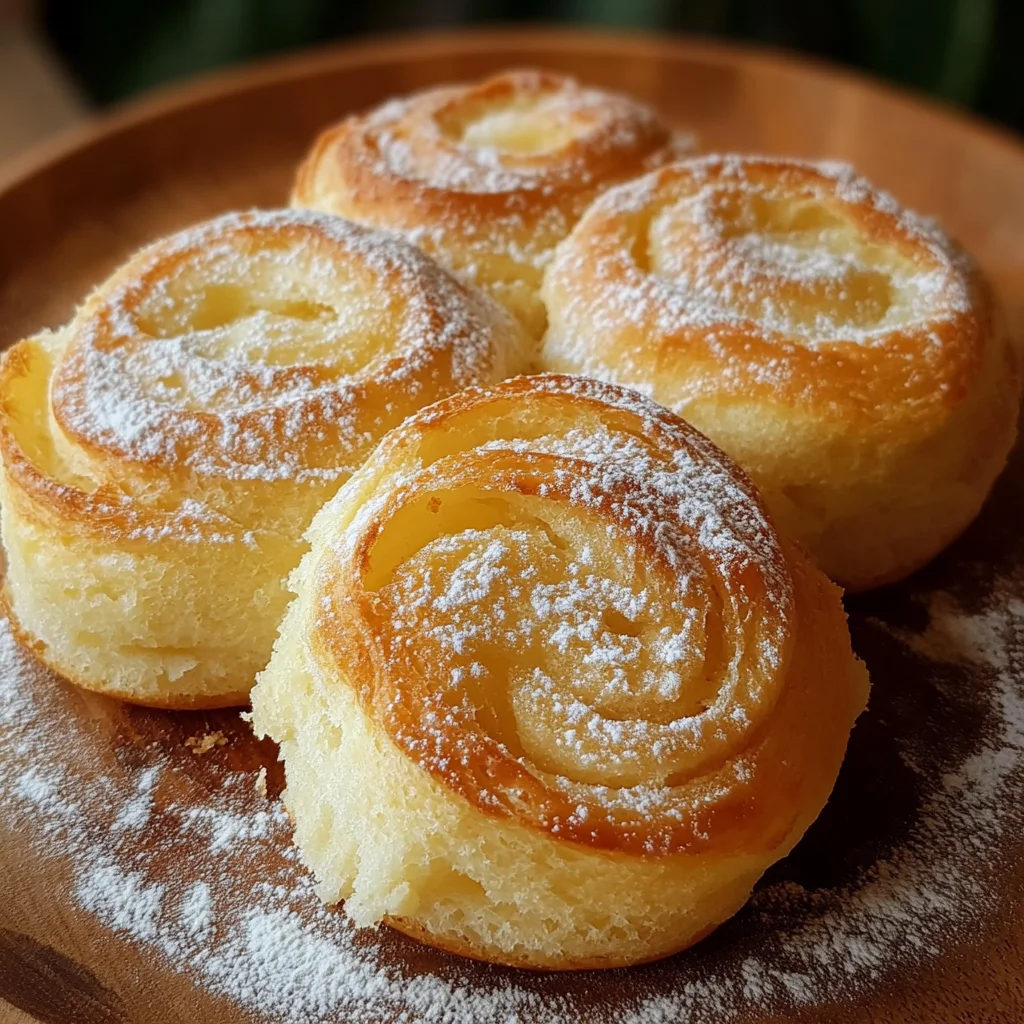
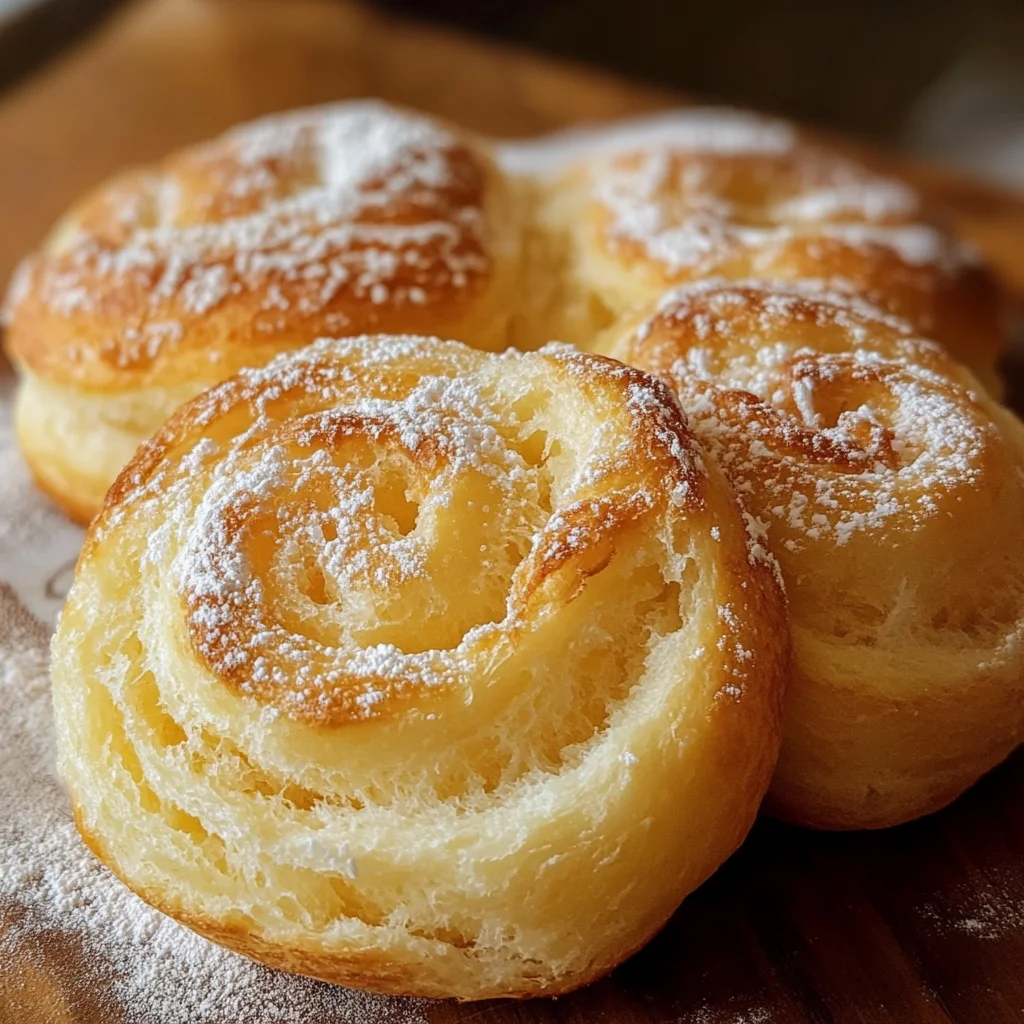
Step 6: Shape Your Ensaymadas. Gently punch down the risen dough to release the air. Turn it out onto your clean counter. Divide the dough into 8 equal portions. You can eyeball it or use a kitchen scale for precision (each piece should be around 80-85 grams). Take one portion and roll it out into a long rope, about 12 inches long. Then, starting from one end, coil the rope into a spiral, just like making a cinnamon roll. When you get to the end, gently tuck the tail underneath the coiled bun.
Step 7: Second Rise. Line a baking sheet with parchment paper. Carefully place the shaped ensaymadas onto the prepared sheet, leaving some space between them as they will rise again. Loosely cover the baking sheet with plastic wrap (I often spray the plastic wrap lightly with cooking spray so it doesn’t stick to the dough). Let them rise again for another 30 to 45 minutes, or until they look puffy and almost doubled in size. Don’t rush this step – it’s important for a light texture!
Step 8: Time to Bake! While the ensaymadas are on their second rise, preheat your oven to 350°F (175°C). Once they’re risen and the oven is hot, gently brush the tops of each ensaymada with that softened butter. Pop the baking sheet into the preheated oven. Bake for 20 to 25 minutes. You’re looking for them to turn a beautiful golden brown color on top.
Step 9: Cool and Enjoy! Carefully take the baked ensaymadas out of the oven. Let them cool slightly on the baking sheet for a few minutes, then transfer them to a wire rack to finish cooling. They are absolutely heavenly served warm, perhaps with a little extra softened butter brushed on top! Pull one apart and enjoy that soft, sweet goodness.
Substitutions & Additions
This recipe is a wonderful base, but feel free to get creative! Here are a few ideas:
- Butter vs. Margarine: The recipe calls for either, and both work. Butter gives a richer flavor, but margarine is traditional for some. Use what you prefer!
- Milk: Whole milk gives the richest result, but 2% milk will work just fine too.
- Sweetness: If you like a sweeter dough, you can add an extra tablespoon or two of sugar.
- Traditional Toppings: Once they’re baked and still warm, brush with more softened butter and then roll them in granulated sugar. Some people love to add grated cheese on top after the butter and sugar – usually a mild, salty cheese like Eden cheese or even mild cheddar. It’s a sweet and salty combo that’s surprisingly delicious!
- Flavor Boosts: A little bit of vanilla extract or even lemon zest added to the dough can be lovely.
Tips for Success
Baking is a science, but don’t stress! Keep these tips in mind for the best results:
- Yeast Health: Always check the expiry date on your yeast. If your water isn’t warm enough, or is too hot (above 130°F kills it!), your yeast won’t activate, and your dough won’t rise. Stick to that 105-115°F range for warm water.
- Kneading is Key: Don’t cut the kneading time short. Developing the gluten is what gives the bread its structure and soft chewiness. However, don’t over-knead either, especially if using a mixer, which can make the dough tough.
- Resist Adding Too Much Flour: A slightly sticky dough is better than a dry, tough one. Use flour sparingly when kneading and shaping.
- Warm Place for Rising: Yeast loves warmth. If your kitchen is cool, your dough will take longer to rise. Find that cozy spot! An oven that was briefly turned on and then turned off (or just the oven with the light on) can be a good proofing box.
- Don’t Overbake: Keep an eye on the color. Once they’re golden brown, they’re likely done. Overbaking will dry them out.
- Prep Ahead: You can prepare the dough through the first rise, punch it down, wrap it well, and refrigerate it overnight. The next day, let it come to room temperature for about 30-60 minutes, then proceed with shaping and the second rise.
How to Store It
Ensaymadas are definitely best enjoyed fresh and warm, but if you happen to have any leftovers (a rare occurrence in my house!), here’s how to keep them:
Store completely cooled ensaymadas in an airtight container at room temperature for 2-3 days. For longer storage, you can freeze them. Wrap each cooled ensaymada individually in plastic wrap, then place them in a freezer bag or container. They will keep in the freezer for up to 2-3 months. To reheat, thaw at room temperature if frozen, then warm gently in a microwave or a low oven (around 300°F) until soft.
FAQs
Got questions? Let’s see if we can answer a couple of common ones!
Q: Why didn’t my dough rise?
A: The most common culprits are inactive yeast (check expiry, ensure proper water temperature in step 1) or a cold environment for rising. Make sure your yeast gets foamy and find a warm, draft-free spot for your dough!
Q: Can I make these in a stand mixer?
A: Absolutely! Use the dough hook attachment. Mix the wet ingredients, gradually add the dry, then knead on medium speed for about 6-8 minutes until the dough is smooth and elastic.
Q: What kind of cheese is traditionally used for the topping?
A: A mild, slightly salty cheese like Eden cheese is classic in the Philippines. Mild cheddar or even grated Parmesan can offer a similar salty counterpoint to the sweet bun.
Q: My ensaymadas spread out instead of rising up. What happened?
A: This can happen if the dough is too soft or if the coiling isn’t tight enough, or if they over-proofed (rose too long) on the second rise, causing the structure to collapse a bit. Ensure you didn’t add too little flour initially and try to coil them relatively snugly.

Classic Soft & Sweet Ensaymada Bread
Ingredients
Equipment
Method
- Step 1: Wake Up the Yeast. In a large bowl, combine warm water and sugar. Stir briefly, then sprinkle instant yeast over the top. Let sit for 5 to 10 minutes until foamy and bubbly.
- Step 2: Mix the Wet Ingredients. Once yeast is active, whisk in the beaten eggs, melted butter (ensure it's not too hot), and warm milk until combined.
- Step 3: Add the Dry Stuff. Gradually add the sifted flour and salt to the wet mixture, mixing with a wooden spoon or spatula until a rough, shaggy dough forms.
- Step 4: Knead That Dough. Turn the dough onto a lightly floured surface. Knead by hand for 8-10 minutes, or with a stand mixer (dough hook) on medium speed for 6-8 minutes, until smooth and elastic. Add flour sparingly if too sticky.
- Step 5: First Rise (The Magical Part!). Lightly oil a clean bowl. Place the dough in the bowl, turn to coat, cover tightly with plastic wrap, and let rise in a warm spot for 1 to 1.5 hours, or until doubled in size.
- Step 6: Shape Your Ensaymadas. Gently punch down the risen dough. Turn onto a clean counter and divide into 8 equal portions (about 80-85g each). Roll each portion into a 12-inch long rope, then coil into a spiral, tucking the tail underneath.
- Step 7: Second Rise. Line a baking sheet with parchment paper. Place shaped ensaymadas on the sheet, leaving space. Loosely cover with plastic wrap and let rise for 30 to 45 minutes until puffy and almost doubled.
- Step 8: Time to Bake! While the ensaymadas rise, preheat oven to 350°F (175°C). Once risen, gently brush tops with softened butter. Bake for 20 to 25 minutes until golden brown.
- Step 9: Cool and Enjoy! Remove from oven. Cool slightly on the baking sheet for a few minutes, then transfer to a wire rack. Serve warm, optionally brushing with more softened butter and rolling in granulated sugar or topping with grated cheese.