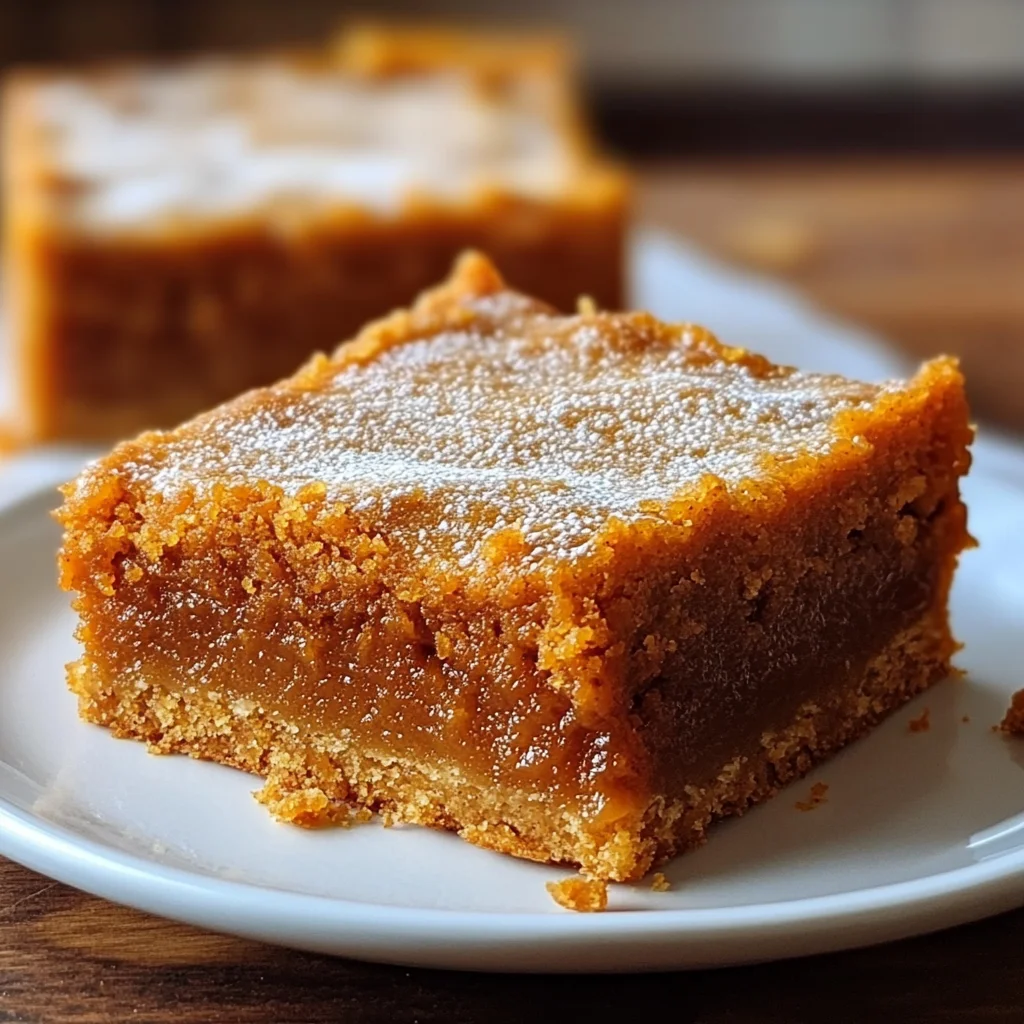
Oh, friend, there are just some recipes that bring you right back to cozy autumn afternoons, don’t you agree? For me, it’s these incredible Libby’s Pumpkin Bars. There’s something so comforting about the scent of cinnamon and pumpkin wafting through the house, promising a slice of pure, unadulterated happiness. This isn’t just any pumpkin bar recipe; it’s the classic, the one passed down through generations, making everyone ask for seconds. And the best part? It’s so incredibly easy to whip up, you’ll wonder why you ever waited!
Why You’ll Love Libby’s Pumpkin Bars
- Fast: From mixing bowl to oven in minutes, these bars come together in a flash.
- Easy: No fancy techniques or complicated steps here, just straightforward baking bliss.
- Giftable: They make the perfect treat to share with neighbors, friends, or to bring to any potluck or holiday gathering.
- Crowd-pleasing: Trust me, these disappear faster than fall leaves in a strong breeze. Everyone, and I mean everyone, loves them!
Ingredients
Gather your ingredients, my dear, and let’s make some magic! The beauty of this recipe is that it uses pantry staples you likely already have on hand, making it perfect for those spontaneous baking urges.
- 15 oz Libby’s Pumpkin Puree: The star of the show! Make sure it’s 100% pure pumpkin, not pumpkin pie filling.
- 2 cups All-Purpose Flour: Your basic baking backbone, giving these bars their lovely structure.
- 1 ½ cups White Sugar: Just the right amount of sweetness to complement the earthy pumpkin.
- 1 cup Butter, softened: Essential for that rich, tender crumb. Let it sit on the counter for a bit to get perfectly soft.
- 4 large Eggs: Binders that help everything come together beautifully.
- 1 tsp Baking Soda: Helps with lift and creates that perfect texture.
- 2 tsp Baking Powder: Double the leavening for a wonderfully fluffy bar.
- 2 tsp Ground Cinnamon: The quintessential fall spice, adding warmth and aroma.
- 1 tsp Pumpkin Pie Spice: This blend really amplifies that cozy pumpkin flavor. If you don’t have it, a mix of nutmeg, ginger, and cloves works too!
- ½ tsp Salt: A little bit of salt brings out all the other flavors.
For the Cream Cheese Frosting:
Because what’s a pumpkin bar without its luscious, tangy cream cheese crown?
- 5 cups Confectioners’ Sugar: Also known as powdered sugar, for that smooth, sweet finish.
- 8 oz Cream Cheese, softened: The heart of any good cream cheese frosting. Again, softened is key!
- ¼ cup Butter, softened: Adds richness and helps with the creamy texture.
- 1 tsp Pure Vanilla Extract: A splash of vanilla brightens up the whole frosting.
- Milk (as needed for consistency): Just a touch to get that perfect spreadable texture.
How to Make Libby’s Pumpkin Bars
Ready to get baking? This process is so simple, you’ll have these moist pumpkin bars cooling on your counter in no time!
- Prepare for Baking: First things first, get your oven ready. Preheat it to a cozy 350°F (175°C). Then, grab a 12″x17″ half-sheet pan. I always recommend lining it with parchment paper – it makes cleanup a breeze and ensures your bars won’t stick! Give the sides a quick spray with cooking spray too, just for good measure.
- Mix the Batter: In a large mixing bowl, you’re going to cream together your softened butter and white sugar. Beat them until they’re light and fluffy. Now, crack those eggs in, one at a time, making sure to beat well after each addition. This helps incorporate air and makes for a lighter bar. In a separate bowl, it’s time to sift your dry ingredients: the flour, salt, cinnamon, baking soda, and baking powder. Sifting prevents lumps and ensures even distribution. Gradually add these dry ingredients to your wet mixture, mixing until just combined. Don’t overmix! Finally, blend in that gorgeous pumpkin puree until your batter is smooth and a beautiful orange hue.
- Bake the Bars: Pour the delightful batter into your prepared pan. Use a spatula to smooth the surface evenly. Pop it into your preheated oven and bake for 20-25 minutes. How do you know they’re done? A trusty toothpick inserted into the center should come out clean. Once baked, let them cool completely on a wire rack before you even think about frosting them. This is crucial – warm bars will melt your beautiful frosting!
- Make the Frosting: While your bars are cooling, let’s make that dreamy cream cheese frosting. In another bowl, beat together the softened cream cheese, butter, and vanilla extract until they’re wonderfully creamy and lump-free. Now, gradually add the confectioners’ sugar, beating until you reach your desired frosting consistency. If it feels a little too stiff, no worries! Just add milk, one tablespoon at a time, until it’s perfectly spreadable. I find a little milk makes it extra silky.
- Frost and Serve: Once your pumpkin bars are completely cool (I can’t stress this enough!), spread that glorious cream cheese frosting evenly over the top. Then, slice them into squares or rectangles. These are perfect for a snack, dessert, or even a delightful breakfast treat with your morning coffee.

Substitutions & Additions
These classic Libby’s Pumpkin Bars are perfect as is, but if you’re feeling adventurous, here are a few ideas to shake things up:
- Spice it Up: Feel free to adjust the spices to your liking. A pinch of ground ginger or cloves can really enhance the flavor.
- Mix-Ins: Fold in a cup of chocolate chips, chopped pecans, or walnuts into the batter for an added layer of texture and flavor.
- Different Frosting Flavors: While cream cheese is classic, you could try a maple buttercream or even a simple vanilla glaze. For another wonderfully comforting and classic dessert, you might enjoy making the ultimate classic carrot cake, which also pairs beautifully with cream cheese frosting!
- Gluten-Free: You can often substitute a good quality 1:1 gluten-free baking flour for the all-purpose flour.
Tips for Success
A few little tricks to ensure your Libby’s Pumpkin Bars turn out perfect every single time:
- Don’t Overmix: Overmixing the batter can lead to tough bars. Mix just until the ingredients are combined.
- Soften Your Butter and Cream Cheese: This is a non-negotiable for smooth batter and lump-free frosting. Take them out of the fridge at least 30 minutes to an hour before you plan to bake.
- Cool Completely: I know, I know, it’s hard to wait! But frosting warm bars will result in a runny, messy situation. Patience is a virtue here.
- Proper Pan Size: A 12″x17″ half-sheet pan gives you nice, thin bars. If you use a smaller pan, your baking time will increase, and the bars will be thicker. You might also explore other pumpkin-themed treats like these delightful pumpkin swirl muffins if you’re looking for individual portions!
- Parchment Paper is Your Friend: Seriously, it makes lifting the entire cooled slab out of the pan a breeze, making frosting and cutting so much easier.
How to Store Libby’s Pumpkin Bars
So, you’ve somehow managed to have leftovers (good for you!) Here’s how to keep them fresh and delicious:
- Countertop (Short Term): If you plan to eat them within a day or two, you can store them in an airtight container at room temperature.
- Refrigerator (Best Option): Because of the cream cheese frosting, these bars are best stored in an airtight container in the refrigerator. They’ll stay fresh for up to 5 days. Just pull them out about 15-20 minutes before serving to let the frosting soften slightly.
- Freezer (Long Term): Yes, you can freeze them! Place unfrosted or frosted (but firm) bars in a single layer on a baking sheet and freeze until solid. Then, wrap individual bars tightly in plastic wrap, then aluminum foil, or place them in a freezer-safe bag or container. They’ll keep well for up to 2-3 months. Thaw in the refrigerator overnight before serving. This is a great tip for any baked bar, much like how you might store your easy chocolate chip cheesecake bars.
FAQs
Got questions? I’ve got answers!
- Can I use canned pumpkin pie filling instead of pumpkin puree?
No, absolutely not! Pumpkin pie filling has added spices and sugar, which will throw off the balance of this recipe. Make sure you grab pure pumpkin puree. - My frosting is too thin/thick. What do I do?
If your frosting is too thin, gradually add more confectioners’ sugar, a quarter cup at a time, until it thickens. If it’s too thick, add milk, one teaspoon at a time, until you reach your desired consistency. - Can I make these bars ahead of time for a party?
Yes! You can bake the bars a day ahead and store them unfrosted at room temperature (covered). Make the frosting the day of the party, frost the bars, and then chill until serving. Or, as mentioned above, you can freeze them for longer storage! - What if I don’t have a 12″x17″ half-sheet pan?
You can use a 9×13-inch baking dish for thicker bars. Just be aware that the baking time will likely increase (start checking around 30-35 minutes), and the texture will be denser.
I hope you love these classic Libby’s Pumpkin Bars as much as my family and I do. They’re truly a taste of autumn, warmth, and home in every bite. Happy baking, friends!
For more delicious and easy recipes, be sure to follow us on Pinterest!

The Ultimate Classic Libby's Pumpkin Bars with Cream Cheese Frosting
Ingredients
Equipment
Method
- Step 1: Prepare for Baking: Preheat your oven to 350°F (175°C). Line a 12"x17" half-sheet pan with parchment paper, and spray the sides with cooking spray.
- Step 2: Mix the Batter: In a large mixing bowl, cream together the softened butter and white sugar until light and fluffy. Crack in the eggs one at a time, beating well after each addition. In a separate bowl, sift together the flour, salt, cinnamon, baking soda, and baking powder. Gradually add these dry ingredients to your wet mixture, mixing until just combined (do not overmix). Finally, blend in the pumpkin puree until your batter is smooth and a beautiful orange hue.
- Step 3: Bake the Bars: Pour the batter into your prepared pan and use a spatula to smooth the surface evenly. Pop it into your preheated oven and bake for 20-25 minutes. The bars are done when a toothpick inserted into the center comes out clean. Once baked, let them cool completely on a wire rack.
- Step 4: Make the Frosting: While your bars are cooling, prepare the cream cheese frosting. In another bowl, beat together the softened cream cheese, butter, and vanilla extract until wonderfully creamy and lump-free. Gradually add the confectioners' sugar, beating until you reach your desired frosting consistency. If it feels too stiff, add milk, one tablespoon at a time, until it's perfectly spreadable.
- Step 5: Frost and Serve: Once your pumpkin bars are completely cool, spread the cream cheese frosting evenly over the top. Then, slice them into squares or rectangles and serve immediately.