Oh, friend, do you ever find yourself just needing a moment of simple wonder? A little pause in the busy day to watch something beautiful unfold? I know I do! And let me tell you, there’s nothing quite like rediscovering the magic of science, especially when it’s as dazzling and easy as this Colorful Oil and Water Experiment. It takes me right back to being a kid, marveling at the vibrant slick on a puddle after a rain, or seeing those cool lava lamps from back in the day. It’s truly a little piece of mesmerizing art you can create with things you probably already have lying around your kitchen!
This isn’t just a science lesson; it’s a moment of calm, a burst of color, and a super fun activity all rolled into one. You’ll be amazed at how quickly you can set it up, how few ingredients it takes, and how utterly captivating the results are. Trust me, once you try this, it’ll become your new favorite go-to for a quick burst of joy or an instant mood-lifter.
Why You’ll Love Colorful Oil and Water Experiment
- Fast: From gathering ingredients to watching the magic happen, you’re looking at just a few minutes of your time. Instant gratification, anyone?
- Easy: No complicated steps, no fancy equipment. If you can pour and stir, you can do this!
- Giftable: Think outside the box! You could assemble a charming “science kit” with a beautiful jar, small bottles of oil and food coloring, and a printed instruction card for a unique, thoughtful present. Perfect for sparking curiosity in friends or little ones!
- Crowd-pleasing: Whether it’s a rainy afternoon activity, a captivating centerpiece for a party, or just a quiet moment of personal observation, this experiment mesmerizes everyone who sees it. It’s a guaranteed conversation starter!
Ingredients
Gathering your supplies for this magical experiment is probably the easiest part – most likely, everything you need is already in your pantry!
- Jar: Any clear jar will be perfect! Think repurposed jam jars, a sleek mason jar, or even a tall, clear drinking glass. The clearer the glass, the better you’ll see the vibrant dance of colors.
- 4 tablespoons cooking oil: Your everyday vegetable oil, canola oil, or even a lighter option like baby oil (for an extra clear separation!) works wonderfully. Just make sure it’s liquid at room temperature.
- Liquid food coloring: This is where the magic truly comes alive! Grab a variety of bright colors. Liquid food coloring disperses beautifully, but gel food coloring can also be used if that’s what you have.
- Water: Simple tap water is all you need to fill your jar and create the base for our colorful spectacle.
- Small bowl: This is where we’ll gently prepare our colorful oil mixture.
- Spoon: A regular kitchen spoon is perfect for mixing.
How to Make Colorful Oil and Water Experiment
Alright, let’s get to the fun part! You’re just a few simple steps away from a dazzling display.
- Fill your jar: Carefully fill your chosen jar about three-quarters full with water. You want to leave enough space at the top so that our colorful oil has room to spread out and do its thing without overflowing.
- Measure the oil: Pour 4 tablespoons of your cooking oil into your small bowl. This is the stage where our colors will get their vibrant kick!
- Add the food coloring: Now for the artistic touch! Add 3 to 5 drops of liquid food coloring to the oil in the bowl for each color you want to use. Feel free to mix and match colors in the same bowl, or use separate bowls for a multi-color effect later. I love using bold colors like blue, red, and yellow!
- Gently stir: Take your spoon and gently stir the oil and food coloring together. You’ll notice the food coloring won’t mix with the oil in the traditional sense, but it will break into tiny, beautiful droplets suspended within the oil. This is exactly what we want!
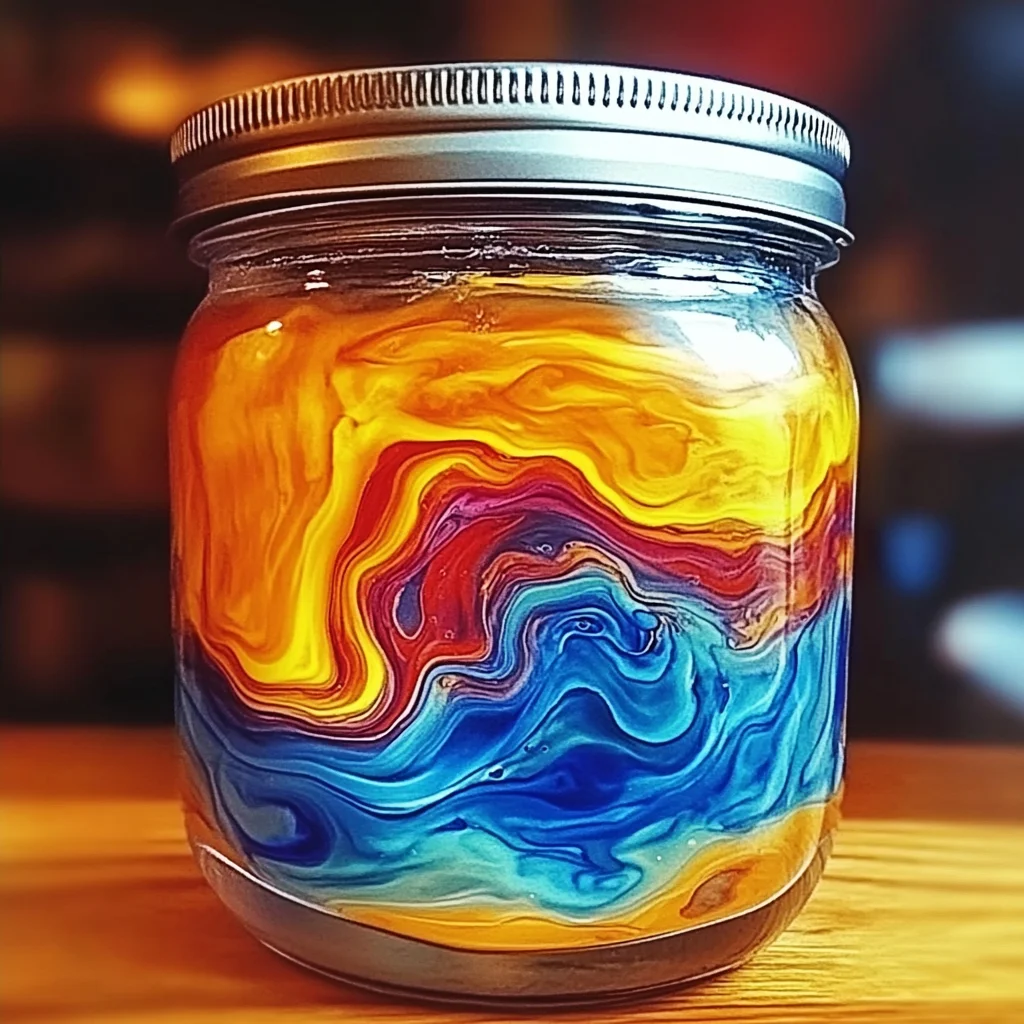
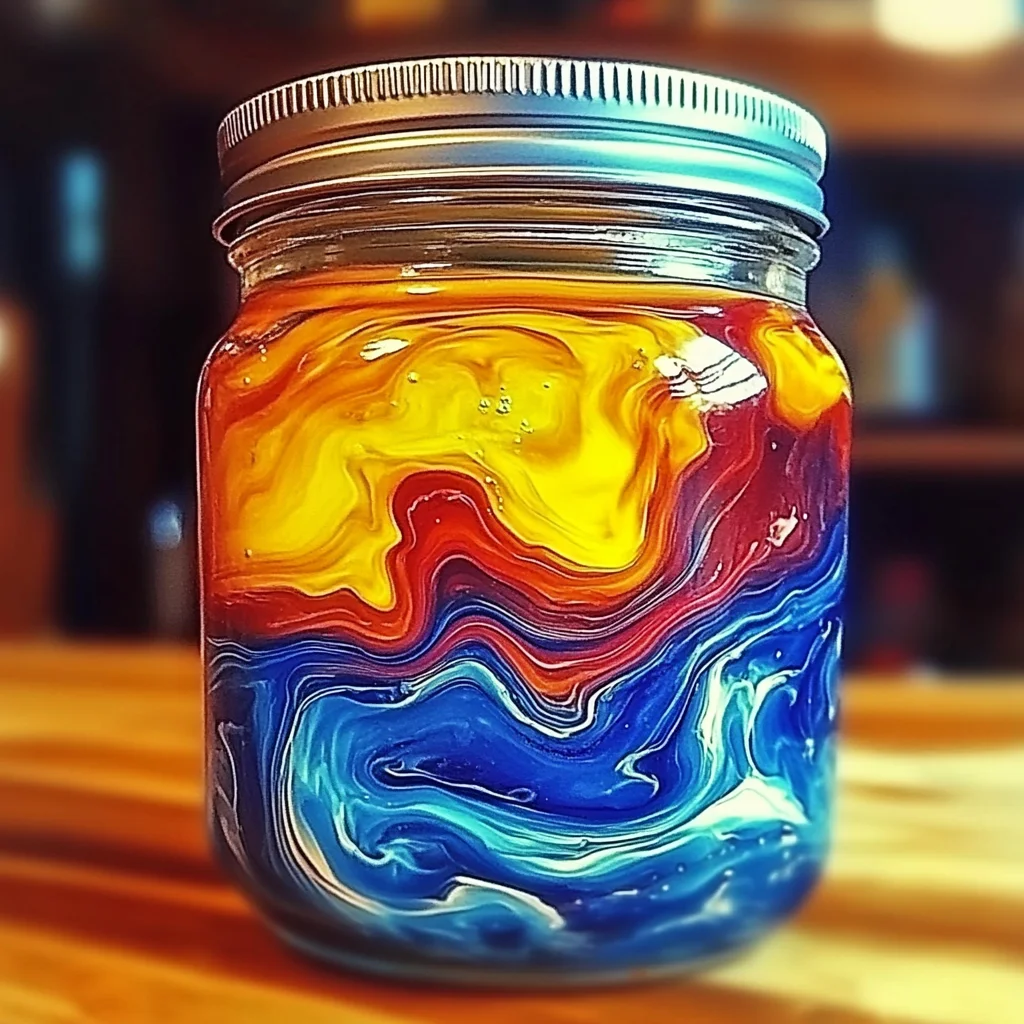
- Pour the colorful oil: This is the grand finale! Carefully and slowly pour your colorful oil mixture into the jar of water. Watch closely as the oil settles on top of the water (because it’s less dense!), and then, the real show begins as the colored droplets slowly, dramatically sink through the oil layer and burst into vibrant streaks as they hit the water. It’s absolutely mesmerizing!
Substitutions & Additions
This experiment is wonderfully forgiving and open to creativity! Here are some ideas to make it even more unique:
- Different Oils: While cooking oil works great, try baby oil for an even clearer, more distinct separation and a truly crystalline look. Mineral oil is another fantastic option for super clear results.
- Sparkle and Shine: A tiny pinch of fine glitter added to your oil-and-food-coloring mixture before you pour it into the water can add an extra layer of magical shimmer.
- Lava Lamp Effect: For a bubbly, “lava lamp” vibe, after you’ve poured your colorful oil into the water, drop a few effervescent tablets (like Alka-Seltzer) into the jar. They’ll sink to the bottom, react with the water, and carry colorful oil droplets up and down. It’s so cool! If you love simple reactions, you might also enjoy our Baking Soda and Vinegar Balloon Experiment for another fizzy good time.
- Aromatic Boost: Add a drop or two of essential oil (like lavender or peppermint) to your cooking oil mixture for a lovely, subtle scent that enhances the experience.
- Variety of Containers: Don’t limit yourself to just one jar! Experiment with tall, slender vases, shallow dishes, or even a series of small jars to create a dynamic, multi-experiment display. If you’re into other visually captivating DIYs, you’ll adore making a DIY Rain Cloud Jar too!
Tips for Success
While this experiment is pretty foolproof, a few pointers can make sure your colorful creation is absolutely stunning:
- Pour Slowly: The key to distinct layers and a beautiful “rain” effect is to pour the colorful oil mixture into the water slowly and gently. This helps the oil settle evenly on top.
- Don’t Over-Stir the Food Coloring: When mixing the food coloring into the oil, you just want to break the color into small droplets, not try to fully emulsify it. Gentle stirring is best to keep those little color bombs intact.
- Experiment with Color Combos: Try different color combinations! Primary colors are great because as the droplets sink and hit the water, they might mix and create secondary colors right before your eyes. It’s like a mini art show!
- Clean Jar, Clear View: Make sure your jar is sparkling clean to get the best, unobstructed view of your colorful masterpiece.
How to Store Colorful Oil and Water Experiment
While this experiment is truly captivating, it’s designed to be a temporary wonder! The beauty is in the process and the immediate, vibrant visual effect. Once the food coloring has mostly settled and dissolved into the water (which usually takes a good while, or faster if you agitate it), the magic of the falling droplets fades a bit.
You can certainly keep the jar on display for a day or two to observe the slow movement of the oil and any remaining color droplets. It continues to be pretty! After that, simply pour the mixture down the drain (the small amount of oil and water is usually fine for most household plumbing, or you can dispose of the oil properly if you prefer). Then, give your jar a good wash, and it’s ready for your next colorful adventure!
FAQs
Why don’t oil and water mix?
Great question! It all comes down to their molecular structure. Water molecules are “polar,” meaning they have a slight positive and negative charge, which makes them attracted to each other. Oil molecules are “non-polar” and don’t have these charges, so they’re not attracted to water. It’s like oil and water are from different social circles – they just don’t hang out!
Why does the food coloring only mix with the water, not the oil?
Most liquid food colorings are water-based. Since water and food coloring are both polar, they happily mix together. The oil, being non-polar, keeps the food coloring droplets suspended until they can break through the oil layer and reach their water-based friends below!
Is this experiment safe for young children?
Absolutely! It uses common, non-toxic household ingredients. However, as with any activity involving liquids and glass, adult supervision is always recommended, especially for very young children, to prevent spills or accidental ingestion.
Can I reuse the oil?
While technically you could, the oil will have tiny bits of food coloring mixed into it, which might affect future cooking endeavors. For best results and food safety, it’s best to use fresh oil for cooking and dispose of the experiment oil once you’re done.
For more easy and fun ideas, be sure to follow us on Pinterest!

Rainbow in a Jar: Colorful Oil and Water Experiment
Ingredients
Equipment
Method
- Step 1: Fill your chosen jar about three-quarters full with water, leaving enough space at the top.
- Step 2: Pour 4 tablespoons of cooking oil into your small bowl.
- Step 3: Add 3 to 5 drops of liquid food coloring to the oil in the bowl for each color you want to use. You can mix and match colors.
- Step 4: Gently stir the oil and food coloring together with a spoon until the food coloring breaks into tiny, beautiful droplets suspended within the oil.
- Step 5: Carefully and slowly pour your colorful oil mixture into the jar of water. Observe as the oil settles on top and the colored droplets slowly sink, bursting into vibrant streaks as they hit the water.