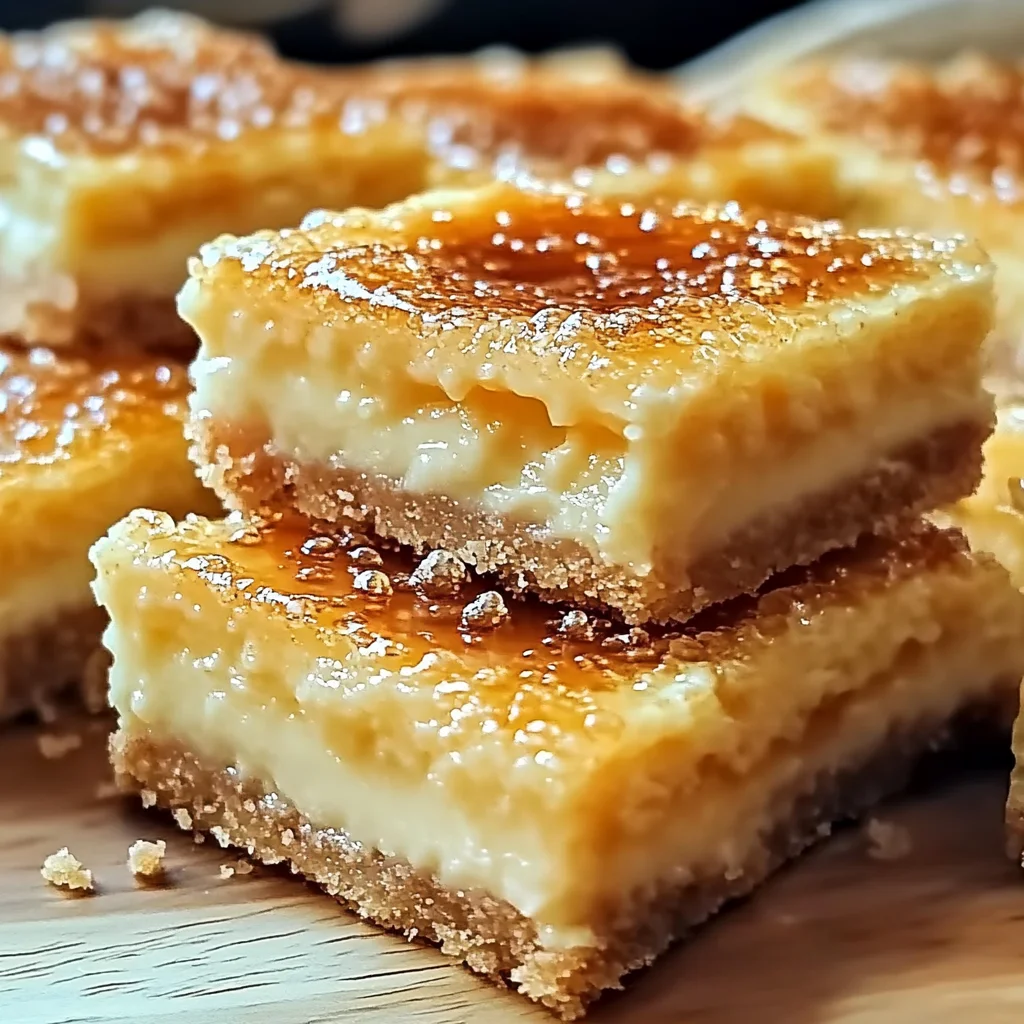
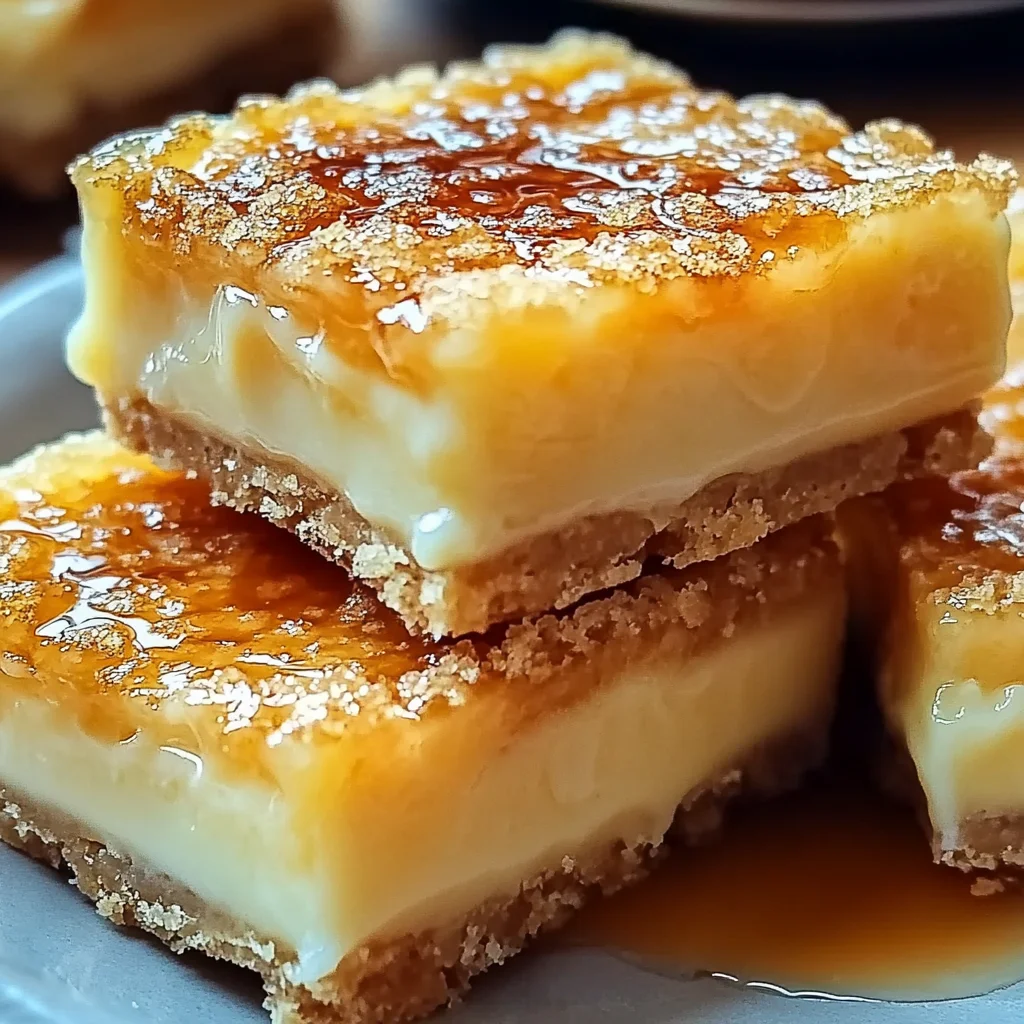
There’s something truly magical about Crème Brûlée, isn’t there? That perfectly smooth, creamy custard topped with a glistening, crisp layer of caramelized sugar that shatters with the tap of a spoon. It’s pure dessert poetry! But let’s be honest, making traditional Crème Brûlée can feel a little… intimidating. All those ramekins, water baths, and blowtorches! Well, my sweet friends, what if I told you that you could capture all that luxurious flavor and delightful texture in an unbelievably easy-to-make cookie bar? Yes, you read that right!
These Crème Brûlée Cookie Bars are about to become your new best friend in the kitchen. They take everything you love about the classic dessert and transform it into a chewy, gooey, incredibly satisfying bar that’s ready in no time. Forget the fancy restaurant; this recipe brings gourmet elegance right to your countertop, without any of the fuss. If you’re anything like me, you love a dessert that looks impressive but is secretly a breeze to whip up. That’s why I’m always searching for those golden recipes that deliver on flavor without the fuss, much like all the incredible finds in our broader collection of easy dessert recipes.
Why You’ll Love Crème Brûlée Cookie Bars
- Fast: Get a fancy-tasting dessert on the table in under an hour!
- Easy: No special equipment or tricky techniques required.
- Giftable: These bars make a gorgeous and delicious gift for friends, family, or neighbors.
- Crowd-pleasing: Seriously, who can resist the allure of crème brûlée in cookie form?
Ingredients
Gather your simple ingredients, and let’s get ready to bake some magic!
- 1/2 cup (113g) unsalted butter: The foundation of our chewy, buttery cookie base. Make sure it’s unsalted so we can control the seasoning.
- 12 oz (about 2 cups or 350g) white chocolate chips: This is our “custard” flavor base! Good quality white chocolate makes all the difference for that creamy, sweet taste.
- 1 1/4 cups (155g) all-purpose flour: The backbone of our cookie bar, giving it structure and chewiness.
- 3/4 cup (149g) granulated sugar: For just the right amount of sweetness to complement the white chocolate.
- 1 tablespoon (15ml) vanilla extract: A must-have for that classic Crème Brûlée warmth. Don’t skimp on the good stuff!
- 1/4 teaspoon salt: Balances out all that sweetness and really makes the flavors pop. It’s a small but mighty ingredient!
- 3 large eggs: These add richness and help bind everything together for that perfect bar texture.
- 1 cup toffee bits: Ah, the “brûlée” part! These little gems melt into a beautiful, buttery, crunchy layer that perfectly mimics the caramelized sugar on top of a classic Crème Brûlée.
How to Make Crème Brûlée Cookie Bars
Get ready for pure baking joy! Follow these simple steps for cookie bar perfection:
- First things first, preheat your oven to 350°F (175°C). You want it nice and ready to go!
- Grab a saucepan and gently melt the butter and white chocolate chips over low heat. Stir continuously until the mixture is beautifully smooth and shiny. Be patient here; we don’t want any scorched chocolate!
- Once melted, take that luscious mixture off the heat and pour it into a large mixing bowl.
- Now, stir in your granulated sugar, vanilla extract, and salt. Give it a good whisk until everything is well combined and fragrant.
- Time for the eggs! Add them one at a time, mixing thoroughly after each addition. You’ll see the mixture start to come together beautifully.
- Finally, add your all-purpose flour and mix until it’s just combined. Don’t overmix; we want tender bars, not tough ones!
- Line a 9×13-inch baking pan with parchment paper. This is a crucial step, trust me! It makes removing and slicing your bars an absolute dream. Leave a little overhang on the sides for easy lifting.
- Pour the rich batter into your prepared pan and spread it evenly with a spatula.
- Pop it into the preheated oven and bake for 25 minutes.
- After 25 minutes, carefully remove the pan from the oven and sprinkle those glorious toffee bits evenly over the top of the partially baked bars.
- Return the pan to the oven and bake for an additional 5 to 10 minutes. Keep an eye on them; you’re looking for the edges to turn a lovely golden brown and the center to be set but still look a little soft. That’s the key to their gooey perfection!
- The hardest part: letting them cool! Let the bars cool completely in the pan on a wire rack. I know, I know, it’s tempting to dig in, but cooling helps them set properly for clean, beautiful slices.
- Once fully cooled, use the parchment paper overhang to lift the entire slab of bars out of the pan. Place on a cutting board, slice into squares, and serve! And just like that, you’ll have a pan of pure cookie bar bliss! If you’re a fan of no-fuss treats that disappear quickly, you’ll also adore our No-Bake Oreo Bars for another effortless crowd-pleaser.
Substitutions & Additions
These Crème Brûlée Cookie Bars are fantastic as is, but feel free to play around and make them your own!
- Chocolate Choices: While white chocolate gives that classic crème brûlée flavor, you could experiment with milk chocolate chips or even a mix of dark and white chocolate for a different twist. Just remember, the flavor profile will shift!
- Toffee Alternatives: If you’re not a fan of toffee or can’t find bits, try sprinkling crushed pecans, walnuts, or even a mix of cinnamon sugar on top for a different texture and flavor. For an extra chocolatey kick, a drizzle of melted dark chocolate after they’ve cooled would be divine.
- Flavor Boosters: A tiny pinch of nutmeg or a whisper of almond extract along with the vanilla could add another layer of complexity.
- Sea Salt Finish: For that gourmet touch, sprinkle a tiny bit of flaky sea salt over the toffee bits immediately after taking them out of the oven. It really elevates the flavors! These bars are endlessly adaptable, much like our versatile Easy Chocolate Chip Cheesecake Bars, where you can play with different toppings and flavors.
Tips for Success
Want to ensure your Crème Brûlée Cookie Bars are absolutely perfect every time? Keep these tips in mind!
- Don’t Overbake! This is the golden rule for chewy bars. You want them set but still slightly soft in the middle when they come out of the oven. They’ll continue to set as they cool. Overbaking leads to dry, crumbly bars, and we want gooey goodness!
- Parchment Paper is Your Friend: Seriously, don’t skip lining the pan with parchment paper. It prevents sticking and makes lifting the whole batch out to cool and slice so much easier.
- Cool Completely: I know, it’s torture waiting, but resist the urge to cut into them while they’re warm. Cooling completely allows the bars to set up properly, ensuring clean, neat slices and the best texture.
- Low and Slow Melting: When melting the butter and white chocolate, keep the heat low and stir constantly. White chocolate can seize or burn easily if exposed to high heat.
- Room Temperature Eggs: While not strictly necessary for this recipe, using room temperature eggs can help them incorporate more smoothly into the batter, leading to a more uniform texture.
How to Store Crème Brûlée Cookie Bars
Once your irresistible Crème Brûlée Cookie Bars are baked and cooled, here’s how to keep them fresh and delicious:
- At Room Temperature: Store your bars in an airtight container at room temperature for up to 2-3 days. They stay wonderfully chewy!
- In the Refrigerator: For a slightly firmer texture and extended freshness, you can store them in an airtight container in the refrigerator for up to 5 days. Just let them come to room temperature for a few minutes before serving for the best flavor.
- Freezing: These bars freeze beautifully! Once completely cooled, wrap individual bars tightly in plastic wrap, then place them in a freezer-safe bag or container. They can be frozen for up to 1-2 months. Thaw at room temperature when you’re ready to enjoy!
FAQs
Got questions? I’ve got answers!
Q: Can I use a different size baking pan?
A: You can, but you’ll need to adjust the baking time. A smaller pan will result in thicker bars that may need more time, while a larger pan will yield thinner bars that bake faster. Keep an eye on them for that golden edge and set center!
Q: What if I don’t have toffee bits?
A: No worries! While the toffee bits truly mimic the caramelized sugar, you can absolutely make these without them. Alternatively, you could lightly sprinkle some granulated sugar over the top of the baked bars and use a kitchen torch (if you have one!) to create a true brûléed topping, or simply enjoy them as delicious white chocolate cookie bars!
Q: How do I get clean slices?
A: The key is to let the bars cool completely. Once cool, use a sharp knife, wiping the blade clean with a warm, damp cloth after every few cuts. This prevents sticking and ensures neat, beautiful squares.
For more delicious inspiration and behind-the-scenes peeks, be sure to follow us on Pinterest!
Decadent Crème Brûlée Cookie Bars
Ingredients
Equipment
Method
- Step 1: Preheat your oven to 350°F (175°C).
- Step 2: In a saucepan, gently melt the butter and white chocolate chips over low heat, stirring continuously until smooth and shiny.
- Step 3: Remove the melted mixture from heat and pour it into a large mixing bowl.
- Step 4: Stir in the granulated sugar, vanilla extract, and salt until well combined and fragrant.
- Step 5: Add the eggs one at a time, mixing thoroughly after each addition until the mixture comes together beautifully.
- Step 6: Add the all-purpose flour and mix until just combined; do not overmix.
- Step 7: Line a 9x13-inch baking pan with parchment paper, leaving a little overhang on the sides for easy lifting.
- Step 8: Pour the batter into your prepared pan and spread it evenly with a spatula.
- Step 9: Bake in the preheated oven for 25 minutes.
- Step 10: Carefully remove the pan from the oven and sprinkle the toffee bits evenly over the top of the partially baked bars.
- Step 11: Return the pan to the oven and bake for an additional 5 to 10 minutes, until the edges are golden brown and the center is set but still looks slightly soft.
- Step 12: Let the bars cool completely in the pan on a wire rack. Once fully cooled, use the parchment paper overhang to lift the entire slab out, slice into squares, and serve.