Oh, friend, do you ever have those days when you just need something utterly delicious, comforting, and crispy on your plate, but you’re short on time? I know I do! There’s a special kind of magic in a perfectly cooked chicken cutlet – that golden, crunchy coating giving way to tender, juicy chicken. It takes me right back to simpler times, to family dinners where good food brought everyone together without any fuss. Well, get ready, because today we’re making the absolute best Crispy Chicken Cutlets, and I promise you, this isn’t just a recipe; it’s a game-changer for your busy weeknights, your special occasions, and everything in between. It’s incredibly easy, surprisingly quick, and unbelievably memorable. Let’s get cooking!
Why You’ll Love Crispy Chicken Cutlets
- Fast: From prep to plate in under 30 minutes! Perfect for those “what’s for dinner?” dilemmas.
- Easy: Simple ingredients, straightforward steps – no culinary degree required!
- Giftable: (Okay, maybe not literally giftable as leftovers, but it’s a gift to your taste buds!) It makes a fantastic, impressive meal for guests.
- Crowd-pleasing: Kids and adults alike devour these. It’s a guaranteed hit every single time.
Ingredients
Gathering your ingredients is the first step to kitchen success! Here’s what you’ll need to make these incredible Crispy Chicken Cutlets:
- 2 large chicken breasts: I always go for boneless, skinless breasts for ease. They’re the perfect canvas for our crispy coating!
- 1 1/4 cups panko bread crumbs: This is our secret weapon for maximum crunch. Panko is lighter and flakier than regular breadcrumbs, giving you that irresistible crispiness.
- 1/4 cup grated Parmesan cheese: Adds a savory, cheesy depth that takes these cutlets to the next level. Freshly grated is always best if you have it!
- 1 teaspoon garlic powder: A pantry staple that infuses a wonderful aroma and flavor into our coating.
- 1 egg: Our binder! It helps the breading stick beautifully to the chicken.
- Salt and pepper, to taste: Don’t forget to season every layer for the best flavor.
- 1/3 cup vegetable oil: For that perfect golden fry. You can also use canola oil or another neutral oil.
How to Make Crispy Chicken Cutlets
Alright, let’s dive into the delicious details! Follow these simple steps for chicken cutlet perfection.
Step 1: Prep Your Chicken for Success
First things first, let’s get those chicken breasts ready. I have a little trick that makes slicing them so much easier: pop your chicken breasts into the freezer for about 20 minutes. It’s not long enough to fully freeze them, but it firms them up just enough to get nice, clean cuts. Once they’re slightly firm, take each breast and slice it horizontally in half, creating two thinner pieces. Now, this next part is key for even cooking and tenderness: place each chicken piece between two sheets of plastic wrap or in a large ziploc bag. Using a meat mallet (or even the bottom of a heavy skillet!), gently but firmly pound each cutlet to an even 1/4-inch thickness. This ensures they cook quickly and evenly, becoming incredibly tender.
Step 2: Get Your Breading Station Ready
Now for the fun part – creating that magical crispy coating! You’ll want two shallow dishes. In the first dish, whisk together your panko bread crumbs, grated Parmesan cheese, and garlic powder. Give it a good stir to make sure everything is evenly combined. In your second shallow bowl, whisk the egg until it’s well beaten. Now, take your perfectly pounded chicken cutlets and season both sides generously with salt and pepper. Don’t be shy here, as this is where a lot of your flavor will come from! One by one, dip each chicken cutlet into the whisked egg, letting any excess drip off. Then, immediately transfer it to the panko mixture. Press firmly on both sides to ensure a complete and even coating. You want every nook and cranny covered for maximum crispiness! If you’re looking for another amazing chicken dish that’s a total weeknight winner, you might also love our Savory Garlic Butter Chicken Bites with Lemon Parmesan Spaghetti!
Step 3: Cook to Golden Perfection
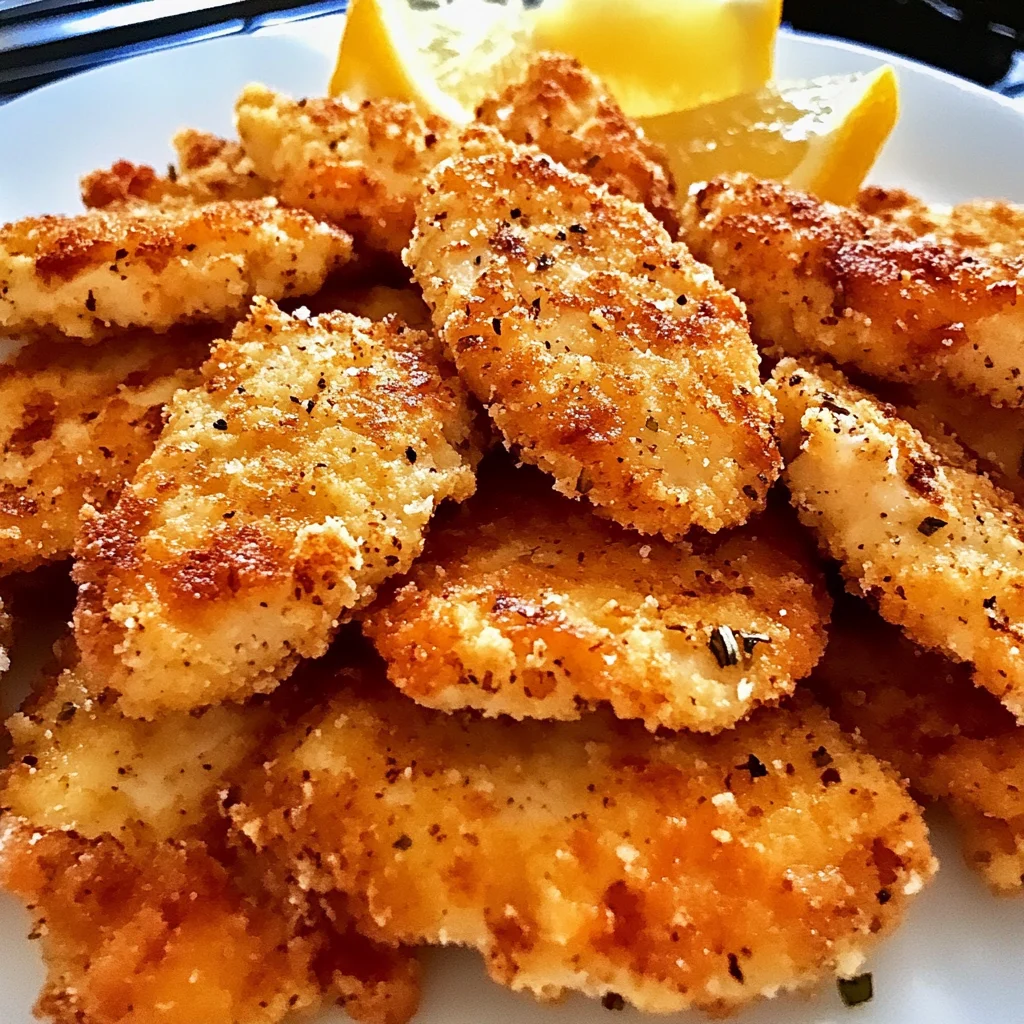
Time to get cooking! Heat the vegetable oil in a large skillet over medium heat. You want the oil shimmering but not smoking. A good trick is to drop a tiny pinch of panko into the oil – if it sizzles gently, you’re ready! Carefully place your breaded chicken cutlets into the hot oil. Be careful not to overcrowd the pan; cook them in batches if necessary so they can get beautifully golden and crispy. Cook for 2-3 minutes per side, or until they’re a gorgeous golden brown and the internal temperature reaches 165°F (74°C). I always recommend using a meat thermometer to ensure your chicken is perfectly cooked through and safe to eat.
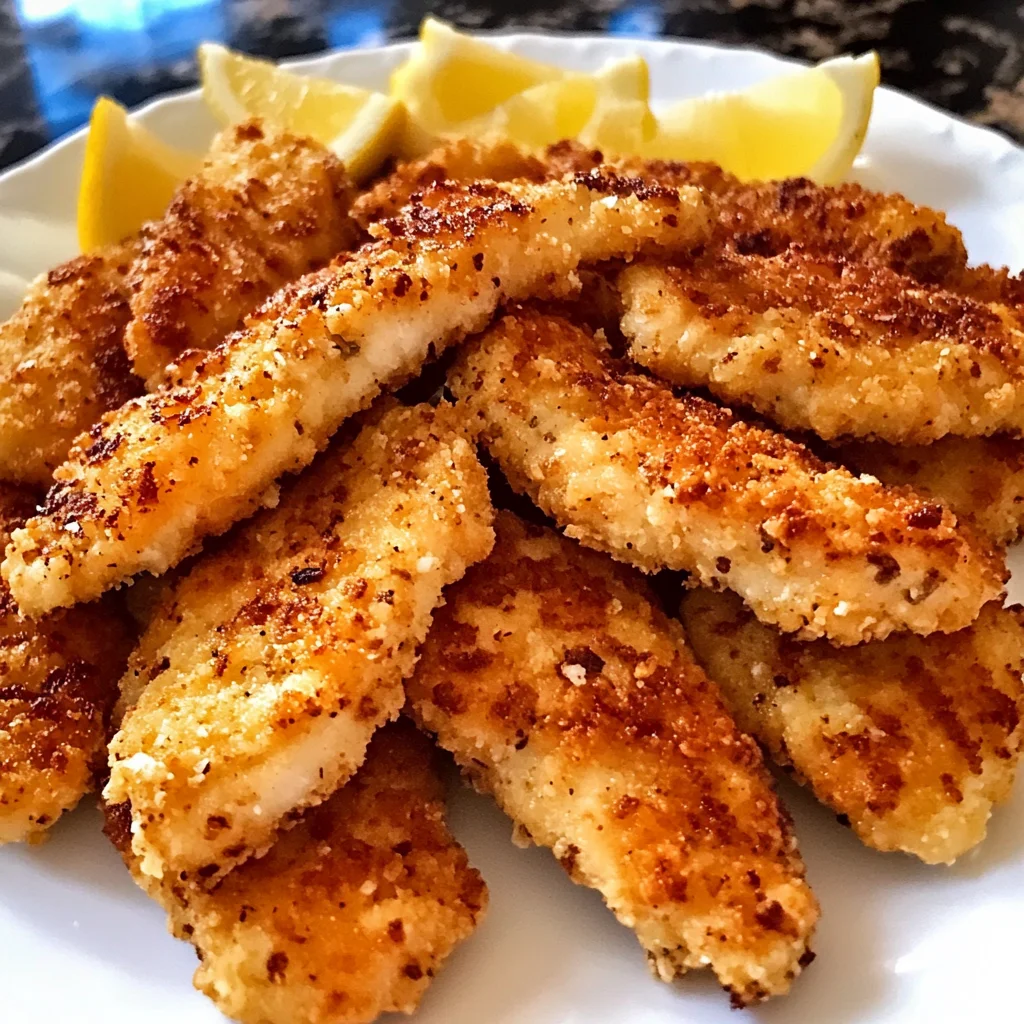
Step 4: Serve and Enjoy!
Once your chicken cutlets are perfectly golden and cooked, transfer them to a plate lined with a paper towel to drain any excess oil. This helps keep them extra crispy! Serve them immediately while they’re hot and at their best. A squeeze of fresh lemon juice over the top is always a fantastic touch. These are so versatile, you can pair them with almost anything! For a comforting side, I often serve them with a simple green salad or even a hearty Cream Cheese Corn Casserole.
Substitutions & Additions
This recipe is wonderfully adaptable! Feel free to play around with it and make it your own:
- Different Meats: This method works beautifully with thin-sliced pork tenderloin or even turkey cutlets.
- Spice it Up: Add a pinch of cayenne pepper, smoked paprika, or a dash of your favorite seasoning blend (like Italian seasoning or Cajun spice) to the panko mix for an extra flavor kick.
- Cheesy Swaps: Experiment with other hard cheeses like Pecorino Romano or even finely shredded Asiago in your breading.
- Flavor Boosters: Mix in some finely chopped fresh herbs like parsley or thyme into your panko for a fragrant twist.
- Sauce It: These cutlets are fantastic with a side of marinara, honey mustard, a creamy ranch dip, or even a simple squeeze of fresh lemon juice.
- Make it a Sandwich: Pop a crispy cutlet onto a bun with some lettuce, tomato, and mayo for an amazing chicken sandwich!
Tips for Success
Want to ensure your chicken cutlets are perfect every single time? Here are my go-to tips:
- Don’t Skip the Freeze: Seriously, that 20 minutes in the freezer makes all the difference for easy, even slicing.
- Pound it Evenly: Uniform thickness is crucial for chicken that cooks through at the same rate and stays tender.
- Press Firmly When Breading: You want a thick, even coat of panko. Don’t be afraid to really press that chicken into the breadcrumb mixture.
- Maintain Oil Temperature: Medium heat is your friend. If the oil is too hot, the breading will burn before the chicken cooks. If it’s too cool, the cutlets will soak up too much oil and become greasy. A small sizzle when a crumb hits the oil is what you’re looking for.
- Don’t Overcrowd the Pan: Give those cutlets space! Crowding lowers the oil temperature and can lead to steaming instead of frying, resulting in less crispy chicken. Cook in batches if needed.
- Season Generously: Remember to season the chicken before breading, as well as flavoring your panko mixture. Layers of seasoning equal layers of flavor! If you love that satisfying crunch, you should definitely check out The Secret to Perfectly Crispy Amish Onion Fritters for another amazing side!
- Resting Period: Once cooked, let the cutlets rest for a minute or two on a wire rack or paper towel-lined plate. This allows the juices to redistribute, keeping the chicken tender.
How to Store Crispy Chicken Cutlets
If you happen to have any leftovers (which is rare in my house!), here’s how to store and enjoy them later:
- Refrigeration: Place cooled crispy chicken cutlets in an airtight container in the refrigerator for up to 3-4 days.
- Freezing: Cooked cutlets can be frozen for up to 2-3 months. Lay them in a single layer on a baking sheet to freeze solid, then transfer to a freezer-safe bag or container with parchment paper between layers to prevent sticking.
- Reheating: To bring back that crispiness, avoid the microwave! Reheat in a preheated oven at 375°F (190°C) for about 10-15 minutes, or in an air fryer at 350°F (175°C) for 5-8 minutes, until heated through and crispy again.
FAQs
Q: Can I bake or air fry these chicken cutlets instead of frying?
A: Absolutely! To bake, preheat your oven to 400°F (200°C). Place the breaded cutlets on a wire rack set on a baking sheet, spray lightly with cooking spray, and bake for 15-20 minutes, flipping halfway, until golden and cooked through. For air frying, preheat your air fryer to 375°F (190°C), spray the basket and cutlets with oil, and cook for 10-14 minutes, flipping halfway, until crispy and golden.
Q: What’s the best way to prevent soggy chicken cutlets?
A: Several factors contribute to crispiness! Use panko bread crumbs, don’t overcrowd the pan, ensure your oil is at the right medium heat, and place the cooked cutlets on a wire rack (or paper towel-lined plate) immediately after cooking to allow air circulation and drain excess oil.
Q: Can I prep the chicken ahead of time?
A: Yes! You can pound and bread the chicken cutlets up to 1-2 days in advance. Store them in a single layer on a plate or baking sheet, covered with plastic wrap, in the refrigerator. This makes weeknight cooking even faster!
Q: What are some good side dishes to serve with these?
A: Oh, so many options! They’re wonderful with mashed potatoes, a fresh green salad, roasted vegetables, pasta with marinara, or even a side of rice. They truly pair well with almost any of your favorite comfort food sides.
For more delicious recipes and cooking inspiration, make sure to follow us on Pinterest!

Crispy Golden Chicken Cutlets
Ingredients
Equipment
Method
- Step 1: Prep Your Chicken for Success. For easier slicing, pop chicken breasts into the freezer for about 20 minutes to firm them up. Slice each breast horizontally in half to create two thinner pieces. Place each piece between two sheets of plastic wrap or in a large ziploc bag. Using a meat mallet or heavy skillet, pound each cutlet to an even 1/4-inch thickness.
- Step 2: Get Your Breading Station Ready. In the first shallow dish, whisk together panko bread crumbs, grated Parmesan cheese, and garlic powder. In the second shallow bowl, whisk the egg until well beaten. Season both sides of the pounded chicken cutlets generously with salt and pepper. Dip each cutlet into the whisked egg, letting excess drip off, then immediately transfer to the panko mixture. Press firmly on both sides to ensure a complete and even coating.
- Step 3: Cook to Golden Perfection. Heat the vegetable oil in a large skillet over medium heat until shimmering (a tiny pinch of panko should sizzle gently). Carefully place breaded chicken cutlets into the hot oil, ensuring not to overcrowd the pan (cook in batches if necessary). Cook for 2-3 minutes per side, or until golden brown and the internal temperature reaches 165°F (74°C) with a meat thermometer.
- Step 4: Serve and Enjoy! Once cooked, transfer the chicken cutlets to a plate lined with a paper towel or a wire rack to drain any excess oil and keep them crispy. Serve immediately, perhaps with a squeeze of fresh lemon juice, a simple green salad, or a hearty side dish.