Hey there, fellow homebody! Do you ever walk into a room and wish it just smelled…cozier? Like a warm hug, but for your nose? Forget those overwhelming, artificial air fresheners that give you a headache. Today, we’re diving into a super simple, incredibly satisfying DIY project that will have your home smelling absolutely divine: homemade aroma stones! This reminds me of those simple childhood crafts we used to do, but with a grown-up, beautifully fragrant twist. They’re so easy, quick to whip up, and trust me, they’re memorable for all the right reasons.
Why You’ll Love DIY Aroma Stones
- Fast
- Easy
- Giftable
- Crowd-pleasing
Ingredients

Gathering your ingredients for these little scent powerhouses is probably the easiest part! Most of these you might even have hiding in your pantry right now.
- 1 cup Baking Soda: This is our main workhorse, forming the solid base of your stones. It’s inexpensive and readily available.
- 1/2 cup Cornstarch: Partnering with baking soda, cornstarch helps bind everything together and gives your aroma stones a lovely, smooth finish.
- 1/2 cup Water: Just plain old tap water! This brings everything together into a moldable paste.
- 15-30 drops Essential Oils (of your choice): Here’s where the magic happens! Choose your favorite scents – lavender for relaxation, peppermint for invigoration, sweet orange for a burst of sunshine, or even a blend!
- Food Coloring or Mica Powder (optional): Want to add a pop of color to match your decor or mood? A few drops of food coloring or a pinch of mica powder will do the trick!
- Dried Herbs or Edible Flowers (optional): For an extra touch of beauty and texture, sprinkle in some dried lavender buds, rose petals, or tiny sprigs of rosemary.
- Silicone Molds, Cookie Cutters, or Trays: This is where you get creative! Mini muffin tins, candy molds, or even just rolling out the dough and using cookie cutters work wonderfully.
How to Make DIY Aroma Stones
Alright, let’s get our hands a little messy – the fun kind of messy! You’ll be amazed at how quickly these come together.
- Mix Your Dry Goods: Grab a medium mixing bowl. Pour in your baking soda and cornstarch. Give them a good stir until they’re fully blended and you don’t see any lumps. You want a super smooth, uniform powder to start with.
- Introduce the Water: Now, slowly, and I mean slowly, start pouring in the water while continuously stirring. You’ll see it transform from a powder into a thick, moldable paste. Don’t dump all the water in at once; you might need a tiny bit more or less depending on your humidity, so go gradually until you have a play-dough like consistency.
- Add Your Scent: Once your paste is ready, it’s time for the star of the show – your essential oils! Drip in 15-30 drops, or more if you prefer a stronger scent. Stir really well to make sure that beautiful fragrance is evenly distributed throughout the mixture. I always recommend starting with 15 and adding more if you want a more potent aroma!
- Color It Up (Optional): If you’re going for a pop of color, now’s the time! Add a small amount of food coloring or mica powder and mix it in until you reach your desired shade. Remember, a little goes a long way!
- Fill Your Molds: Take your chosen molds and gently start filling them with the mixture. Aim for about 3/4 full. Use the back of a spoon to smooth out the surface. If you’re using cookie cutters, roll out the dough to about 1/4 inch thick and press your shapes! For an extra charming touch, you can press a few dried herbs or edible flowers onto the top of each stone before it dries.
- Let Them Dry: This is the patience part! Carefully place your filled molds (or shaped stones on parchment paper) in a dry, well-ventilated area. Think a countertop away from direct sunlight or a windowsill. Let them air dry for anywhere from 6 to 24 hours, or until they feel completely hard to the touch. The drying time can vary based on humidity and the thickness of your stones. While you’re waiting for these to dry, why not try another fun project like making easy DIY suncatchers to brighten another spot in your home?
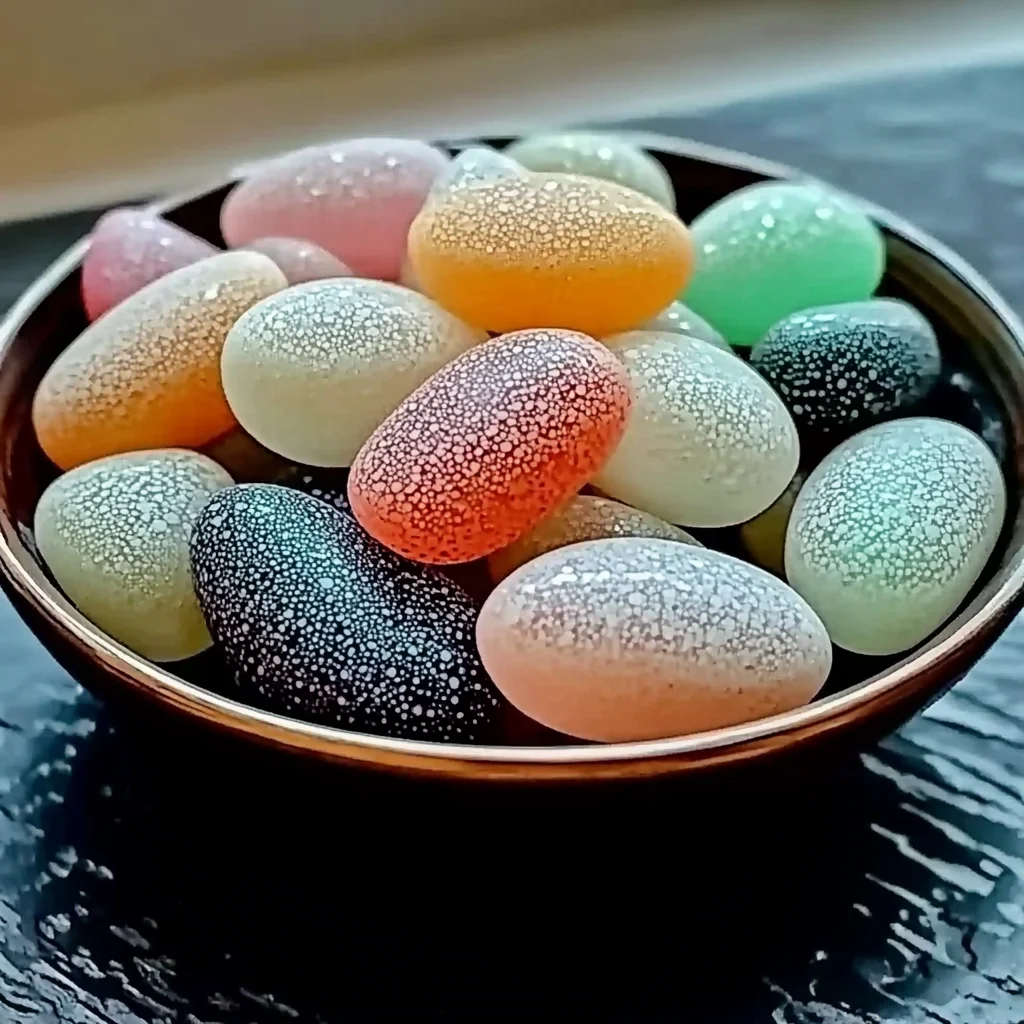
- Demold and Enjoy!: Once your aroma stones are perfectly dry and firm, carefully pop them out of their molds. If they resist, gently push from the bottom of silicone molds. Voilà! You now have beautiful, fragrant aroma stones ready to adorn your home.

Substitutions & Additions
The beauty of DIY is making it your own! Here are some ideas to switch things up:
- Different Fragrances: Not just essential oils! You can experiment with skin-safe fragrance oils, but always check their specific safety instructions.
- Natural Colors: Instead of food coloring, try natural powders like spirulina for green, turmeric for yellow, or beetroot powder for a lovely pink hue.
- Sparkle & Shine: A little bit of biodegradable glitter mixed into the paste can add a magical shimmer, especially if you’re making these for a special occasion or as a gift.
- Texture Play: Add a pinch of fine sand or very fine salt to the dry mix for a slightly textured, more “stone-like” feel.
- Hang Them Up: Before they dry, poke a small hole with a skewer or toothpick if you want to thread a ribbon through and hang them in closets or on doorknobs. If you love getting creative with simple materials, you might also enjoy making DIY color-changing crystal treasure stones – another fun project for all ages!
Tips for Success
Even though this recipe is super forgiving, a few pointers can help you achieve perfect aroma stones every time:
- Go Slow with Water: Seriously, this is the most crucial tip! Adding too much water too fast can make your paste soupy and hard to mold, leading to crumbly stones. Add a little, mix, then add more if needed.
- Humidity is a Factor: If you live in a humid climate, your stones might take longer to dry. A fan nearby can help speed up the process.
- Mix Oils Thoroughly: Ensure your essential oils are fully incorporated into the paste for an even scent distribution.
- Don’t Be Afraid to Re-oil: Over time, the scent will naturally fade. Don’t throw them out! Just add a few more drops of essential oil to the surface, let it soak in, and they’ll be as good as new.
- Consider Your Placement: Think about where you’ll put your finished stones. Lavender is lovely by the bed, citrus in a bathroom, and peppermint in a home office.
How to Store DIY Aroma Stones
Once your aroma stones are completely dry, they’re quite durable! For long-term storage, especially if you’re making a batch to give as gifts, keep them in an airtight container away from high humidity. This will help preserve their shape and scent for as long as possible. Their shelf life is pretty much indefinite as long as they stay dry, but the aroma will naturally mellow over a few weeks or months. When that happens, just follow the “re-oil” tip above to refresh them!
FAQs
Got a few more questions buzzing around? Let’s clear them up!
Q: How long do the essential oil scents typically last?
A: The noticeable scent usually lasts for a few weeks to a month, depending on the oil’s volatility and the stone’s size. After that, simply add a few more drops of essential oil to refresh them.
Q: Can I use these in my car?
A: Absolutely! They make wonderful car air fresheners. Just be sure to place them where they won’t roll around too much, and avoid direct, prolonged sunlight to prevent any potential “sweating” of the oils.
Q: Are these safe to use around pets?
A: This is an important one! While the essential oils are diluted and dispersed, some essential oils can be toxic to pets if ingested. It’s best to place your aroma stones in areas where curious paws (or mouths!) can’t reach them, especially if you have pets that like to chew.
Q: What if my aroma stones crack or crumble when drying?
A: This usually happens if there was a little too much water in the mixture, or if they dried too quickly in an area with very low humidity. Try adding slightly less water next time, ensuring a good, thick paste. You can always try to salvage them by crumbling them up and adding a tiny bit more water to re-mold!
And if you’re ever looking for more delicious homemade goodness or fun projects to try, be sure to check out all our other amazing recipes!
For more delightful recipes and DIY ideas, follow us on Pinterest!
Easy DIY Aroma Stones
Ingredients
Equipment
Method
- Step 1: Mix Your Dry Goods. Grab a medium mixing bowl. Pour in your baking soda and cornstarch. Give them a good stir until they're fully blended and you don't see any lumps, aiming for a super smooth, uniform powder.
- Step 2: Introduce the Water. Slowly pour in the water while continuously stirring. You'll see it transform from a powder into a thick, moldable paste. Add gradually until you have a play-dough-like consistency; you might need a tiny bit more or less depending on humidity.
- Step 3: Add Your Scent. Once your paste is ready, drip in 15-30 drops of essential oils (or more for a stronger scent). Stir really well to ensure the fragrance is evenly distributed throughout the mixture. Start with 15 drops and add more if desired.
- Step 4: Color It Up (Optional). If adding color, now's the time! Add a small amount of food coloring or mica powder and mix it in until you reach your desired shade. Remember, a little goes a long way!
- Step 5: Fill Your Molds. Gently fill your chosen molds (silicone molds, mini muffin tins, candy molds, or use cookie cutters on rolled-out dough) about 3/4 full. Use the back of a spoon to smooth out the surface. For an extra charming touch, press a few dried herbs or edible flowers onto the top of each stone before it dries. If making for hanging, poke a small hole with a skewer or toothpick now.
- Step 6: Let Them Dry. Carefully place your filled molds (or shaped stones on parchment paper) in a dry, well-ventilated area away from direct sunlight. Let them air dry for anywhere from 6 to 24 hours, or until they feel completely hard to the touch. Drying time can vary based on humidity and stone thickness; a fan nearby can help speed up the process.
- Step 7: Demold and Enjoy! Once your aroma stones are perfectly dry and firm, carefully pop them out of their molds. If they resist, gently push from the bottom of silicone molds. Your beautiful, fragrant aroma stones are now ready to adorn your home.