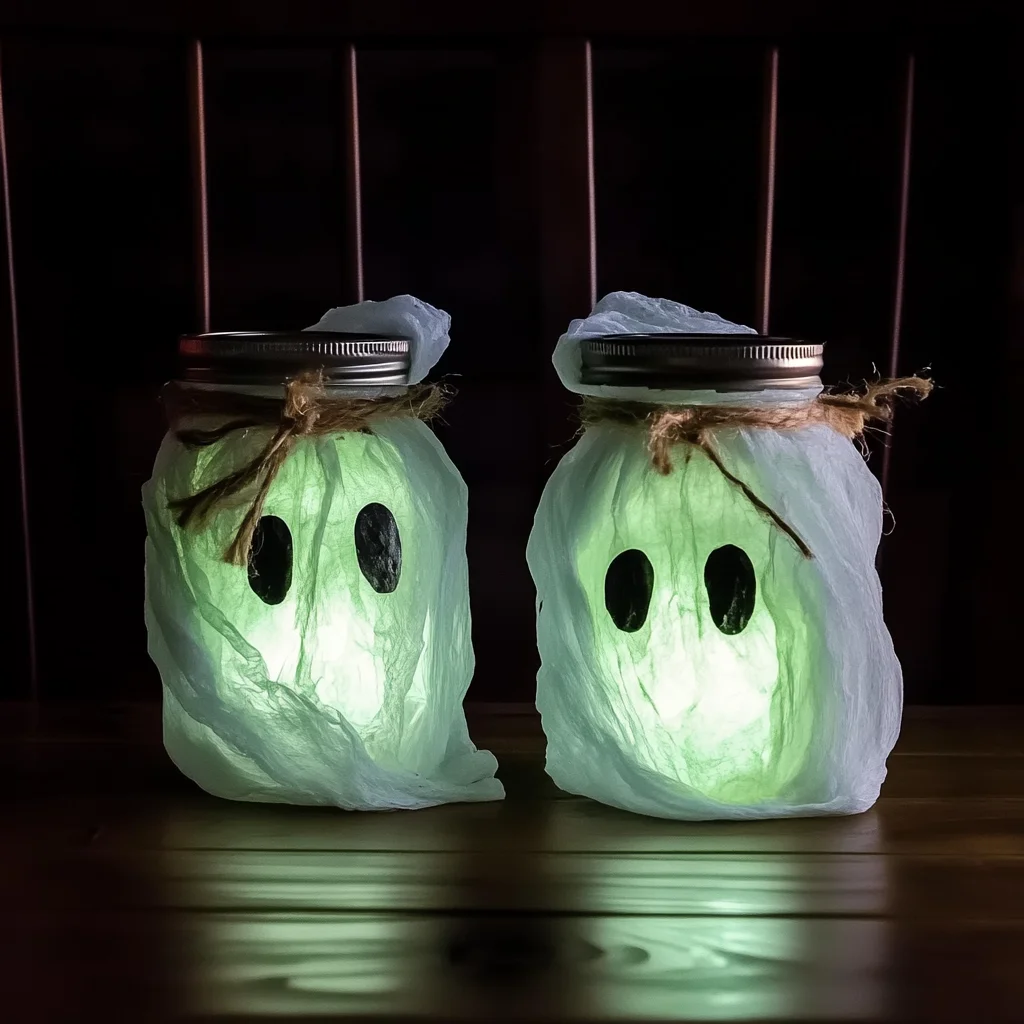
Oh, friend, there’s just something magical about those crisp autumn evenings, isn’t there? The air gets a little cooler, the leaves start to turn, and suddenly, my heart just craves all things cozy and a little bit spooky! If you’re anything like me, you love bringing that festive spirit into your home without a ton of fuss. That’s exactly why I’m so excited to share this super easy, wonderfully quick, and incredibly memorable DIY project with you today: Glow-in-the-Dark Ghost Jars!
Seriously, these little guys are pure joy. They bring such a whimsical, hauntingly beautiful glow to any corner of your home, and they’re so simple, you’ll wonder why you haven’t made them sooner. Perfect for a cozy family craft night or to add that extra special touch to your Halloween decor!
Why You’ll Love DIY Glow-in-the-Dark Ghost Jars
- Fast
- Easy
- Giftable
- Crowd-pleasing
Ingredients
Gathering your supplies for these charming ghost jars is half the fun! Most of these you probably already have lying around, especially if you’re a fellow craft enthusiast.
- Empty Glass Jars: Mason jars, old spaghetti sauce jars, pickle jars – anything goes! Just make sure they’re clean.
- White Tissue Paper or Gauze: This is what gives your ghosts their ethereal, floaty look. I love using medical gauze for a really raggedy, spooky vibe!
- Glow-in-the-Dark Paint (or Glow Spray): The star of the show! You can find this at any craft store. The brighter the glow, the better, so don’t skimp here.
- Foam Brush: Perfect for smooth, even coats of paint.
- Black Construction Paper (for ghost faces): For those adorable, or spooky, ghost expressions.
- Scissors: For cutting out your ghost faces and tissue paper.
- Glue or Mod Podge: To secure everything in place. Mod Podge is great because it also acts as a sealant!
How to Make DIY Glow-in-the-Dark Ghost Jars
Alright, grab your apron (or don’t, this isn’t that messy!), and let’s get crafting! You’re going to be amazed at how quickly these come together.
- Prep Your Jars: First things first, you want to make sure your glass jars are sparkling clean and bone-dry. Any moisture or grime can prevent the paint from sticking properly, so give them a good wash with soap and water, then let them air dry completely or wipe them down thoroughly.
- Paint Your Glow: Now for the magic! Using your foam brush, apply 2-3 thin coats of glow-in-the-dark paint to the exterior of each jar. Here’s my pro tip: patience is key! Make sure each coat dries completely before you apply the next. This layering is what really builds up the glow power, giving you that optimal, eerie luminosity when the lights go out. While you’re waiting for layers to dry, why not check out some other fun recipes or even another easy craft like light-up scarecrow mason jars?
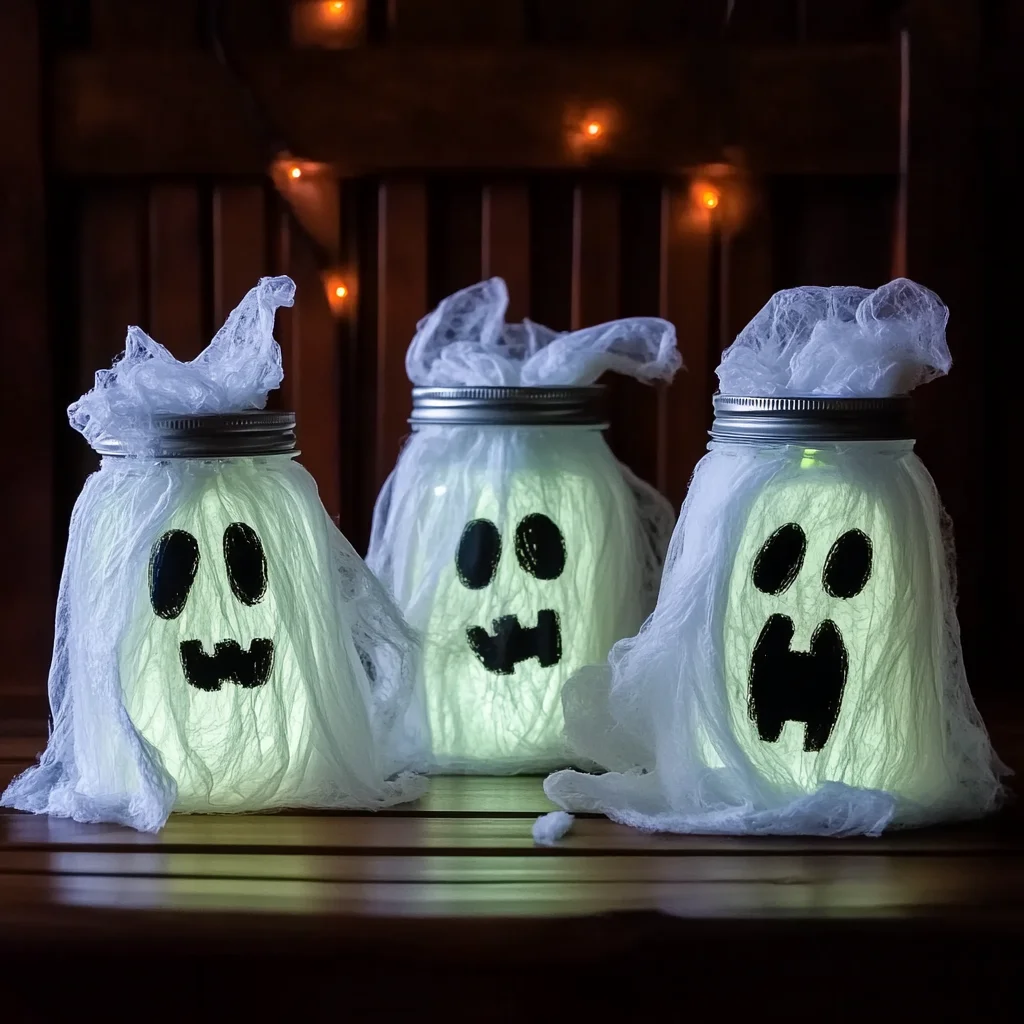
- Wrap Your Ghosts: Once your paint is totally dry and glowing bright, it’s time to give your ghosts their ghostly bodies! Take your white tissue paper or gauze and gently wrap it around each jar. You can do a neat wrap or tear it into strips for a more tattered, spooky effect. Secure the paper in place with a little bit of glue or Mod Podge. Don’t worry about being too perfect; a little asymmetry adds character!
- Give Them Personality: Grab your black construction paper and scissors. This is where your ghosts truly come to life! Cut out eyes and a mouth for each ghost. You can make them round and friendly, slit and mischievous, or jagged and scary—whatever your ghostly heart desires! Affix these features to the tissue-covered jars using a dab of glue. For another fun afternoon activity, especially if you have little ones, you might also love making some DIY rainbow bouncy balls!
- Activate the Glow: The grand finale! To activate that fantastic glow, place your finished ghost jars under a bright light source for several minutes. A sunny window, a lamp, or even your phone’s flashlight will do the trick. Then, the moment of truth: turn off the lights and watch your adorable (or terrifying!) ghosts illuminate the room!
Substitutions & Additions
Part of the joy of DIY is making it your own! Here are a few ideas to get your creative juices flowing:
- Different Jar Shapes: Don’t limit yourself to just plain jars! Look for interesting glass bottles, small milk bottles, or even old apothecary jars for different looks.
- Sparkle & Shine: Before applying the tissue paper, you could sprinkle a tiny bit of fine glitter over the wet glow paint for an extra magical shimmer when the lights are on.
- Twine or Ribbon: Tie a bit of rustic twine or a spooky black ribbon around the neck of the jar for an added decorative touch.
- Fairy Lights: For an extra boost of consistent light, you can carefully place a small string of battery-operated fairy lights inside the finished jar. This makes them glow even when not “charged” by ambient light.
- Colored Tissue: While white is classic, imagine ghosts with a hint of gray, light green, or even purple tissue for a different effect!
Tips for Success
Even the simplest crafts have their little secrets for perfection!
- Cleanliness is Key: I really can’t stress enough how important it is to have clean, dry jars. It ensures your paint adheres smoothly and evenly.
- Thin Coats of Paint: Resist the urge to glob on a thick layer of glow paint. Thin, even coats that are fully dried between applications will give you a much brighter, more consistent glow than one thick, uneven coat.
- Patience, My Friend: Allow plenty of drying time for the paint. If it’s still tacky, the tissue paper might stick unevenly or peel the paint.
- Charge Them Up: The brighter and longer you expose them to light, the more intensely and longer they will glow in the dark. Give them a good “sunbath” or lamp charge before their big debut!
- Outdoor Use: If you plan to put these outside, consider using outdoor-specific glow paint and a weather-resistant Mod Podge to help them stand up to the elements.
How to Store DIY Glow-in-the-Dark Ghost Jars
These little ghosts are pretty low maintenance once they’re made! To keep them looking their best for seasons to come:
- Keep Dry: Store them in a dry place to prevent any moisture from affecting the paint or glue.
- Protect from Dust: Placing them in a box, perhaps nestled with some tissue paper, will keep them free from dust and cobwebs (unless you want those for extra spookiness!).
- Avoid Prolonged Direct Sunlight: While they need light to charge, storing them in direct, harsh sunlight for weeks or months might cause the paint or tissue paper to fade over time.
- Shelf Life: With proper care, these DIY ghost jars can last for many Halloweens! The glow paint itself usually has a very long life.
FAQs
Got questions? I’ve got answers!
Q: How long do these ghost jars typically glow?
A: The duration of the glow depends heavily on the quality of your glow-in-the-dark paint and how long and intensely they were charged. Generally, a good quality paint, fully charged, can glow visibly for 30 minutes to a couple of hours, with a subtle afterglow that can last longer.
Q: Can I use different colors of glow paint?
A: Absolutely! While green is the classic spooky glow, you can find glow paint in blue, orange, or even purple. Experiment to create a whole spectral rainbow!
Q: Are these safe for kids to make?
A: Yes, they are a fantastic kid-friendly craft! Just supervise with scissors and ensure proper ventilation if using spray paint (though brush-on paint is usually non-toxic). The clean-up is minimal, and the reward is huge smiles!
Q: Can I put anything inside the jars?
A: You bet! You can place small battery-operated LED candles inside for an extra flicker, or even some small plastic spiders or autumn leaves to enhance your display.
Don’t forget to follow us on Pinterest for more easy recipes and DIY fun!

Spooky & Simple: DIY Glow-in-the-Dark Ghost Jars
Ingredients
Equipment
Method
- Step 1: Make sure your glass jars are sparkling clean and bone-dry. Wash with soap and water, then let them air dry completely or wipe them down thoroughly.
- Step 2: Using a foam brush, apply 2-3 thin coats of glow-in-the-dark paint to the exterior of each jar. Allow each coat to dry completely before applying the next.
- Step 3: Once paint is totally dry, wrap white tissue paper or gauze around each jar. Secure in place with a little bit of glue or Mod Podge.
- Step 4: Cut out eyes and a mouth for each ghost from black construction paper. Affix these features to the tissue-covered jars using a dab of glue.
- Step 5: Place your finished ghost jars under a bright light source (sunny window, lamp, or phone's flashlight) for several minutes to activate the glow. Then, turn off the lights and watch them illuminate!