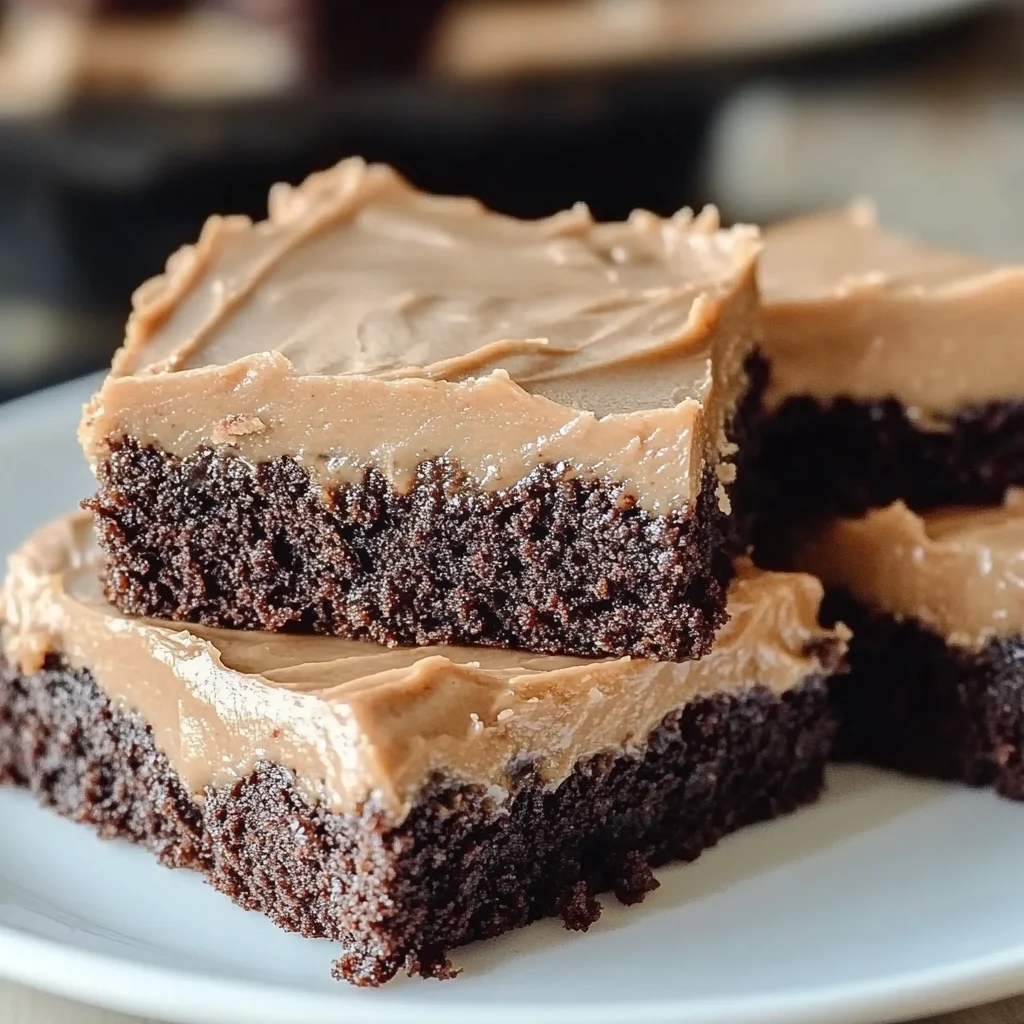
Imagine a crisp autumn afternoon, or maybe a cozy Sunday morning, when the rich aroma of coffee fills your kitchen, mingling with the sweet scent of baking chocolate. There’s something undeniably comforting about that combination, isn’t there? For me, it takes me right back to warm memories of baking with loved ones. And today, I’m so excited to share a recipe that perfectly captures that feeling: Frosted Coffee Brownies. They’re quick to whip up, unbelievably easy, and trust me, they’re so memorable, they’ll become an instant classic in your home, right up there with Grandma’s easy lunch lady brownies! You’re just minutes away from sinking your teeth into a perfectly fudgy brownie topped with a dreamy, rich coffee frosting – it’s pure bliss!
Why You’ll Love Frosted Coffee Brownies
- Fast: From start to first bite, these beauties come together in a flash.
- Easy: No fancy techniques or equipment needed, just simple mixing and baking!
- Giftable: These make the perfect homemade gift for friends, family, or neighbors.
- Crowd-pleasing: Seriously, who can resist a rich, fudgy brownie with a coffee kick?
Ingredients
Gather your kitchen essentials, friend! Here’s what you’ll need to make these incredible Frosted Coffee Brownies:
- For the Brownies:
- 1 cup butter, melted: This is key for that perfectly fudgy texture.
- 2 cups granulated sugar: For just the right amount of sweetness and a lovely crackly top.
- 4 large eggs: They bind everything together and add richness.
- 1 tsp vanilla extract: A classic flavor enhancer that makes everything better.
- 1 cup all-purpose flour: Just enough to hold it all together without making them cakey.
- 1/2 cup cocoa powder: The star of the show for that deep, chocolatey goodness.
- 1/2 tsp salt: Don’t skip this! It balances the sweetness and brings out the chocolate flavor.
- 1/2 tsp baking powder: Gives them a little lift, but keeps them dense.
- 1/2 cup brewed coffee (cooled): The secret ingredient for that wonderful coffee essence in the brownie itself!
- For the Coffee Frosting:
- 1 cup powdered sugar: For a silky-smooth, melt-in-your-mouth frosting.
- 1/4 cup unsalted butter, softened: Makes the frosting rich and spreadable.
- 2 tbsp brewed coffee (cooled): Doubling down on the coffee flavor for the frosting!
- 1 tsp vanilla extract: A hint of warmth in the frosting.
- 2 tbsp heavy cream (optional): For an extra creamy, luxurious frosting consistency. You might not even need it all!
How to Make Frosted Coffee Brownies
Ready to get baking? Follow these simple steps, and you’ll have a tray of deliciousness in no time!
- Preheat Oven & Prep Pan: First things first, preheat your oven to a cozy 350°F (175°C). Then, grab a 9×13-inch baking pan. You can either grease and flour it the old-fashioned way, or for super easy removal, line it with parchment paper, leaving a little overhang on the sides to use as “handles.” Trust me, that parchment trick is a game-changer!
- Mix the Wet Brownie Ingredients: In a large mixing bowl, combine your melted butter and granulated sugar. Give it a good stir until they’re well blended. Then, one at a time, crack in your eggs, mixing thoroughly after each addition. You want everything to be nice and incorporated. Finally, stir in the vanilla extract and that wonderfully cool brewed coffee. This is where the magic begins!
- Combine the Dry Ingredients: In a separate, medium-sized bowl, take a whisk and combine the flour, cocoa powder, salt, and baking powder. Whisk them together really well to make sure there are no clumps and everything is evenly distributed.
- Mix the Batter: Now for the fun part! Gradually add your dry ingredients mixture into your wet ingredients bowl. Use a spatula or a wooden spoon to gently fold them together. Be careful not to overmix! Mix just until everything is combined and you don’t see any dry streaks of flour. Overmixing can lead to tough brownies, and we want fudgy!
- Bake to Perfection: Pour your luscious brownie batter into your prepared pan, spreading it evenly. Pop it into your preheated oven and bake for 25-30 minutes. Keep an eye on them! You’ll know they’re done when a toothpick inserted into the center comes out with moist crumbs, but not wet batter. Remember, a slightly underbaked brownie is a fudgy brownie! Once baked, let them cool completely in the pan on a wire rack. This is crucial for easy frosting and slicing.
- Whip Up the Coffee Frosting: While your brownies are chilling out, let’s make that dreamy coffee frosting. In a bowl, grab your softened butter, powdered sugar, brewed coffee, and vanilla extract. Beat them together with an electric mixer until the frosting is wonderfully smooth and creamy. If you want it a little looser or extra rich, now’s the time to drizzle in that heavy cream, a tablespoon at a time, until you reach your desired consistency.
- Frost the Brownies: This step is important: make absolutely sure your brownies are completely cool before you even think about frosting them! If they’re warm, the frosting will melt into a messy puddle. Once cooled, spread your delicious coffee frosting evenly over the top.
- Slice and Serve: Now for the best part! Slice your Frosted Coffee Brownies into squares. For extra clean cuts, I always run my knife under hot water and wipe it clean between each slice. Serve them up and watch them disappear! And if you’re a true coffee fiend, you might want to explore other delightful coffee-infused treats like this creamy homemade coffee ice cream for an extra indulgence!
Substitutions & Additions
Want to put your own spin on these Frosted Coffee Brownies? Here are a few ideas to get your creative juices flowing:
- Amp up the Chocolate: Stir in a handful of chocolate chips (milk, dark, or white!) into the brownie batter before baking for extra pockets of melty goodness.
- Nutty Goodness: Add chopped walnuts, pecans, or even almonds to the brownie batter for a delightful crunch.
- Spice It Up: A pinch of cinnamon or a dash of cardamom in the brownie batter can complement the coffee flavor beautifully.
- Espresso Boost: For an even more intense coffee flavor, add a teaspoon of instant espresso powder to the dry ingredients for the brownies, and a little extra to the frosting.
- Flavor Swaps for Frosting: Not a huge coffee frosting fan? You could easily make a classic vanilla buttercream or even a rich chocolate ganache instead. Or for a fun twist, try a peanut butter swirl brownie by melting some peanut butter and swirling it through the batter before baking!
- Dairy-Free Option: You can swap out the dairy butter for a good quality plant-based butter alternative, and use a dairy-free milk or creamer in the frosting.
- Gluten-Free Friendly: For a gluten-free version, simply substitute the all-purpose flour with a 1:1 gluten-free baking flour blend.
Tips for Success
Baking is all about practice and a few clever tricks! Here are my top tips for making sure your Frosted Coffee Brownies turn out perfect every single time:
- Do NOT Overbake! This is the golden rule for fudgy brownies. If a toothpick comes out completely clean, they’re probably already a little dry. You want moist crumbs clinging to the toothpick. Remember, they’ll continue to cook slightly as they cool.
- Cool Completely Before Frosting: I know, I know, it’s hard to wait! But patience is key here. If you try to frost warm brownies, your beautiful frosting will just melt into a messy puddle. Let them cool fully, preferably for a few hours or even overnight.
- Room Temperature Frosting Ingredients: For the smoothest, creamiest frosting, make sure your butter (for the frosting) is softened to room temperature. This helps it blend seamlessly with the powdered sugar and coffee.
- Use Good Quality Cocoa Powder: The cocoa powder is a star in this recipe, so using a good quality unsweetened cocoa powder will make a big difference in flavor.
- Coffee Strength Matters: Adjust the strength of your brewed coffee to your personal preference. Stronger coffee will give a more pronounced coffee flavor in both the brownies and the frosting.
- Clean Cuts: For perfectly neat squares, use a sharp knife and wipe it clean with a damp cloth after each cut. For extra precision, you can briefly run the knife under hot water before each slice.
How to Store Frosted Coffee Brownies
If you manage to have any leftovers (a rare occurrence with these!), here’s how to keep them fresh:
- At Room Temperature: Store the frosted brownies in an airtight container at room temperature for up to 2-3 days.
- In the Refrigerator: For longer storage, or if your kitchen is particularly warm, keep them in an airtight container in the refrigerator for up to a week. Just let them come to room temperature for about 15-20 minutes before serving for the best texture.
- Freezing: Yes, you can freeze them! Place cooled, frosted brownies in a single layer on a baking sheet and freeze until firm. Once frozen, transfer them to a freezer-safe airtight container or heavy-duty freezer bag for up to 3 months. Thaw in the refrigerator overnight or at room temperature for a few hours before serving.
FAQs
Got questions? I’ve got answers!
- Q: Can I use instant coffee instead of brewed coffee?
A: Yes, absolutely! For the brownies, dissolve 1-2 tablespoons of instant coffee granules (or espresso powder) in 1/2 cup of hot water, then let it cool completely before adding. For the frosting, dissolve 1-2 teaspoons in 2 tablespoons of hot water and cool. Adjust to your desired coffee strength. - Q: My brownies turned out dry, what went wrong?
A: The most common culprit for dry brownies is overbaking. Keep a close eye on them during the last few minutes of baking, and remember that a toothpick should come out with moist crumbs, not completely clean. - Q: Can I make these brownies ahead of time for a party?
A: Yes, these brownies are fantastic for making ahead! You can bake the brownies a day in advance, let them cool, then frost them the day of your event, or even frost them the day before. They store beautifully. - Q: Do I have to use heavy cream in the frosting?
A: The heavy cream is optional and just gives the frosting an extra luxurious, creamier consistency. If you don’t have it, or prefer not to use it, the frosting will still be delicious! You might need to add a tiny bit more brewed coffee or milk to get the right spreading consistency.
For more delicious and easy recipes, make sure to follow along on Pinterest!

Frosted Coffee Brownies
Ingredients
Equipment
Method
- Step 1: Preheat your oven to a cozy 350°F (175°C). Grab a 9x13-inch baking pan and either grease and flour it, or line it with parchment paper, leaving a little overhang on the sides to use as "handles."
- Step 2: In a large mixing bowl, combine your melted butter and granulated sugar. Stir until well blended. Crack in your eggs one at a time, mixing thoroughly after each addition. Stir in the vanilla extract and the cool brewed coffee.
- Step 3: In a separate, medium-sized bowl, whisk together the flour, cocoa powder, salt, and baking powder until there are no clumps and everything is evenly distributed.
- Step 4: Gradually add your dry ingredients mixture into your wet ingredients bowl. Use a spatula or a wooden spoon to gently fold them together. Mix just until everything is combined and you don't see any dry streaks of flour; do not overmix.
- Step 5: Pour your brownie batter into your prepared pan, spreading it evenly. Pop it into your preheated oven and bake for 25-30 minutes. They are done when a toothpick inserted into the center comes out with moist crumbs, but not wet batter. Once baked, let them cool completely in the pan on a wire rack.
- Step 6: While your brownies are cooling, make the coffee frosting. In a bowl, combine your softened butter, powdered sugar, brewed coffee, and vanilla extract. Beat them together with an electric mixer until the frosting is wonderfully smooth and creamy. If you want it a little looser or extra rich, drizzle in the heavy cream, a tablespoon at a time, until you reach your desired consistency.
- Step 7: Make sure your brownies are completely cool before frosting them. Once cooled, spread your delicious coffee frosting evenly over the top.
- Step 8: Slice your Frosted Coffee Brownies into squares. For extra clean cuts, run your knife under hot water and wipe it clean between each slice. Serve immediately.