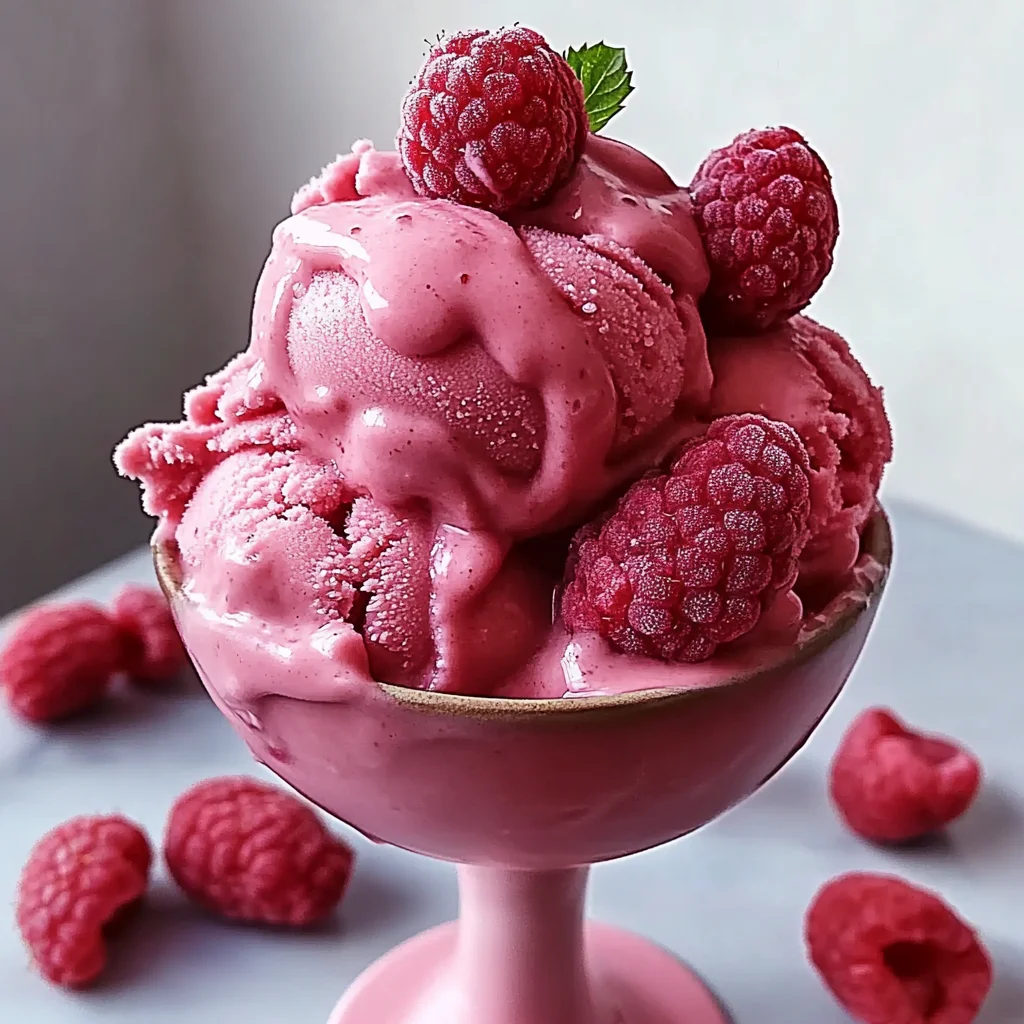
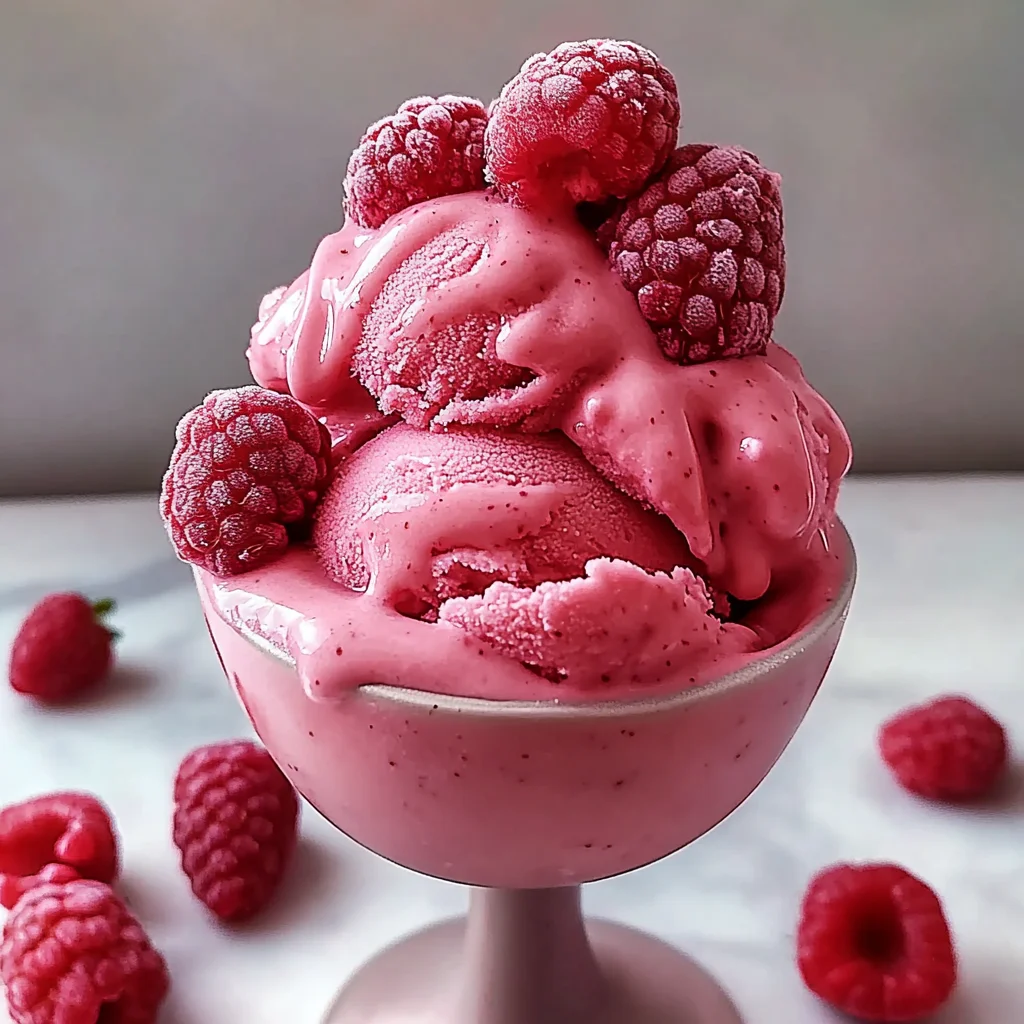
Oh friend, does anything scream “summer” quite like the vibrant color and tangy sweetness of fresh raspberries? Growing up, a scoop of bright pink sorbet on a hot day felt like pure magic. It was refreshing, light, and just bursting with berry goodness. But you know what? Making that magic at home is way easier than you might think! Forget the fancy store-bought stuff; this homemade raspberry sorbet recipe is so simple, so quick, and delivers that intense, fresh flavor you crave without any artificial anything. It’s the perfect treat for a sunny afternoon, a light dessert after dinner, or even a fun project with the kids. Get ready to churn up some happiness!
Why You’ll Love This Recipe
- Fast: Seriously, once your simple syrup cools, the whole process is just a few minutes of blending and about 20 minutes in the ice cream maker.
- Easy: You only need a handful of ingredients and a basic ice cream maker. No complex steps here!
- Giftable: Pour the churned sorbet into cute containers before freezing and you’ve got a sweet, thoughtful gift.
- Crowd-pleasing: Who doesn’t love a scoop of vibrant, fruity sorbet? It’s naturally dairy-free and vegan too, making it perfect for guests with dietary needs.
Ingredients
You really don’t need much for this sorbet, and each ingredient plays a key role in getting that perfect texture and flavor.
- 500 g Raspberries: This is your star! You can use fresh raspberries for the brightest flavor, especially when they’re in season. Frozen raspberries work beautifully too – no need to thaw them completely before blending, just make sure they aren’t one solid block.
- 200 g Sugar: This sweetens the sorbet, of course, but it also helps lower the freezing point, resulting in a smoother, less icy texture. We’ll turn this into a simple syrup first.
- Juice of 1/2 Lemon: A little citrus is crucial! It brightens the raspberry flavor and adds a touch of necessary tartness to balance the sweetness. Use fresh lemon juice, please!
- 250 ml Water: This is the base for our simple syrup, dissolving the sugar evenly.
How to Make It
Let’s get this sorbet party started! It’s a straightforward process, I promise.
- First, we make the simple syrup. Grab a small saucepan and pour in the water and sugar. Put it over low heat and stir, stir, stir. Your goal is just to dissolve the sugar completely, not to boil it vigorously. Once you can’t see any sugar crystals anymore, take the pan off the heat. Now, this is important: let it cool down completely. You can let it sit at room temperature, or pop it in the fridge for faster cooling if you’re impatient like me! A warm syrup will melt your raspberries and won’t churn properly later.
- Blend the base. Once your simple syrup is totally cool, pour it into your food processor or a high-powered blender. Add those beautiful raspberries and the fresh squeeze of lemon juice. Process until everything is silky smooth. Seriously blend it well – you don’t want little bits of raspberry seeds in your sorbet! Some people strain the mixture at this point to remove seeds, but I usually skip this for the extra fiber and flavor; it’s up to you!
- Chill, chill, chill! Pour the smooth raspberry mixture into a container (a jar or bowl works) and pop it in the refrigerator. Let it chill for at least 1 hour. This step is crucial for getting a good texture in the ice cream maker.
- Prep your ice cream maker. While the base is chilling, get your ice cream maker ready. Make sure the bowl has been in the freezer for the amount of time specified by your machine’s manufacturer – usually at least 12-24 hours. A properly frozen bowl is key to successful churning!
- Churn time! Pour the well-chilled raspberry mixture into the frozen ice cream maker bowl. Turn on your machine and let it churn. It typically takes around 20 minutes, but keep an eye on it. You’re looking for a consistency that’s like thick soft-serve ice cream.
- Freeze to firm up. Once it’s reached that soft-serve stage, scoop the sorbet into a freezer-safe container. To prevent ice crystals from forming on the surface, press a layer of plastic wrap directly onto the surface of the sorbet before putting the lid on or sealing the container. Pop it in the freezer for at least 3 hours to let it firm up completely. Then, scoop and enjoy!
Substitutions & Additions
Want to get creative? Here are a few ideas:
- Other Berries: Swap out some or all of the raspberries for strawberries, blueberries, or a mix!
- Herb Infusion: Add a few sprigs of fresh mint or basil to the simple syrup while it’s cooling. Strain them out before blending with the berries for a subtle herbal note.
- Citrus Boost: Replace the lemon juice with lime juice for a different kind of tang.
- Boozy Kick: For a grown-up treat, stir in a tablespoon or two of raspberry liqueur or vodka into the mixture just before churning. Alcohol lowers the freezing point even more, which can make for a softer sorbet, but too much will prevent it from freezing.
- Vanilla: A tiny splash of vanilla extract in the blend can add depth, though I usually prefer the pure raspberry flavor myself.
Tips for Success
Even though it’s simple, a few tips can make your sorbet go from good to absolutely amazing.
- Chill Everything: I cannot stress this enough! Make sure your simple syrup is fully cooled and your raspberry mixture is well-chilled in the fridge before churning. A warm base will not freeze properly in the machine.
- Frozen Bowl is Key: Ensure your ice cream maker bowl is frozen solid for the recommended time. If it’s not cold enough, your sorbet won’t churn into the right consistency.
- Don’t Overfill: Check your ice cream maker’s instructions – most recommend not filling the bowl more than 2/3 full, as the mixture expands as it churns.
- Prevent Ice Crystals: The plastic wrap pressed directly onto the surface before the final freeze is your best friend for keeping your sorbet smooth!
- Let it Soften Slightly: Sorbet can freeze quite hard. For the best scooping texture, let it sit out on the counter for 5-10 minutes before serving.
How to Store It
Store your finished raspberry sorbet in an airtight, freezer-safe container. As mentioned, pressing plastic wrap directly onto the surface helps prevent dreaded freezer burn and ice crystals. It will keep well in the freezer for up to 2-3 weeks, though honestly, it’s so delicious it rarely lasts that long in my house!
FAQs
Got questions? Let’s tackle a few common ones!
Q: Why is my sorbet icy?
A: The most common culprits are not making a simple syrup (just adding granulated sugar directly), not using enough sugar (sugar helps keep it smooth), not chilling the mixture long enough before churning, or not storing it properly with plastic wrap on the surface.
Q: Can I make this without an ice cream maker?
A: You can! It requires more work and the texture won’t be quite as smooth. After blending the mixture, pour it into a shallow freezer-safe dish. Freeze for 30-45 minutes, then take it out and scrape it thoroughly with a fork to break up any ice crystals. Repeat this scraping process every 30-45 minutes for 3-4 hours until it’s frozen. It’s more effort, but totally doable!
Q: Can I use frozen raspberries?
A: Absolutely! Just measure out the weight called for. You don’t need to fully thaw them before blending, which is a time-saver. They’ll still give you that beautiful color and flavor.
Q: Can I reduce the sugar?
A: You can experiment, but be aware that sugar is important for texture in sorbet. Reducing it too much will likely result in a harder, icier final product. If you need less sugar, you might try substituting some with a liquid sweetener, but it will change the result.

Easy Homemade Raspberry Sorbet
Ingredients
Equipment
Method
- Step 1: Make the simple syrup. Combine water and sugar in a small saucepan over low heat. Stir until sugar is completely dissolved. Remove from heat and let cool completely (at room temperature or in the fridge).
- Step 2: Blend the base. Once the simple syrup is cool, pour it into a food processor or blender. Add raspberries and lemon juice. Process until silky smooth.
- Step 3: Chill the mixture. Pour the smooth raspberry mixture into a container and refrigerate for at least 1 hour.
- Step 4: Prep ice cream maker. While the base chills, ensure your ice cream maker bowl has been frozen according to manufacturer instructions (usually 12-24 hours).
- Step 5: Churn. Pour the chilled mixture into the frozen ice cream maker bowl. Churn for approximately 20 minutes, or until it reaches a thick soft-serve consistency.
- Step 6: Freeze. Scoop the churned sorbet into a freezer-safe container. Press plastic wrap directly onto the surface to prevent ice crystals. Freeze for at least 3 hours to firm up. Let soften slightly before serving.