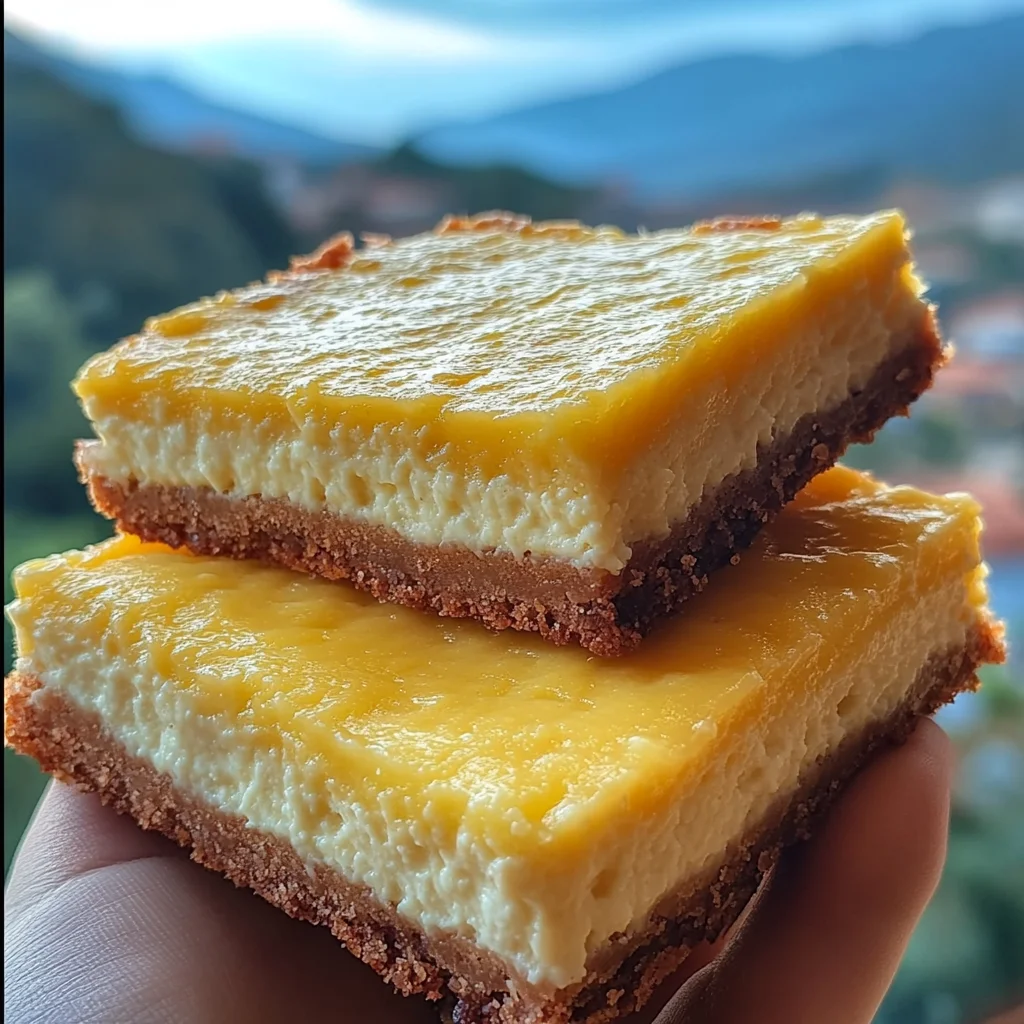
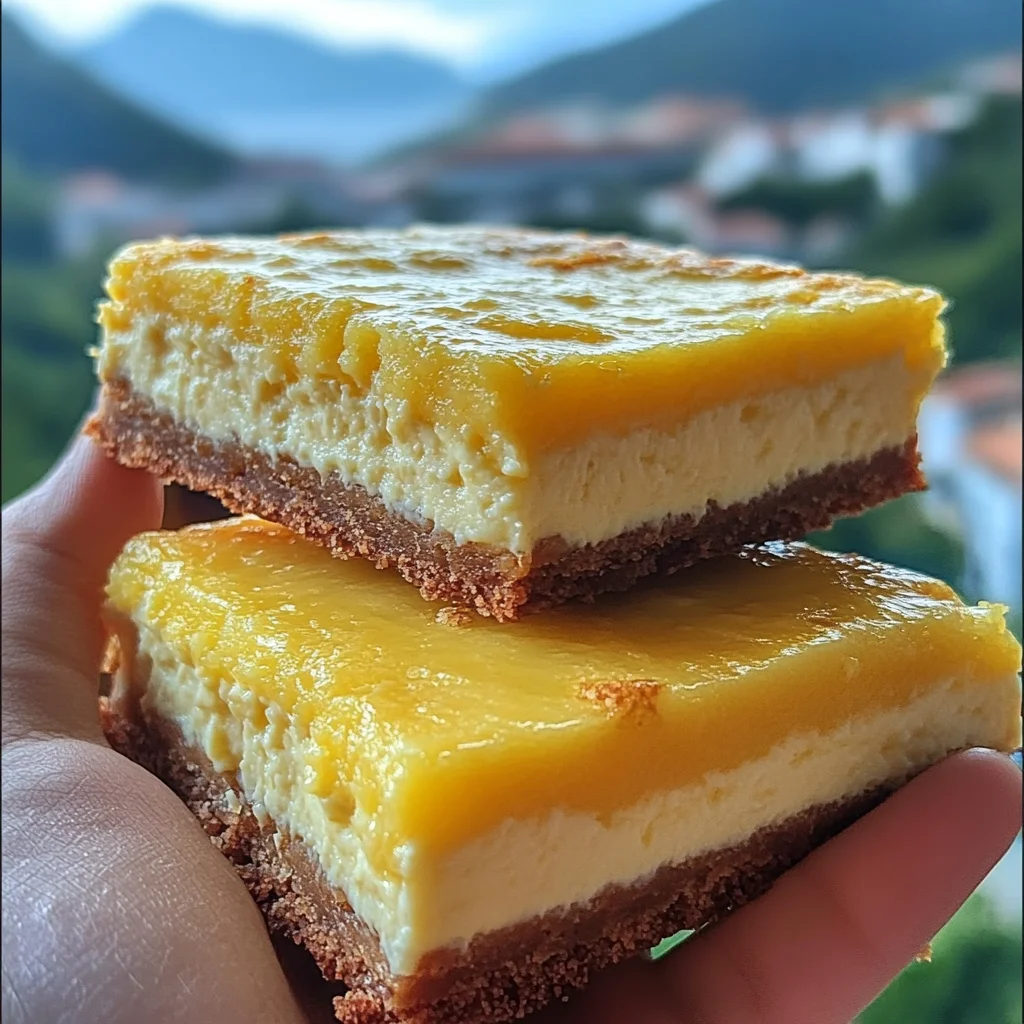
Oh, friend, do you ever get that craving for something sweet, tangy, and utterly refreshing that just screams “sunny day” but don’t want to spend all afternoon in the kitchen? I know I do! There’s something so wonderfully nostalgic about lemon desserts – they just bring to mind lazy summer afternoons, picnics, and grandmas who always had a special treat waiting. Well, get ready, because these Lemon Cottage Cheese Bars are about to become your new go-to. They’re unbelievably easy, come together quicker than you can say “lemon zest,” and trust me, they’re so memorable, you’ll be making them on repeat. Seriously, you’re going to fall in love with how simple and delicious these are!
Why You’ll Love Lemon Cottage Cheese Bars
- Fast: From prep to oven, these bars are a whirlwind of efficiency. Perfect for last-minute cravings or unexpected guests!
- Easy: No fancy techniques, no complicated steps. If you have a blender, you’re practically done.
- Giftable: Packaged up with a pretty ribbon, these zesty bars make a thoughtful and delicious gift for neighbors, teachers, or anyone who deserves a little sunshine.
- Crowd-pleasing: The bright lemon flavor and creamy texture appeal to just about everyone. Watch them disappear at your next potluck!
Ingredients
- 1 cup cottage cheese: Make sure to drain it for about 10 minutes! This helps remove excess moisture, ensuring your bars set up perfectly creamy, not watery.
- 2 eggs or 3 egg whites: Either works great! Eggs help bind everything together and give that lovely custardy texture.
- 1 tsp vanilla extract: A little touch of warmth to complement the bright lemon.
- Zest of 1 lemon: Don’t skip this! It’s where so much of that amazing, intense lemon aroma and flavor comes from.
- ¼ cup fresh lemon juice: Fresh is best here for that vibrant, tangy punch.
- ½ cup raw cane sugar or sweetener of choice: Adjust to your sweetness preference. I love raw cane sugar for its subtle caramel notes, but any granulated sweetener works.
- 1 cup almond flour or oat flour: These flours give a wonderful, tender crumb without being heavy. Almond flour makes them naturally gluten-friendly too!
- 1 tsp baking powder: Helps give these bars a little lift and tenderness.
- ½ tsp salt: A pinch of salt balances the sweetness and enhances all the flavors.
- ¼ cup white chocolate, melted and slightly cooled (optional): This is my secret ingredient for an extra layer of richness and a truly decadent texture. It melts right into the batter!
- 2 tbsp white chocolate chips (optional): For a little extra pockets of sweetness on top.
- ½ cup berries (optional, if not using chocolate): If you’re not a chocolate fan, or just want a burst of fruity color, a handful of fresh blueberries or raspberries on top is divine!
How to Make Lemon Cottage Cheese Bars
Ready to whip up some magic? Let’s get to it!
- First things first, let’s get that oven warm. Preheat your oven to 350°F (175°C). Grab an 8×8-inch pan, give it a light grease, and then line it with parchment paper, leaving a little overhang on the sides. This makes lifting the cooled bars out an absolute breeze!
- If you’re using white chocolate in the batter (which I highly recommend for that extra oomph!), go ahead and melt your ¼ cup of white chocolate. You can do this gently in the microwave in 30-second bursts, stirring in between, or over a double boiler. Once melted, set it aside to cool down a bit while you gather your other ingredients.
- Now for the fun part: the blender! In your trusty blender or food processor, combine your drained cottage cheese, eggs (or egg whites), vanilla extract, that lovely lemon zest, fresh lemon juice, and your sugar. Blend, blend, blend until the mixture is super smooth and creamy. You want absolutely no cottage cheese lumps here – a silky-smooth base is key!
- Next, add your baking powder, salt, and that slightly cooled melted white chocolate (if using) into the blender. Give it another good blend until everything is beautifully incorporated and smooth.
- In a medium-sized mixing bowl, put your almond or oat flour. Now, pour that gorgeous, creamy lemon mixture from the blender into the bowl with the flour. Gently mix everything together until it’s just combined. Be careful not to overmix, as that can make your bars tough. We want them tender and delightful!
- Pour the batter evenly into your prepared 8×8-inch pan. Use a spatula to smooth out the top so it’s all nice and even.
- Time for toppings! If you’re a chocolate lover, sprinkle those 2 tablespoons of white chocolate chips over the top. If you’re leaning towards a fruity vibe today, scatter ½ cup of fresh berries over the top instead. Both options are fantastic!
- Pop your pan into the preheated oven. Bake for about 25-30 minutes, or until the center is just set. You can test this by gently pressing the center – it should feel firm to the touch, and a toothpick inserted into the middle should come out with moist crumbs, not wet batter. Remember, every oven is a little different, so keep an eye on it!
- The hardest part: patience! Let these glorious bars cool completely in the pan on a wire rack before you even think about slicing them. For the absolute best, densest, and fudgiest texture, I highly recommend chilling them in the refrigerator for at least an hour (or even overnight!) before cutting. It makes a huge difference!
Substitutions & Additions
One of my favorite things about baking is how flexible recipes can be! These Lemon Cottage Cheese Bars are no exception. Here are some ideas to make them uniquely yours:
- Flour Power: If you don’t have almond or oat flour, a good quality gluten-free all-purpose flour blend (with xanthan gum) could work, though the texture might be slightly different.
- Sweetener Swaps: You can absolutely use granulated erythritol, stevia blends, or even maple syrup (adjusting other liquid ingredients slightly) if you prefer other sweeteners.
- Citrus Swirl: Not a lemon purist? Try lime zest and juice for a Key Lime pie vibe! Or for a more delicate flavor, use orange zest and juice.
- Fruity Fun: Instead of white chocolate chips, mix in fresh blueberries, raspberries, or even finely diced strawberries into the batter before baking. They’ll create little bursts of fruitiness in every bite.
- Crust Crazy: While this recipe is naturally crustless, you could press a simple graham cracker or shortbread crust into the bottom of the pan before adding the batter for an extra layer of texture. If you’re looking for more easy, no-bake dessert ideas that are equally delightful, you might love these Easy No-Bake Lemon Cheesecake Bars!
- Spice It Up: A tiny pinch of cardamom or a whisper of ginger could add an unexpected warmth that pairs beautifully with the lemon.
Tips for Success
- Drain Your Cottage Cheese: I know I mentioned it in the ingredients, but it’s crucial! Excess liquid can make your bars too soft. Just spoon it into a fine-mesh sieve set over a bowl for 10-15 minutes.
- Fresh is Best for Lemon: Seriously, bottled lemon juice just won’t give you the same bright, vibrant flavor. And don’t forget the zest – it holds so much of the lemon oil and fragrance!
- Don’t Overbake: These bars are meant to be moist and slightly fudgy. If you bake them until they’re completely firm, they might lose that wonderful creamy texture. A slight wobble in the center is okay as they will continue to set as they cool.
- Chill, Chill, Chill: For the cleanest slices and that perfect dense, cheesecake-like texture, chilling them thoroughly (at least an hour, but overnight is ideal) is a game-changer.
- For a Zestier Kick: If you’re a true lemon fanatic, add an extra teaspoon of lemon zest to the batter. You won’t regret it!
How to Store Lemon Cottage Cheese Bars
These bars are so good, they probably won’t last long, but here’s how to keep them fresh!
- Counter: I don’t recommend storing these at room temperature for more than a couple of hours, especially if your kitchen is warm, due to the dairy content.
- Refrigerator: The best place for these beauties! Store them in an airtight container in the refrigerator for up to 4-5 days. They actually taste even better cold, in my opinion!
- Freezer: Yes, you can freeze them! Wrap individual slices tightly in plastic wrap, then place them in a freezer-safe bag or container. They’ll keep well for up to 1 month. Thaw in the refrigerator before serving.
FAQs
Can I use low-fat cottage cheese?
Absolutely! Low-fat or non-fat cottage cheese works just fine, but using full-fat will result in a richer, creamier bar. It really just depends on your preference!
My bars didn’t set, what happened?
The most common culprits are not draining the cottage cheese enough, over-mixing the batter (which can develop gluten if using oat flour and make it tough, preventing it from setting properly), or not baking them quite long enough. Also, remember they firm up a lot as they cool, especially when chilled!
Can I make these ahead of time?
Yes, please do! These bars are fantastic for making a day or two in advance. In fact, chilling them overnight enhances their texture and flavor. They’re perfect for meal prep or getting a jump start on your party desserts. They’re as versatile as my Fluffy Lemon Ricotta Pancakes, which also benefit from a little thoughtful planning!
What can I serve with these?
They’re delightful on their own, but a dollop of whipped cream, a scoop of vanilla ice cream, or a fresh berry compote would take them over the top. They’d also be a perfect light dessert after a rich meal, perhaps something like my Easy Chocolate Chip Cheesecake Bars for a decadent alternative!
If you loved this recipe, make sure to follow us on Pinterest for more delicious ideas!

Lemon Cottage Cheese Bars
Ingredients
Equipment
Method
- Step 1: Preheat your oven to 350°F (175°C). Lightly grease an 8x8-inch pan and line it with parchment paper, leaving an overhang on the sides.
- Step 2: If using white chocolate in the batter, gently melt ¼ cup of white chocolate in the microwave (30-second bursts, stirring) or over a double boiler. Set aside to cool slightly.
- Step 3: In a blender or food processor, combine drained cottage cheese, eggs (or egg whites), vanilla extract, lemon zest, fresh lemon juice, and sugar. Blend until super smooth and creamy with no lumps.
- Step 4: Add baking powder, salt, and the slightly cooled melted white chocolate (if using) to the blender. Blend again until everything is beautifully incorporated and smooth.
- Step 5: In a medium-sized mixing bowl, place your almond or oat flour. Pour the creamy lemon mixture from the blender into the flour. Gently mix until just combined, being careful not to overmix.
- Step 6: Pour the batter evenly into your prepared 8x8-inch pan. Use a spatula to smooth out the top.
- Step 7: For toppings, sprinkle 2 tablespoons of white chocolate chips over the top if desired, or scatter ½ cup of fresh berries instead.
- Step 8: Bake for about 25-30 minutes, or until the center is just set (it should feel firm to the touch, and a toothpick inserted should come out with moist crumbs). Do not overbake.
- Step 9: Let the bars cool completely in the pan on a wire rack. For the best, densest, and fudgiest texture, chill them in the refrigerator for at least an hour (or even overnight) before slicing and serving.