Oh, friends! Get ready to take a delicious trip down memory lane, but with a fun, modern twist! Remember those simple, layered icebox cakes our moms or grandmas used to whip up? The ones that magically transformed simple cookies and cream into a delightful, soft dessert just by sitting in the fridge? Well, this is one of those magical desserts, but we’re giving it a vibrant, party-ready makeover with Birthday Cake Oreos and colorful sprinkles! It’s truly one of the easiest, most impressive desserts you can make, and guess what? Absolutely NO baking required! Seriously, you just layer, chill, and enjoy. Perfect for a potluck, a birthday celebration, or just because you deserve a little sprinkle-filled happiness.
Why You’ll Love This Recipe
- Fast: Takes mere minutes to assemble before the fridge does the rest of the work.
- Easy: If you can whip cream and layer cookies, you can make this!
- Giftable: It travels well and is always a welcome sight at any gathering.
- Crowd-pleasing: Who can resist the combo of Oreos, creamy goodness, and sprinkles? It’s pure joy!
Ingredients
- 2 packages Birthday Cake Oreos: About 36 cookies total. These are the stars! Their Funfetti filling is key to the vibe.
- 480ml (2 cups) heavy whipping cream: Make sure it’s VERY cold! This is crucial for whipping up into stiff peaks.
- 225g (1 cup) full-fat cream cheese: Softened to room temperature. This gives our cream layer that lovely, slightly tangy richness and helps it set up nicely.
- 120g (1 cup) powdered sugar: Sifted if you can! It helps avoid any little lumps in your smooth cream mixture.
- 1 tsp pure vanilla extract: Enhances all the sweet flavors.
- ½ cup colorful sprinkles: Because it’s not a party without sprinkles! Use your favorites.
How to Make It
Making this icebox cake is almost as fun as eating it! Grab your mixing bowls and let’s get started:
- First things first, grab that super cold heavy cream. In a large mixing bowl, whip it using an electric mixer on medium-high speed until beautiful, stiff peaks form. You’ll know they’re stiff when you lift the beaters and the peaks stand up straight! Set that aside gently.
- Now, in a separate bowl, combine your softened cream cheese (make sure it’s nice and soft!), the sifted powdered sugar, and the vanilla extract. Beat this on medium speed until it’s completely smooth and there are no lumps. You want it perfectly creamy.
- Okay, time to combine! Gently fold the whipped cream into the cream cheese mixture. I like to do this in two batches using a rubber spatula. Be careful not to overmix – you just want it just combined so you don’t lose all that lovely air from the whipped cream.
- Get your baking dish ready. A 9×13-inch (23×33 cm) dish is perfect. You can line it with parchment paper if you want to make lifting out slices extra easy later. Now, arrange a single layer of those delicious Birthday Cake Oreos to cover the bottom of the dish. Don’t worry if you have to break a few to fit the edges!
- Spread half of your creamy mixture evenly over that first layer of Oreos. Get it right into the corners!
- Add a second layer of Oreos right on top of the cream layer. More cookies, yay!
- Finish it off by spreading the remaining cream mixture smoothly across the top. Make it look pretty!
- Now for the grand finale before the chill: generously sprinkle colorful sprinkles all over the top layer. Go wild!
- Cover the dish tightly. Plastic wrap works great, or if your dish has a lid, use that.
- Pop the whole thing in the refrigerator. This is where the magic happens! It needs at least 4 hours to set, but honestly, it’s best if you can leave it overnight. This gives the cookies time to soften and become lovely and cake-like, and allows the cream layer to firm up beautifully. Patience is key for icebox cake perfection!
- Once it’s set and ready, use a sharp knife to cut it into neat squares right in the dish while it’s still cold. Serve chilled and watch everyone smile!
Substitutions & Additions
This recipe is super flexible! Here are some ideas to make it your own:
- Different Cookies: Don’t have Birthday Cake Oreos? Regular Oreos, Golden Oreos, or even other sandwich cookies like Nutter Butters would be delicious, though the flavor will change. Graham crackers work too for a more classic icebox cake base!
- Add Fruit: Layer some thinly sliced strawberries or raspberries between the cookie and cream layers for a burst of fresh flavor.
- Chocolate Swirl: Drizzle a little melted white chocolate or even hot fudge sauce over one of the cream layers before adding the next layer of cookies.
- Extracts: Add a touch of almond extract or a different flavoring to the cream mixture along with the vanilla.
- Mini Chips: Stir some mini chocolate chips or white chocolate chips into the final cream layer or sprinkle them on top with the sprinkles.
Tips for Success
Making this is easy, but these little tips will help ensure yours turns out perfectly every time:
- Cold Cream is Non-Negotiable: Seriously, make sure your heavy cream is straight from the coldest part of your fridge for the best whipping results.
- Soften That Cream Cheese: Take it out at least an hour before you start. Soft cream cheese beats smooth and combines much better.
- Gentle Folding: When you combine the whipped cream and cream cheese mixture, be gentle! You worked hard to get air into that cream; don’t beat it out. Fold just until no streaks of cream cheese or whipped cream remain.
- Chill Time is Essential: Do not skip the chilling time! The longer it chills (up to overnight), the better the cookies soften and the cake sets. Trust the process!
- Sharp Knife for Cutting: For nice, clean squares, use a sharp knife and wipe it clean between cuts if needed. You can even dip it in hot water.
- Parchment Paper Magic: While optional, lining the dish makes lifting out the whole cake (if you want to transfer it) or just individual slices incredibly easy.
How to Store It
Keep any leftover No-Bake Funfetti Oreo Icebox Cake covered tightly with plastic wrap or a lid in the refrigerator. It will stay delicious for about 2-3 days. The cookies will continue to soften over time, which just makes it even more cake-like!
FAQs
- Q: Can I use Cool Whip instead of whipping cream?
A: Yes, you can for ease, but whipping your own heavy cream really gives you a richer, more luxurious texture and flavor. If you use Cool Whip, you might need about 12-16 ounces, but the result won’t be quite the same. - Q: How far in advance can I make this?
A: You can definitely make this cake a day or two ahead of time. It actually gets better as it sits and the flavors meld and the cookies soften! - Q: Why did my cream mixture seem a little runny?
A: This usually happens if your heavy cream wasn’t cold enough when whipped, or if you overmixed the cream cheese and whipped cream mixture, causing the whipped cream to deflate. Make sure both components are prepared correctly before gently folding. - Q: Can I make this in a different size dish?
A: You can, but you might need to adjust the quantities of cookies and cream layers. A smaller dish will result in a taller cake, while a larger one will be thinner. A 9×13-inch is ideal for this quantity.

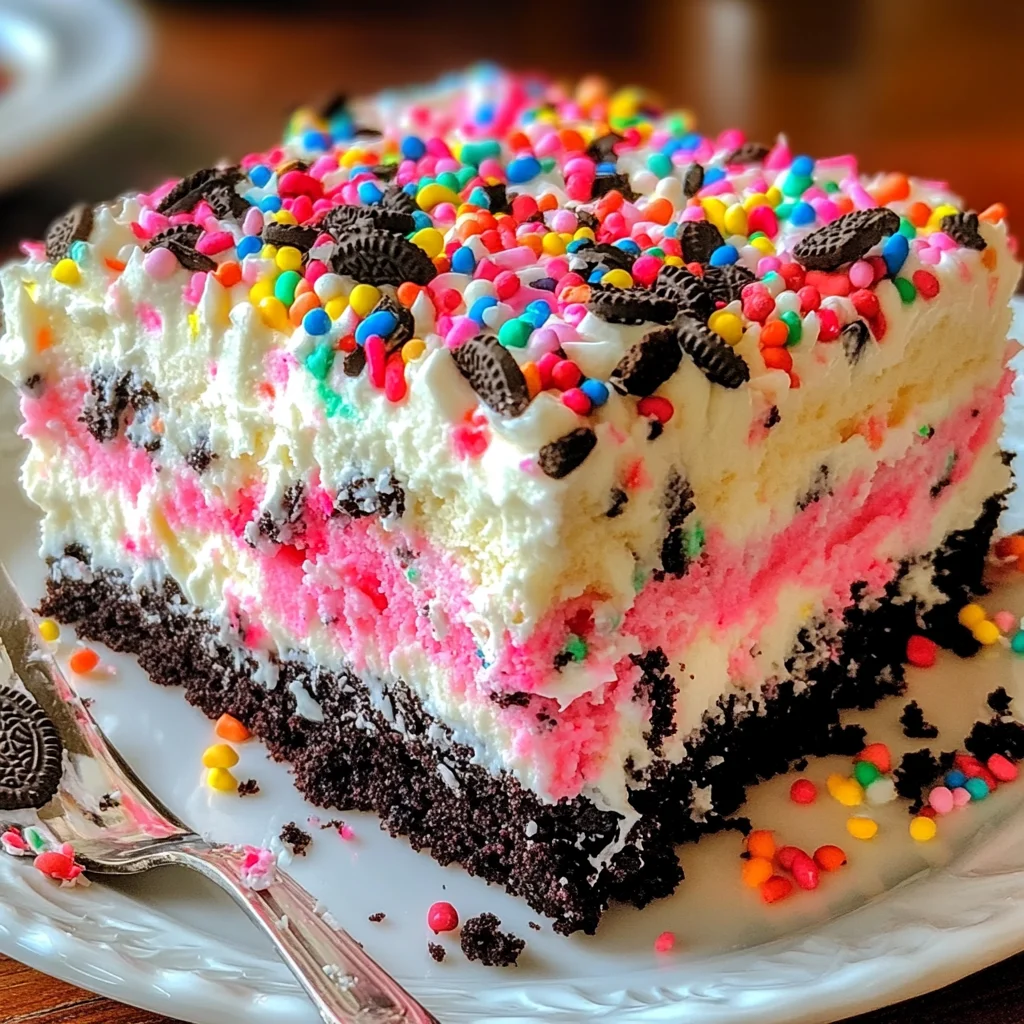
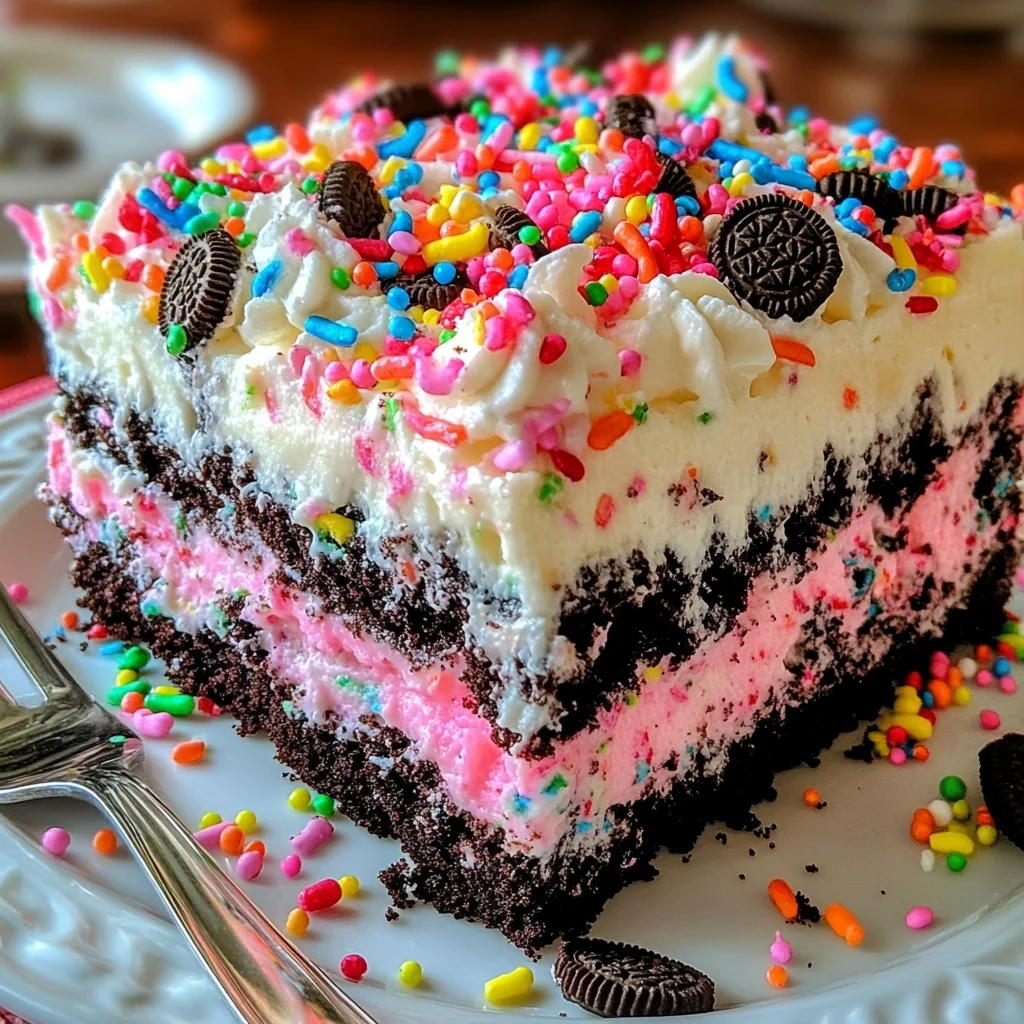
Easy No-Bake Funfetti Oreo Icebox Cake
Ingredients
Equipment
Method
- Step 1: Grab that super cold heavy cream. In a large mixing bowl, whip it using an electric mixer on medium-high speed until beautiful, stiff peaks form. Set that aside gently.
- Step 2: In a separate bowl, combine your softened cream cheese, the sifted powdered sugar, and the vanilla extract. Beat this on medium speed until it's completely smooth and there are no lumps.
- Step 3: Gently fold the whipped cream into the cream cheese mixture. Do this in two batches using a rubber spatula. Be careful not to overmix – just until combined so you don't lose all that lovely air.
- Step 4: Get your baking dish ready (a 9x13-inch dish is perfect). You can line it with parchment paper if you want to make lifting out slices extra easy later. Arrange a single layer of Birthday Cake Oreos to cover the bottom of the dish. Break a few to fit the edges if needed.
- Step 5: Spread half of your creamy mixture evenly over that first layer of Oreos. Get it right into the corners!
- Step 6: Add a second layer of Oreos right on top of the cream layer.
- Step 7: Finish it off by spreading the remaining cream mixture smoothly across the top.
- Step 8: Generously sprinkle colorful sprinkles all over the top layer.
- Step 9: Cover the dish tightly (plastic wrap or a lid). Pop the whole thing in the refrigerator for at least 4 hours to set. It's best if you can leave it overnight for the cookies to soften and the cream to firm up beautifully.
- Step 10: Once it's set and ready, use a sharp knife to cut it into neat squares right in the dish while it's still cold. Serve chilled and watch everyone smile!