
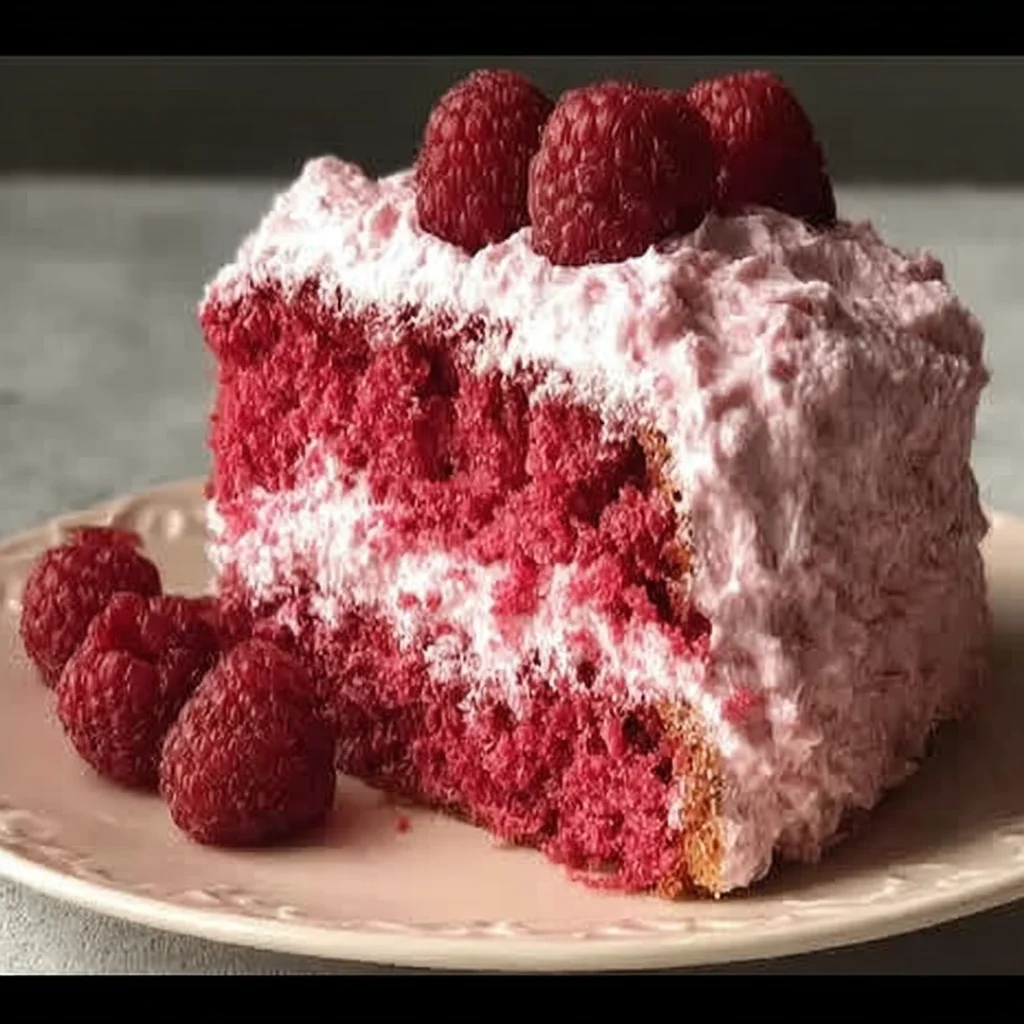
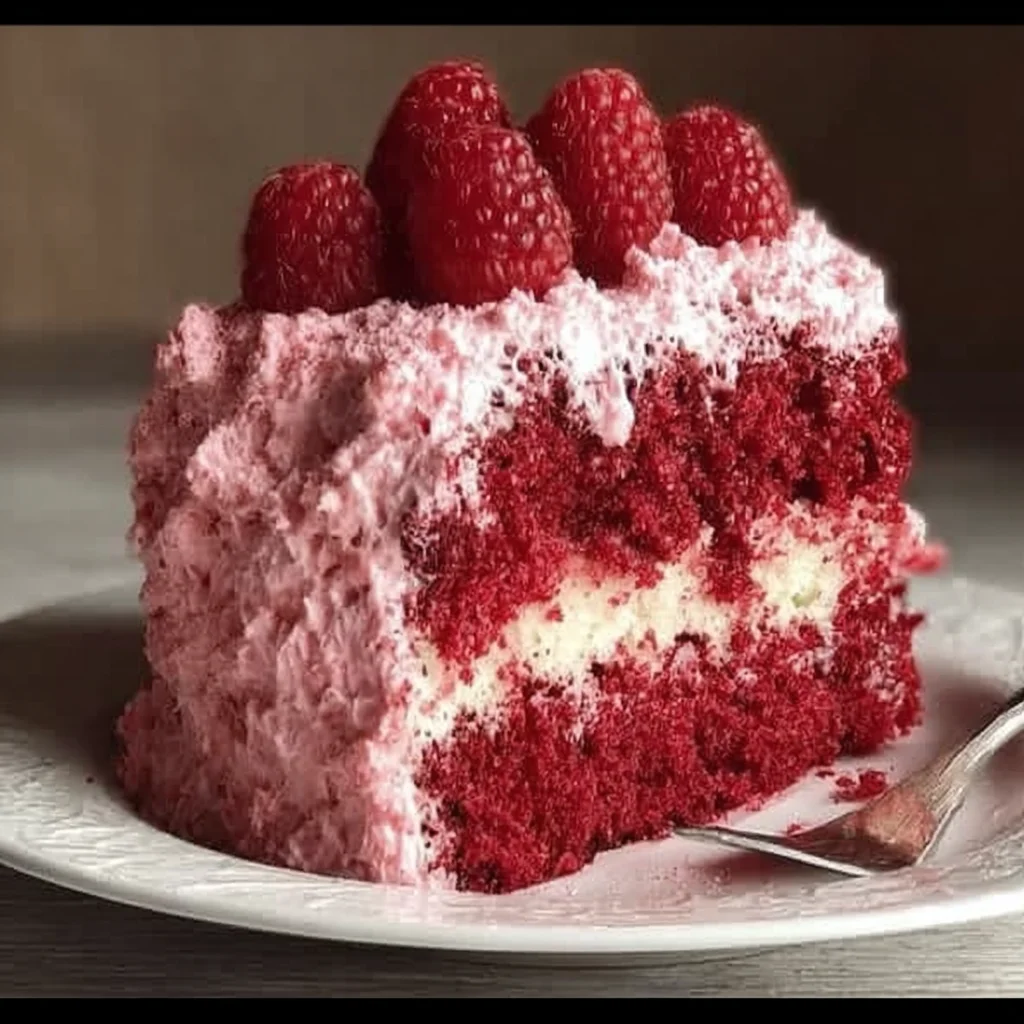
Oh, friend! There’s just something magical about baking a cake, isn’t there? Especially one bursting with fresh, juicy raspberries. It reminds me of sunny afternoons, simple pleasures, and maybe even a little bit of grandma’s kitchen warmth. This Raspberry Cake isn’t fussy or complicated, but it delivers on flavor and that beautiful pop of color. It’s the kind of cake you’ll want to bake for birthdays, potlucks, or just because it’s Tuesday and you deserve a treat. Trust me, you’re going to love how simple and utterly delicious this is!
Why You’ll Love This Recipe
- Fast (Quick to whip up!)
- Easy (No fancy techniques required)
- Giftable (Wrap it up and share the love!)
- Crowd-pleasing (Everyone adores cake!)
- Bursting with Fresh Flavor!
Ingredients
Gather ’round, let’s look at what you’ll need. Nothing too out of the ordinary here, just simple ingredients coming together for something special.
For the Cake:
- 2 1/2 cups all-purpose flour: Your standard pantry staple! Make sure it’s measured right for the perfect texture.
- 2 1/2 teaspoons baking powder: This gives your cake that lovely lift.
- 1/2 teaspoon salt: Just a pinch to balance out all that sweetness.
- 1 cup (2 sticks) unsalted butter, softened: Gotta be nice and soft so it creams beautifully with the sugar. I usually leave mine out on the counter for an hour or two before I start.
- 1 3/4 cups granulated sugar: For sweetness and moisture.
- 4 large eggs: Make sure these are at room temperature! It helps everything emulsify better.
- 1 tablespoon vanilla extract: Pure vanilla is best for that classic, comforting flavor.
- 1 cup whole milk: Also best at room temperature! Whole milk gives the cake a lovely richness.
- 1 1/2 cups fresh raspberries: The star! Use beautiful, plump berries.
For the Frosting:
- 1 cup (2 sticks) unsalted butter, softened: Again, soft butter is key for creamy frosting.
- 4 cups powdered sugar: Sifted is even better if you want super smooth frosting, but not strictly necessary.
- 2–3 tablespoons heavy cream or milk: To get that perfect spreadable consistency. Start with 2 and add more if needed.
- 1 teaspoon vanilla extract: More vanilla goodness!
- 1/4 cup raspberry preserves (optional): This adds a beautiful pink hue and extra raspberry punch to the frosting. Totally recommend it if you have some on hand!
For Garnish:
- Fresh raspberries: For decorating the top.
- Mint leaves (optional): A little green pop makes it look fancy!
- Powdered sugar (for dusting): A simple elegant finish.
How to Make It
Alright, let’s get baking! Follow these simple steps, and you’ll have a gorgeous cake ready in no time.
Step 1: Prep Your Pans and Oven
First things first, let’s get your oven ready. Preheat it to 350°F (175°C). Then, grab two 8-inch round cake pans. You can grease and flour them the old-fashioned way, or my personal favorite is to line the bottoms with parchment paper and then grease the sides. It makes getting the cakes out so much easier!
Step 2: Whisk the Dry Guys
In a medium bowl, whisk together your flour, baking powder, and salt. Give it a good mix so everything is evenly distributed. Set this aside for a moment.
Step 3: Cream the Butter and Sugar
Now, in a large bowl, add your softened butter and granulated sugar. Beat them together using an electric mixer until the mixture is light, fluffy, and pale yellow. This can take about 3-5 minutes. Don’t rush this step – it helps create a tender cake!
Step 4: Add the Eggs and Vanilla
Add the eggs to the butter mixture, one at a time. Make sure you beat well after each egg goes in. Scrape down the sides of the bowl if needed. Once the eggs are incorporated, stir in that lovely vanilla extract.
Step 5: Alternate Wet and Dry
This is a classic cake technique! You’re going to alternately add your dry ingredients (the flour mixture) and the milk to your butter mixture. Start with a third of the dry ingredients, mix until just combined, then add half of the milk, mix, then another third of the dry, mix, the rest of the milk, mix, and finally end with the last third of the dry ingredients. Make sure you don’t overmix here! As soon as the last of the flour disappears, stop mixing. Overmixing develops the gluten too much and can make your cake tough.
Step 6: Gently Fold in Raspberries
Now for the star! Gently fold in the fresh raspberries. Be careful not to mash them. A rubber spatula works great for this.
Step 7: Divide and Bake!
Divide the batter as evenly as possible between your two prepared cake pans. Pop them into your preheated oven.
Bake for 30–35 minutes. How do you know they’re done? Insert a toothpick or a clean knife into the center of the cakes. If it comes out clean (maybe with a few moist crumbs, but no wet batter), they’re ready!
Step 8: Cool Those Cakes
Let the cake layers cool completely in the pans on a wire rack. This is SO important! Trying to frost warm cakes is a messy business. Give them plenty of time to cool down entirely.
Step 9: Whip Up the Frosting
While the cakes are cooling, make the frosting! In a bowl, beat the softened butter until it’s nice and creamy.
Gradually add the powdered sugar, beating on low speed at first to avoid a sugar cloud, then increasing the speed until it’s smooth.
Stir in the vanilla extract. Then, add the heavy cream or milk, a tablespoon at a time, beating until you reach a smooth, spreadable frosting consistency. You might need 2 or 3 tablespoons depending on how thick you like your frosting.
If you’re using it, mix in the raspberry preserves now. This adds a lovely flavor and beautiful color!
Step 10: Assemble Your Masterpiece
Once the cake layers are completely cool, place one layer on your serving plate or cake stand. Spread a generous layer of that delicious frosting over the top.
Carefully place the second cake layer on top. Then, use an offset spatula or knife to frost the top and sides of the entire cake. Make it smooth and perfect, or embrace a rustic look – whatever makes you happy!
Step 11: Garnish and Serve!
Decorate the top of the cake with fresh raspberries, a few mint leaves if you like, and a dusting of powdered sugar. Slice it up and enjoy every single bite!
Substitutions & Additions
Want to play around with the recipe a little? Go for it! Here are some ideas:
- Frozen Raspberries: You can use frozen raspberries! Don’t thaw them first; just gently fold them in frozen. You might need to add a few extra minutes to the baking time.
- Lemon Zest: Raspberries and lemon are a match made in heaven! Add the zest of one lemon to the cake batter along with the wet ingredients.
- Almond Extract: Swap out some of the vanilla extract for almond extract for a lovely nutty undertone.
- Buttermilk: Use buttermilk instead of whole milk for a tangier, even more tender cake.
- Other Berries: Try this recipe with blueberries, blackberries, or a mix of berries!
- Cream Cheese Frosting: Not a fan of buttercream? A simple cream cheese frosting pairs wonderfully with raspberry cake.
Tips for Success
A few little tricks I’ve learned along the way to help make sure your cake turns out perfectly:
- Room Temperature Ingredients: I know I mentioned it before, but it’s worth repeating! Softened butter, eggs, and milk at room temperature blend together much more smoothly, creating a better emulsion and therefore a better cake texture.
- Measure Flour Correctly: Don’t scoop the flour directly from the bag with your measuring cup – this packs it down! Instead, spoon the flour into your measuring cup and then level it off with a knife.
- Don’t Overmix: Once you start adding the dry and wet ingredients, mix only until they are just combined. Overmixing develops gluten, which can result in a tough cake.
- Cool Cakes COMPLETELY: Seriously. Warm cakes plus frosting equals a sliding, crumbling mess. Be patient!
- Raspberries Sinking? If you find your raspberries tend to sink to the bottom, try tossing them gently in a tablespoon or two of the dry flour mixture before folding them into the batter.
How to Store It
Your beautiful cake needs a good home! Store any leftover cake in an airtight container at room temperature for 2-3 days. If your kitchen is very warm, or if you used perishable fillings (which this recipe doesn’t!), you might want to store it in the refrigerator. Let refrigerated cake sit at room temperature for about 20-30 minutes before serving for the best flavor and texture.
FAQs
Got questions? I’ve got answers!
Q: Can I use frozen raspberries instead of fresh?
A: Yes, absolutely! Just add them to the batter frozen and be prepared for a potentially slightly longer baking time.
Q: How do I know when the cake is done baking?
A: Insert a toothpick or a clean knife into the center of the cake layers. If it comes out clean (no wet batter attached), it’s ready! A few moist crumbs are fine.
Q: Can I make this into cupcakes?
A: Yes! This batter works well for cupcakes. Fill cupcake liners about two-thirds full and bake for approximately 18-22 minutes, or until a toothpick comes out clean.
Q: My frosting seems too thick/thin. What should I do?
A: If it’s too thick, add a little more heavy cream or milk (half a tablespoon at a time) until it’s the right consistency. If it’s too thin, add a little more powdered sugar (a tablespoon at a time) until it thickens up.

The Best Easy Raspberry Cake with Vanilla Buttercream
Ingredients
Equipment
Method
- Step 1: Prep Your Pans and Oven
First things first, let's get your oven ready. Preheat it to 350°F (175°C). Then, grab two 8-inch round cake pans. You can grease and flour them the old-fashioned way, or my personal favorite is to line the bottoms with parchment paper and then grease the sides. It makes getting the cakes out so much easier! - Step 2: Whisk the Dry Guys
In a medium bowl, whisk together your flour, baking powder, and salt. Give it a good mix so everything is evenly distributed. Set this aside for a moment. - Step 3: Cream the Butter and Sugar
Now, in a large bowl, add your softened butter and granulated sugar. Beat them together using an electric mixer until the mixture is light, fluffy, and pale yellow. This can take about 3-5 minutes. Don't rush this step – it helps create a tender cake! - Step 4: Add the Eggs and Vanilla
Add the eggs to the butter mixture, one at a time. Make sure you beat well after each egg goes in. Scrape down the sides of the bowl if needed. Once the eggs are incorporated, stir in that lovely vanilla extract. - Step 5: Alternate Wet and Dry
This is a classic cake technique! You're going to alternately add your dry ingredients (the flour mixture) and the milk to your butter mixture. Start with a third of the dry ingredients, mix until just combined, then add half of the milk, mix, then another third of the dry, mix, the rest of the milk, mix, and finally end with the last third of the dry ingredients. Make sure you don't overmix here! As soon as the last of the flour disappears, stop mixing. Overmixing develops the gluten too much and can make your cake tough. - Step 6: Gently Fold in Raspberries
Now for the star! Gently fold in the fresh raspberries. Be careful not to mash them. A rubber spatula works great for this. - Step 7: Divide and Bake!
Divide the batter as evenly as possible between your two prepared cake pans. Pop them into your preheated oven.
Bake for 30–35 minutes. How do you know they're done? Insert a toothpick or a clean knife into the center of the cakes. If it comes out clean (maybe with a few moist crumbs, but no wet batter), they're ready! - Step 8: Cool Those Cakes
Let the cake layers cool completely in the pans on a wire rack. This is SO important! Trying to frost warm cakes is a messy business. Give them plenty of time to cool down entirely. - Step 9: Whip Up the Frosting
While the cakes are cooling, make the frosting! In a bowl, beat the softened butter until it's nice and creamy.
Gradually add the powdered sugar, beating on low speed at first to avoid a sugar cloud, then increasing the speed until it's smooth.
Stir in the vanilla extract. Then, add the heavy cream or milk, a tablespoon at a time, beating until you reach a smooth, spreadable frosting consistency. You might need 2 or 3 tablespoons depending on how thick you like your frosting.
If you're using it, mix in the raspberry preserves now. This adds a lovely flavor and beautiful color! - Step 10: Assemble Your Masterpiece
Once the cake layers are completely cool, place one layer on your serving plate or cake stand. Spread a generous layer of that delicious frosting over the top.
Carefully place the second cake layer on top. Then, use an offset spatula or knife to frost the top and sides of the entire cake. Make it smooth and perfect, or embrace a rustic look – whatever makes you happy! - Step 11: Garnish and Serve!
Decorate the top of the cake with fresh raspberries, a few mint leaves if you like, and a dusting of powdered sugar. Slice it up and enjoy every single bite!


