Oh, summer. Just the word brings back memories, right? Picnics in the park, long days spent outside, and the absolute perfection of biting into a juicy, sun-ripened peach. There’s nothing quite like it! And if you’re anything like me, you’re always looking for delicious ways to capture that fleeting summer magic in your kitchen.
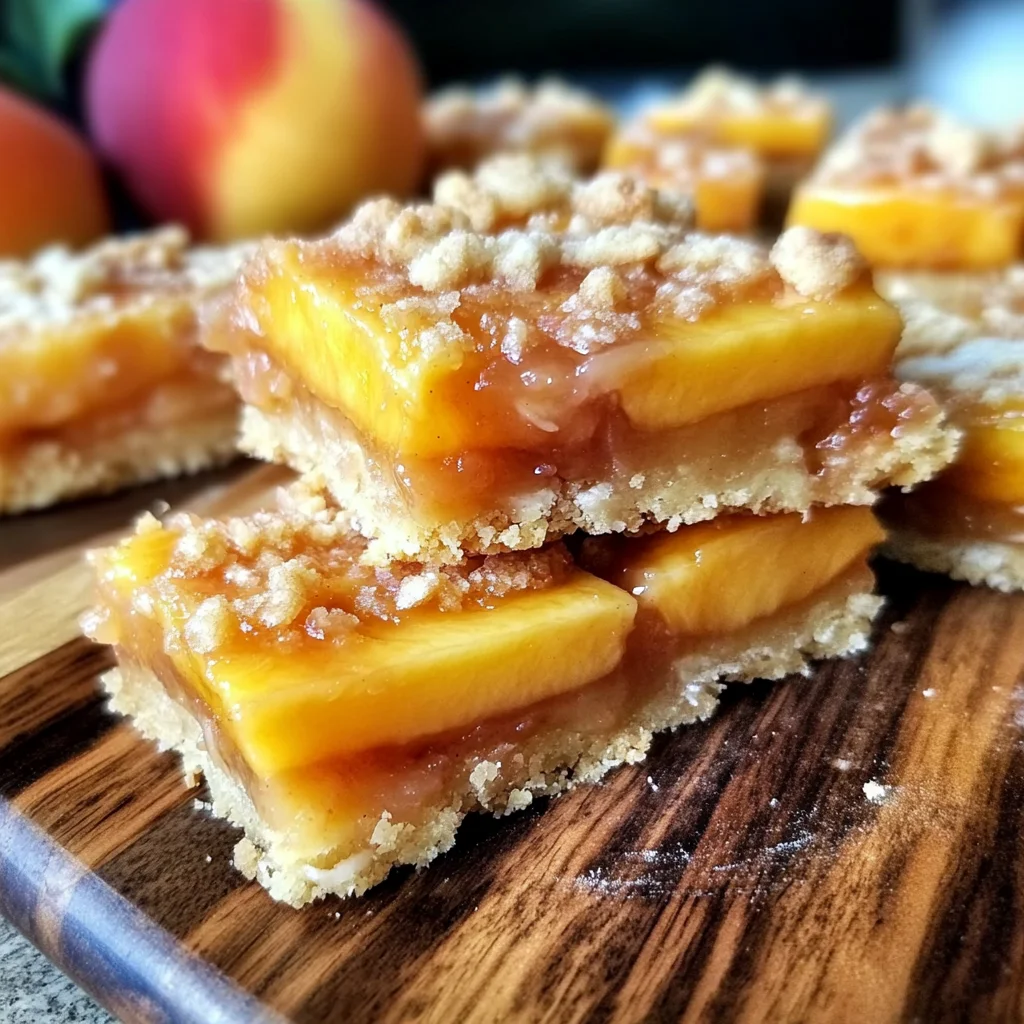
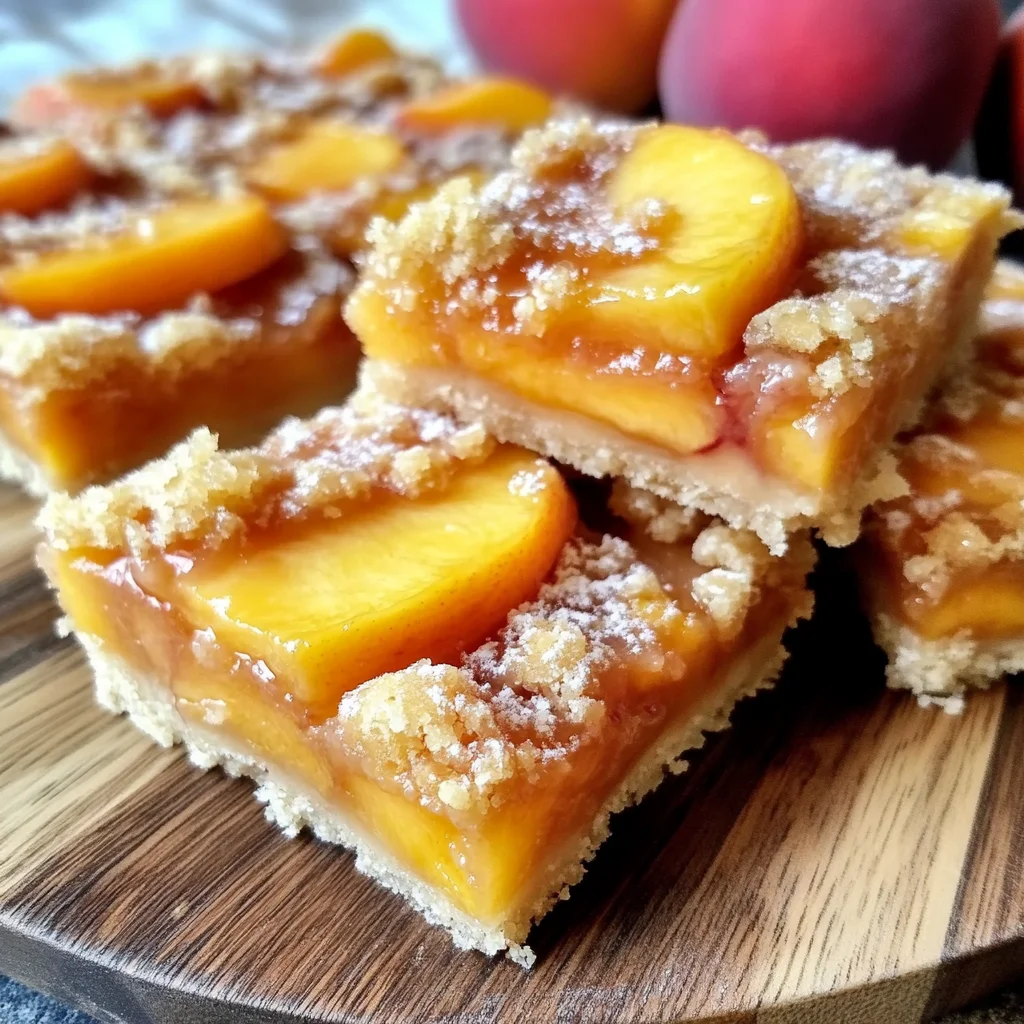
That’s where these Easy & Heavenly Summer Peach Crumb Bars come in. They are, quite simply, sunshine in a pan! Imagine a buttery, slightly crisp shortbread crust, piled high with sweet, tender peaches, all topped off with a irresistible, cinnamon-spiced crumb topping. It’s comfort food, elevated for the season, and surprisingly simple to whip up. These bars disappear fast whenever I make them, and they always bring a little smile to everyone’s face. Let’s make some sweet memories together!
Why You’ll Love This Recipe
- Fast & Simple: Honestly, you can have these ready for the oven in no time. The steps are straightforward, making them perfect for a laid-back weekend bake or even a weeknight treat.
- Utterly Easy: No fancy techniques here! If you can mix and press, you can make these bars.
- Perfectly Giftable: Need a treat for a friend, a potluck contribution, or a hostess gift? These bars travel beautifully and are always a welcomed sight. Just try to save some for yourself!
- A True Crowd-Pleaser: Kids, adults, picky eaters… everyone seems to fall head over heels for the classic combination of sweet peaches and buttery crumbs. Get ready for compliments!
Ingredients
Here’s what you’ll need to gather from your pantry and fridge. Don’t worry, it’s mostly simple stuff!
- For the Crust:
- 1 cup all-purpose flour: Just your standard flour works perfectly for this buttery base.
- 1/4 cup granulated sugar: Adds just enough sweetness to the crust.
- 1/4 teaspoon salt: Balances the sweetness and brings out the flavor of the butter.
- 1/2 cup unsalted butter, cold and cubed: Keep that butter nice and chilly! It’s key to getting that tender, crumbly crust texture when you cut it in.
- For the Peach Filling:
- 3–4 large peaches, peeled, pitted, and sliced: Ah, the stars of the show! Ripe, juicy peaches are best, but not overly soft. I’ll share a tip on peeling later!
- 1/2 cup granulated sugar: Sweetens the peaches and helps create that lovely, slightly syrupy filling.
- 2 tablespoons all-purpose flour: This acts as a thickener, helping the peach juices set up so your bars aren’t too watery.
- 1 tablespoon lemon juice: A little citrus brightens the flavor of the peaches and adds a touch of necessary acidity. Freshly squeezed is always my preference!
- 1/2 teaspoon vanilla extract: Vanilla and peaches are a match made in heaven.
- For the Crumb Topping:
- 1/2 cup all-purpose flour: The base for our glorious crumbs.
- 1/4 cup granulated sugar: For sweetness.
- 1/4 cup brown sugar: Adds moisture, a hint of caramel flavor, and that classic crumb topping texture. Yum!
- 1/4 teaspoon cinnamon: Couldn’t have a crumb topping without a little warming spice, right?
- 1/4 teaspoon salt: Again, balances the sweetness.
- 1/4 cup unsalted butter, melted: Makes it easy to mix everything together into those lovely, irregular crumbs.
How to Make It
Alright, let’s get baking! You’ve got this.
- Prep Your Pan: First things first, preheat your oven to 350°F (175°C). Grab a 9×9-inch baking pan and line it with parchment paper. Leave some overhang on the sides – this makes lifting the finished bars out so much easier. Trust me on this one!
- Whip up the Crust: In a medium bowl, whisk together the flour, sugar, and salt for the crust. Now, drop in those cold butter cubes. Use a pastry blender, a fork, or even your fingertips (the warmth of your hands works quickly though!) to cut the butter into the dry ingredients until it looks like coarse crumbs, maybe the size of small peas. Dump this mixture into your prepared pan and press it down evenly across the bottom. You can use the bottom of a glass or just your clean hands. Pop this crust into the preheated oven for 15–18 minutes, just until it looks lightly golden around the edges. Let it cool slightly while you work on the rest.
- Make the Peachy Filling: While the crust is cooling a bit, grab another bowl. Toss your sliced peaches into the bowl. Sprinkle the sugar and flour over the peaches, then drizzle in the lemon juice and vanilla extract. Gently toss everything together with a spoon or spatula until the peaches are nicely coated.
- Create the Crumb Topping: In a third bowl (sorry for all the bowls, but it’s worth it!), mix together the flour, both sugars, cinnamon, and salt for the topping. Pour in the melted butter and stir everything with a fork until clumps and crumbs form. Some big, some small – that’s exactly what you want!
- Assemble the Magic: Now for the fun part! Spread the peach filling evenly over your slightly cooled crust in the pan. Make sure the peaches are in a single layer as much as possible. Then, sprinkle that gorgeous crumb topping all over the peaches, covering them from edge to edge.
- Bake to Perfection: Place the assembled bars back into your 350°F oven. Bake for 45–50 minutes. You’ll know they’re ready when the topping is golden brown and the filling is bubbly around the edges. The smell in your kitchen will be heavenly!
- Cool Completely: This is the hardest part: letting them cool! You must let the bars cool completely in the pan before attempting to slice them. The filling needs time to set up. I usually let them cool on a wire rack for at least 2-3 hours, or even pop them in the fridge for a bit if I’m in a hurry (though patience yields the cleanest slices!). Once cool, use the parchment paper overhang to lift the entire slab out and cut it into squares.
Substitutions & Additions
Want to play around with the recipe? Great! Here are a few ideas:
- Different Fruit: Not a peach person? Or maybe peaches aren’t in season? You can easily swap them out! Try apples (slice thinly and maybe precook slightly), berries (like blueberries, raspberries, or a mix), or even other stone fruits like nectarines or plums.
- Add Nuts: Mix some chopped nuts like pecans or walnuts into the crumb topping for extra crunch and flavor.
- Make it Gluten-Free: You can experiment with a good quality gluten-free all-purpose flour blend for both the crust and the topping.
- Extra Spice: Feel free to add a pinch of nutmeg or ginger to the peach filling or the crumb topping for more warm spice notes.
- A Little Zest: Add a teaspoon of lemon zest to the peach filling for an extra punch of citrus flavor.
Tips for Success
A few little things I’ve learned along the way to make sure your bars turn out perfect every time:
- Cold Butter for Crust: Seriously, keep that butter cold! It’s essential for creating the right texture in the shortbread crust.
- Don’t Overwork the Crust: Mix the crust ingredients just until they come together into those coarse crumbs. Overmixing can result in a tough crust.
- Peach Ripeness: Use ripe but still slightly firm peaches. Overly soft, mushy peaches can make the filling too wet.
- Peeling Peaches: The easiest way is to score a small ‘X’ on the bottom of each peach, then briefly dip them in boiling water for 30-60 seconds, followed immediately by an ice bath. The skins should then slip right off!
- Cooling is Crucial: I know, I said it before, but it’s worth repeating! Cutting into hot or warm bars will lead to a messy, gooey (but still delicious!) situation. Let them cool completely to get nice, clean slices.
How to Store It
Once cooled and sliced, these bars are pretty sturdy! You can store them in an airtight container at room temperature for 2-3 days. If you want them to last longer, or if your kitchen is particularly warm, you can store them in the refrigerator for up to 5-7 days. They are also freezer-friendly! Wrap individual bars or the whole slab tightly in plastic wrap, then aluminum foil. They’ll keep in the freezer for up to 2-3 months. Thaw at room temperature.
FAQs
Got questions? Let’s tackle a couple of common ones!
Can I use frozen peaches?
Yes, you absolutely can! Thaw them completely in a colander set over a bowl to drain off as much excess liquid as possible. You might even want to pat them dry gently with paper towels before tossing them with the sugar and flour for the filling.
Do I have to peel the peaches?
While you don’t have to, I highly recommend it for the best texture. Peach skins can become tough and slightly chewy when baked. Peeling gives you that lovely, smooth, tender peach filling.
Can I make the crumb topping ahead of time?
Great idea! You can mix the crumb topping ingredients, including the melted butter, cover the bowl, and keep it in the refrigerator for a day or two until you’re ready to assemble and bake the bars.
Easy & Heavenly Summer Peach Crumb Bars
Ingredients
Equipment
Method
- Step 1: Prep Your Pan: Preheat your oven to 350°F (175°C). Grab a 9x9-inch baking pan and line it with parchment paper, leaving some overhang on the sides.
- Step 2: Whip up the Crust: In a medium bowl, whisk together the flour, sugar, and salt for the crust. Cut in the cold butter cubes using a pastry blender, fork, or fingertips until it looks like coarse crumbs. Dump into the prepared pan and press down evenly. Bake for 15–18 minutes until lightly golden. Let cool slightly.
- Step 3: Make the Peachy Filling: While the crust cools, toss your sliced peaches in another bowl. Sprinkle with the sugar and flour for the filling, then drizzle in the lemon juice and vanilla extract. Gently toss until coated.
- Step 4: Create the Crumb Topping: In a third bowl, mix together the flour, both sugars, cinnamon, and salt for the topping. Pour in the melted butter and stir with a fork until clumps and crumbs form.
- Step 5: Assemble the Magic: Spread the peach filling evenly over your slightly cooled crust. Sprinkle the crumb topping all over the peaches, covering them from edge to edge.
- Step 6: Bake to Perfection: Place the assembled bars back into your 350°F oven. Bake for 45–50 minutes until the topping is golden brown and the filling is bubbly.
- Step 7: Cool Completely: Let the bars cool completely in the pan before slicing. This allows the filling to set. Cool on a wire rack for at least 2-3 hours, or chill in the fridge. Once cool, lift using the parchment paper overhang and cut into squares.