Oh, my sweet friends, there are just some flavors that take you right back, aren’t there? For me, the moment that little box of Samoas (or Caramel deLites, depending on where you grew up!) arrived on my doorstep each year was pure magic. That perfect blend of crispy cookie, gooey caramel, toasted coconut, and rich chocolate drizzle? Pure bliss! But what if I told you that you don’t have to wait for cookie season to enjoy that iconic taste? What if you could whip up these dreamy, decadent treats right in your own kitchen? Get ready, because today we’re making Homemade Samoas Girl Scout Cookies, and I promise you, they’re even better than you remember! This recipe is incredibly easy, a delightful kitchen project, and yields cookies so good, you’ll be wondering why you didn’t try it sooner.
Why You’ll Love Homemade Samoas Girl Scout Cookies
- Fast: While there are a few steps, each one is quick, making the overall process surprisingly speedy.
- Easy: No fancy techniques or equipment needed, just simple baking and assembly.
- Giftable: These beautiful cookies make the perfect homemade gift for friends, family, or teachers.
- Crowd-pleasing: Seriously, who can resist a Samoa? They disappear faster than you can say “cookie season”!
Ingredients

Gather your ingredients, my dear, and let’s get ready to create some magic!
- 1 cup unsalted butter, softened: Make sure it’s nice and soft, but not melted, for the perfect creamy cookie dough.
- 1/2 cup granulated sugar: Just enough sweetness to make our cookie base delightful.
- 2 cups all-purpose flour: Our sturdy foundation for that perfect shortbread-like texture.
- 1/4 teaspoon baking powder: A tiny boost to give our cookies a nice lift.
- 1/4 teaspoon salt: Balances out the sweetness and brings out all those lovely flavors.
- 2 tablespoons milk: Helps bring the dough together beautifully.
- 1/2 teaspoon vanilla extract: The essential flavor enhancer for any good cookie.
- 3 cups shredded sweetened coconut: The star of our caramel-coconut topping! Sweetened is key here for that authentic taste.
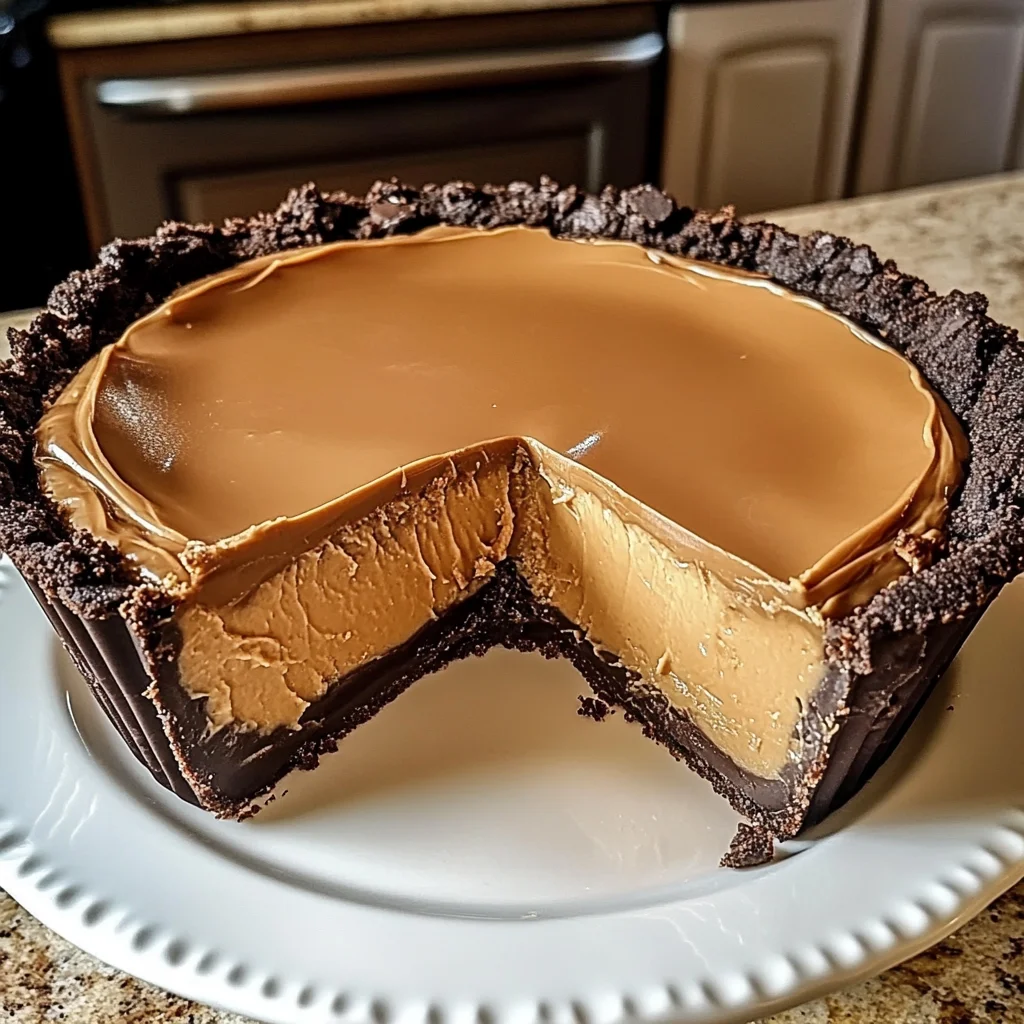
- 12 ounces chewy caramels: Pick your favorite brand; these will melt into glorious goo.
- 3 tablespoons heavy cream: Helps make the caramel wonderfully smooth and spreadable.
- 1/4 teaspoon salt: A pinch of salt in the caramel makes all the difference!
- 8 ounces semi-sweet chocolate chips: For that classic chocolatey drizzle and dipped bottoms.
How to Make Homemade Samoas Girl Scout Cookies
Alright, apron on, and let’s get baking! You’re going to feel like a cookie-making superstar.
- First things first, let’s get that oven ready. Preheat your oven to a cozy 350°F (175°C) and grab a baking sheet. Line it with parchment paper – trust me, it makes cleanup a breeze!
- In a large mixing bowl, take your softened butter and granulated sugar. Cream them together until they’re light and fluffy. This is where the air gets incorporated, making for a tender cookie.
- Now, slowly add your flour, baking powder, and salt to the butter mixture. Mix it until it’s just combined. Then, pour in the milk and vanilla extract. Keep mixing until a soft dough forms. You might need to give it a gentle knead with your hands to bring it all together.
- Lightly flour your counter or a large piece of parchment paper. Roll out your cookie dough to about 1/4-inch thickness. You want it even so all your cookies bake consistently.
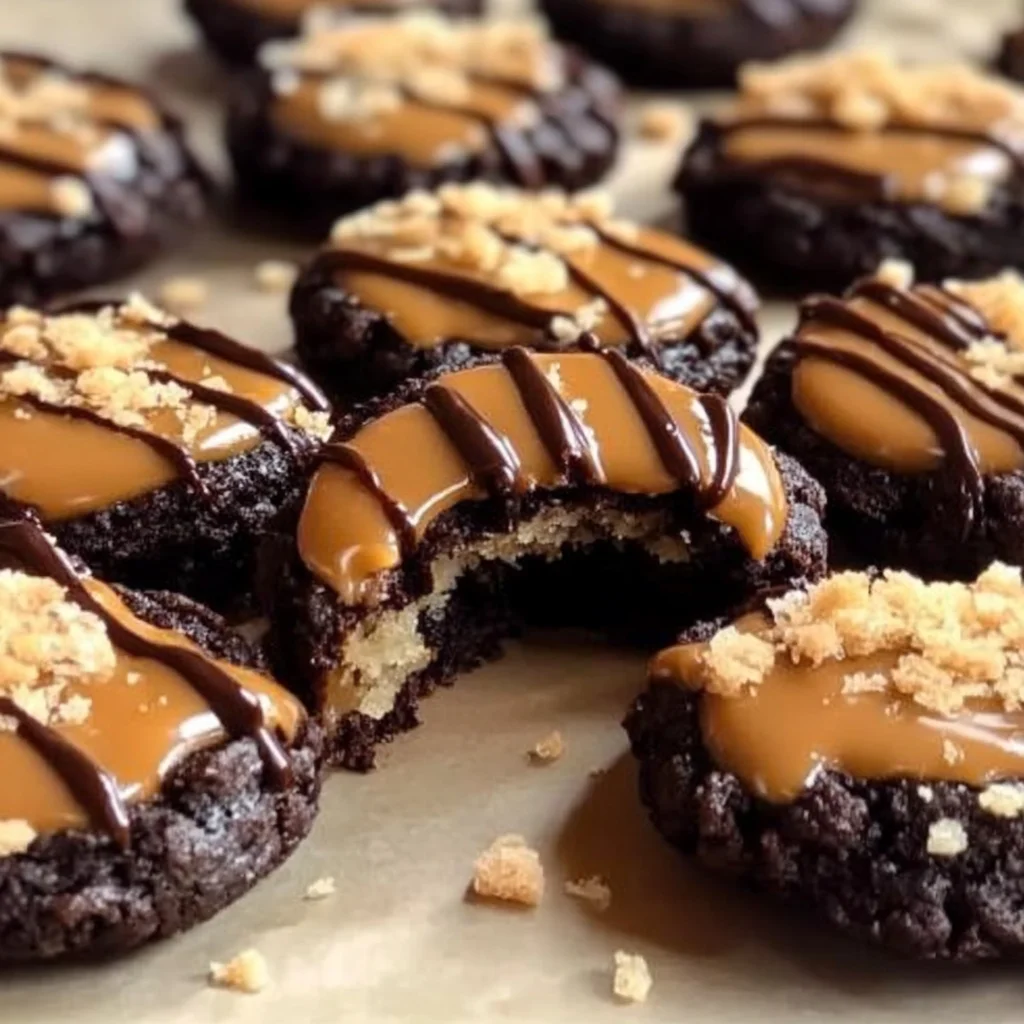
- Time for shaping! Use a 2-inch round cookie cutter to cut out your circles. Then, with a smaller cutter (like a piping tip or a tiny round cutter), cut out the center of each circle to create that iconic ring shape. Place these delicate rings on your prepared baking sheet.
- Bake for 10–12 minutes, or until the edges are just lightly golden. Keep a close eye on them! You want them tender, not too crisp. Let them cool completely on a wire rack. Patience is a virtue, especially when it comes to perfect cookies!
- While your cookies are cooling, let’s get that coconut ready. Spread the shredded sweetened coconut evenly on another baking sheet. Pop it into the oven for about 5–7 minutes, giving it a good stir halfway through, until it’s beautifully golden brown and fragrant. This toasting step is crucial for that signature Samoa flavor!
- Now for the irresistible caramel. In a saucepan over low heat, combine your chewy caramels, heavy cream, and a pinch of salt. Stir continuously until everything is melted and gloriously smooth. This is going to smell amazing! If you love caramel as much as I do, you might also enjoy making easy no-bake caramel pretzel bars for another sweet and salty treat.
- Once your caramel is smooth, gently fold in the toasted coconut. Mix it until every strand is coated in that sticky, sweet goodness.
- It’s assembly time! Take a cooled cookie and carefully spread a generous spoonful of the caramel-coconut mixture on top, pressing gently to make sure it adheres nicely. Repeat with all your cookies.
- Finally, the chocolate! Melt your semi-sweet chocolate chips. You can do this in the microwave (stirring every 30 seconds to prevent burning) or in a double boiler. Dip the bottoms of each cookie into the melted chocolate, then use a fork or a small spoon to drizzle more chocolate artfully over the top. For another twist on chocolate-dipped delights, check out these strawberry cheesecake stuffed cookies – they’re a dream!
- Place your newly adorned Samoas on a fresh piece of parchment paper and chill them in the refrigerator for 10–15 minutes. This quick chill will help the chocolate set perfectly.
Substitutions & Additions
Feeling adventurous? Here are some ideas to tweak your Samoas to perfection!
- Gluten-Free: You can absolutely use your favorite 1:1 gluten-free flour blend for the cookie base. Just be sure to check the blend’s instructions, as some may require a little extra liquid.
- Chocolate Variations: Not a fan of semi-sweet? Try milk chocolate for a sweeter profile, or dark chocolate for a richer, more intense flavor. White chocolate could also be a fun drizzle!
- Pre-made Caramel: Short on time? You can buy pre-made caramel sauce (like ice cream topping) and warm it gently with the coconut. It won’t be quite as chewy, but it’ll still be delicious!
- Nutty Twist: Add a sprinkle of finely chopped pecans or walnuts to your coconut-caramel mixture for an extra layer of crunch and flavor.
Tips for Success
To ensure your homemade Samoas are absolutely perfect every time, keep these little nuggets of wisdom in mind:
- Don’t Overbake the Cookies: A slightly underbaked cookie is better than an overbaked one here. You want the cookie base to be tender, not hard or too crisp, as the caramel provides plenty of chewiness.
- Watch Your Coconut: Toasted coconut can go from perfectly golden to burnt in a flash! Stay by the oven and stir frequently.
- Quality Caramels Matter: Using good quality, soft, chewy caramels will make a big difference in the texture and flavor of your topping.
- Chill Power: Don’t skip the chilling step! It sets the chocolate beautifully and makes the cookies easier to handle and store.
- Even Spreading: When applying the caramel-coconut mixture, try to spread it as evenly as possible. It helps the cookies look uniform and ensures every bite is balanced.
How to Store Homemade Samoas Girl Scout Cookies
If you manage to have any left, here’s how to keep them fresh and fabulous:
- At Room Temperature: Store your cookies in an airtight container at room temperature for up to 3-4 days. Layer them between sheets of parchment paper to prevent sticking.
- In the Refrigerator: For a slightly firmer cookie and to extend freshness, you can store them in an airtight container in the fridge for up to a week. Let them come to room temperature for a few minutes before serving, or enjoy them chilled!
- Freezing: These cookies freeze wonderfully! Place them in a single layer on a baking sheet to flash freeze for about an hour, then transfer them to a freezer-safe airtight container or bag. They’ll keep for up to 2-3 months. Thaw at room temperature when you’re ready to enjoy.
FAQs
Got questions? I’ve got answers, friend!
Q: Can I use store-bought caramel sauce instead of melting caramels?
A: Yes, you can! Just be aware that the texture might be a little less chewy and a bit softer than using melted caramels. Warm it gently and mix in the toasted coconut.
Q: My cookie dough is too sticky to roll out. What should I do?
A: If your dough is too sticky, wrap it in plastic wrap and chill it in the refrigerator for 20-30 minutes. This will firm it up and make it much easier to handle. A little extra flour on your surface helps too!
Q: How do I get the chocolate drizzle to look nice and neat?
A: For a perfect drizzle, use a fork, a piping bag with a very small hole, or a Ziploc bag with the corner snipped off. Hold it a little higher above the cookies and move quickly for thin, even lines.
Q: Can I make the cookie dough ahead of time?
A: Absolutely! You can prepare the cookie dough, wrap it tightly in plastic wrap, and store it in the refrigerator for up to 2-3 days, or freeze it for up to a month. Thaw in the fridge before rolling and baking.
I hope you have the most wonderful time making these nostalgic treats! Don’t forget to follow us on Pinterest for more delicious recipes and kitchen inspiration!

Homemade Samoas Girl Scout Cookies
Ingredients
Equipment
Method
- Step 1: Preheat oven to 350°F (175°C). Line a baking sheet with parchment paper.
- Step 2: In a large mixing bowl, cream softened butter and granulated sugar until light and fluffy.
- Step 3: Slowly add flour, baking powder, and salt to the butter mixture; mix until just combined. Pour in milk and vanilla extract and mix until a soft dough forms. Knead gently with hands to bring together.
- Step 4: Lightly flour your counter or parchment paper. Roll out cookie dough to about 1/4-inch thickness. Use a 2-inch round cookie cutter to cut circles, then use a smaller cutter to cut out the center, creating rings. Place on the prepared baking sheet.
- Step 5: Bake for 10–12 minutes, or until edges are lightly golden. Let cool completely on a wire rack.
- Step 6: Spread shredded sweetened coconut evenly on another baking sheet. Toast in the oven for 5–7 minutes, stirring halfway, until golden brown and fragrant.
- Step 7: In a saucepan over low heat, combine chewy caramels, heavy cream, and a pinch of salt. Stir continuously until melted and smooth.
- Step 8: Gently fold the toasted coconut into the smooth caramel mixture until every strand is coated.
- Step 9: Take a cooled cookie and carefully spread a generous spoonful of the caramel-coconut mixture on top, pressing gently. Repeat with all cookies.
- Step 10: Melt semi-sweet chocolate chips (in the microwave or a double boiler). Dip the bottoms of each cookie into the melted chocolate, then use a fork or small spoon to drizzle more chocolate artfully over the top.
- Step 11: Place cookies on fresh parchment paper and chill in the refrigerator for 10–15 minutes to set the chocolate.
Notes
Tips for Success: Avoid overbaking the cookies to ensure a tender base; a slightly underbaked cookie is better. Watch your coconut carefully while toasting, as it can burn quickly. Use good quality, soft, chewy caramels for the best topping texture and flavor. Don't skip the chilling step; it sets the chocolate beautifully and makes cookies easier to handle. Try to spread the caramel-coconut mixture as evenly as possible for uniform cookies.
How to Store: Store in an airtight container at room temperature for up to 3-4 days, layering with parchment paper to prevent sticking. For a firmer cookie and extended freshness, store in the refrigerator for up to a week. They also freeze wonderfully: flash freeze on a baking sheet, then transfer to a freezer-safe container or bag for up to 2-3 months. Thaw at room temperature before enjoying.