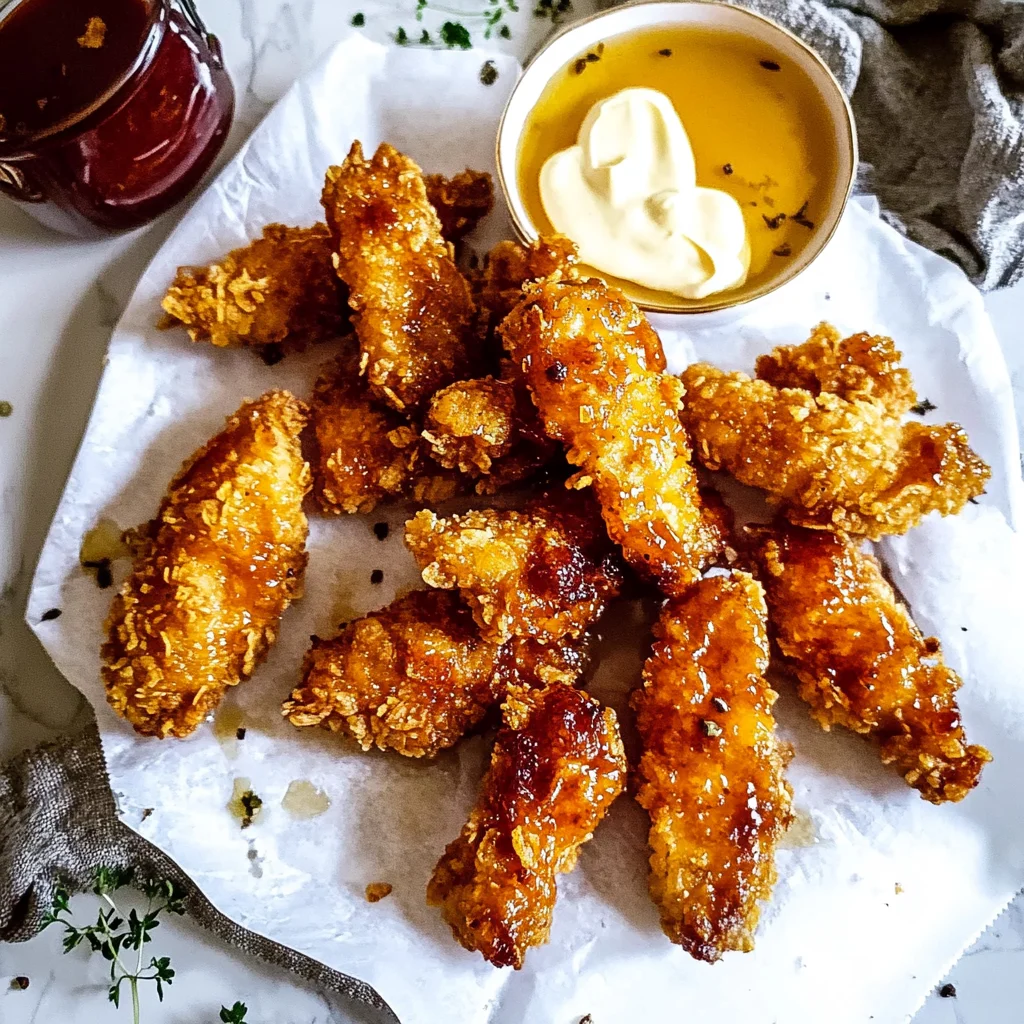
There’s something so comforting about biting into crispy, golden chicken tenders—especially when they’re kissed with that perfect balance of sweet heat from hot honey. I remember those carefree days of childhood when chicken tenders were the ultimate crowd-pleaser at every gathering. But this recipe takes it up a notch by soaking the tenders in pickle juice, giving them an incredible tang that cuts through the crispy crust and sweet-spicy drizzle. Whether you’re making a quick weeknight dinner or prepping for a weekend gathering, hot honey chicken tenders are your new go-to for an easy, memorable meal that’s sure to impress.
What I love most about these tenders is how simple they are to prepare, yet they deliver big on flavor and texture. You can pan-fry, bake, or even air fry them for a healthier twist. And that hot honey drizzle? It’s the magic touch that turns these tenders into an unforgettable treat. Stick with me as I walk you through every step, share some handy tips, and even suggest delicious variations. Ready to spice up your chicken game?
Why You’ll Love Hot Honey Chicken Tenders
- Fast: Ready in under an hour (or less if you’re short on time), these tenders come together quickly, especially with a short brine.
- Easy: No complicated ingredients or fancy equipment needed—just simple pantry staples and your favorite chicken breasts.
- Giftable: Pack them up for game days, parties, or even as a homemade food gift that everyone will rave about.
- Crowd-pleasing: The perfect balance of crispy, tangy, and sweet-spicy flavors makes these a hit with kids and adults alike.
Ingredients
Here’s what you’ll need to make these crispy, juicy hot honey chicken tenders. Each ingredient plays a special role in creating that signature flavor and texture:
- 1.25–1.5 lb chicken breasts: Fresh, boneless, and skinless chicken breasts cut into uniform tenders are key for even cooking.
- 1 cup dill pickle juice: This is your secret weapon! The brine tenderizes the chicken and adds a subtle tang. You can substitute with any flavored pickle juice you love.
- ⅓ cup all-purpose flour: Use gluten-free flour if needed. This helps the coating stick and adds a light barrier for crispiness.
- ½ tsp salt: Enhances all the flavors in the breading.
- ½ tsp red pepper flakes: Adds a gentle heat to the flour mix for a little kick even before the hot honey drizzle.
- ½ tsp garlic powder & ½ tsp onion powder: These add depth and warmth to the coating without overpowering the chicken.
- 3 eggs, whisked: Acts as a glue to hold the crunchy corn flakes on the chicken.
- 4 cups crushed corn flakes: This gives the tenders that satisfying crunch. You can add more if you want an extra thick crust.
- ⅓ cup hot honey: The star of the show! Use store-bought for convenience or try making your own for a personalized touch.
- ¼ cup oil for frying: Use a neutral oil like vegetable or canola if pan frying. You might need a bit more depending on your pan size.
- Pickles for serving (optional): Because why not keep the pickle theme going? They make a refreshing sidekick.
How to Make Hot Honey Chicken Tenders
Let’s dive into the step-by-step process to make these tenders perfectly crispy, juicy, and bursting with flavor.
Step 1: Brine the Chicken
First, slice your chicken breasts into tenders that are roughly the same size. This helps them cook evenly. Place the tenders into a large gallon-sized ziplock bag or bowl, then pour in the dill pickle juice. Seal or cover and refrigerate for at least 20 minutes. If you have time, brining them for up to 24 hours will make the chicken incredibly tender and flavorful. I like to brine overnight when I can—it’s a little extra effort that pays off big time in taste.
Step 2: Prepare the Dredging Station
While the chicken is brining, set up three shallow bowls or plates to create your dredging station:
- Bowl 1: Mix the all-purpose flour, salt, red pepper flakes, garlic powder, and onion powder. These spices infuse the flour with lots of flavor.
- Bowl 2: Whisk the eggs until smooth. This will help the coating stick tight to the chicken.
- Bowl 3: Place the crushed corn flakes. If you want, you can add a pinch of salt or a little paprika here for extra flavor.
Step 3: Dredge the Chicken
Remove the chicken tenders from the brine and let any excess juice drip off. Coat each tender in the seasoned flour first, shaking off any extra. Then, dip it into the whisked eggs, making sure it’s fully coated. Finally, press it into the crushed corn flakes, coating thoroughly for maximum crunch. Lay the coated tenders on a parchment-lined baking sheet until you’re ready to cook. This step is so satisfying—I always find myself sneaking a crispy crumb here and there!
Step 4: Cook the Chicken Tenders
You have three easy options for cooking, depending on your mood and kitchen setup:
- Pan Fry: Heat the oil in a large skillet over medium heat. Fry 4-6 tenders at a time for about 6-7 minutes per side, turning often. You want a deep golden brown crust and an internal temperature of 165ºF. Drain on paper towels to keep them crispy.
- Air Fryer: Preheat your air fryer to 350ºF. Lightly spray the tenders with cooking spray to help them crisp up. Cook for 15-18 minutes, flipping halfway through. This method is a great healthier alternative that still delivers crunch.
- Bake: Preheat your oven to 375ºF. Place tenders on a parchment-lined baking sheet and spritz with cooking spray. Bake for 16-18 minutes, flipping once halfway through for even browning.
I personally love the pan-fried version for that authentic crispy texture, but the baked and air-fried methods are perfect when you want less mess or fewer calories. Whichever you choose, just keep an eye on the color and internal temp for best results.
Step 5: Serve with Hot Honey
Once your chicken tenders are cooked through and nicely crisp, let them rest for a few minutes. Then, drizzle generously with hot honey. The sweet heat melts into the crunchy coating, creating a flavor explosion with every bite. If you want to keep the pickle theme going, serve with your favorite pickles on the side—they add a refreshing crunch and acidity that balances the richness perfectly.
Substitutions & Additions
One of the best things about this recipe is how flexible it is! Feel free to tailor it to your preferences or what you have on hand:
- Pickle Juice Alternatives: Don’t have dill pickle juice? Try using jalapeño pickle juice for an extra spicy kick or even lemon juice mixed with a bit of salt to mimic the tang.
- Flour Choices: Gluten-free all-purpose flour works beautifully here if you need to avoid gluten.
- Crunchy Coating: Instead of crushed corn flakes, panko breadcrumbs or crushed potato chips make excellent crunchy substitutes.
- Hot Honey Variations: Make your own by mixing honey with hot sauce or chili flakes, or try infusing honey with fresh jalapeños for more heat.
- Extra Flavor Boosts: Add smoked paprika or cumin to your flour mix for a smoky twist. You can also toss in some freshly chopped herbs like thyme or parsley into the egg wash for a fresh note.
- Serving Ideas: Pair your hot honey chicken tenders with a creamy dipping sauce like ranch or blue cheese, or try them alongside a fresh salad such as my easy zesty Italian tuna pasta salad for a complete meal.
Tips for Success
Here are some insider tips I’ve learned from making hot honey chicken tenders many times to help you get the best results:
- Don’t skip the brine: Even just 20 minutes in pickle juice makes the chicken incredibly juicy and flavorful.
- Press the coating well: When dredging in corn flakes, gently press to make sure the crumbs stick well, so you don’t lose that crunch during cooking.
- Cook in batches: Whether frying or air frying, don’t overcrowd the pan or basket. Give the tenders space to crisp evenly.
- Use a thermometer: For perfectly cooked chicken, check the internal temperature with a meat thermometer. It should reach 165ºF.
- Prep ahead: You can brine the chicken and set up your dredging station in advance to save time on busy days.
- Keep warm: If cooking in batches, keep cooked tenders warm on a baking sheet in a low oven (around 200ºF) until ready to serve.
How to Store Hot Honey Chicken Tenders
Leftovers? No problem! Hot honey chicken tenders store well and can be enjoyed later:
- In the fridge: Store cooked tenders in an airtight container for up to 3 days. To reheat, bake in a 350ºF oven for 8-10 minutes to crisp them back up.
- Freeze for later: Let tenders cool completely, then freeze in a single layer on a baking sheet. Once frozen, transfer to a freezer-safe bag or container. They keep well for up to 2 months. Reheat from frozen in the oven at 375ºF for 15-20 minutes.
- Hot honey drizzle: It’s best to drizzle hot honey fresh before serving rather than storing tenders coated in honey to keep the crust crisp.
FAQs
Can I make the hot honey from scratch?
Absolutely! Simply warm honey gently on the stove and stir in a pinch of red pepper flakes or your favorite hot sauce to taste. Let it infuse for a few minutes before drizzling.
What if I don’t have corn flakes?
No worries! Use panko breadcrumbs, crushed crackers, or even crushed tortilla chips for a different but equally delicious crunch.
Is air frying really a good option for these tenders?
Definitely! Air frying gives you that crispy texture with less oil and mess. Just be sure to flip the tenders halfway through cooking for even browning.
Can I double this recipe for a crowd?
Yes, this recipe scales up nicely. Just make sure you have enough space to cook the tenders in batches without overcrowding to keep them crispy.
If you’re loving this hot honey chicken tenders recipe, you might also enjoy exploring other delicious chicken dishes like my creamy lemon chicken for a tangy, comforting twist or browsing through the wide array of recipes on Crispy Kitchens’ recipe collection for more inspiration.
Don’t forget to follow me on Pinterest for more mouth-watering recipes, tips, and kitchen inspiration. Happy cooking!
Irresistibly Crispy Hot Honey Chicken Tenders
Ingredients
Equipment
Method
- Step 1: Slice chicken breasts into uniform tenders. Place in a large ziplock bag or bowl and pour in dill pickle juice. Seal and refrigerate for at least 20 minutes, up to 24 hours for best flavor and tenderness.
- Step 2: Prepare dredging station with three shallow bowls: Bowl 1 - mix flour, salt, red pepper flakes, garlic powder, and onion powder; Bowl 2 - whisk eggs; Bowl 3 - crushed corn flakes (optional: add pinch of salt or paprika).
- Step 3: Remove chicken from brine, let excess juice drip off. Coat each tender in seasoned flour, then dip in eggs, then press into crushed corn flakes. Place coated tenders on parchment-lined baking sheet.
- Step 4: Choose cooking method: Pan fry - heat oil in large skillet over medium heat, fry 4-6 tenders at a time for 6-7 minutes per side until golden and internal temp reaches 165ºF; Drain on paper towels. Or Air fry - preheat to 350ºF, spray tenders, cook 15-18 minutes flipping halfway. Or Bake - preheat oven to 375ºF, spritz tenders with cooking spray, bake 16-18 minutes flipping halfway.
- Step 5: Let cooked tenders rest a few minutes. Drizzle generously with hot honey. Serve with pickles if desired.