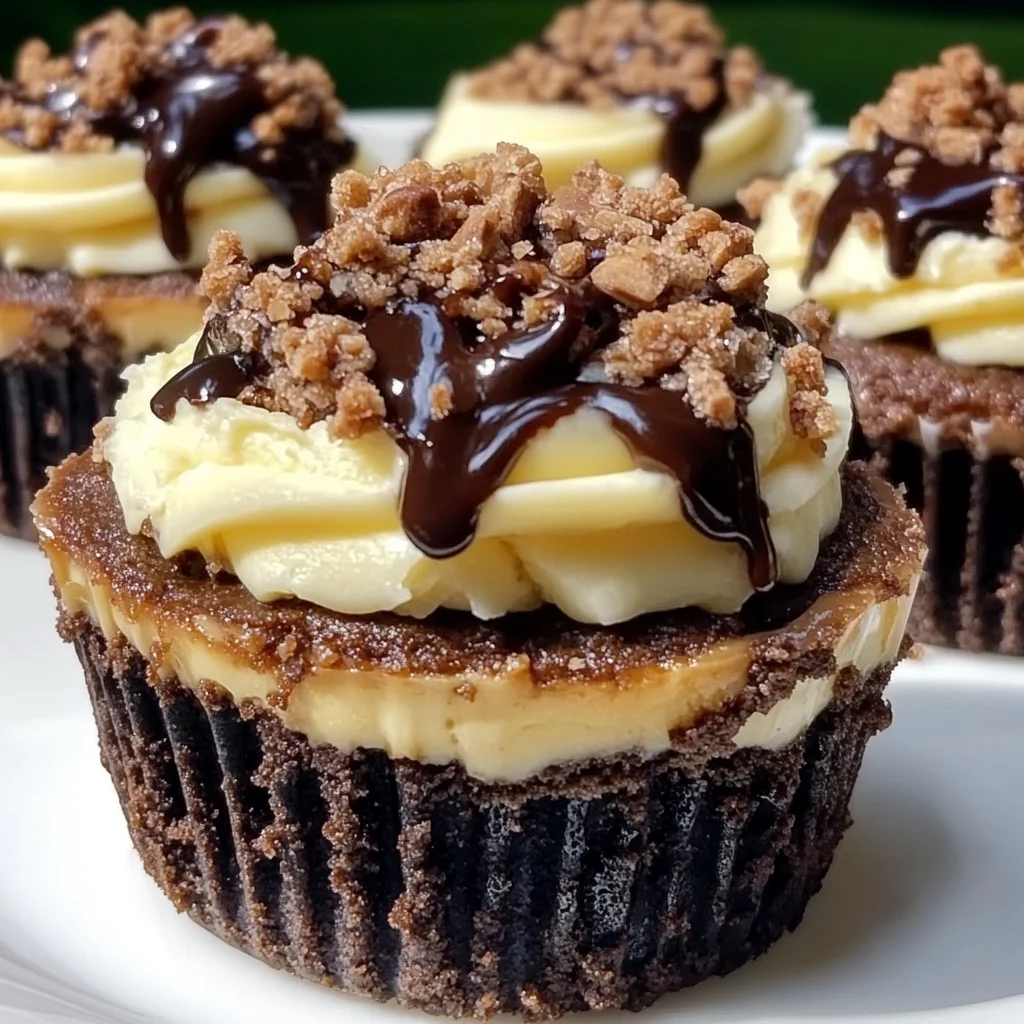
Hey there, sweet friends! Do you ever get that craving for something incredibly decadent, something that feels like a warm hug and a celebration all rolled into one, but you just don’t have hours to spend in the kitchen? I know I do! We’re talking about those moments when you want a rich, chocolatey brownie, the creamy tang of cheesecake, and all your favorite toppings, but without the fuss. Well, pull up a chair, because today we’re diving into a recipe that ticks all those boxes and more: the Loaded Brownie Cheesecake Cup! This little cup of happiness is so easy, so quick, and so utterly memorable, it’s about to become your go-to for any sweet craving or sudden get-together. It’s like having your own personal dessert shop right in your fridge!
Why You’ll Love Loaded Brownie Cheesecake Cup
- Fast: Seriously, these come together in a flash, especially if your brownies are pre-made!
- Easy: No baking, no complicated steps, just layering pure deliciousness.
- Giftable: Pop them into cute jars or containers for a delightful homemade present.
- Crowd-pleasing: Who doesn’t love brownies AND cheesecake? It’s a guaranteed hit!
Ingredients
Gather your sweet supplies, kitchen crew! Here’s what you’ll need for these delightful cups:
- 2 cups fudgy brownies, crumbled: This is where the magic starts! Store-bought, leftover, or freshly baked – whatever you have on hand works perfectly. Just make sure they’re nice and fudgy for that ultimate texture.
- 1 ½ cups cream cheese, softened: Let it sit out on the counter for a bit to get nice and soft. This is key for a super smooth, lump-free cheesecake filling!
- ½ cup powdered sugar: Also known as confectioners’ sugar. It dissolves beautifully for a silky-smooth cream cheese mixture.
- 1 teaspoon vanilla extract: A splash of pure vanilla is essential for that classic, comforting dessert flavor.
- 1 cup heavy whipping cream, whipped to stiff peaks: This is what gives our cheesecake filling that light, airy, dreamy texture. Make sure it’s cold for best results!
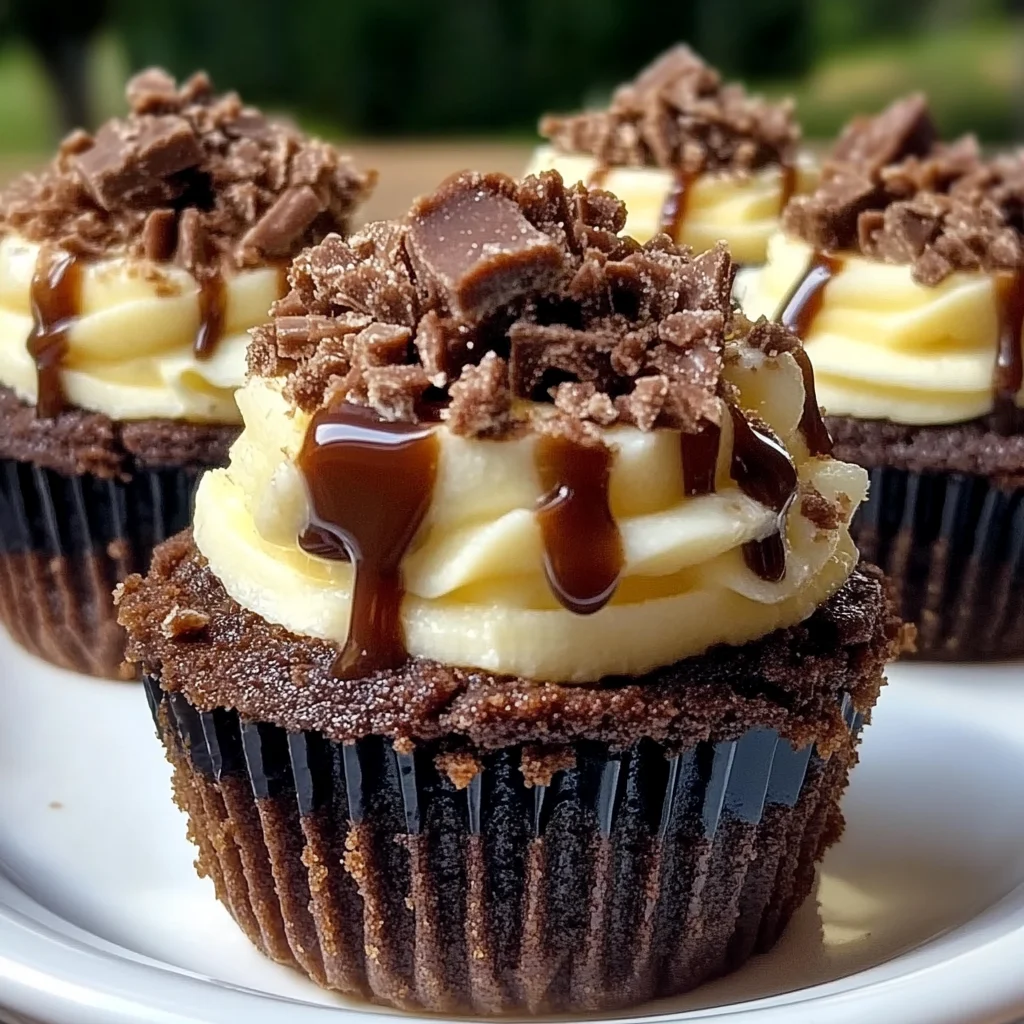
- Chocolate ganache: You can make this by melting chocolate chips with a bit of warm heavy cream until smooth and glossy. Or, grab a store-bought chocolate syrup for an even quicker shortcut!
- Caramel sauce: Drizzle-ready goodness! Homemade or your favorite jarred caramel will do the trick.
- Extra brownie crumbs: For that final flourish and added brownie texture.
How to Make Loaded Brownie Cheesecake Cup
Alright, let’s get those hands happy and create some dessert masterpieces! You’re going to be amazed at how simple this is.
- Whip Up Your Dreamy Cheesecake Filling: In a medium-sized bowl, grab your softened cream cheese, powdered sugar, and vanilla extract. Now, get that electric mixer going! Beat them together on medium speed until the mixture is beautifully smooth and utterly lump-free. Once that’s done, gently, and I mean gently, fold in your whipped heavy cream until everything is just combined. You want to keep that lovely airy texture, so don’t overmix it!
- Start Assembling Your Cups of Joy: Grab your individual serving cups (small mason jars, clear tumblers, or even wine glasses work wonderfully!). Spoon or press a generous layer of your crumbled fudgy brownies at the very bottom. This forms the delicious foundation.
- Add That Creamy Layer and Drizzles: Now, carefully spoon or pipe your heavenly cheesecake filling over the brownie layer. If you have a piping bag, it makes for a super pretty presentation, but a spoon works just as well! Once the cheesecake is in, it’s time for the fun part: generously drizzle both chocolate ganache and rich caramel sauce over the cheesecake. Don’t be shy!
- Repeat for Layers of Deliciousness: You’re doing great! Now, repeat the layering process. Add another layer of crumbled brownies, followed by more creamy cheesecake filling, and another delightful drizzle of both chocolate ganache and luscious caramel sauce. Keep going until your cup is wonderfully full, creating those beautiful visible layers. If you’re looking for another fantastic layered dessert that doesn’t require baking, you should definitely check out our No-Bake Chocolate Lasagna – it’s another family favorite!
- The Grand Finale Topping: For the ultimate flourish, top off your masterpiece with a sprinkle of extra brownie crumbs. Then, give it one final, glorious drizzle of both chocolate and caramel sauce. This is where you can really make it shine!
- Chill Out (Literally!): This is the hardest part, I promise! Place your loaded brownie cheesecake cups into the refrigerator for at least 1 hour. This chilling time allows the cheesecake filling to firm up nicely and all those wonderful flavors to meld together. Trust me, it’s worth the wait!
Substitutions & Additions
The beauty of these Loaded Brownie Cheesecake Cups is how customizable they are! Feel free to get creative and make them uniquely yours:
- Brownie Swap: No brownies? No problem! You can use crumbled cookies (Oreos, chocolate chip, graham crackers), or even slices of pound cake.
- Cheesecake Flavor Boost: Add a hint of almond extract instead of vanilla, or a tiny splash of mint extract for a holiday twist.
- Chocolate Ganache Alternatives: Try white chocolate ganache, a different flavor of syrup (strawberry, raspberry), or even a hot fudge topping.
- Caramel Sauce Fun: Butterscotch, dulce de leche, or even a sprinkle of sea salt flakes over the caramel would be divine!
- Extra Toppings Galore: This is where the “loaded” really comes in! Think chopped nuts (pecans, walnuts), mini chocolate chips, sprinkles, whipped cream, fresh berries, mini marshmallows, or even a sprinkle of cocoa powder. If you’re a fan of no-bake desserts with a little crunch, you might also adore our Easy No-Bake Caramel Pretzel Bars!
Tips for Success
Want to make sure your Loaded Brownie Cheesecake Cups are absolutely perfect every time? Here are a few tried-and-true tips from my kitchen to yours:
- Softened Cream Cheese is a Must: I really can’t stress this enough! Cold cream cheese will give you lumpy filling, and no one wants that. Plan ahead and let it sit out for at least 30 minutes, or even an hour, before you start.
- Don’t Overmix the Whipped Cream: Once you fold in the whipped cream, stop as soon as it’s combined. Overmixing will deflate the air you’ve worked so hard to incorporate, making your cheesecake filling dense instead of light and fluffy.
- Chill Time is Crucial: While tempting to dive right in, the chilling time really allows the flavors to meld and the cheesecake layer to set properly. This makes for cleaner layers and a more enjoyable texture.
- Make Ahead Magic: These cups are fantastic for making ahead! Prepare them up to a day in advance and store them in the fridge. This makes entertaining a breeze!
- Use Good Quality Ingredients: Since there’s no baking involved with the cheesecake, the flavors of your ingredients really shine through. Use good quality cream cheese, vanilla, and your favorite fudgy brownies.
How to Store Loaded Brownie Cheesecake Cup
These delightful treats are best enjoyed chilled! Store your Loaded Brownie Cheesecake Cups covered in the refrigerator. They will stay fresh and delicious for up to 3-4 days. While you can freeze individual components, I don’t recommend freezing the assembled cups, as the texture of the cheesecake and brownies might change after thawing. For best results, just keep them cool and enjoy within a few days!
FAQs
Here are some quick answers to common questions you might have about making these delightful cups:
Can I use a box brownie mix for the brownie layer?
Absolutely! A box brownie mix, baked according to package directions and then cooled and crumbled, works perfectly. Just make sure it’s a fudgy variety!
Can I make these in a single large dish instead of individual cups?
You sure can! Layer everything into an 8×8 inch square dish or a small trifle bowl for a family-style dessert. Just adjust chilling time as needed.
What if I don’t have heavy whipping cream?
While heavy whipping cream provides the best texture, you could try using an 8 oz tub of whipped topping (like Cool Whip), thawed. Just gently fold it into the cream cheese mixture as instructed.
Are these truly “no-bake”?
The cheesecake filling itself is completely no-bake! If you use store-bought pre-made brownies or leftover brownies, then yes, the whole dessert is a no-bake wonder. If you bake your brownies from scratch first, then it’s a “partially baked” assembly, but still incredibly easy!
For more delicious and easy recipes, make sure to follow us on Pinterest!

Loaded Brownie Cheesecake Cup
Ingredients
Equipment
Method
- Step 1: In a medium-sized bowl, combine softened cream cheese, powdered sugar, and vanilla extract. Beat with an electric mixer on medium speed until smooth and lump-free. Gently fold in the whipped heavy cream until just combined, being careful not to overmix to maintain an airy texture.
- Step 2: Grab your individual serving cups (small mason jars, clear tumblers, or wine glasses work well). Spoon or press a generous layer of crumbled fudgy brownies at the bottom of each cup to form the foundation.
- Step 3: Carefully spoon or pipe your cheesecake filling over the brownie layer. If using a piping bag, it creates a super pretty presentation. Generously drizzle both chocolate ganache and rich caramel sauce over the cheesecake layer.
- Step 4: Repeat the layering process: add another layer of crumbled brownies, followed by more creamy cheesecake filling, and another delightful drizzle of both chocolate ganache and luscious caramel sauce. Continue until your cup is wonderfully full, creating beautiful visible layers.
- Step 5: For the ultimate flourish, top off your masterpiece with a sprinkle of extra brownie crumbs. Then, give it one final, glorious drizzle of both chocolate and caramel sauce.
- Step 6: Place your loaded brownie cheesecake cups into the refrigerator for at least 1 hour. This chilling time allows the cheesecake filling to firm up nicely and all those wonderful flavors to meld together.