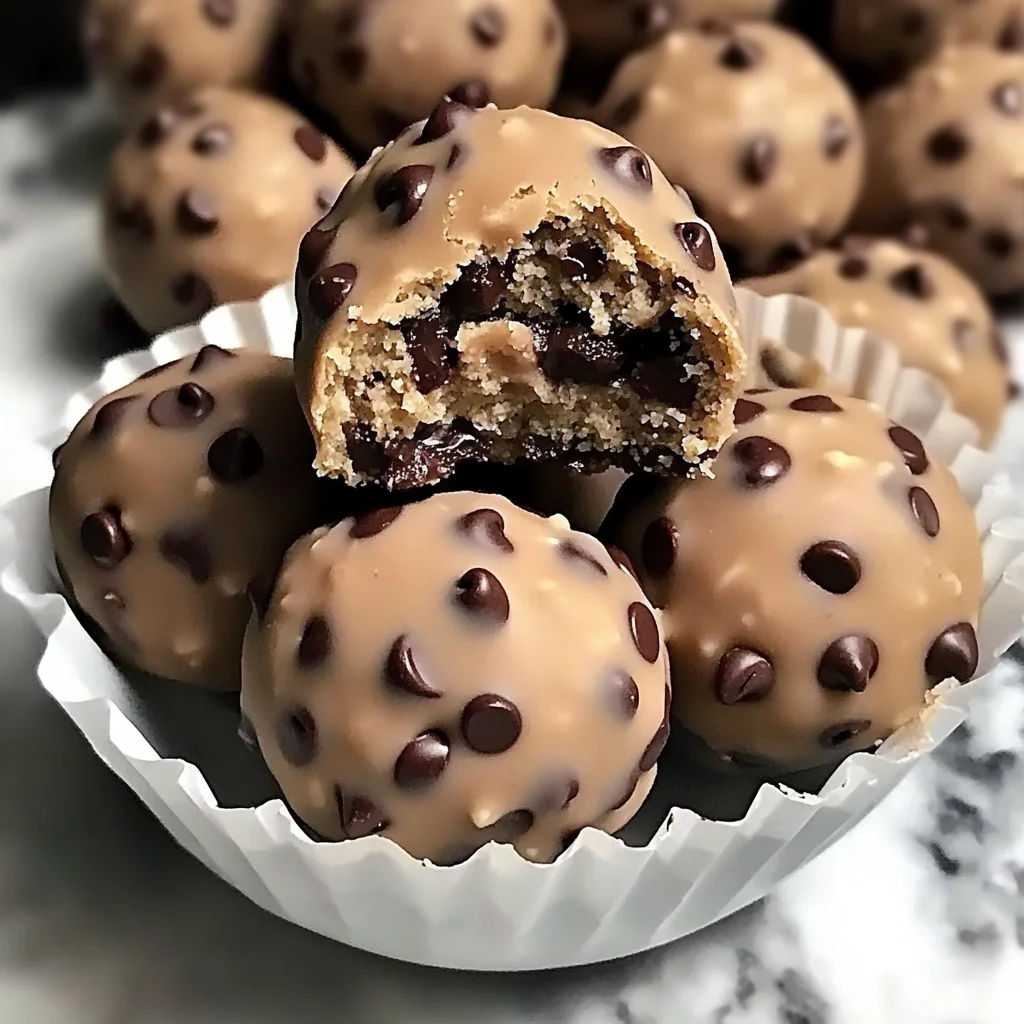
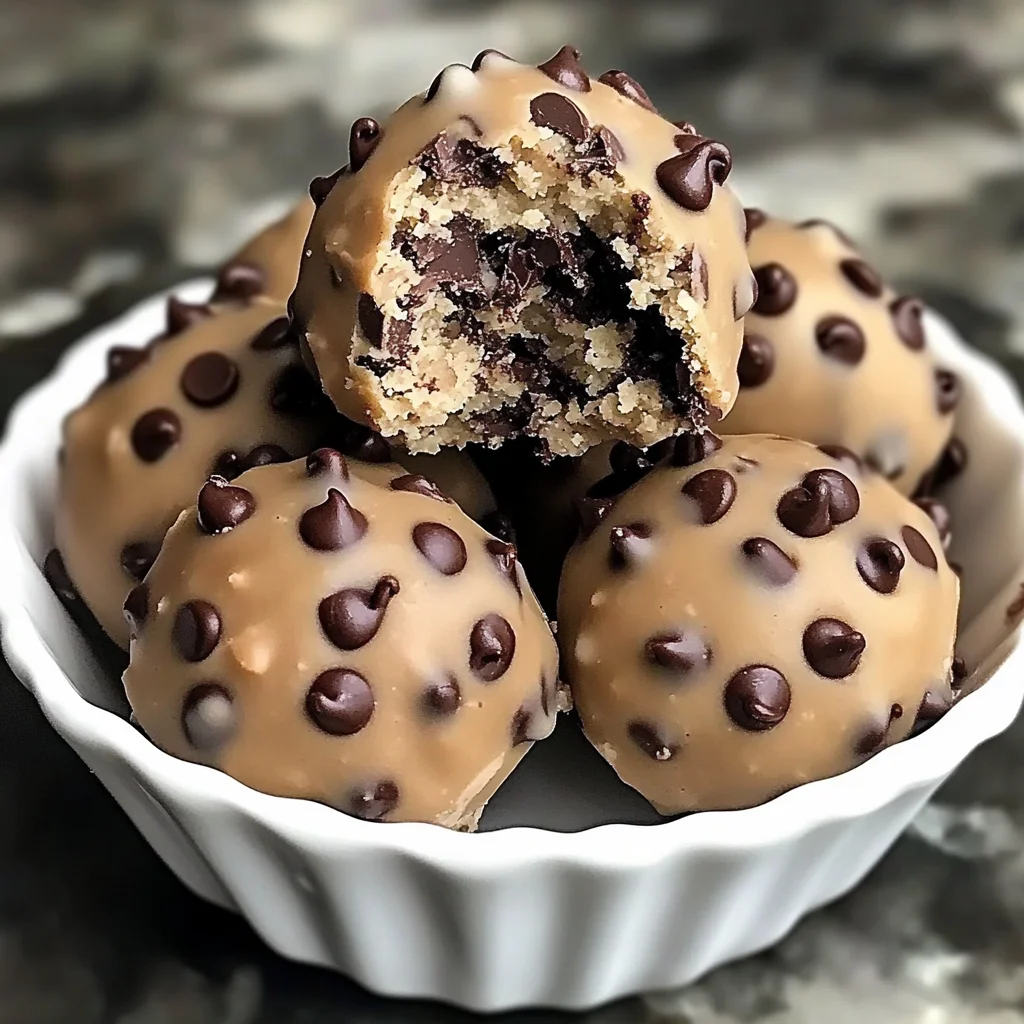
Remember those childhood days, sneaking spoonfuls of raw cookie dough from the bowl when Mom wasn’t looking? Ah, pure bliss! Well, what if I told you that you could recapture that exact feeling, but in a way that’s actually good for you, packed with protein, and ready in a flash? Get ready to meet your new obsession: Chocolate Chip Cookie Dough Protein Balls. These little bites of heaven are so easy, so quick, and so incredibly delicious, they’ll transport you right back to your happy place, no oven required!
Why You’ll Love Chocolate Chip Cookie Dough Protein Balls
These aren’t just a snack; they’re a revelation! Here’s why you’ll find yourself making them again and again:
- Fast: From start to finish, you’re looking at under 20 minutes of active prep time. Perfect for those sudden cravings!
- Easy: No baking, no complicated steps, just simple mixing and rolling. Anyone can make these!
- Giftable: Package them up in a cute box or jar, and you’ve got a thoughtful, homemade gift that friends and family will adore.
- Crowd-pleasing: Seriously, who doesn’t love chocolate chip cookie dough? These disappear quickly at parties and gatherings.
- Healthy-ish: Packed with protein and good-for-you ingredients, they satisfy your sweet tooth without the guilt.
Ingredients
Gather your simple ingredients, and let’s get rolling!
- 1 cup almond flour (or oat flour): This is our base, giving us that lovely cookie dough texture. I often use almond flour for a slightly nuttier flavor, but oat flour works great too!
- 1/2 cup vanilla protein powder (whey, casein, or plant-based): The star of our protein show! Choose your favorite, whether it’s a creamy whey or a plant-based option for a vegan twist.
- 1/4 cup cashew butter (or almond/sunflower seed butter): This adds richness and helps bind everything together. Cashew butter is wonderfully neutral, but almond or even sunflower seed butter for nut-free options are fantastic.
- 2–3 tbsp milk (dairy or non-dairy): Just enough to get our dough to the perfect consistency. Start with less, you can always add more!
- 1/4 cup mini chocolate chips (plus extra for topping): Because what’s cookie dough without chocolate chips? Mini ones are perfect for an even distribution in every bite.
- 2 tbsp honey or maple syrup: Our natural sweetener! Honey gives a lovely classic taste, while maple syrup keeps it vegan-friendly and adds a warm sweetness.
- 1 tsp vanilla extract: Essential for that classic cookie dough flavor. Don’t skip it!
- Pinch of salt: Just a tiny bit to balance the sweetness and really make those chocolate chips sing.
For the Chocolate Coating:
- 1 cup milk chocolate chips: For that irresistible outer shell. You can use dark chocolate if you prefer a less sweet option!
- 1 tsp coconut oil (or vegetable oil): This helps the chocolate melt smoothly and gives it a lovely, glossy finish that hardens beautifully.
How to Make Chocolate Chip Cookie Dough Protein Balls
Get ready for the easiest recipe you’ve made all week!
- First things first, grab a medium-sized bowl. Into this bowl, you’ll whisk together your almond flour, protein powder, and that little pinch of salt. Make sure it’s all nicely combined, so there are no powdery surprises later on.
- Now, in a separate bowl, it’s time for the wet ingredients. Stir together your cashew butter, 2 tablespoons of milk (remember we’re saving the rest just in case!), honey or maple syrup, and vanilla extract. Whisk these until you have a smooth, creamy mixture. It should look delicious even on its own!
- Next, you’re going to combine the two. Pour the wet mixture into your bowl of dry ingredients and mix them thoroughly. You might start with a spoon, but I often find that getting in there with clean hands works best to ensure everything is evenly incorporated and to really feel the dough.
- Gently, almost lovingly, fold in the 1/4 cup of mini chocolate chips. We want them spread throughout, so every protein ball gets a perfect chocolatey burst!
- Now, for the “feel” test. If your mixture seems a little too dry or crumbly and isn’t holding together well, go ahead and add the remaining 1 tablespoon of milk, or even a teaspoon at a time if needed, until the dough is slightly sticky but firm enough to roll. Think of perfect cookie dough consistency! If you’re a fan of no-bake treats, you’ll love how forgiving this process is, much like making our easy no-bake caramel pretzel bars!
- Time to roll! Take small portions of the dough and roll them into 1-inch balls. As you finish each one, place it on a parchment-lined plate. This makes cleanup a breeze and prevents sticking.
- Pop that plate of glorious cookie dough balls into the fridge. Let them chill for a minimum of 30 minutes. This step is crucial for helping them firm up and setting their shape before we coat them.
- While your balls are chilling, let’s get that luscious chocolate coating ready! In a microwave-safe bowl, combine the 1 cup of milk chocolate chips and 1 teaspoon of coconut oil. Microwave in 30-second bursts, stirring really well after each interval, until the chocolate is perfectly smooth and glossy. Be patient here; burnt chocolate is no fun!
- Once the balls are chilled and the chocolate is melted, it’s dipping time! Take each protein ball and dip it into the melted chocolate, turning it to get an even coating. Gently tap off any excess chocolate against the side of the bowl.
- Immediately after dipping, sprinkle a few extra mini chocolate chips on top of each coated ball. This not only looks pretty but adds another layer of chocolatey goodness. If you enjoy recipes that allow you to indulge in rich chocolatey flavors, you should definitely try these chocolate chip cookie dough brownie bombs for another treat!
- Finally, place the coated balls back on your parchment-lined plate and return them to the refrigerator for another 15-20 minutes, or until the chocolate coating is completely set and firm to the touch. Then, get ready to enjoy!
Substitutions & Additions
The beauty of these protein balls is how adaptable they are! Feel free to get creative and make them your own.
- Nut Butter Swap: Instead of cashew butter, try peanut butter for a classic peanut butter cookie dough vibe, or sunflower seed butter for a nut-free option.
- Sweetener Alternatives: If you want to cut down on sugar, you can use a sugar-free maple syrup or a few drops of stevia to taste.
- Protein Powder Flavor: Don’t limit yourself to vanilla! Chocolate protein powder would make these incredibly rich, or even a peanut butter flavored one.
- Mix-ins Galore:
- Swap mini chocolate chips for white chocolate chips, butterscotch chips, or even chopped nuts like walnuts or pecans.
- Add a tablespoon of shredded coconut for a tropical twist.
- A sprinkle of cinnamon or a pinch of instant espresso powder can add delightful depth of flavor.
- For a different texture, try adding 2 tablespoons of oats (quick or rolled) to the dough mixture.
- Coating Variations: Instead of a full chocolate dip, you could drizzle the chocolate over the balls or roll them in cocoa powder for a truffle-like finish. Sometimes I just leave them plain for a pure cookie dough experience!
Tips for Success
Even though this recipe is super easy, a few tricks can make them absolutely perfect!
- Don’t Rush the Chill: The initial 30-minute refrigeration step is key. It helps the dough firm up, making the balls easier to roll and ensuring they hold their shape beautifully.
- Texture is Key for Dough: The amount of milk can vary based on your protein powder and nut butter. Add it slowly, a teaspoon at a time, until the dough is just sticky enough to come together but not wet.
- Melt Chocolate Carefully: Overheating chocolate can make it seize and become grainy. Microwave in short bursts and stir frequently. If it’s too thick, add another tiny bit of coconut oil.
- Work Quickly with Chocolate Coating: Once the balls are dipped, immediately add any toppings like extra chocolate chips before the chocolate sets.
- Prep Ahead: These are fantastic for meal prepping! Make a big batch at the beginning of the week, and you’ll have a healthy snack ready to grab whenever you need a boost. It’s a great way to stay on track, just like having healthy protein cinnamon rolls ready for breakfast.
How to Store Chocolate Chip Cookie Dough Protein Balls
These delicious bites keep well, making them perfect for on-the-go snacking!
Store your chocolate chip cookie dough protein balls in an airtight container in the refrigerator for up to 1 week. You can also freeze them for longer storage! Simply place them in a single layer on a parchment-lined tray until solid, then transfer them to a freezer-safe bag or container for up to 1-2 months. Thaw them in the fridge for a few minutes or enjoy them straight from the freezer for a super-chilled treat!
FAQs
Got questions? I’ve got answers!
Q: Can I use a different type of flour?
A: Almond flour and oat flour are my top recommendations for texture and flavor. Other flours might absorb liquid differently, so you might need to adjust the milk content.
Q: Are these suitable for a vegan diet?
A: Absolutely! Just ensure you use a plant-based protein powder, maple syrup instead of honey, and a non-dairy milk. Many chocolate chip brands are also dairy-free, so check your labels!
Q: Why are my protein balls crumbly?
A: They likely need more moisture! Add milk, one teaspoon at a time, until the mixture comes together and is easy to roll without crumbling. Different protein powders and nut butters can affect the dough’s consistency.
Q: Can I skip the chocolate coating?
A: Of course! The cookie dough balls are delicious on their own. The coating is an extra layer of indulgence, but certainly not mandatory.
For more delicious recipes and kitchen inspiration, be sure to follow us on Pinterest!

No-Bake Chocolate Chip Cookie Dough Protein Balls
Ingredients
Equipment
Method
- Step 1: Grab a medium-sized bowl. Into this bowl, whisk together your almond flour, protein powder, and that little pinch of salt. Make sure it's all nicely combined, so there are no powdery surprises later on.
- Step 2: Now, in a separate bowl, stir together your cashew butter, 2 tablespoons of milk, honey or maple syrup, and vanilla extract. Whisk these until you have a smooth, creamy mixture.
- Step 3: Pour the wet mixture into your bowl of dry ingredients and mix them thoroughly. You might start with a spoon, but clean hands often work best to ensure everything is evenly incorporated.
- Step 4: Gently fold in the 1/4 cup of mini chocolate chips, ensuring they are spread throughout for a perfect chocolatey burst in every protein ball!
- Step 5: If your mixture seems a little too dry or crumbly and isn't holding together well, add the remaining 1 tablespoon of milk, or even a teaspoon at a time if needed, until the dough is slightly sticky but firm enough to roll.
- Step 6: Take small portions of the dough and roll them into 1-inch balls. As you finish each one, place it on a parchment-lined plate.
- Step 7: Pop that plate of glorious cookie dough balls into the fridge. Let them chill for a minimum of 30 minutes. This step is crucial for helping them firm up and setting their shape before we coat them.
- Step 8: While your balls are chilling, prepare the chocolate coating. In a microwave-safe bowl, combine the 1 cup of milk chocolate chips and 1 teaspoon of coconut oil. Microwave in 30-second bursts, stirring well after each interval, until the chocolate is perfectly smooth and glossy.
- Step 9: Once the balls are chilled and the chocolate is melted, it’s dipping time! Take each protein ball and dip it into the melted chocolate, turning it to get an even coating. Gently tap off any excess chocolate against the side of the bowl.
- Step 10: Immediately after dipping, sprinkle a few extra mini chocolate chips on top of each coated ball for an extra layer of chocolatey goodness.
- Step 11: Finally, place the coated balls back on your parchment-lined plate and return them to the refrigerator for another 15-20 minutes, or until the chocolate coating is completely set and firm to the touch. Then, get ready to enjoy!