
Oh, my sweet friends, do you remember those days when a simple spoonful of peanut butter was pure joy, or when a creamy, decadent dessert just hit all the right spots? Well, get ready to combine those two glorious feelings because today, we’re diving into something truly special: No-Bake Peanut Butter Cheesecake Bars! This recipe is like a warm hug for your taste buds, bringing back those cozy, comforting vibes without ever needing to turn on your oven. Seriously, if you’re looking for a showstopper dessert that’s ridiculously easy and quick to whip up, you’ve found your new go-to. It’s so simple, you’ll wonder why you haven’t made it every single week! And trust me, if you’re a fan of rich, gooey no-bake chocolate peanut butter bars, you are going to fall head over heels for these cheesecake wonders.
Why You’ll Love No Bake Peanut Butter Cheesecake Bars
- Fast: No oven means no waiting for preheating or baking time!
- Easy: Simple ingredients, straightforward steps, and minimal cleanup.
- Giftable: They cut beautifully into squares, making them perfect for potlucks, parties, or thoughtful edible gifts.
- Crowd-pleasing: Who can resist the magical combination of peanut butter and creamy cheesecake? Absolutely nobody!
Ingredients

Gather ’round, buttercups! Here’s what you’ll need to create this peanut butter paradise. I always recommend getting your cream cheese out of the fridge a little early so it can soften up nicely – it makes a huge difference in getting that super smooth texture!
- 1 ½ cups graham cracker crumbs: The classic foundation for any good no-bake dessert! You can buy them pre-crushed or crush your own.
- 6 tablespoons unsalted butter, melted: This binds our crust together, giving it that perfect buttery richness.
- ¼ cup granulated sugar: Just a touch of sweetness for our humble crust.
- 16 oz cream cheese, softened: The star of our cheesecake! Make sure it’s good and soft for a lump-free filling.
- ¾ cup creamy peanut butter: The hero! Use your favorite creamy variety, not the natural kind that separates, unless you want a different texture.
- 1 cup powdered sugar: Dissolves beautifully into the filling for a silky-smooth finish.
- 1 teaspoon vanilla extract: A splash of warmth to enhance all those lovely flavors.
- 1 cup heavy whipping cream: This is what gives our cheesecake that light, airy, melt-in-your-mouth texture.
- ½ cup semi-sweet chocolate chips (optional, for topping): A fantastic complement to the peanut butter, adding a lovely visual and flavor pop!
How to Make No Bake Peanut Butter Cheesecake Bars
Alright, let’s get those hands (and maybe a mixer!) ready. You’re just a few simple steps away from peanut butter bliss!
- Prepare the Crust: In a large mixing bowl, combine the graham cracker crumbs, melted butter, and granulated sugar. Give it a good mix until everything is fully combined and looks like wet sand. This forms the delightful base of your bars. If you’ve ever made no-bake buckeye graham crackers, you know how satisfying this crumbly stage is!
- Form the Crust: Now, line a 9×9-inch baking pan with parchment paper, leaving a little overhang on the sides – this will be your best friend later for easy lifting! Press the graham cracker mixture firmly and evenly into the bottom of the pan. I like to use the back of a measuring cup or a flat-bottomed glass to really pack it down tightly. Pop that pan into the refrigerator to chill while you prepare the filling.
- Prepare the Cheesecake Base: In another spacious mixing bowl, grab your electric mixer and beat the softened cream cheese until it’s wonderfully smooth and creamy. Next, add in the glorious peanut butter, powdered sugar, and that lovely vanilla extract. Beat it all together until it’s perfectly combined and beautifully fluffy.
- Whip Heavy Cream: In a separate, clean bowl (it’s important for whipping cream!), pour in your cold heavy cream. Whip it with your electric mixer on high speed until stiff peaks form. This means when you lift the beaters, the cream holds its shape and points upwards.
- Fold and Pour Filling: This is where the magic happens! Gently, oh so gently, fold the whipped cream into your peanut butter mixture. Use a spatula and scoop from the bottom, folding it over the top until no white streaks of whipped cream remain. You want to keep that beautiful airy texture you just worked hard to create! Once combined, pour this luscious peanut butter cheesecake filling over your chilled crust, spreading it evenly with a spatula. Smooth the top for a pretty finish.
- Add Topping (Optional): If you’re a chocolate lover like me (and let’s be real, peanut butter and chocolate are soulmates!), now’s the time to sprinkle those semi-sweet chocolate chips over the top of your cheesecake layer. They add a fantastic crunch and extra layer of flavor!
- Chill Until Firm: Cover your pan with plastic wrap and slide it back into the refrigerator. This is the hardest part – waiting! Let those bars chill for at least 4 hours, or even better, overnight, until they are nice and firm. This is crucial for clean slices!
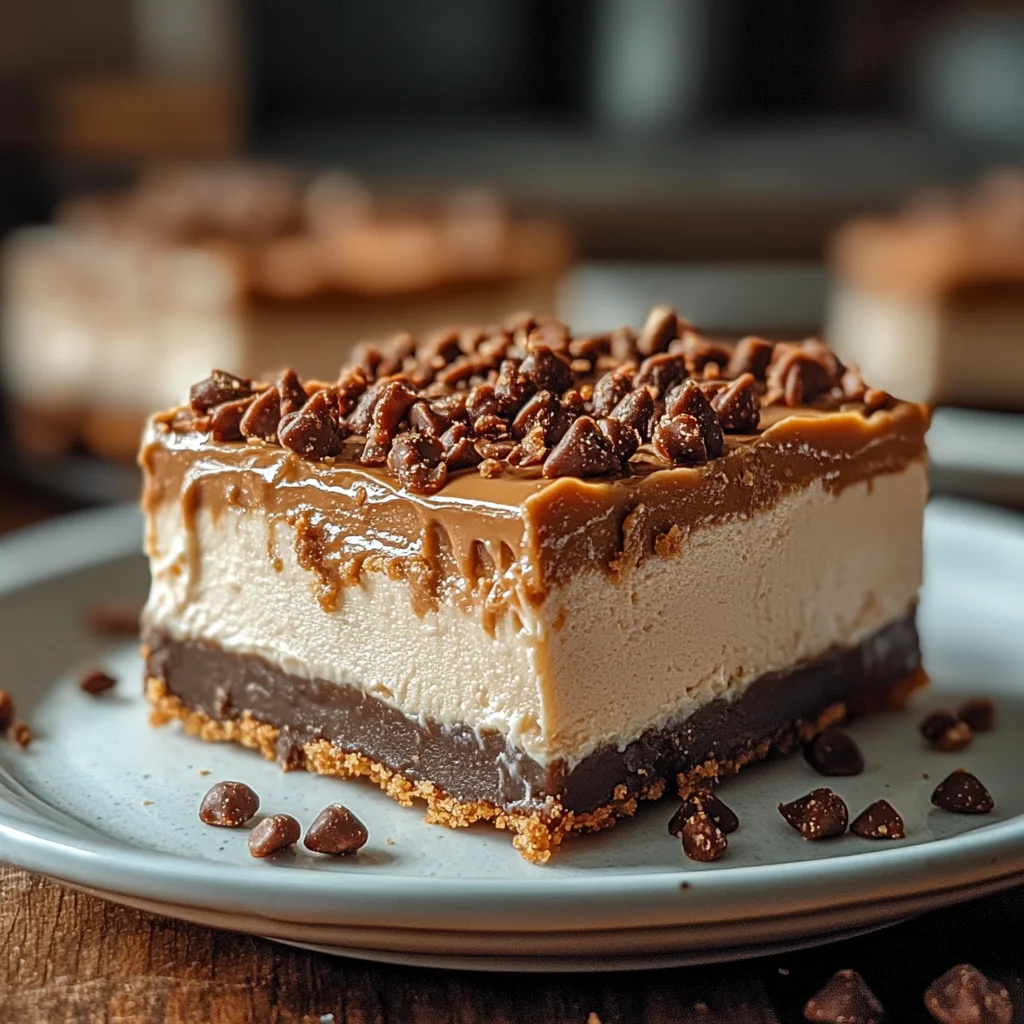
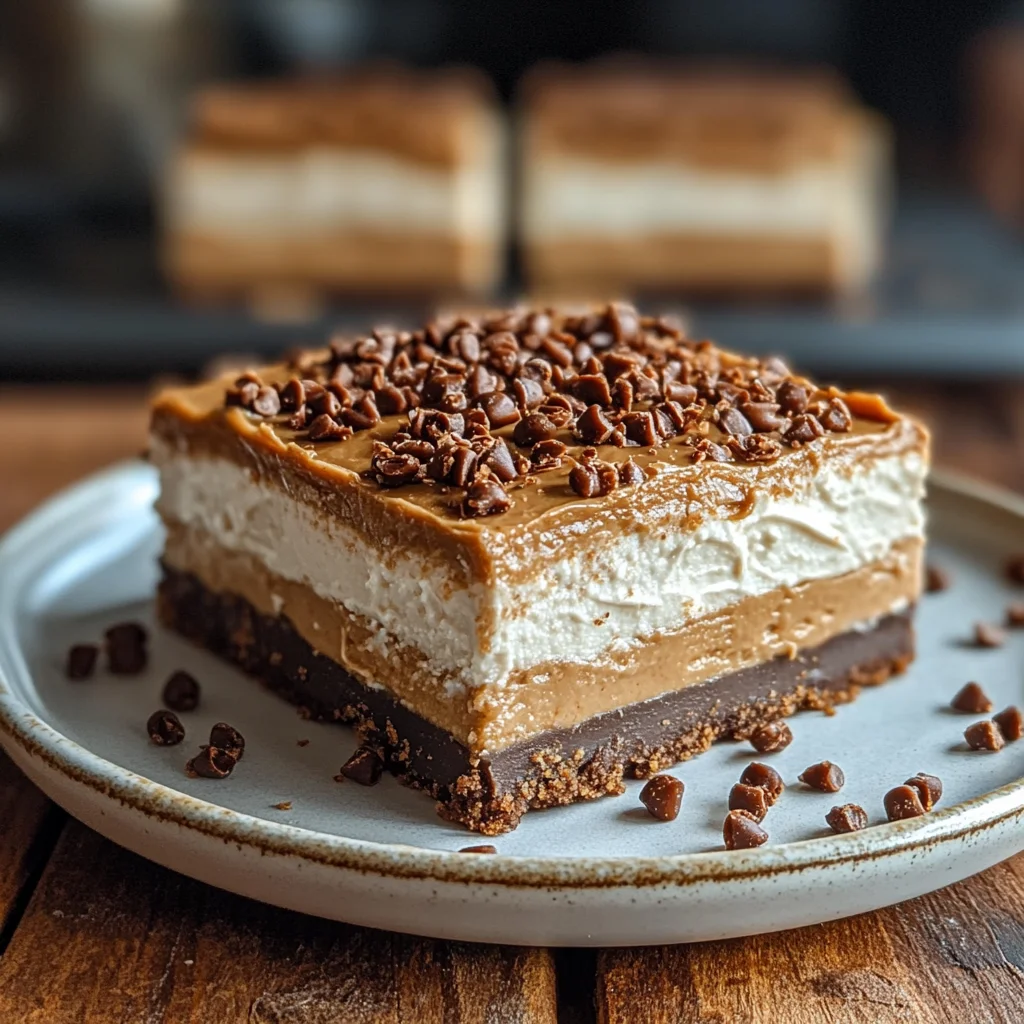
- Slice and Serve: Once completely set, use that handy parchment paper overhang to lift the entire slab of cheesecake out of the pan. Place it on a cutting board, grab a sharp knife (you can run it under hot water and wipe it clean between cuts for extra neat slices!), and cut into perfect squares. Serve chilled and watch them disappear!
Substitutions & Additions
Part of the fun of baking (or no-baking!) is making a recipe your own. Here are some ideas to get your creative juices flowing:
- Crust Variations: Not a graham cracker fan? Try crushed Oreos, Nilla Wafers, or even pretzel crumbs for a salty-sweet twist!
- Peanut Butter Power-Ups: Swirl in some melted chocolate or caramel sauce before chilling for extra decadence. You could also sprinkle chopped Reese’s Peanut Butter Cups or Mini M&M’s on top instead of or in addition to chocolate chips.
- Crunch Factor: Add some chopped roasted peanuts to the filling or sprinkle on top for extra texture.
- Chocolate Drizzle: Instead of chocolate chips, melt some chocolate and drizzle it artfully over the chilled bars just before serving.
- Espresso Kick: A tiny bit of espresso powder (about ½ teaspoon) in the cream cheese mixture can deepen the chocolate and peanut butter flavors without making it taste like coffee.
Tips for Success
- Softened Cream Cheese is Key: I really can’t stress this enough! Cold cream cheese will give you lumpy filling, and nobody wants that. Take it out at least an hour before you start, or gently warm it in the microwave for 10-15 seconds at a time until soft.
- Don’t Overmix the Whipped Cream: Whip it until stiff peaks, but stop there! Over-whipping can turn it grainy.
- Fold Gently: When incorporating the whipped cream, be delicate. This preserves the airiness that makes the cheesecake so light and fluffy.
- Chill Time is Non-Negotiable: Don’t rush it! The longer it chills, the firmer and easier to slice your bars will be. A well-chilled bar holds its shape beautifully. If you’re a fan of other set-up desserts, you know how important this step is, just like with our Giant No-Bake Reese’s Peanut Butter Pie.
- Clean Slices: For super neat squares, use a sharp knife and wipe it clean between each cut.
- Prep Ahead: These bars are ideal for making a day in advance! They often taste even better after a full night in the fridge, giving the flavors time to meld.
How to Store No Bake Peanut Butter Cheesecake Bars
Once you’ve made these delicious bars, you’ll want to keep them fresh and ready for snacking!
Store your No-Bake Peanut Butter Cheesecake Bars in an airtight container in the refrigerator for up to 5 days. For longer storage, you can freeze them! Cut the bars into individual portions, wrap each tightly in plastic wrap, and then place them in a freezer-safe bag or container. They’ll keep well in the freezer for up to 1 month. Thaw them in the refrigerator for a few hours before serving.
FAQs
Here are a few common questions I get about these delightful bars:
Can I use natural peanut butter?
I don’t recommend natural peanut butter for this recipe because its consistency is usually much thinner and more oily, which can affect the set and texture of the cheesecake filling. Stick to creamy, processed peanut butter like Jif or Skippy for the best results.
Do I have to line the pan with parchment paper?
While you don’t have to, I highly recommend it! It makes lifting the whole slab out of the pan incredibly easy, allowing for clean, perfect cuts without damaging the crust or sides. If you don’t use parchment, you might need to run a knife around the edges to loosen before slicing.
Can I make these in a different sized pan?
A 9×13-inch pan would work, but your bars will be thinner. If you opt for a larger pan, you might want to increase the ingredients by about 1.5 times to maintain a good thickness, especially for the filling.
For more sweet and savory recipes, be sure to follow us on Pinterest!
Heavenly No-Bake Peanut Butter Cheesecake Bars: Your Easiest Dream Dessert!
Ingredients
Equipment
Method
- Step 1: Prepare the Crust: In a large mixing bowl, combine the graham cracker crumbs, melted butter, and granulated sugar. Mix until everything is fully combined and looks like wet sand.
- Step 2: Form the Crust: Line a 9x9-inch baking pan with parchment paper, leaving a little overhang on the sides. Press the graham cracker mixture firmly and evenly into the bottom of the pan. Use the back of a measuring cup or a flat-bottomed glass to really pack it down tightly. Pop that pan into the refrigerator to chill while you prepare the filling.
- Step 3: Prepare the Cheesecake Base: In another spacious mixing bowl, beat the softened cream cheese with an electric mixer until it’s wonderfully smooth and creamy. Next, add in the peanut butter, powdered sugar, and vanilla extract. Beat it all together until it's perfectly combined and beautifully fluffy.
- Step 4: Whip Heavy Cream: In a separate, clean bowl, pour in cold heavy cream. Whip it with your electric mixer on high speed until stiff peaks form. This means when you lift the beaters, the cream holds its shape and points upwards.
- Step 5: Fold and Pour Filling: Gently fold the whipped cream into your peanut butter mixture. Use a spatula and scoop from the bottom, folding it over the top until no white streaks of whipped cream remain. Once combined, pour this luscious peanut butter cheesecake filling over your chilled crust, spreading it evenly with a spatula. Smooth the top for a pretty finish.
- Step 6: Add Topping (Optional): If you’re a chocolate lover, now's the time to sprinkle those semi-sweet chocolate chips over the top of your cheesecake layer.
- Step 7: Chill Until Firm: Cover your pan with plastic wrap and slide it back into the refrigerator. Let those bars chill for at least 4 hours, or even better, overnight, until they are nice and firm. This is crucial for clean slices!
- Step 8: Slice and Serve: Once completely set, use that handy parchment paper overhang to lift the entire slab of cheesecake out of the pan. Place it on a cutting board, grab a sharp knife (you can run it under hot water and wipe it clean between cuts for extra neat slices!), and cut into perfect squares. Serve chilled and watch them disappear!


