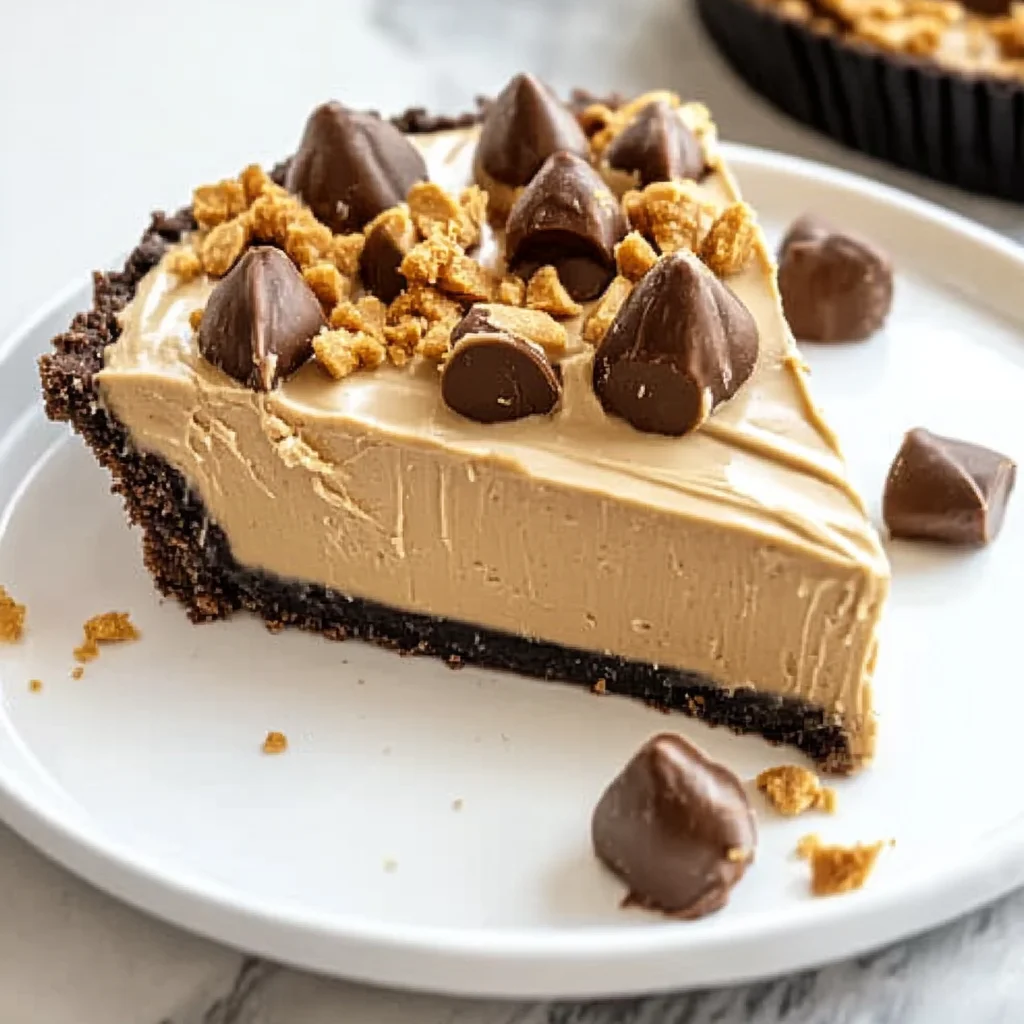
Oh, friend, do you ever get that craving? That deep, delicious longing for something sweet, something rich, something that just melts in your mouth and makes all your worries float away? But then, the thought of turning on the oven, waiting for things to bake, and dealing with a sink full of dishes just makes you sigh. I totally get it! That’s exactly why this No-Bake Peanut Butter Pie has become a staple in my kitchen, and soon, it’ll be in yours too.
This pie isn’t just a dessert; it’s a little slice of heaven that whisks me back to childhood summers, to potlucks, and to those impromptu get-togethers where a quick, crowd-pleasing treat was always needed. It’s so incredibly easy, wonderfully quick to assemble, and the creamy, dreamy peanut butter filling nestled in a chocolatey crust is pure bliss. Seriously, it’s memorable, effortlessly delicious, and will have everyone asking for the recipe. And for even more delicious ideas and inspiration for every meal, make sure to pop over to Easily Cooked!
Why You’ll Love No Bake Peanut Butter Pie
- Fast: Seriously, hands-on time is minimal! You’ll be done mixing before your coffee cools.
- Easy: No oven required! Just a few simple ingredients and a mixer.
- Giftable: Perfect for sharing with neighbors, bringing to a party, or brightening someone’s day.
- Crowd-pleasing: Who doesn’t love peanut butter and chocolate? This combo is always a winner!
Ingredients
Gather your simple treasures, friends. Here’s what you’ll need to create this masterpiece:
- 8 ounces (225 g) cream cheese, softened to room temperature: This is our secret weapon for a rich, smooth, and utterly delightful pie filling. Make sure it’s really soft, or you’ll have lumps!
- 1 ¼ cups (660 g) creamy peanut butter, divided: The star of our show! I prefer creamy for that silky texture, but feel free to get adventurous. We’ll use most for the filling and a little bit for a dreamy drizzle on top.
- ¾ cup (90 g) powdered sugar: Also known as confectioners’ sugar. It dissolves beautifully, ensuring a smooth, sweet filling without any grainy bits.
- 8 ounces (750 ml) whipped topping, thawed: Like Cool Whip. This lightens the filling, giving it that airy, fluffy texture we all adore. Don’t forget to thaw it completely in the fridge before you start.
- 1 9-inch chocolate graham cracker crust: You can totally grab a store-bought one – no judgment here! It’s all about ease, right? But if you’re feeling fancy, a homemade chocolate graham crust is always a treat.
- 1 cup mini peanut butter cups, chopped (optional): Oh, these are the crown jewels! They add extra peanut butter goodness and a lovely texture.
How to Make No Bake Peanut Butter Pie
Alright, let’s get cooking (or, rather, not cooking)! Follow these simple steps for peanut butter pie perfection:
- Cream it up: Grab that big bowl and your electric mixer. Toss in the softened cream cheese, 1 cup of that glorious creamy peanut butter, and the powdered sugar. Beat them together until the mixture is beautifully smooth and creamy. No lumps allowed! This is the base for our dreamy filling.
- Lighten the load: Now for the magic! Gently, oh so gently, fold the thawed whipped topping into your peanut butter mixture. You want to combine it fully, but be careful not to overmix, as we want to keep that light, airy texture. Use a spatula for this part; it’s a labor of love!
- Into the crust: Carefully spoon this delightful mixture into your chocolate graham cracker crust. Take your time to spread it evenly with a spatula, making sure the top is nice and smooth. It’s starting to look like a real pie, isn’t it?
- Chill out: Into the fridge it goes! This is the hardest part – the waiting game. Refrigerate your pie for at least 4 hours, but honestly, overnight is even better if you can swing it. It needs this time to firm up and let all those amazing flavors meld together.
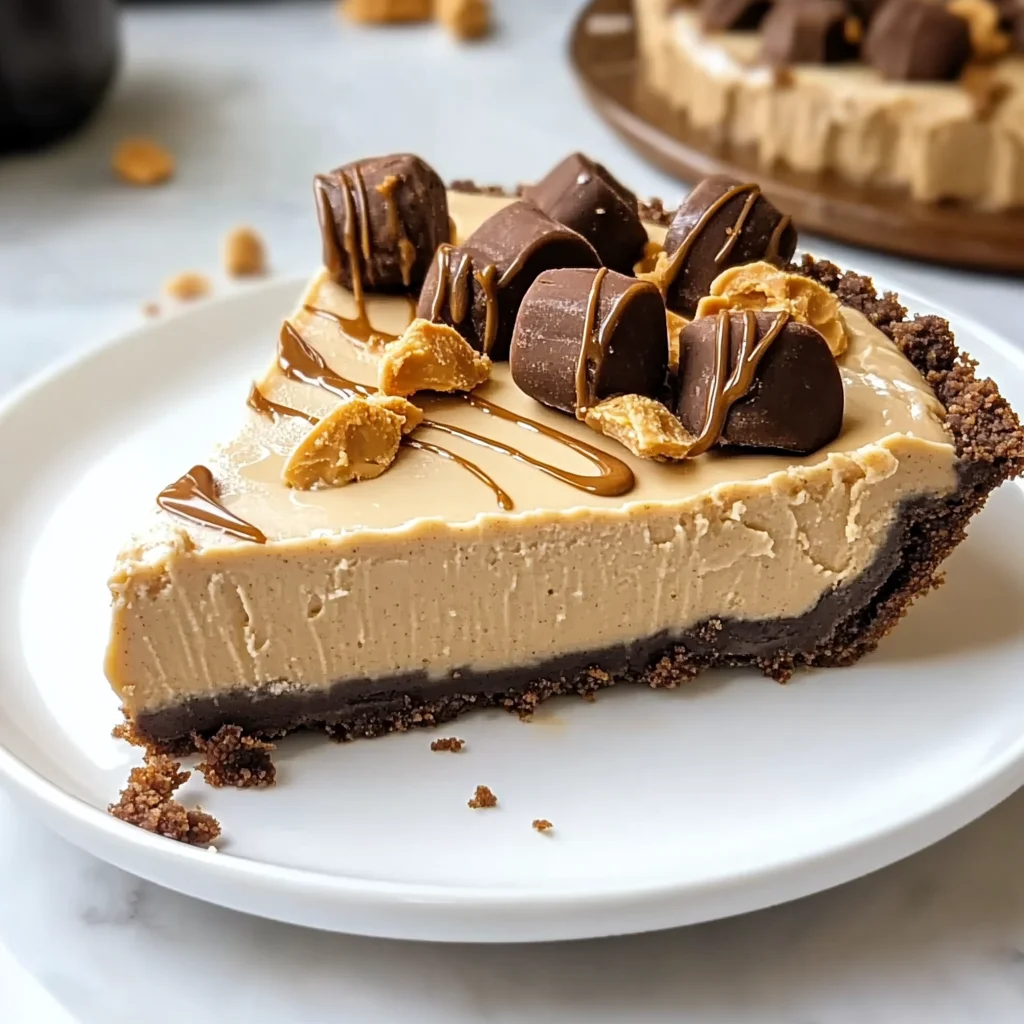
- The grand finale: When it’s time to shine, pull your pie out of the fridge. Sprinkle generously with those chopped mini peanut butter cups. For an extra touch, melt the remaining ¼ cup of peanut butter slightly (a quick zap in the microwave will do!) and drizzle it artfully over the top. Now, slice, serve, and bask in the glory!
Substitutions & Additions
This pie is super flexible! Here are some ideas to make it uniquely yours:
- Crust Variations: Not a chocolate graham cracker fan? No problem! Try an Oreo crust for a double chocolate punch, a Nilla wafer crust for a classic vanilla hint, or even a simple graham cracker crust.
- Peanut Butter Power: While I recommend creamy, if you love a bit of crunch, go for crunchy peanut butter! Just be aware the texture of the filling will be different. You can also experiment with different nut butters if allergies aren’t a concern.
- Homemade Whipped Cream: If you’re feeling ambitious, you can definitely use homemade whipped cream instead of store-bought whipped topping. Just make sure it’s stabilized or it might deflate a bit.
- Topping Extravaganza: Beyond mini peanut butter cups, consider drizzling with chocolate syrup, sprinkling with chopped roasted peanuts, adding Reese’s Pieces, or even some chocolate shavings. A tiny sprinkle of flaky sea salt on top can really enhance the flavors!
- Hidden Layers: For an extra surprise, spread a thin layer of melted chocolate or chocolate ganache on the bottom of the crust before adding the peanut butter filling. If you’re a fan of no-bake treats, you might also love my recipe for No-Bake Chocolate Peanut Butter Bars, which shares that same effortless deliciousness.
Tips for Success
Want to make sure your No-Bake Peanut Butter Pie turns out perfect every single time? Here are my go-to tips:
- Room Temperature Cream Cheese is CRUCIAL: I can’t stress this enough! If your cream cheese isn’t soft, you’ll end up with lumps, and nobody wants lumpy pie. Take it out of the fridge at least an hour before you start.
- Don’t Overmix the Whipped Topping: When folding in the whipped topping, be gentle. Overmixing can cause it to lose its airiness, making your pie denser than desired. We want light and fluffy!
- Chill Time is Non-Negotiable: I know, I know, it’s hard to wait! But that 4-hour (or overnight) chill time is essential for the pie to set properly. If you cut into it too soon, it might be a bit too soft. Patience is a virtue, especially in no-bake desserts!
- For Clean Slices: To get those picture-perfect slices, run your knife under hot water, wipe it clean, and then make your cut. Repeat for each slice. It makes all the difference!
- Prep Ahead Magic: This pie is an absolute dream for making ahead. It actually tastes even better the next day once all the flavors have had a chance to mingle and deepen. It’s perfect for parties, holidays, or just a busy weeknight treat. For another classic dessert that’s always a hit, whether baked or served alongside this no-bake wonder, why not try our recipe for The Ultimate Classic Carrot Cake?
How to Store No Bake Peanut Butter Pie
Once you’ve indulged, you might (just might) have leftovers. Here’s how to keep them fresh:
- In the Refrigerator: Cover the pie tightly with plastic wrap or aluminum foil. It will stay wonderfully fresh in the fridge for 3-5 days. The longer it sits, the softer the crust might get, but the filling will remain delicious!
- In the Freezer: Yes, you can freeze this pie! Wrap it tightly in plastic wrap, then an additional layer of aluminum foil. It will keep well in the freezer for up to a month. When you’re ready to enjoy, thaw it in the refrigerator overnight or for a few hours on the counter until it’s easy to slice.
FAQs
Q: Can I use natural peanut butter for this recipe?
A: You can, but it might change the texture slightly. Natural peanut butter tends to be a bit thinner and can separate, so make sure it’s very well stirred before using. The pie might be a little less firm.
Q: Do I really need to soften the cream cheese?
A: Absolutely! Softened cream cheese ensures a smooth, lump-free filling. If it’s cold, it won’t blend properly and you’ll end up with a chunky texture.
Q: My pie didn’t set completely, what went wrong?
A: The most common reason is not enough chilling time. Make sure it gets at least 4 hours, and preferably overnight, in the refrigerator. Also, ensure your whipped topping was fully thawed but still cold when folded in.
Q: Can I make individual mini peanut butter pies?
A: Yes! You can use mini graham cracker crusts or press a mixture of graham cracker crumbs and melted butter into muffin tins. Adjust the chilling time accordingly.
For more delicious and easy recipes, be sure to follow us on Pinterest!

The Ultimate No-Bake Peanut Butter Pie
Ingredients
Equipment
Method
- Step 1: Cream it up. In a large bowl, using an electric mixer, beat the softened cream cheese, 1 cup of creamy peanut butter, and powdered sugar until the mixture is smooth and creamy with no lumps. This forms the base of the filling.
- Step 2: Lighten the load. Gently fold the thawed whipped topping into the peanut butter mixture using a spatula. Combine fully, being careful not to overmix, to maintain a light and airy texture.
- Step 3: Into the crust. Carefully spoon the delightful mixture into the chocolate graham cracker crust. Spread it evenly with a spatula, ensuring the top is smooth.
- Step 4: Chill out. Refrigerate the pie for at least 4 hours, but ideally overnight. This essential chill time allows the pie to firm up and the flavors to meld together.
- Step 5: The grand finale. When ready to serve, remove the pie from the fridge. Sprinkle generously with the chopped mini peanut butter cups. For an extra touch, melt the remaining ¼ cup of peanut butter slightly (e.g., in a microwave) and artfully drizzle it over the top. Slice, serve, and enjoy!