
Oh, honey, do you remember those magical moments around the holidays? The cozy warmth of the kitchen, the twinkling lights, and that unmistakable scent of peppermint wafting through the air? For me, there’s something truly special about a treat that feels both festive and utterly effortless, something that brings back all those sweet childhood memories.
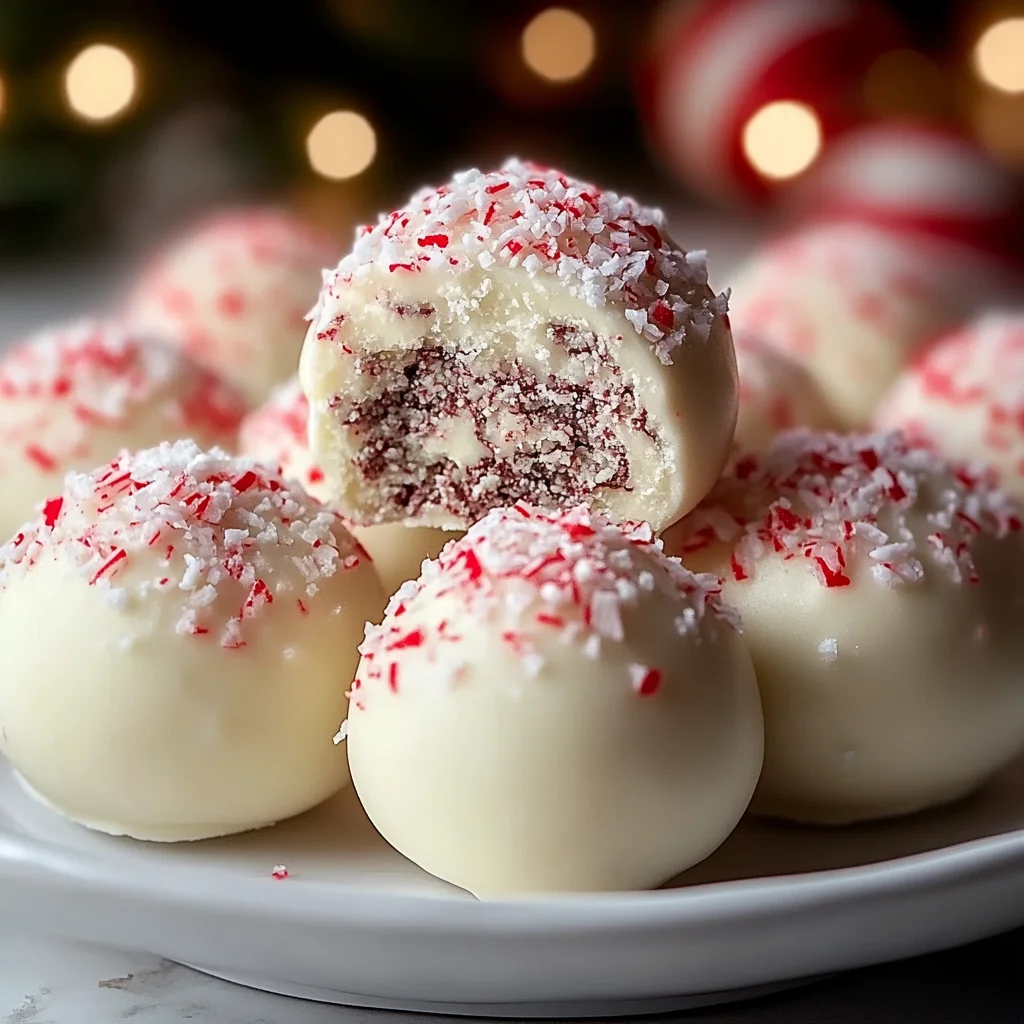
Well, get ready, because these No-Bake Peppermint Bark Snowballs are about to become your new favorite holiday tradition! They’re ridiculously easy, super quick to whip up, and bring all that joyful, minty magic without ever needing to turn on your oven. Seriously, if you can stir and roll, you can make these! They’re the kind of memorable dessert that disappears from the plate faster than you can say “Happy Holidays!” Plus, if you’re a fan of simple, delightful desserts that come together in a flash, you’ll absolutely love how quick and easy this recipe is, just like our No-Bake Chocolate Lasagna!
Why You’ll Love No-Bake Peppermint Bark Snowballs
- Fast: Ready in no time, perfect for last-minute gatherings.
- Easy: No baking required, minimal steps, maximum flavor.
- Giftable: Pack them in cute tins for thoughtful homemade presents.
- Crowd-pleasing: A universally loved flavor combo that disappears quickly!
Ingredients
- 1½ cups crushed chocolate sandwich cookies: Think classic Oreos, but any chocolate sandwich cookie will do! They create the rich, dark base for our snowballs. Just pulse them in a food processor until they’re fine crumbs.
- 1 cup powdered sugar: This fine sugar blends beautifully, adding sweetness without any graininess, and helps keep our snowballs perfectly smooth.
- 1 cup cream cheese, softened: The magical ingredient that brings everything together into a soft, pliable, and utterly delicious dough. Make sure it’s at room temperature for easy mixing!
- 1 teaspoon peppermint extract: This is where the holiday cheer comes in! A little goes a long way to give that iconic cool, minty flavor.
- 1½ cups white chocolate chips: For that beautiful, crisp outer shell that perfectly complements the peppermint. I always recommend using a good quality brand for the best melting and setting results.
- ½ cup crushed peppermint candies or candy canes: The vibrant, festive topping that screams “peppermint bark!” Crushing them beforehand makes for an easy sprinkle.
How to Make No-Bake Peppermint Bark Snowballs
Alright, let’s get those hands a little messy (the best kind of messy!) and whip up some holiday joy!
- Mix Your Base: Grab your biggest mixing bowl and combine the crushed chocolate sandwich cookies, powdered sugar, softened cream cheese, and peppermint extract. Dive in with a sturdy spoon or even your hands (wearing gloves can help if you don’t want sticky fingers!). Stir until the mixture is smooth and fully combined. It should be firm enough to roll but still pliable. This is the heart of your snowball!
- Roll & Chill: Now for the fun part! Scoop the mixture into approximately 1-inch balls. I find a small cookie scoop works wonders for consistency, but a tablespoon is just fine too. Roll them gently between your palms until they’re nice and round. Arrange these little beauties on a parchment-lined baking sheet. Pop them into the freezer for 15 to 20 minutes to firm up. This quick chill makes them much easier to dip! While you’re enjoying the simplicity of no-bake treats, you might also like to try our classic No-Bake Oreo Bars for another easy win!
- Melt the Chocolate: While your snowballs are chilling, it’s time to prepare your luscious white chocolate coating. Place the white chocolate chips in a microwave-safe bowl. Heat them in 20-second intervals, stirring thoroughly after each burst, until the chocolate is completely smooth and glossy. Be patient and don’t rush this step – burnt chocolate is no fun!
- Dip & Coat: Take your chilled snowballs out of the freezer. One by one, dip each snowball into the melted white chocolate, rolling it around until it’s thoroughly coated. A fork or a dipping tool works great for this. Let any excess chocolate drip off, then return the coated balls to your parchment-lined baking sheet.
- Sprinkle the Sparkle: This next step needs to happen quickly! Before the white chocolate sets, sprinkle those vibrant crushed peppermint candies or candy canes generously over each snowball. The chocolate will still be tacky enough to grab onto all those festive bits.
- Set & Serve: Once all your snowballs are dipped and sprinkled, gently transfer the baking sheet back to the refrigerator. Let them chill for at least 30 minutes, or until the chocolate coating hardens completely. I know it’s hard to wait, but trust me, it’s worth it for that perfect crunch! Once set, they’re ready to serve and impress! And if you’re looking for another show-stopping holiday dessert that’s surprisingly easy, our Holiday Eggnog Pie is always a hit!
Substitutions & Additions
These snowballs are super versatile! Here are a few ideas to get your creative juices flowing:
- Chocolate Swap: Not a white chocolate fan? You can easily use dark chocolate chips or milk chocolate chips for coating. The peppermint-chocolate combo is classic either way!
- Different Cookies: While chocolate sandwich cookies are traditional, you could try vanilla wafers, graham crackers, or even gingersnaps for a different flavor profile.
- Extract Variations: Instead of peppermint, try a hint of almond extract or even vanilla extract for a more subtle flavor.
- Fun Toppings: Beyond peppermint, consider rolling them in cocoa powder for a “dirt snowball” look, sprinkles for extra festivity, finely crushed nuts, or even a drizzle of melted dark chocolate.
- Extra Crunch: For a delightful texture, you could add a tablespoon or two of mini chocolate chips or finely chopped nuts directly into the cookie base mixture before rolling.
Tips for Success
- Softened Cream Cheese is Key: I can’t stress this enough! If your cream cheese isn’t soft, you’ll end up with a lumpy base. Take it out of the fridge at least 30 minutes before you start.
- Don’t Over-Process Cookies: You want fine crumbs, not a paste. If using a food processor, pulse until uniform but avoid over-processing.
- Chill Time Matters: Don’t skip the initial freezing step! It ensures your snowballs hold their shape when dipped and prevents them from falling apart in the warm chocolate.
- Melt Chocolate Carefully: White chocolate can seize easily if overheated or if it comes into contact with water. Use short microwave intervals and stir, stir, stir! If it gets too thick, add a tiny bit of coconut oil or shortening (about ½ teaspoon) to thin it out.
- Sprinkle Quickly: Have your crushed peppermints ready to go as soon as you dip the snowballs. The chocolate sets fast, especially on chilled balls.
- Prep Ahead: You can make the cookie balls and freeze them solid days in advance. Then, when you’re ready, just melt the chocolate, dip, decorate, and chill!
How to Store No-Bake Peppermint Bark Snowballs
These delightful little treats need to stay cool to maintain their perfect texture and set chocolate coating.
- Refrigeration: Store your No-Bake Peppermint Bark Snowballs in an airtight container in the refrigerator for up to 1 week. Stack them gently with parchment paper between layers to prevent sticking.
- Freezing: For longer storage, you can freeze them! Place the set snowballs in a single layer on a parchment-lined baking sheet and freeze until solid (about 1-2 hours). Once frozen, transfer them to a freezer-safe airtight container or freezer bag. They’ll keep well in the freezer for up to 1 month. Thaw them in the refrigerator for a few hours before serving.
FAQs
Got questions? I’ve got answers!
Q: Can I use different types of chocolate for the coating?
A: Absolutely! While white chocolate gives that classic “snowball” look, dark or milk chocolate would be delicious too, creating a reverse peppermint bark effect!
Q: My chocolate mixture is too thick for dipping, what can I do?
A: If your melted chocolate seems too thick, you can stir in about ½ to 1 teaspoon of coconut oil or vegetable shortening until it reaches a smoother, more dippable consistency. Be careful not to add too much, though!
Q: Can I make these without the peppermint extract?
A: You can, but then they won’t really be “peppermint bark” snowballs! They’ll still be delicious chocolate cookie balls, but without that signature minty kick. You could add vanilla extract instead for a classic chocolate-vanilla flavor.
Q: How far in advance can I make these for a party?
A: These are fantastic for making ahead! You can prepare them up to 3-4 days in advance and keep them stored in an airtight container in the refrigerator. They actually taste even better after a day or so, as the flavors meld!
For more delicious recipes and kitchen inspiration, be sure to follow us on Pinterest!

Easy No-Bake Peppermint Bark Snowballs
Ingredients
Equipment
Method
- Step 1: In a large mixing bowl, combine crushed chocolate sandwich cookies, powdered sugar, softened cream cheese, and peppermint extract. Stir with a sturdy spoon or your hands until smooth and fully combined. The mixture should be firm enough to roll but pliable.
- Step 2: Scoop the mixture into approximately 1-inch balls. Roll gently between your palms until round. Arrange on a parchment-lined baking sheet and freeze for 15 to 20 minutes to firm up. This quick chill makes them much easier to dip.
- Step 3: While snowballs chill, place white chocolate chips in a microwave-safe bowl. Heat in 20-second intervals, stirring thoroughly after each burst, until completely smooth and glossy. Be patient to avoid burning the chocolate.
- Step 4: Remove chilled snowballs from the freezer. One by one, dip each snowball into the melted white chocolate, coating it thoroughly. Let excess chocolate drip off, then return to the parchment-lined baking sheet.
- Step 5: Immediately sprinkle crushed peppermint candies or candy canes generously over each white chocolate-coated snowball before the chocolate sets. The chocolate will still be tacky enough to grab onto the festive bits.
- Step 6: Transfer the baking sheet back to the refrigerator. Chill for at least 30 minutes, or until the chocolate coating hardens completely. Once set, they're ready to serve and impress!
Notes
- Chocolate Swap: Use dark chocolate chips or milk chocolate chips for coating instead of white chocolate.
- Different Cookies: Try vanilla wafers, graham crackers, or gingersnaps for the base.
- Extract Variations: Substitute peppermint with almond or vanilla extract for a different flavor profile.
- Fun Toppings: Roll in cocoa powder, sprinkles, finely crushed nuts, or drizzle with melted dark chocolate.
- Extra Crunch: Add 1-2 tablespoons of mini chocolate chips or finely chopped nuts into the cookie base mixture.
- Softened Cream Cheese: Ensure cream cheese is at room temperature for a smooth base.
- Cookie Crumbs: Process cookies to fine crumbs, avoiding a paste.
- Chill Time: Do not skip the initial freezing step; it helps snowballs hold their shape.
- Melt Chocolate Carefully: Heat white chocolate in short intervals, stirring frequently, to prevent seizing. If too thick, add ½-1 teaspoon coconut oil or shortening.
- Sprinkle Quickly: Have crushed peppermints ready as the chocolate sets fast on chilled balls.
- Prep Ahead: Cookie balls can be frozen days in advance.
- Refrigeration: Store in an airtight container in the refrigerator for up to 1 week. Place parchment paper between layers to prevent sticking.
- Freezing: Freeze set snowballs in a single layer for 1-2 hours, then transfer to a freezer-safe airtight container or bag for up to 1 month. Thaw in the refrigerator for a few hours before serving.