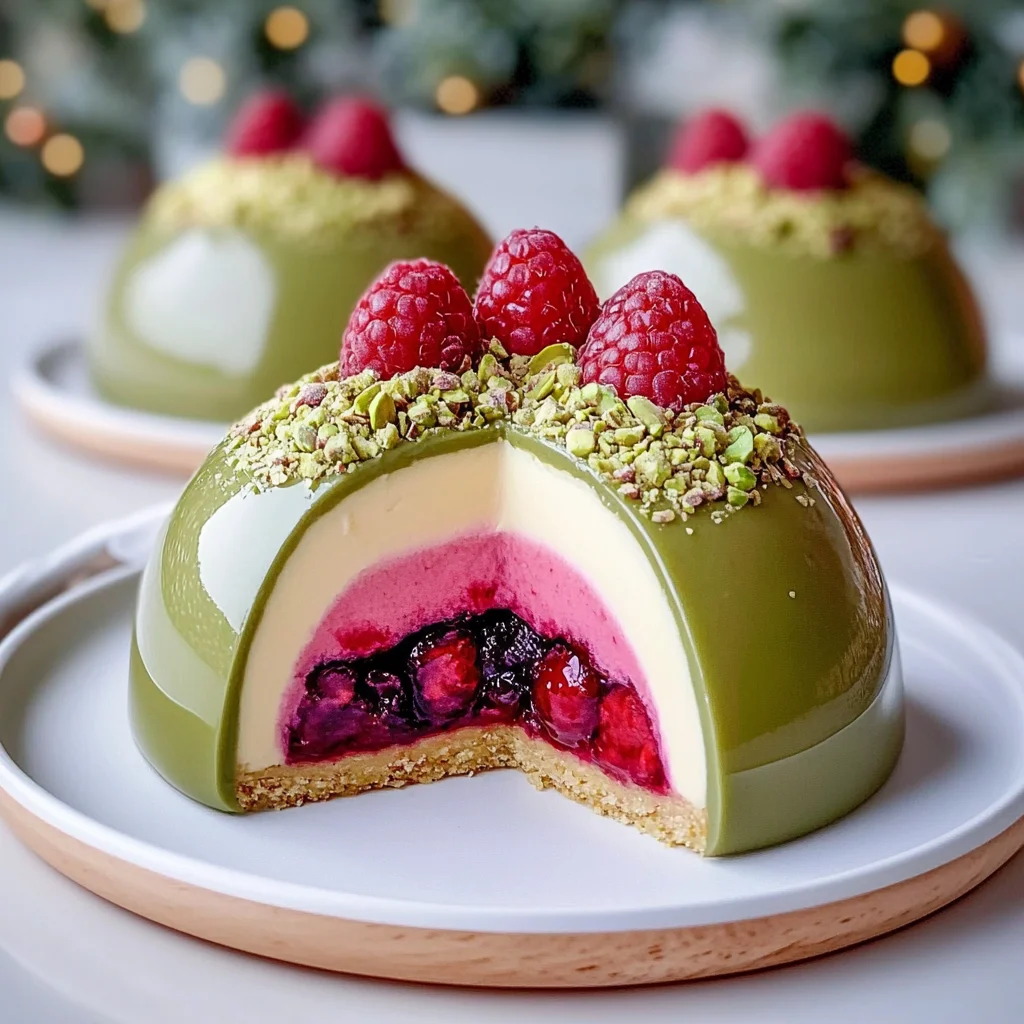
There’s something truly magical about desserts that bring a little surprise with every bite, isn’t there? I still remember the first time I made these Pistachio Cheesecake Domes with Raspberry Surprise—they looked like elegant little gems, perfect for special occasions or simply treating yourself after a long day. The creamy pistachio cheesecake paired with a tart raspberry center, all encased in a glossy green mirror glaze, makes for a show-stopping dessert that’s surprisingly simple to whip up. Whether you’re a seasoned baker or just love easy, no-fuss recipes, this one will quickly become a favorite in your kitchen.
What I love most about this recipe is how it combines nostalgic flavors with a modern twist. The buttery cookie crust brings that classic cheesecake base we all adore, while the raspberry “surprise” tucked inside adds a burst of freshness. Plus, the vibrant green glaze makes these little domes pop on any dessert table. If you’re looking for a memorable treat that’s both quick and impressive, you’re in the right place!
Why You’ll Love Pistachio Cheesecake Domes with Raspberry Surprise
- Fast: With no baking required, you can get these ready in less than an hour of active prep time.
- Easy: Simple ingredients and straightforward steps make this recipe perfect for beginners.
- Giftable: These domes look so beautiful that they make wonderful homemade gifts for friends and family.
- Crowd-pleasing: The combination of creamy, crunchy, and fruity flavors delights all palates.
Ingredients
Before you dive into making these cheesecake domes, let’s take a look at the ingredients. Each component plays a special role in creating this layered dessert experience.
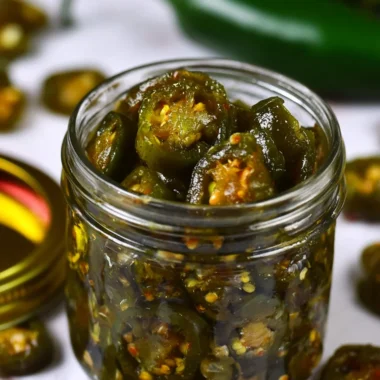
- Crust: 100 g digestive or graham crackers, finely crushed — these form the base and add a lovely crunch and buttery flavor. I find digestive crackers give a slightly less sweet, more traditional taste, but graham crackers work beautifully too.
- Unsalted butter: 50 g, melted — binds the crushed crackers together and gives that rich, buttery crumb.
- Raspberry Center: 150 g frozen raspberries — frozen raspberries are perfect here since they’re easy to work with and keep the center nice and firm once frozen.
- Sugar: 2 tbsp — balances the tartness of the raspberries.
- Lemon juice: 1 tsp — brightens the raspberry flavor and adds freshness.
- Cornstarch: 1 tbsp — thickens the raspberry mixture so it sets well inside the domes.
- Water: 1 tbsp — used to create the cornstarch slurry.
- Cheesecake Layer: 250 g cream cheese, softened — the rich and creamy base of your cheesecake.
- Heavy cream: 200 ml — whipped to soft peaks for a light and airy texture.
- White chocolate: 70 g, melted and slightly cooled — adds a subtle sweetness and smoothness to the cheesecake.
- Powdered sugar: 50 g — for sweetness and smooth texture.
- Vanilla extract: 1 tsp — enhances the overall flavor with warmth.
- Gelatin: 4 g, soaked in 2 tbsp water — helps the cheesecake layer hold its shape without baking.
- Mirror Glaze: 150 g white chocolate, finely chopped — the glossy, shiny finish that makes these domes look like little works of art.
- Condensed milk: 100 ml — adds creaminess and depth to the glaze.
- Water: 100 ml — used to dissolve sugar and gelatin.
- Sugar: 100 g — sweetens the glaze.
- Gelatin: 6 g, soaked in 2 tbsp water — for that smooth, set glaze.
- Green gel food coloring: just a few drops — to tint the glaze that signature pistachio green.
- Topping: 40 g pistachios, finely chopped — for crunch and visual appeal.
- Fresh raspberries: 6 — for a burst of color and fresh flavor on top.
How to Make Pistachio Cheesecake Domes with Raspberry Surprise
Making these domes is like assembling a little masterpiece. I love how each layer comes together to create a dessert that’s as beautiful as it is delicious. Here’s how you can make them step-by-step:
Step 1: Prepare the Raspberry Center
Start by combining the frozen raspberries, sugar, and lemon juice in a saucepan over medium heat. Stir gently as the raspberries soften and release their juices, letting the mixture bubble lightly. This is the moment the kitchen starts to smell amazing! Next, mix the cornstarch with water to form a smooth slurry, then add it to the raspberry mixture. Cook for another 1–2 minutes until it thickens to a jam-like consistency. Pour this mixture into silicone dome molds or small half-sphere molds and pop them into the freezer until completely solid. I like to do this part first because it gives the raspberry centers plenty of time to set while you prep the rest.
Step 2: Make the Crust
While the raspberry centers are freezing, mix the crushed digestive or graham crackers with the melted butter until the crumbs are evenly coated. Press this mixture firmly into the base of your dome molds to form a solid crust. Pop them into the fridge to chill and firm up as you move on.
Step 3: Prepare the Cheesecake Layer
Soak the gelatin for the cheesecake layer in water for about 5 minutes, allowing it to bloom. Meanwhile, beat the softened cream cheese with powdered sugar and vanilla extract until the mixture is silky smooth. Then gently fold in the melted white chocolate, being careful not to deflate the mixture.
Heat the bloomed gelatin gently until fully dissolved—do this in short bursts in the microwave or over a double boiler. Add the dissolved gelatin into the cheesecake mixture and stir well to combine.
Next, whip the heavy cream to soft peaks. This makes the cheesecake layer light and airy, which I love because it balances the richness of the cream cheese and white chocolate. Gently fold the whipped cream into the cheesecake mixture, maintaining as much airiness as possible.
Step 4: Assemble the Domes
Now comes the fun part! Spoon a layer of the cheesecake mixture into your molds, then carefully press a frozen raspberry center into the middle. Cover completely with more cheesecake mixture until the molds are full. Smooth the tops for a nice finish. Freeze the domes until they are firm enough to handle, at least a few hours or overnight for best results.
Step 5: Make the Mirror Glaze
Soak the gelatin for the glaze in water for 5 minutes. In a saucepan, heat the water, sugar, and condensed milk over medium heat until it begins to steam—don’t let it boil. Pour this hot mixture over the finely chopped white chocolate and let it sit for a minute to melt. Add the soaked gelatin and stir or blend until the glaze is perfectly smooth and glossy. Add green gel food coloring a drop at a time until you reach that gorgeous pistachio green shade.
Let the glaze cool to about 32–34°C (90–93°F). This temperature is crucial because if it’s too hot, it will melt your domes; too cool, and it won’t spread smoothly.
Step 6: Glaze and Garnish
Place your frozen domes on a wire rack with a tray underneath to catch drips. Pour the mirror glaze evenly over each dome, letting the excess drip off. The glaze sets quickly and creates that stunning mirror-like finish.
Once glazed, garnish each dome with finely chopped pistachios and a fresh raspberry on top. The pistachios add a lovely texture contrast and highlight the pistachio flavor beautifully.
Chill the domes until you’re ready to serve. These are best enjoyed cold and fresh for that perfect creamy texture with a refreshing raspberry center.
Substitutions & Additions
If you want to get creative or need to tweak the recipe based on what you have on hand, here are some ideas that work well:
- Crust: Swap digestive or graham crackers for finely crushed amaretti biscuits or even pistachio cookies to amp up the nutty flavor.
- Raspberry Center: Fresh raspberries can be used instead of frozen. You could also experiment with other berries like blackberries or a mixed berry blend for a different twist.
- Cheesecake Layer: For a dairy-free option, try using a vegan cream cheese and coconut cream instead of heavy cream. Just note this may affect the texture slightly.
- White Chocolate: You can try swapping white chocolate for milk chocolate for a richer, deeper flavor, though it will change the color of the glaze.
- Mirror Glaze Coloring: If green isn’t your vibe, feel free to use pink or purple gel food coloring for a fun play on colors.
- Extra Garnish: Add edible gold leaf or a sprinkle of crushed pistachio brittle on top for an extra festive touch—perfect if you’re making these for a party.
If you’re intrigued by pistachio desserts, you might also enjoy my pistachio-stuffed chocolate chip cookies recipe—another sweet way to celebrate this lovely nut!
Tips for Success
Making no-bake desserts like these can be wonderfully straightforward, but a few little tips can make your experience even better:
- Use room temperature cream cheese: This makes it so much easier to get a smooth cheesecake mixture without lumps.
- Don’t overmix the whipped cream: Fold gently to keep the batter light and airy, which helps balance the richness.
- Bloom your gelatin properly: Soak gelatin in cold water before heating gently. This prevents clumps and ensures a smooth texture.
- Temperature check for the glaze: Use a kitchen thermometer to cool the glaze to the ideal temperature before pouring, so it sets perfectly without melting the domes.
- Freeze the raspberry centers well: Make sure they’re completely solid before inserting them into the cheesecake mixture to avoid any leaking or mixing.
- Prep ahead: You can prepare the raspberry centers and crust a day in advance and freeze/chill them. This speeds up assembly on the day you want to serve.
- Use silicone molds: They make it so much easier to unmold your domes without damaging their delicate shape.
For more no-bake dessert inspiration, check out these no-bake peanut butter brownie cookies that are just as simple and delicious!
How to Store Pistachio Cheesecake Domes with Raspberry Surprise
Storage is key to keeping these domes fresh and tasting their best. Since they contain dairy and gelatin, refrigeration is essential.
- Refrigerate: Store the domes in an airtight container in the fridge for up to 3 days. Keep them covered to prevent the glaze from drying out or absorbing odors.
- Freeze: You can freeze these domes before glazing for up to 1 month. Just make sure to thaw them in the fridge for several hours before glazing and serving.
- After glazing: Once glazed, keep the domes refrigerated and consume within 24-48 hours for the best texture and flavor.
When serving, let them sit at room temperature for about 10 minutes so they’re not too cold and the flavors can shine. The raspberry surprise inside will remain refreshingly cool and tart.
FAQs
Can I make these cheesecake domes without gelatin?
Gelatin helps the cheesecake and glaze set firmly without baking. If you prefer not to use gelatin, you can try agar-agar as a vegetarian substitute but be sure to follow the package instructions, as it behaves differently.
What if I don’t have silicone dome molds?
You can use small muffin tins lined with plastic wrap or silicone cupcake molds. Just be sure whatever you use can handle freezing and unmolding without breaking the domes.
Can I prepare these domes in advance for a party?
Absolutely! The raspberry centers and crust can be made a day or two ahead, and the cheesecake domes can be frozen before glazing. Just glaze and garnish on the day you want to serve for the freshest look and taste.
How do I get a shiny mirror glaze every time?
The key is temperature control. Make sure the glaze cools to about 32–34°C (90–93°F) before pouring. Use a blender to mix the glaze for a smooth finish, and pour over fully frozen domes to set instantly.
If you enjoy playing with creative desserts, you might also love these easy mini raspberry cheesecake bites—great for when you want similar flavors but in bite-sized form!
These Pistachio Cheesecake Domes with Raspberry Surprise are a wonderful way to impress guests or indulge yourself with a treat that feels fancy without the fuss. I hope you’ll have as much fun making and eating them as I do. Happy baking (or rather, assembling)!
For more recipes and kitchen inspiration, explore the full collection of delicious ideas at Crispy Kitchens’ recipe archive.
And don’t forget to follow us on Pinterest for beautiful food photos, tips, and more inspiring recipes.
Pistachio Cheesecake Domes with Raspberry Surprise
Ingredients
Equipment
Method
- Step 1: Prepare the raspberry center by combining frozen raspberries, sugar, and lemon juice in a saucepan over medium heat. Stir gently as raspberries soften and juice releases. Mix cornstarch with water to form slurry, add to raspberry mixture, cook 1–2 minutes until thickened to jam-like consistency. Pour into silicone dome molds and freeze until solid.
- Step 2: Make the crust by mixing crushed digestive or graham crackers with melted butter until evenly coated. Press firmly into the base of dome molds and chill in the fridge to firm up.
- Step 3: Prepare the cheesecake layer: soak gelatin in water for 5 minutes to bloom. Beat softened cream cheese with powdered sugar and vanilla extract until smooth. Fold in melted white chocolate gently. Heat soaked gelatin until dissolved and add to cheesecake mixture. Whip heavy cream to soft peaks and fold gently into the mixture, maintaining airiness.
- Step 4: Assemble the domes by spooning cheesecake mixture into molds, pressing a frozen raspberry center into the middle, then covering completely with more cheesecake mixture. Smooth tops and freeze until firm, at least a few hours or overnight.
- Step 5: Make the mirror glaze: soak gelatin in water for 5 minutes. Heat water, sugar, and condensed milk in a saucepan until steaming (do not boil). Pour hot mixture over chopped white chocolate and let melt for a minute. Stir in soaked gelatin and blend until smooth and glossy. Add green gel food coloring drop by drop until desired color is reached. Cool glaze to about 32–34°C (90–93°F).
- Step 6: Place frozen domes on a wire rack with a tray underneath. Pour mirror glaze evenly over each dome, allowing excess to drip off. Once glazed, garnish with finely chopped pistachios and a fresh raspberry on top. Chill until ready to serve.