Ingredients
Equipment
Method
- Step 1: Get Ready to Bake: First things first, preheat your oven to a cozy 350°F (175°C). While it's warming up, go ahead and line a baking sheet with parchment paper. This little step makes cleanup a breeze and helps prevent sticking.
- Step 2: Cream It Up: In a large mixing bowl, grab your softened butter, creamy peanut butter, granulated sugar, and brown sugar. Beat these together with an electric mixer until they're beautifully light and fluffy. This usually takes a couple of minutes. You'll see the color lighten and the texture become airy.
- Step 3: Add the Wet Ingredients: Now, crack in your large egg and pour in that fragrant vanilla extract. Mix until everything is fully incorporated and smooth. Scrape down the sides of the bowl to make sure no bits are left out!
- Step 4: Combine Dry Ingredients: In a separate, smaller bowl, whisk together your all-purpose flour, baking soda, and salt. Giving them a good whisk ensures that the leavening and salt are evenly distributed throughout your cookies.
- Step 5: Mix It All Together: Gradually add the dry ingredients to your wet mixture, mixing on low speed until a soft dough forms. Be careful not to overmix; as soon as it comes together, stop! Overmixing can lead to tough cookies, and we want tender, chewy ones.
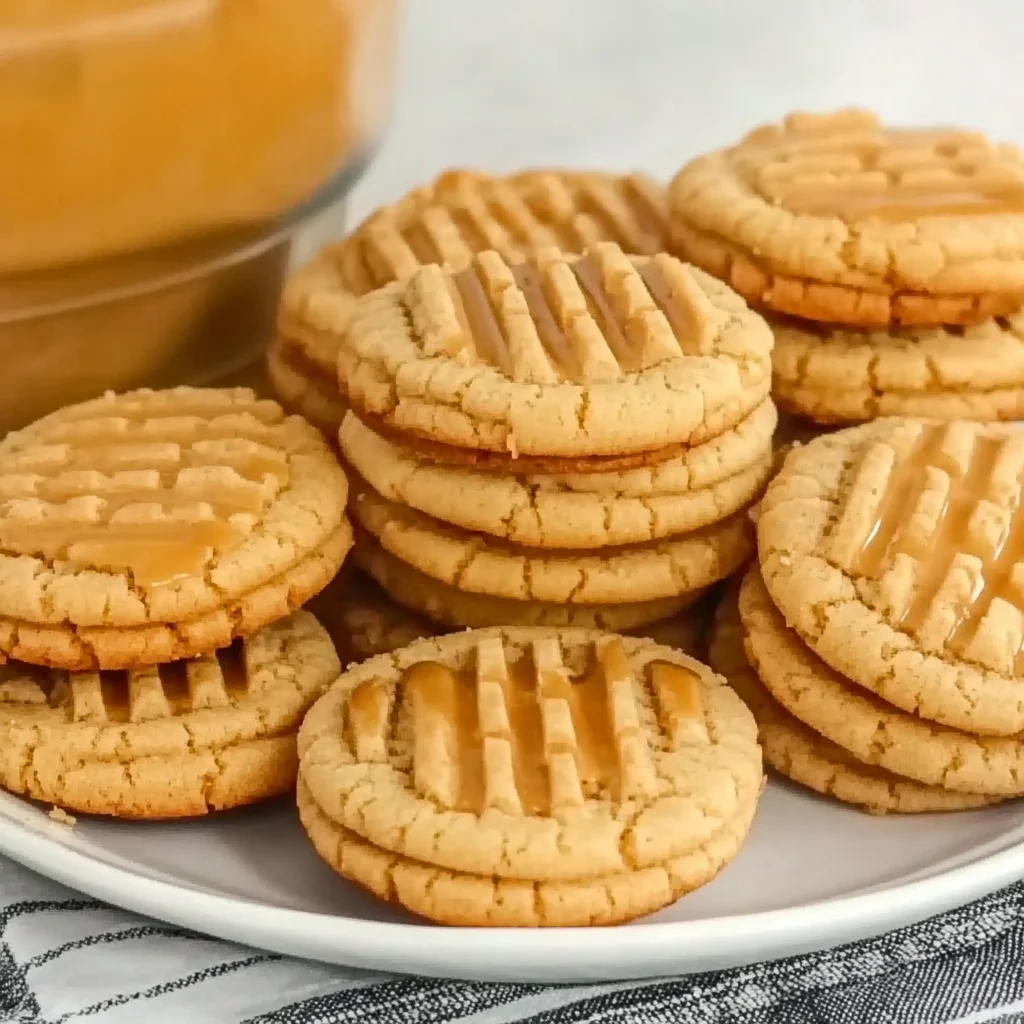
- Step 6: Shape and Pattern: Now for the fun part! Roll the dough into small balls, about 1 inch in diameter. Then, gently shape each ball into an oval. To get that classic Nutter Butter look, lightly press each oval with a fork to create a charming crosshatch pattern. Before baking, lightly sprinkle the tops of the shaped cookies with a little extra granulated sugar for a lovely sparkle and a touch of added sweetness.
- Step 7: Bake to Perfection: Place your shaped cookies on the prepared baking sheet. Bake for 8–10 minutes, or until the edges are lightly golden. The centers might still look a little soft, but they'll firm up as they cool. This is key for a chewy cookie! Allow the cookies to cool completely on the baking sheet before moving them. This prevents them from breaking and helps them set.
- Step 8: Time for the Filling!: While your cookies are cooling, let's make that luscious filling. In a medium bowl, beat together the creamy peanut butter and softened butter until it’s wonderfully smooth. Next, add the powdered sugar and vanilla extract, mixing until the filling becomes creamy and smooth. If it's a bit too thick, add milk one tablespoon at a time until you reach your desired consistency – something spreadable but not runny.
- Step 9: Assemble Your Sandwiches: Once the cookies are completely cool (this is important, warm cookies will melt the filling!), spread or pipe a generous amount of filling onto the flat side of one cookie. Then, gently top it with another cookie to create your perfect peanut butter sandwich. Repeat until all your cookies are assembled, and then get ready to enjoy!
Notes
Baking is all about having fun and making a recipe your own! Here are a few ideas to customize your copycat Nutter Butters:
- Crunchy Peanut Butter: If you love a little extra texture, feel free to use crunchy peanut butter in both the cookies and the filling. Just be aware the filling might be slightly less smooth.
- Nut Butter Alternatives: For those with peanut allergies or who prefer other flavors, almond butter or cashew butter can work, though the taste will obviously differ from a true Nutter Butter.
- Chocolate Drizzle: A drizzle of melted milk or dark chocolate over the finished sandwich cookies takes them to another level. Peanut butter and chocolate are a match made in heaven!
- Mini Cookies: Make smaller dough balls for bite-sized Nutter Butters, perfect for parties or little hands.
- Spices: A tiny pinch of cinnamon or a dash of nutmeg in the cookie dough can add a warm, cozy note.
- Extra Crunch: Roll the edges of the filled cookies in finely chopped peanuts for an added textural element.
- Softened Butter is Key: Don't skip this! Butter that's too cold won't cream properly, and melted butter will make your cookies spread too much. Let it sit on the counter for about 30-60 minutes before you start.
- Measure Flour Correctly: The best way to measure flour is to spoon it into your measuring cup and then level it off with a straight edge. Scooping directly can pack too much flour, leading to dry cookies.
- Don't Overmix: Once you add the flour, mix only until just combined. Overmixing develops the gluten in the flour, resulting in tougher cookies.
- Cool Completely: I know, it's hard to resist, but seriously, let those cookies cool down completely before you add the filling. Otherwise, your beautiful creamy filling will melt and slide right off.
- Adjust Filling Consistency: The amount of milk for the filling is a guideline. Start with less and add more a tiny bit at a time until you get a smooth, spreadable, but firm consistency. You want it to hold its shape.
- Prep Ahead: You can make the cookie dough ahead of time and chill it in the fridge for up to 3 days. Let it sit out for about 15-20 minutes before shaping. You can also bake the cookies and make the filling a day in advance, storing them separately, then assemble them just before serving.
- At Room Temperature: Store your assembled cookies in an airtight container at room temperature for up to 3-4 days.
- Refrigeration: While not strictly necessary, if your kitchen is particularly warm or you prefer a firmer filling, you can refrigerate them for up to a week. Just bring them to room temperature for about 15 minutes before serving for the best texture.
- Freezing: These cookies freeze beautifully! You can freeze the baked, unfilled cookies in an airtight container for up to 3 months. Let them thaw at room temperature, then make the filling and assemble. You can also freeze the assembled cookies for about 1 month, layered with parchment paper in an airtight container. Thaw them at room temperature.