Oh, friend, do you remember those iconic peanut-shaped cookies from childhood? The ones with that unmistakable peanut butter crunch and creamy, dreamy filling? For me, just thinking about them brings back sunny afternoons, sticky fingers, and pure, unadulterated joy. There’s something so comforting about a good peanut butter cookie, especially when it’s a sandwich cookie. Well, what if I told you that you could recreate that magic right in your own kitchen, and it’s actually incredibly easy? Get ready to whip up a batch of these unforgettable copycat Nutter Butter cookies that taste even better than the store-bought version!
This recipe is a true game-changer. It’s quick enough for a weeknight craving but special enough to share. Trust me, once you make these homemade beauties, you’ll never look back. They’re soft, chewy, bursting with peanut butter flavor, and the filling is just divine. Let’s get baking!
Why You’ll Love Copycat Nutter Butter Cookies
- Fast: From mixing bowl to cookie jar in under an hour!
- Easy: No fancy equipment or complex techniques needed – just simple ingredients and steps.
- Giftable: These make a perfect homemade present for friends, teachers, or anyone who loves a good cookie.
- Crowd-pleasing: Seriously, who can resist a homemade peanut butter sandwich cookie? They disappear fast!
Ingredients
Gathering your ingredients is the first step to any delicious baking adventure. For these Nutter Butter copycats, you’ll need a few pantry staples, and I promise, they all play a vital role in creating that perfect peanut butter experience!
For the Cookies:
- 1/2 cup unsalted butter, softened: Make sure it’s nice and soft, but not melted, for that perfect creamy base.
- 1/2 cup creamy peanut butter: The star of the show! I prefer creamy for these for a smoother texture, but check out the substitutions section if you’re a crunchy fan.
- 1/2 cup granulated sugar: For sweetness and a little crispiness on the edges.
- 1/2 cup brown sugar: This adds moisture and a wonderful depth of flavor, making the cookies extra chewy.
- 1 large egg: Our binder, bringing everything together.
- 1 teaspoon vanilla extract: A must-have for enhancing all those sweet flavors.
- 1 1/4 cups all-purpose flour: The foundation of our cookie.
- 3/4 teaspoon baking soda: Helps our cookies rise just right.
- 1/4 teaspoon salt: Balances the sweetness and truly brings out the peanut butter flavor. Don’t skip it!
For the Filling:
- 1/2 cup creamy peanut butter: Again, creamy is best for that smooth, spreadable filling.
- 1/4 cup unsalted butter, softened: Just like for the cookies, softened is key here.
- 1 cup powdered sugar: This gives the filling its classic sweet and smooth texture.
- 1 teaspoon vanilla extract: A lovely flavor boost.
- 1–2 tablespoons milk (as needed): This helps you achieve the perfect creamy, pipeable consistency for your filling.
How to Make Copycat Nutter Butter Cookies
Alright, apron on, and let’s get to it! You’re going to be amazed at how simple and satisfying these cookies are to make.
- Get Ready to Bake: First things first, preheat your oven to a cozy 350°F (175°C). While it’s warming up, go ahead and line a baking sheet with parchment paper. This little step makes cleanup a breeze and helps prevent sticking.
- Cream It Up: In a large mixing bowl, grab your softened butter, creamy peanut butter, granulated sugar, and brown sugar. Beat these together with an electric mixer until they’re beautifully light and fluffy. This usually takes a couple of minutes. You’ll see the color lighten and the texture become airy.
- Add the Wet Ingredients: Now, crack in your large egg and pour in that fragrant vanilla extract. Mix until everything is fully incorporated and smooth. Scrape down the sides of the bowl to make sure no bits are left out!
- Combine Dry Ingredients: In a separate, smaller bowl, whisk together your all-purpose flour, baking soda, and salt. Giving them a good whisk ensures that the leavening and salt are evenly distributed throughout your cookies.
- Mix It All Together: Gradually add the dry ingredients to your wet mixture, mixing on low speed until a soft dough forms. Be careful not to overmix; as soon as it comes together, stop! Overmixing can lead to tough cookies, and we want tender, chewy ones. If you’re always on the hunt for more incredible treats, be sure to explore all our delightful dessert recipes.
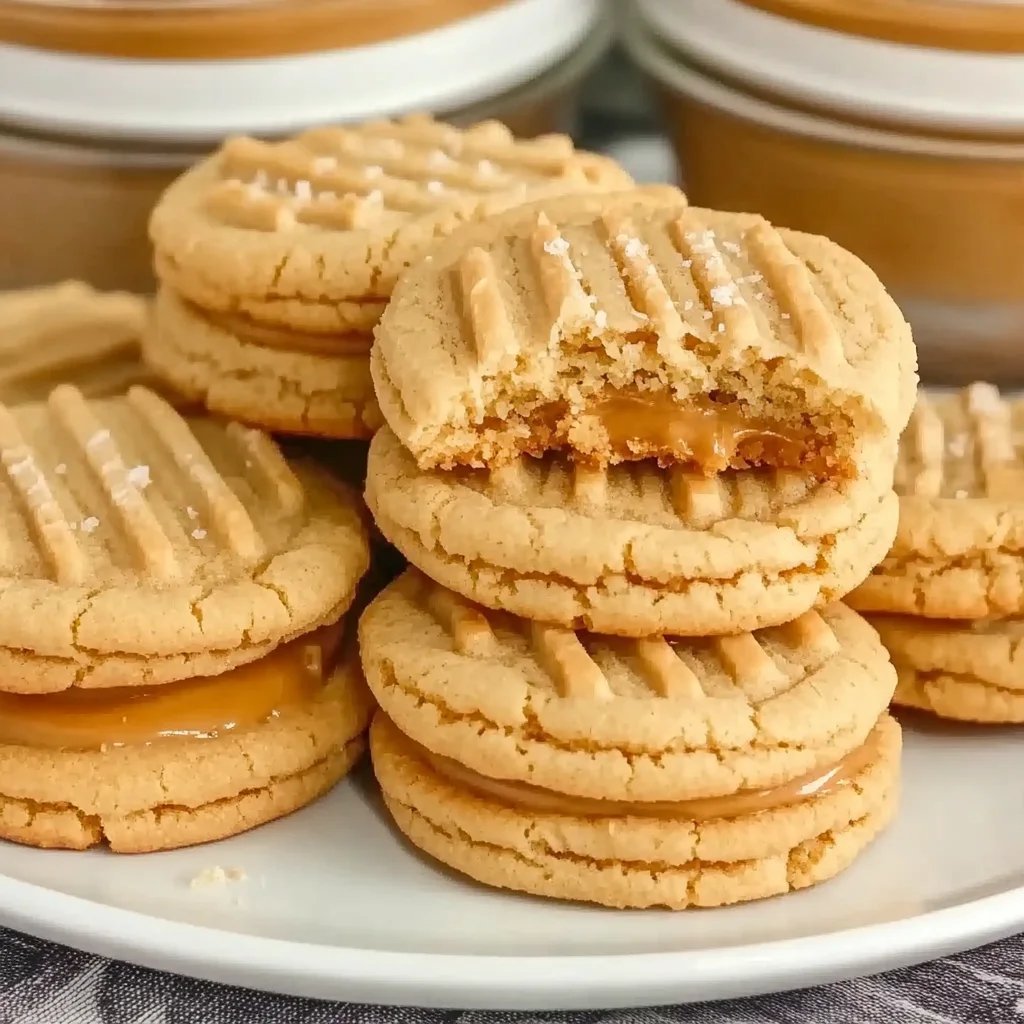
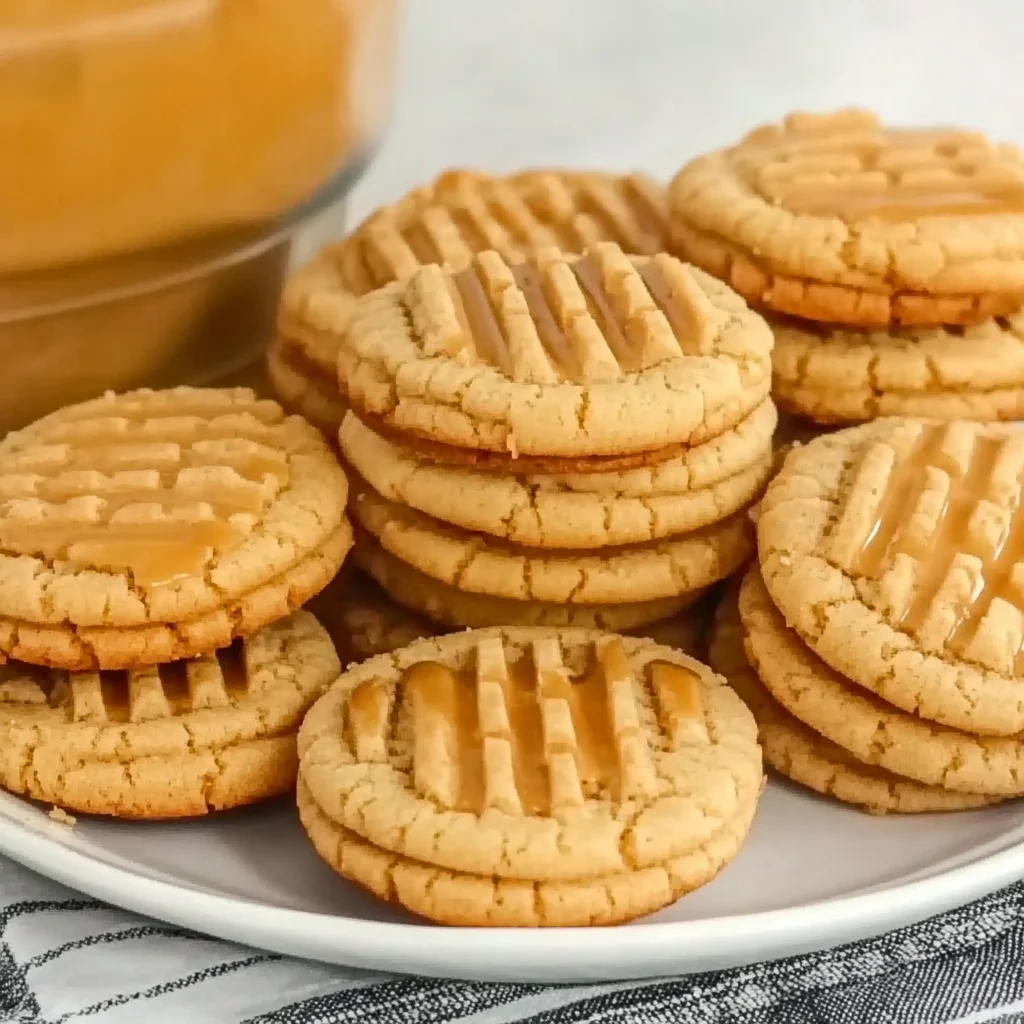
- Shape and Pattern: Now for the fun part! Roll the dough into small balls, about 1 inch in diameter. Then, gently shape each ball into an oval. To get that classic Nutter Butter look, lightly press each oval with a fork to create a charming crosshatch pattern. Before baking, lightly sprinkle the tops of the shaped cookies with a little extra granulated sugar for a lovely sparkle and a touch of added sweetness.
- Bake to Perfection: Place your shaped cookies on the prepared baking sheet. Bake for 8–10 minutes, or until the edges are lightly golden. The centers might still look a little soft, but they’ll firm up as they cool. This is key for a chewy cookie! Allow the cookies to cool completely on the baking sheet before moving them. This prevents them from breaking and helps them set.
- Time for the Filling! While your cookies are cooling, let’s make that luscious filling. In a medium bowl, beat together the creamy peanut butter and softened butter until it’s wonderfully smooth. Next, add the powdered sugar and vanilla extract, mixing until the filling becomes creamy and smooth. If it’s a bit too thick, add milk one tablespoon at a time until you reach your desired consistency – something spreadable but not runny. If you’re as obsessed with peanut butter as I am, you might also adore these no-bake peanut butter brownie cookies for another quick fix!
- Assemble Your Sandwiches: Once the cookies are completely cool (this is important, warm cookies will melt the filling!), spread or pipe a generous amount of filling onto the flat side of one cookie. Then, gently top it with another cookie to create your perfect peanut butter sandwich. Repeat until all your cookies are assembled, and then get ready to enjoy!
Substitutions & Additions
Baking is all about having fun and making a recipe your own! Here are a few ideas to customize your copycat Nutter Butters:
- Crunchy Peanut Butter: If you love a little extra texture, feel free to use crunchy peanut butter in both the cookies and the filling. Just be aware the filling might be slightly less smooth.
- Nut Butter Alternatives: For those with peanut allergies or who prefer other flavors, almond butter or cashew butter can work, though the taste will obviously differ from a true Nutter Butter.
- Chocolate Drizzle: A drizzle of melted milk or dark chocolate over the finished sandwich cookies takes them to another level. Peanut butter and chocolate are a match made in heaven!
- Mini Cookies: Make smaller dough balls for bite-sized Nutter Butters, perfect for parties or little hands.
- Spices: A tiny pinch of cinnamon or a dash of nutmeg in the cookie dough can add a warm, cozy note.
- Extra Crunch: Roll the edges of the filled cookies in finely chopped peanuts for an added textural element.
Tips for Success
Even the simplest recipes have a few tricks to make them absolutely perfect. Here are my go-to tips for these copycat Nutter Butters:
- Softened Butter is Key: Don’t skip this! Butter that’s too cold won’t cream properly, and melted butter will make your cookies spread too much. Let it sit on the counter for about 30-60 minutes before you start.
- Measure Flour Correctly: The best way to measure flour is to spoon it into your measuring cup and then level it off with a straight edge. Scooping directly can pack too much flour, leading to dry cookies.
- Don’t Overmix: Once you add the flour, mix only until just combined. Overmixing develops the gluten in the flour, resulting in tougher cookies.
- Cool Completely: I know, it’s hard to resist, but seriously, let those cookies cool down completely before you add the filling. Otherwise, your beautiful creamy filling will melt and slide right off.
- Adjust Filling Consistency: The amount of milk for the filling is a guideline. Start with less and add more a tiny bit at a time until you get a smooth, spreadable, but firm consistency. You want it to hold its shape.
- Prep Ahead: You can make the cookie dough ahead of time and chill it in the fridge for up to 3 days. Let it sit out for about 15-20 minutes before shaping. You can also bake the cookies and make the filling a day in advance, storing them separately, then assemble them just before serving.
How to Store Copycat Nutter Butter Cookies
If you manage to have any left (a big “if”!), here’s how to keep your homemade Nutter Butters fresh and delicious:
- At Room Temperature: Store your assembled cookies in an airtight container at room temperature for up to 3-4 days.
- Refrigeration: While not strictly necessary, if your kitchen is particularly warm or you prefer a firmer filling, you can refrigerate them for up to a week. Just bring them to room temperature for about 15 minutes before serving for the best texture.
- Freezing: These cookies freeze beautifully! You can freeze the baked, unfilled cookies in an airtight container for up to 3 months. Let them thaw at room temperature, then make the filling and assemble. You can also freeze the assembled cookies for about 1 month, layered with parchment paper in an airtight container. Thaw them at room temperature.
FAQs
Q: Can I use natural peanut butter for this recipe?
A: I highly recommend sticking with conventional creamy peanut butter (like Jif or Skippy) for both the cookies and the filling. Natural peanut butter tends to separate and can make the cookies too oily or crumbly, and the filling less stable.
Q: Why did my cookies spread too much?
A: This can happen for a few reasons! Your butter might have been too soft or even melted, you might have too much flour (see tip above), or your oven temperature might be a little off. Make sure your butter is just softened, not greasy. Chilling the dough for 15-30 minutes before baking can also help if spreading is an issue. Speaking of amazing peanut butter treats, you might also enjoy these Crumbl-style Peanut Butter Reese’s copycat cookies.
Q: How do I get the perfect crosshatch pattern?
A: Gently press down on the oval-shaped dough ball with the tines of a fork, then rotate the cookie 90 degrees and press again. Don’t press too hard, or your cookies might stick to the fork or become too thin.
Q: Can I make these dairy-free or gluten-free?
A: For dairy-free, you can substitute dairy-free butter sticks (like Miyoko’s Kitchen or Earth Balance) and plant-based milk for the filling. For gluten-free, a 1:1 gluten-free all-purpose flour blend (like Bob’s Red Mill or King Arthur) typically works well in this recipe. Always check that your peanut butter is also dairy and/or gluten-free if that’s a concern!
If you loved this recipe, be sure to follow us on Pinterest for more delicious inspiration!
Copycat Nutter Butter Cookies
Ingredients
Equipment
Method
- Step 1: Get Ready to Bake: First things first, preheat your oven to a cozy 350°F (175°C). While it's warming up, go ahead and line a baking sheet with parchment paper. This little step makes cleanup a breeze and helps prevent sticking.
- Step 2: Cream It Up: In a large mixing bowl, grab your softened butter, creamy peanut butter, granulated sugar, and brown sugar. Beat these together with an electric mixer until they're beautifully light and fluffy. This usually takes a couple of minutes. You'll see the color lighten and the texture become airy.
- Step 3: Add the Wet Ingredients: Now, crack in your large egg and pour in that fragrant vanilla extract. Mix until everything is fully incorporated and smooth. Scrape down the sides of the bowl to make sure no bits are left out!
- Step 4: Combine Dry Ingredients: In a separate, smaller bowl, whisk together your all-purpose flour, baking soda, and salt. Giving them a good whisk ensures that the leavening and salt are evenly distributed throughout your cookies.
- Step 5: Mix It All Together: Gradually add the dry ingredients to your wet mixture, mixing on low speed until a soft dough forms. Be careful not to overmix; as soon as it comes together, stop! Overmixing can lead to tough cookies, and we want tender, chewy ones.
- Step 6: Shape and Pattern: Now for the fun part! Roll the dough into small balls, about 1 inch in diameter. Then, gently shape each ball into an oval. To get that classic Nutter Butter look, lightly press each oval with a fork to create a charming crosshatch pattern. Before baking, lightly sprinkle the tops of the shaped cookies with a little extra granulated sugar for a lovely sparkle and a touch of added sweetness.
- Step 7: Bake to Perfection: Place your shaped cookies on the prepared baking sheet. Bake for 8–10 minutes, or until the edges are lightly golden. The centers might still look a little soft, but they'll firm up as they cool. This is key for a chewy cookie! Allow the cookies to cool completely on the baking sheet before moving them. This prevents them from breaking and helps them set.
- Step 8: Time for the Filling!: While your cookies are cooling, let's make that luscious filling. In a medium bowl, beat together the creamy peanut butter and softened butter until it’s wonderfully smooth. Next, add the powdered sugar and vanilla extract, mixing until the filling becomes creamy and smooth. If it's a bit too thick, add milk one tablespoon at a time until you reach your desired consistency – something spreadable but not runny.
- Step 9: Assemble Your Sandwiches: Once the cookies are completely cool (this is important, warm cookies will melt the filling!), spread or pipe a generous amount of filling onto the flat side of one cookie. Then, gently top it with another cookie to create your perfect peanut butter sandwich. Repeat until all your cookies are assembled, and then get ready to enjoy!
Notes
- Crunchy Peanut Butter: If you love a little extra texture, feel free to use crunchy peanut butter in both the cookies and the filling. Just be aware the filling might be slightly less smooth.
- Nut Butter Alternatives: For those with peanut allergies or who prefer other flavors, almond butter or cashew butter can work, though the taste will obviously differ from a true Nutter Butter.
- Chocolate Drizzle: A drizzle of melted milk or dark chocolate over the finished sandwich cookies takes them to another level. Peanut butter and chocolate are a match made in heaven!
- Mini Cookies: Make smaller dough balls for bite-sized Nutter Butters, perfect for parties or little hands.
- Spices: A tiny pinch of cinnamon or a dash of nutmeg in the cookie dough can add a warm, cozy note.
- Extra Crunch: Roll the edges of the filled cookies in finely chopped peanuts for an added textural element.
- Softened Butter is Key: Don't skip this! Butter that's too cold won't cream properly, and melted butter will make your cookies spread too much. Let it sit on the counter for about 30-60 minutes before you start.
- Measure Flour Correctly: The best way to measure flour is to spoon it into your measuring cup and then level it off with a straight edge. Scooping directly can pack too much flour, leading to dry cookies.
- Don't Overmix: Once you add the flour, mix only until just combined. Overmixing develops the gluten in the flour, resulting in tougher cookies.
- Cool Completely: I know, it's hard to resist, but seriously, let those cookies cool down completely before you add the filling. Otherwise, your beautiful creamy filling will melt and slide right off.
- Adjust Filling Consistency: The amount of milk for the filling is a guideline. Start with less and add more a tiny bit at a time until you get a smooth, spreadable, but firm consistency. You want it to hold its shape.
- Prep Ahead: You can make the cookie dough ahead of time and chill it in the fridge for up to 3 days. Let it sit out for about 15-20 minutes before shaping. You can also bake the cookies and make the filling a day in advance, storing them separately, then assemble them just before serving.
- At Room Temperature: Store your assembled cookies in an airtight container at room temperature for up to 3-4 days.
- Refrigeration: While not strictly necessary, if your kitchen is particularly warm or you prefer a firmer filling, you can refrigerate them for up to a week. Just bring them to room temperature for about 15 minutes before serving for the best texture.
- Freezing: These cookies freeze beautifully! You can freeze the baked, unfilled cookies in an airtight container for up to 3 months. Let them thaw at room temperature, then make the filling and assemble. You can also freeze the assembled cookies for about 1 month, layered with parchment paper in an airtight container. Thaw them at room temperature.