Ingredients
Equipment
Method
- Step 1 (Puree): Pulse the raspberries: Pop your fresh or frozen raspberries into a blender or food processor and give them a good pulse until they're smooth.
- Step 2 (Puree): Optional seeding: If you're not a fan of seeds, pour the puree through a fine-mesh metal sifter set over a bowl. Use a spoon or rubber spatula to push the puree through, leaving the seeds behind.
- Step 3 (Puree): Reduce the puree: Pour the puree into a small saucepan over low-medium heat. Let it gently boil, stirring occasionally, for about 15-20 minutes, until you're left with about 1/4 to 1/3 cup of a much thicker puree.
- Step 4 (Puree): Cool down: Remove the reduced puree from the heat and set it aside to cool completely.
- Step 5 (Base): Prep the pan: Preheat your oven to 325°F (160°C). Line a 9x13 inch (23x33 cm) baking pan with parchment paper, leaving some overhang on the sides.
- Step 6 (Base): Mix dry ingredients: In a medium bowl, whisk together the flour, sugar, corn starch, and salt.
- Step 7 (Base): Add melted butter: Pour the melted butter into the dry ingredients. Stir it all together until the mixture looks thick and crumbly.
- Step 8 (Base): Press into the pan: Dump the dough mixture into your prepared pan. Use your fingers or the bottom of a flat glass or measuring cup to firmly press the dough evenly into the bottom of the pan, creating a slight lip or edge around the sides.
- Step 9 (Base): Pre-bake the crust: Pop the pan into the preheated oven. Bake the shortbread for 20-25 minutes until set and just slightly golden around the edges. While it's baking, move on to making the lemon-raspberry filling.
- Step 10 (Base): Prick the crust: Once the shortbread comes out of the oven, gently prick the top all over with a fork.
- Step 11 (Filling): Prep while crust bakes: As mentioned, start making this layer while your shortbread is in the oven. In a large bowl, whisk together the granulated sugar and cornstarch.
- Step 12 (Filling): Add wet ingredients: Whisk in the eggs one at a time, until fully combined. Then, pour in your cooled 1/4 cup of reduced raspberry puree and whisk until you have a lovely pink mixture.
- Step 13 (Filling): Pour in lemon juice: Carefully whisk in the fresh lemon juice.
- Step 14 (Filling): Pour over crust: Gently pour the lemon raspberry mixture evenly over the hot, pre-baked shortbread base.
- Step 15 (Filling): Bake the bars: Place the pan back into the 325°F (160°C) oven. Bake for another 20-25 minutes until the filling looks set, matte, and firm.
- Step 16 (Filling): Cool and chill: Remove the pan from the oven and let the bars cool in the pan on a wire rack for at least 1 hour, or until they reach room temperature.
- Step 17 (Filling): Then, cover the pan and pop it into the refrigerator for at least 2 hours to set up properly.
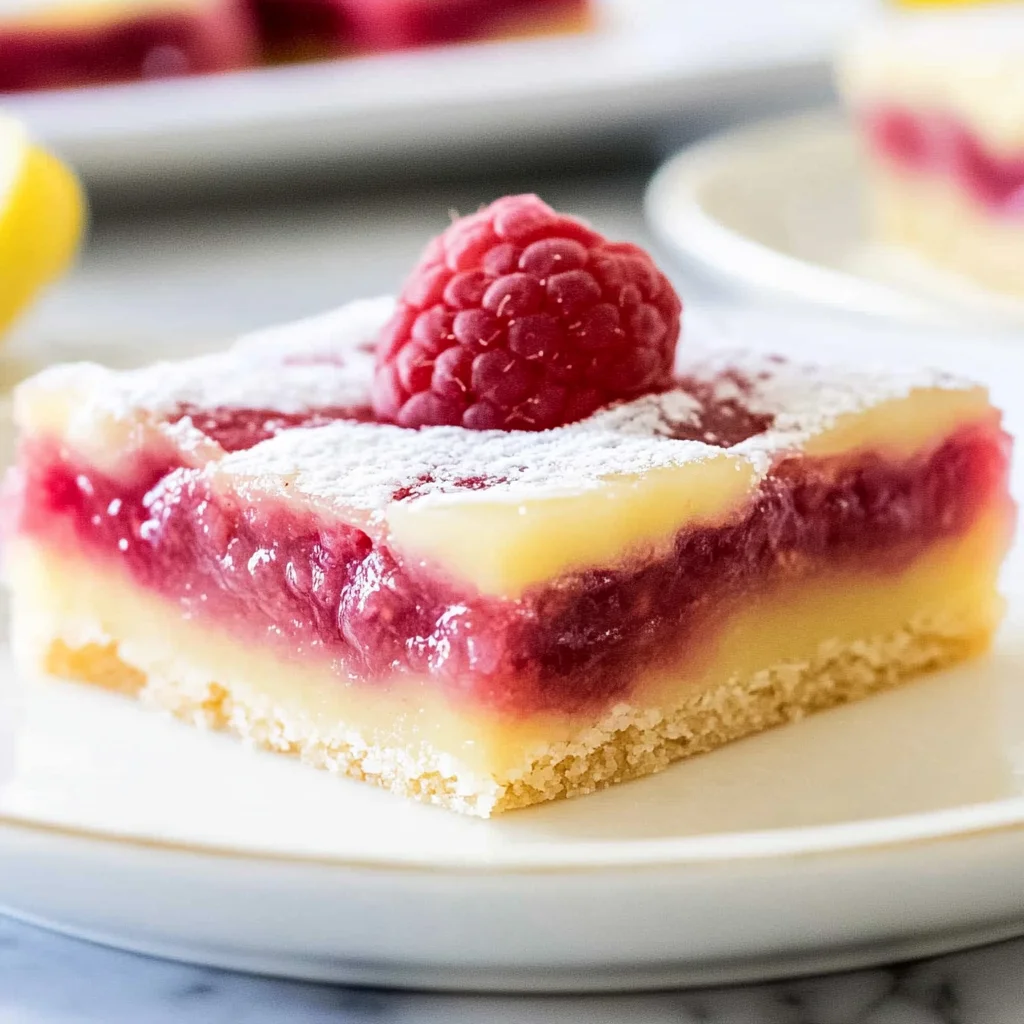
- Step 18 (Filling): Slice and serve: Once thoroughly chilled, use the parchment paper overhang to lift the entire slab of bars out of the pan onto a cutting board. Use a sharp knife to slice them into squares or bars, wiping the blade clean between slices for neatest cuts.
Notes
Store the sliced bars in an airtight container in the refrigerator for up to 4-5 days, layering them with parchment paper if stacking to prevent sticking. The puree reduction step is important to concentrate flavor and remove excess liquid. Measure ingredients accurately, especially cornstarch. Don't overbake the crust; you want it set and lightly golden. Chill thoroughly for clean slicing and a perfect set filling. You can prep the raspberry puree or bake the shortbread base a day ahead. Cracking on the top is common and doesn't affect the taste. While fresh lemon juice is best, bottled can be used in a pinch. Freezing is possible, but may slightly change the filling texture.