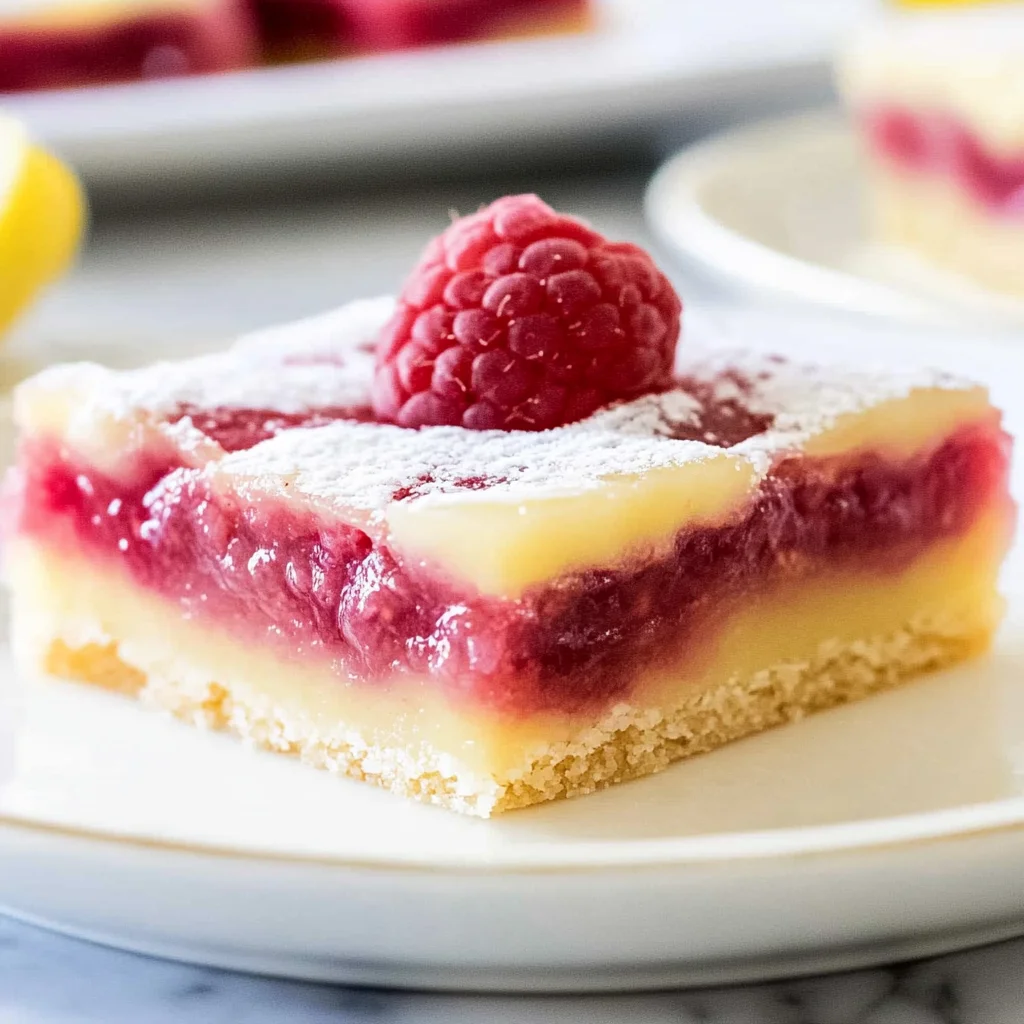
Oh, hey there! Grab a cup of coffee or tea and pull up a chair. Today, we’re diving into a recipe that just screams ‘happy’. You know those desserts that instantly transport you back to a sunny afternoon, maybe a family picnic or a simple moment of pure, sweet indulgence? For me, it’s always something bright and cheerful, and these Lemon Raspberry Bars? They are exactly that. Forget complicated patisserie; these bars are sunshine on a plate, surprisingly simple to whip up, and trust me, they disappear faster than you can say “seconds”! If you’re looking for a dessert that’s vibrant, easy, and absolutely delicious, you’ve found it.
Why You’ll Love This Recipe
You’re going to fall head over heels for these bars because they are:
- Fast: Seriously, the hands-on time is minimal!
- Easy: No fancy techniques needed, just mixing and baking.
- Giftable: Wrap them up – they make the perfect treat for friends or neighbors.
- Crowd-pleasing: That sweet-tart combo? It’s a guaranteed hit!
Ingredients
Alright, let’s gather our goodies. Most of these you might even have lurking in your pantry right now!
For the gorgeous Raspberry Puree:
- 2 cups (250 grams) raspberries, fresh or frozen: Sweet little gems! Frozen work just as well here, just maybe thaw them a tiny bit first.
For the perfect Shortbread Base:
- 2 1/4 cups (281 grams) all-purpose flour: Our sturdy foundation.
- 1/2 cup (100 grams) granulated sugar: Just enough sweetness for the base.
- 1 tablespoon corn starch: This helps give the shortbread that lovely, tender crumb.
- 1/4 teaspoon salt: Balances everything out.
- 1 cup (226 grams) unsalted butter, melted: Melted butter makes this crust super easy to press into the pan!
For the dreamy Lemon Raspberry Layer:
- 1 1/2 cups (300 grams) granulated sugar: This amount creates that classic, crackly-top sweetness.
- 1/3 cup (40 grams) corn starch: Our thickening agent, essential for a set filling.
- 6 large eggs: They bind the filling together into silky perfection.
- 1/4 cup (60 ml) reduced raspberry puree (reduced from 2 cups raspberries): That concentrated raspberry goodness we made earlier!
- 3/4 cup (180 ml) fresh lemon juice: The star of the show! Freshly squeezed is always best for that bright, zesty flavor.
How to Make It
Okay, let’s get baking! Follow along, and you’ll have beautiful bars in no time.
Raspberry Puree
First up, let’s get that lovely raspberry flavor concentrated.
- Pulse the raspberries: Pop your fresh or frozen raspberries into a blender or food processor and give them a good pulse until they’re smooth.
- Optional seeding: If you’re not a fan of seeds (and honestly, I sometimes skip this step when I’m in a hurry!), pour the puree through a fine-mesh metal sifter set over a bowl. Use a spoon or rubber spatula to push the puree through, leaving the seeds behind.
- Reduce the puree: Pour the seedless (or seedy, no judgment here!) puree into a small saucepan. Place it over low-medium heat and let it gently boil. Stir it occasionally. You’re boiling it to reduce the excess liquid and concentrate that amazing raspberry flavor. This should take about 15-20 minutes, until you’re left with about 1/4 to 1/3 cup of a much thicker puree. You’ll see the difference!
- Cool down: Remove the reduced puree from the heat and set it aside to cool completely. We don’t want hot puree curdling our eggs later!
Shortbread Base
Now, for that buttery, delicious crust.
- Prep the pan: Preheat your oven to 325°F (160°C). Grab a 9×13 inch (23×33 cm) baking pan. Line it with parchment paper, making sure to leave some overhang on the sides. This overhang is your best friend for lifting the finished bars out later!
- Mix dry ingredients: In a medium bowl, whisk together the flour, sugar, corn starch, and salt. Give it a good whisk to make sure everything is evenly distributed.
- Add melted butter: Pour the melted butter into the dry ingredients. Stir it all together. The mixture will look thick and maybe a little crumbly, which is exactly what you want.
- Press into the pan: Dump the dough mixture into your prepared pan. Use your fingers or the bottom of a flat glass or measuring cup to firmly press the dough evenly into the bottom of the pan. Try to create a slight lip or edge around the sides – this acts like a little dam for our filling!
- Pre-bake the crust: Pop the pan into the preheated oven. Bake the shortbread for 20-25 minutes. You’re looking for it to be set and just slightly golden around the edges. While it’s baking, move on to making the lemon-raspberry filling.
- Prick the crust: Once the shortbread comes out of the oven, gently prick the top all over with a fork. Be careful not to go all the way through the crust, just enough to create little vents.
Lemon Raspberry Layer
Time for that bright, tangy filling!
- Prep while crust bakes: As mentioned, start making this layer while your shortbread is in the oven. Efficiency is key!
- Whisk sugar and cornstarch: In a large bowl, whisk together the granulated sugar and cornstarch. This helps break up any cornstarch lumps before adding the wet ingredients.
- Add wet ingredients: Whisk in the eggs one at a time, until fully combined. Then, pour in your cooled 1/4 cup of reduced raspberry puree and whisk until you have a lovely pink mixture.
- Pour in lemon juice: Carefully whisk in the fresh lemon juice. The mixture will become quite liquidy, which is totally normal.
- Pour over crust: Gently pour the lemon raspberry mixture evenly over the hot, pre-baked shortbread base.
- Bake the bars: Place the pan back into the 325°F (160°C) oven. Bake for another 20-25 minutes. The filling is done when the top looks set, meaning it’s no longer liquid and jiggly like jelly, but looks matte and firm. It won’t be completely solid like fudge, though!
- Cool and chill: This is the hardest part – waiting! Remove the pan from the oven and let the bars cool in the pan on a wire rack for at least 1 hour, or until they reach room temperature. Then, cover the pan (plastic wrap works great) and pop it into the refrigerator for at least 2 hours. This chilling time is essential for the bars to set up properly so you can slice them cleanly.
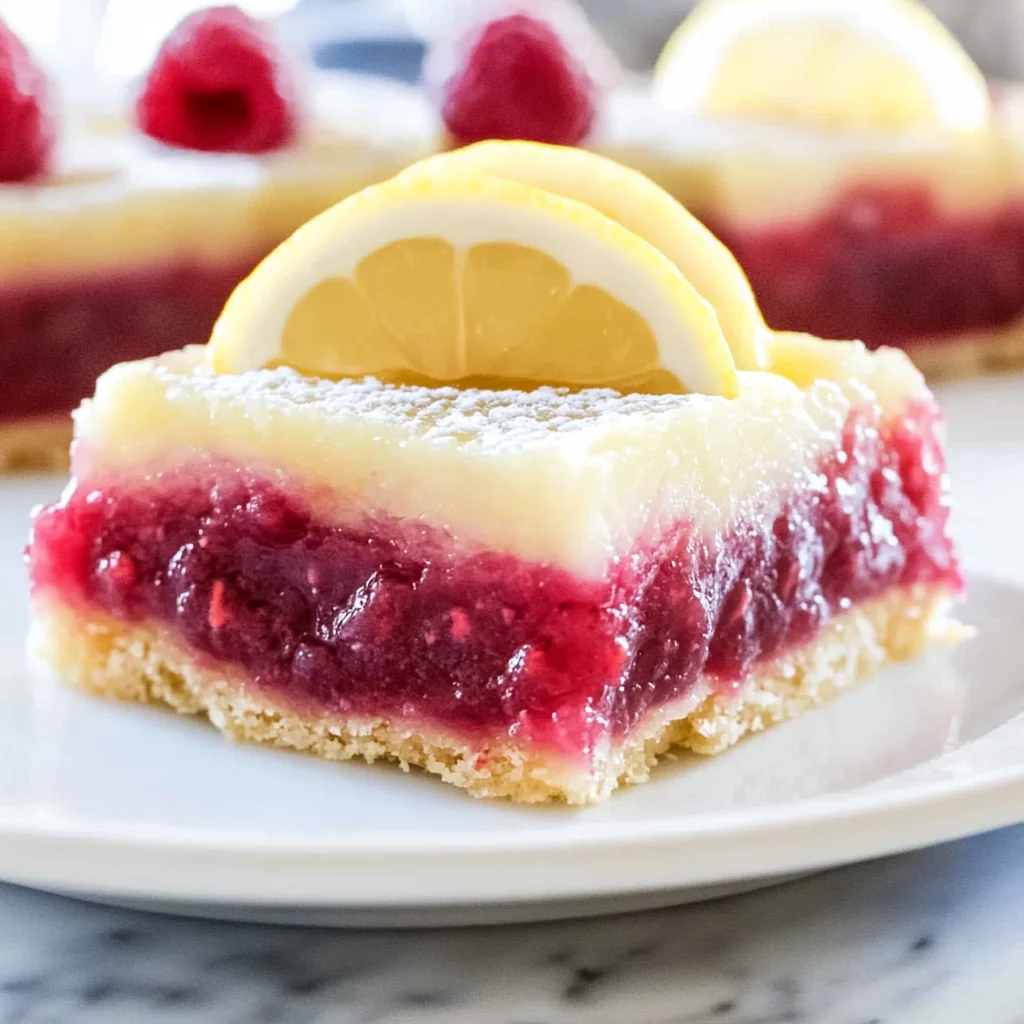
- Slice and serve: Once they are thoroughly chilled, use the parchment paper overhang to lift the entire slab of bars out of the pan and onto a cutting board. Use a sharp knife to slice them into squares or bars. For the neatest cuts, wipe the knife blade clean with a damp paper towel between each slice.
- Store: Keep the finished bars in the fridge.
Substitutions & Additions
Want to mix things up? Here are a few ideas:
- Different Berries: While raspberry is divine, you could try reducing other berries like blueberries or blackberries for a different flavor twist.
- Add Zest: For an extra punch of citrus, you could whisk in a tablespoon or two of fresh lemon zest into the lemon raspberry filling along with the juice.
- Almond Extract: A tiny splash of almond extract (about 1/4 teaspoon) in the shortbread base can add a lovely nutty note.
- White Chocolate: A drizzle of melted white chocolate over the cooled bars is a beautiful and delicious addition.
Tips for Success
A few pointers to help you make these bars perfectly every time:
- Don’t Skip Reducing the Puree: This step is important! It concentrates the raspberry flavor and, more importantly, removes excess liquid that could make your filling too runny.
- Measure Ingredients Accurately: Especially the cornstarch in the filling – too little and it won’t set, too much and it can be gummy. Spoon and level your flour for the crust.
- Don’t Overbake the Crust: You want it set and lightly golden, but not deeply browned, as it will bake again with the filling.
- Chill, Chill, Chill: I know waiting is tough, but allowing the bars to cool completely at room temp and then chilling thoroughly in the fridge is key to clean slicing and a perfect set filling.
- Prep Ahead: You can make the raspberry puree a day or two in advance and keep it in the fridge. You could also bake the shortbread base a day ahead, let it cool completely, cover it, and leave it at room temperature until you’re ready to add the filling and bake again.
How to Store It
Because of that luscious, egg-based filling, these bars need to live in the fridge.
Store the sliced bars in an airtight container in the refrigerator for up to 4-5 days. Layer them with parchment paper if you stack them to prevent sticking.
FAQs
Here are a couple of questions folks often ask about making bars like these:
Q: Can I use bottled lemon juice instead of fresh?
A: While fresh lemon juice gives the absolute best, brightest flavor, you can use bottled in a pinch. Just know the flavor won’t be quite as vibrant.
Q: Why did my filling crack?
A: Cracking on the top is pretty common with bar fillings, especially if they cool too quickly or were slightly overbaked. It doesn’t affect the taste at all! Making sure they cool gradually at room temperature before chilling can help minimize this.
Q: Can I freeze these bars?
A: While you technically could, the texture of the filling can sometimes change slightly after freezing and thawing, potentially becoming a bit softer. For the best texture, I recommend storing them just in the refrigerator.
Okay, there you have it! Go forth and bake some sunshine. I can’t wait for you to try these and brighten your day (and everyone else’s!) with a batch.

Easy Lemon Raspberry Bars
Ingredients
Equipment
Method
- Step 1 (Puree): Pulse the raspberries: Pop your fresh or frozen raspberries into a blender or food processor and give them a good pulse until they're smooth.
- Step 2 (Puree): Optional seeding: If you're not a fan of seeds, pour the puree through a fine-mesh metal sifter set over a bowl. Use a spoon or rubber spatula to push the puree through, leaving the seeds behind.
- Step 3 (Puree): Reduce the puree: Pour the puree into a small saucepan over low-medium heat. Let it gently boil, stirring occasionally, for about 15-20 minutes, until you're left with about 1/4 to 1/3 cup of a much thicker puree.
- Step 4 (Puree): Cool down: Remove the reduced puree from the heat and set it aside to cool completely.
- Step 5 (Base): Prep the pan: Preheat your oven to 325°F (160°C). Line a 9x13 inch (23x33 cm) baking pan with parchment paper, leaving some overhang on the sides.
- Step 6 (Base): Mix dry ingredients: In a medium bowl, whisk together the flour, sugar, corn starch, and salt.
- Step 7 (Base): Add melted butter: Pour the melted butter into the dry ingredients. Stir it all together until the mixture looks thick and crumbly.
- Step 8 (Base): Press into the pan: Dump the dough mixture into your prepared pan. Use your fingers or the bottom of a flat glass or measuring cup to firmly press the dough evenly into the bottom of the pan, creating a slight lip or edge around the sides.
- Step 9 (Base): Pre-bake the crust: Pop the pan into the preheated oven. Bake the shortbread for 20-25 minutes until set and just slightly golden around the edges. While it's baking, move on to making the lemon-raspberry filling.
- Step 10 (Base): Prick the crust: Once the shortbread comes out of the oven, gently prick the top all over with a fork.
- Step 11 (Filling): Prep while crust bakes: As mentioned, start making this layer while your shortbread is in the oven. In a large bowl, whisk together the granulated sugar and cornstarch.
- Step 12 (Filling): Add wet ingredients: Whisk in the eggs one at a time, until fully combined. Then, pour in your cooled 1/4 cup of reduced raspberry puree and whisk until you have a lovely pink mixture.
- Step 13 (Filling): Pour in lemon juice: Carefully whisk in the fresh lemon juice.
- Step 14 (Filling): Pour over crust: Gently pour the lemon raspberry mixture evenly over the hot, pre-baked shortbread base.
- Step 15 (Filling): Bake the bars: Place the pan back into the 325°F (160°C) oven. Bake for another 20-25 minutes until the filling looks set, matte, and firm.
- Step 16 (Filling): Cool and chill: Remove the pan from the oven and let the bars cool in the pan on a wire rack for at least 1 hour, or until they reach room temperature.
- Step 17 (Filling): Then, cover the pan and pop it into the refrigerator for at least 2 hours to set up properly.
- Step 18 (Filling): Slice and serve: Once thoroughly chilled, use the parchment paper overhang to lift the entire slab of bars out of the pan onto a cutting board. Use a sharp knife to slice them into squares or bars, wiping the blade clean between slices for neatest cuts.