Ingredients
Equipment
Method
- Step 1: Preheat Oven & Prepare Pan: First things first, go ahead and preheat your oven to a cozy 350°F (180°C). While it's warming up, grab a 20 cm (about 7.9 inches) loaf pan. You can either line it with parchment paper, leaving a little overhang on the sides for easy lifting later (which I highly recommend for no-fuss removal!), or just grease it really well with a little oil. Trust me, that parchment paper trick is a game-changer!
- Step 2: Combine Wet Ingredients: In a large mixing bowl, grab your three beautifully ripe bananas. Mash them up with a fork until they are completely smooth. No big lumps here, friends! Once they’re mashed, stir in your chosen nut butter and the eggs until everything is wonderfully combined with the mashed banana. Give it a good whisk!
- Step 3: Add Sweetener & Flavoring: Now for the good stuff! Add your granular sweetener of choice, the vanilla extract, and that tiny pinch of sea salt to the banana mixture. Give this wet mixture a good stir with a whisk or fork for about two minutes. You want to make sure all those lovely ingredients are thoroughly combined and happy together.
- Step 4: Combine Dry Ingredients: In a separate bowl, it’s time to bring our dry stars together. Whisk together the oat flour (or your preferred gluten-free flour blend), the cocoa powder, and the baking powder. If you're going for the high protein option, this is where you'd add your protein powder in with the flour. Whisk well to make sure there are no clumps of cocoa or baking powder.
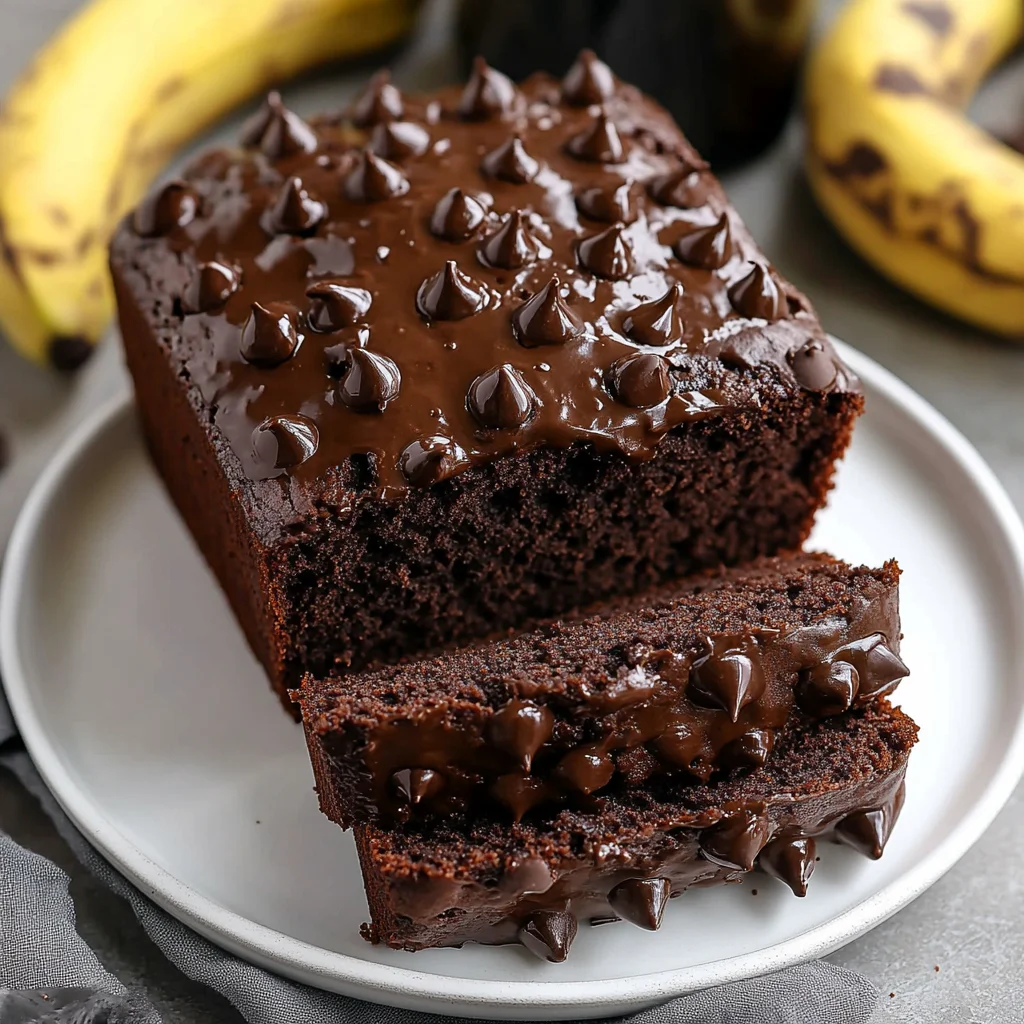
- Step 5: Mix Wet and Dry & Add Chocolate Chips: Now for the moment of truth! Pour your dry ingredient mixture into the wet mixture. Give it a good stir until everything is just combined. The key here is to be gentle – don't overmix! Overmixing can lead to a tougher loaf. Once it's just mixed, gently fold through those lovely chocolate chips. I always hold a few back to sprinkle on top!
- Step 6: Bake: Pour your beautiful batter into your prepared loaf pan. If you saved a few chocolate chips, now’s the time to sprinkle them generously on top for that irresistible bakery look. Pop it into your hot oven for 30 to 40 minutes. You’ll know it’s ready when a toothpick inserted into the very center of your chocolate banana bread comes out clean. Every oven is a little different, so keep an eye on it!
- Step 7: Cool: Ah, the hardest part: waiting! Once it's done, remove the loaf pan from the oven and let your banana bread cool in the pan for about 15 minutes. This helps it set up nicely. Then, carefully lift it out of the pan using that parchment paper overhang (see, I told you it was handy!) and let it cool completely on a wire rack before slicing and serving. I know, I know, it smells incredible, but a little patience makes for the best slices!
Notes
Substitutions & Additions: While oat flour is fantastic, you could also try a 1:1 gluten-free flour blend, whole wheat pastry flour, or even all-purpose flour if gluten isn't a concern (textures might vary slightly). Instead of granular sweetener, you could use maple syrup or honey (use ⅓ cup, but reduce your liquid ingredients by about 1-2 tablespoons as these are liquid sweeteners). Feel free to experiment with different nut butters! Cashew butter makes it extra creamy, and sunflower seed butter is a great nut-free option. Feeling adventurous? Stir in a handful of chopped walnuts or pecans for crunch, shredded coconut, or even a dash of cinnamon or nutmeg for a warming spice blend. If you're adding protein powder, try different flavors! A vanilla or chocolate protein powder can really enhance the overall taste.
Tips for Success: Don't Overmix – mix just until combined to prevent a tougher, chewier loaf. Ripe Bananas are Key – the browner, the better for sweetness and intense banana flavor. If not ripe enough, bake them on a baking sheet at 300°F (150°C) for 15-20 minutes until peels turn black. Cool Completely – let the bread cool completely before slicing to allow it to firm up and prevent crumbling. Check for Doneness – use a toothpick; if it comes out clean, your bread is ready. Parchment Paper is Your Friend – it makes removing the loaf from the pan incredibly easy and mess-free.
How to Store Healthy Chocolate Banana Bread: At room temperature: Store your chocolate banana bread in an airtight container at room temperature for 2-3 days. In the refrigerator: For a longer shelf life, you can store it in an airtight container in the refrigerator for up to 5-7 days (might get a little denser when cold, but a quick zap in the microwave can warm it right up!). Freezing: Banana bread freezes beautifully! Once completely cooled, slice the loaf and wrap individual slices tightly in plastic wrap, then place them in a freezer-safe bag or container. It will keep in the freezer for up to 3 months. When ready, thaw a slice at room temperature or warm gently in the microwave or toaster oven.