Ingredients
Equipment
Method
- Step 1: Prepare the Classic Waffle Batter: Grab a big mixing bowl and whisk together your dry ingredients for the classic batter: flour, sugar, baking powder, baking soda, and salt. In a separate bowl, whisk together the wet ingredients: buttermilk, eggs, melted butter, and vanilla extract. Now, pour those wet ingredients right into the dry ingredients. Mix gently until everything is just combined. A little lumpiness is okay! The key here is not to overmix, or your waffles might turn out tough.
- Step 2: Prepare the Red Velvet Batter: In another mixing bowl, whisk together the dry ingredients for your red velvet batter: flour, cocoa powder, sugar, baking powder, baking soda, and salt. In a third bowl, whisk together the buttermilk, egg, melted butter, vanilla extract, and, of course, that gorgeous red food coloring. Pour the wet ingredients into the dry ingredients and mix until just combined. Again, resist the urge to overmix!
- Step 3: Preheat the Waffle Iron: Get your trusty waffle iron fired up! Follow the manufacturer’s instructions for preheating. You want it nice and hot for perfectly crispy waffles.
- Step 4: Create the Marbled Effect: This is where the magic happens! Once your waffle iron is hot, lightly grease it if needed. Now, take a small amount of your classic waffle batter and dollop it onto the waffle iron. Then, add a small amount of the red velvet batter next to it. Don't cover the whole surface with one batter. Use a toothpick or a knife to gently swirl the two batters together. You're aiming for that beautiful, swirly marble effect, not a completely mixed color.
- Step 5: Cook the Waffles: Close the waffle iron and cook according to your manufacturer’s instructions. This usually takes a few minutes, until the waffles are beautifully golden brown and cooked through. They should be crisp on the outside and tender on the inside.
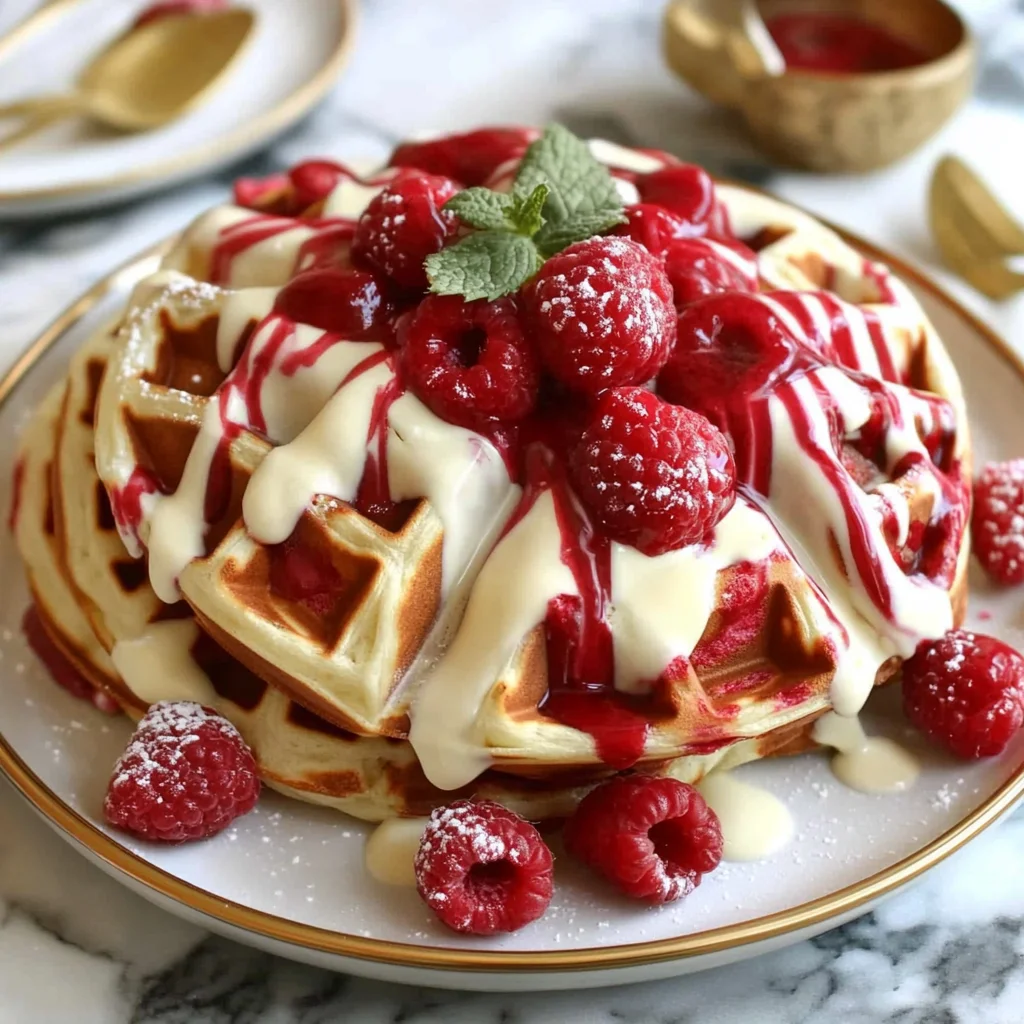
- Step 6: Serve: As soon as they're done, carefully remove them from the waffle iron. Serve these warm wonders with your favorite toppings. I love a dollop of whipped cream and some fresh berries, or a generous drizzle of maple syrup!
Notes
No buttermilk? Make a quick substitute by adding 1 tablespoon of lemon juice or white vinegar to a measuring cup and filling the rest with regular milk to 1 cup, letting it sit for 5-10 minutes. For gluten-free waffles, use a 1:1 gluten-free baking blend with xanthan gum. You can add white or mini chocolate chips for extra chocolate goodness, or drizzle with a cream cheese glaze for a true red velvet cake feel. Don't overmix the batter to avoid tough waffles. Ensure your waffle iron is properly preheated and lightly oiled for crispy, easy-release waffles. Avoid overfilling the iron. Cooked waffles can be kept warm in a 200°F (95°C) oven on a wire rack. For convenience, dry ingredients can be whisked and stored ahead of time, as can wet ingredients (minus food coloring), but mix batters just before cooking for fluffiest results. Leftover cooked waffles can be stored in an airtight container in the refrigerator for 2-3 days, or frozen for up to 2-3 months. Reheat frozen waffles in a toaster, toaster oven, or oven at 350°F (175°C) for 5-10 minutes until crispy.