Oh, friend, there’s just something magical about waking up on a lazy weekend morning, the sun streaming through the window, and the smell of waffles filling the air. It transports you right back to childhood, doesn’t it? But what if those waffles weren’t just any waffles? What if they were swirled with vibrant red and classic cream, creating a stunning masterpiece that tastes as good as it looks? That’s exactly what we’re doing today with these incredible Red Velvet Marble Waffles! They’re surprisingly easy, come together quicker than you might think, and trust me, they’re so memorable, you’ll be making them every chance you get. If you love a little bit of that classic red velvet flavor but want to try something new, these waffles are for you! And if you’re a fan of our easy Red Velvet Marble Cupcakes, you’re going to adore these.
Why You’ll Love Red Velvet Marble Waffles
- Fast: Whip them up in no time for a special breakfast or brunch.
- Easy: Simple steps and common ingredients make this recipe a breeze.
- Giftable: Package them up with some fancy syrup or toppings for a thoughtful food gift!
- Crowd-pleasing: The stunning marble effect and delicious flavor will impress everyone at the table.
Ingredients

Gathering your ingredients is the first step to waffle wonderland! Here’s what you’ll need to make these beautiful, delicious Red Velvet Marble Waffles:
- For the Classic Waffle Batter:
- 1 1/2 cups all-purpose flour: The backbone of our fluffy waffles!
- 1 tablespoon sugar: Just a touch of sweetness to balance the flavors.
- 1 teaspoon baking powder: For that perfect lift and airy texture.
- 1/2 teaspoon baking soda: Works with the buttermilk to create tenderness.
- 1/4 teaspoon salt: A pinch to bring all the flavors to life.
- 1 cup buttermilk: The secret to tender, slightly tangy waffles.
- 2 large eggs: Binds everything together and adds richness.
- 1/4 cup melted butter: Adds incredible flavor and moistness.
- 1 teaspoon vanilla extract: Essential for that warm, comforting aroma.
- For the Red Velvet Batter:
- 1 cup all-purpose flour: Our base for the vibrant red velvet portion.
- 2 tablespoons cocoa powder: The hint of chocolate that defines red velvet.
- 1/4 cup sugar: A little more sweetness for this decadent swirl.
- 1 teaspoon baking powder: To help our red velvet side rise beautifully.
- 1/2 teaspoon baking soda: Again, working its magic with the buttermilk.
- 1/4 teaspoon salt: Enhances the cocoa and sugar.
- 3/4 cup buttermilk: Provides that classic red velvet tang and moisture.
- 1 large egg: For structure and richness.
- 1/4 cup melted butter: Makes the red velvet extra luscious.
- 1 teaspoon vanilla extract: Complements the cocoa perfectly.
- 1 tablespoon red food coloring: The star of the show for that iconic red hue!
How to Make Red Velvet Marble Waffles
Alright, let’s get down to business! Making these marbled beauties is easier than you think. Just follow these simple steps:
- Prepare the Classic Waffle Batter: Grab a big mixing bowl and whisk together your dry ingredients for the classic batter: flour, sugar, baking powder, baking soda, and salt. In a separate bowl, whisk together the wet ingredients: buttermilk, eggs, melted butter, and vanilla extract. Now, pour those wet ingredients right into the dry ingredients. Mix gently until everything is just combined. A little lumpiness is okay! The key here is not to overmix, or your waffles might turn out tough.
- Prepare the Red Velvet Batter: Now, for the star of the show! In another mixing bowl, whisk together the dry ingredients for your red velvet batter: flour, cocoa powder, sugar, baking powder, baking soda, and salt. In a third bowl (yes, we’re using a few today, but it’s worth it!), whisk together the buttermilk, egg, melted butter, vanilla extract, and, of course, that gorgeous red food coloring. Pour the wet ingredients into the dry ingredients and mix until just combined. Again, resist the urge to overmix!
- Preheat the Waffle Iron: Get your trusty waffle iron fired up! Follow the manufacturer’s instructions for preheating. You want it nice and hot for perfectly crispy waffles.
- Create the Marbled Effect: This is where the magic happens! Once your waffle iron is hot, lightly grease it if needed. Now, take a small amount of your classic waffle batter and dollop it onto the waffle iron. Then, add a small amount of the red velvet batter next to it. Don’t cover the whole surface with one batter. Use a toothpick or a knife to gently swirl the two batters together. You’re aiming for that beautiful, swirly marble effect, not a completely mixed color.
- Cook the Waffles: Close the waffle iron and cook according to your manufacturer’s instructions. This usually takes a few minutes, until the waffles are beautifully golden brown and cooked through. They should be crisp on the outside and tender on the inside.
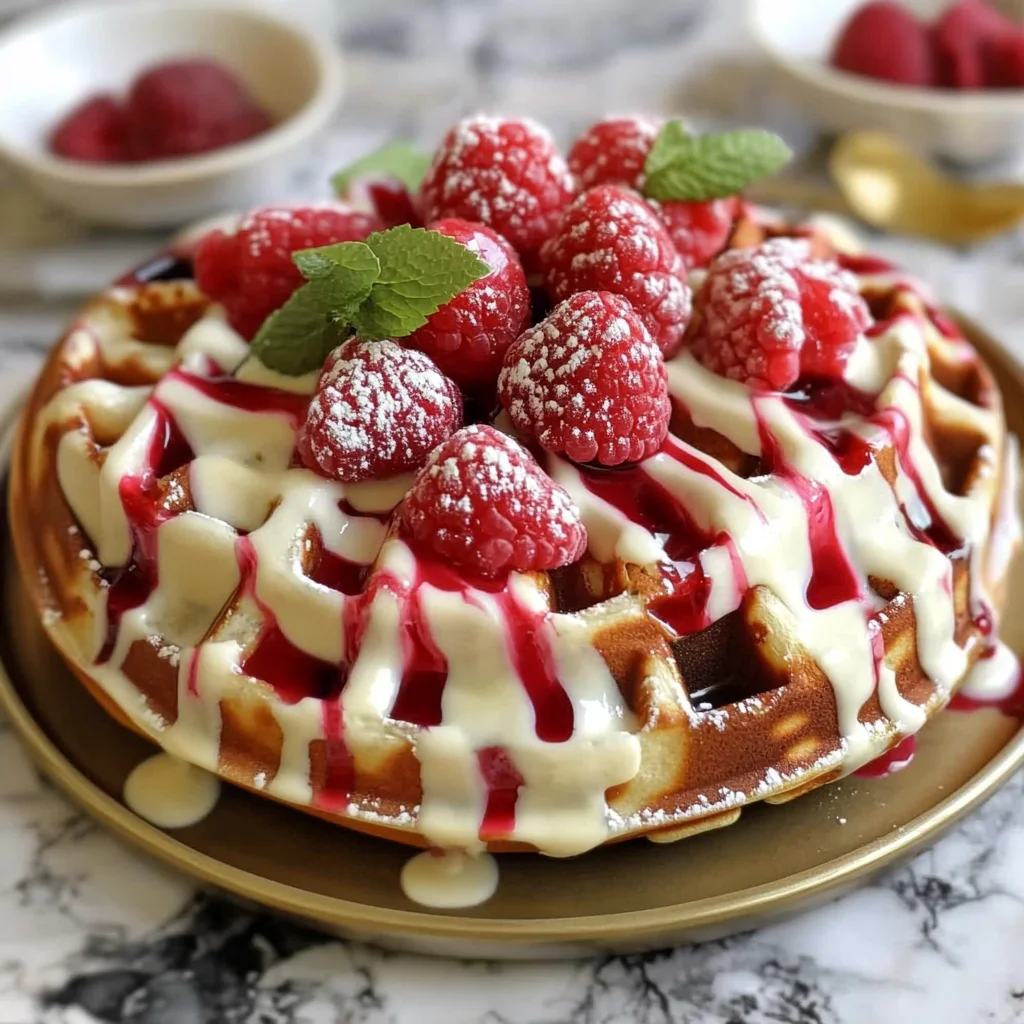
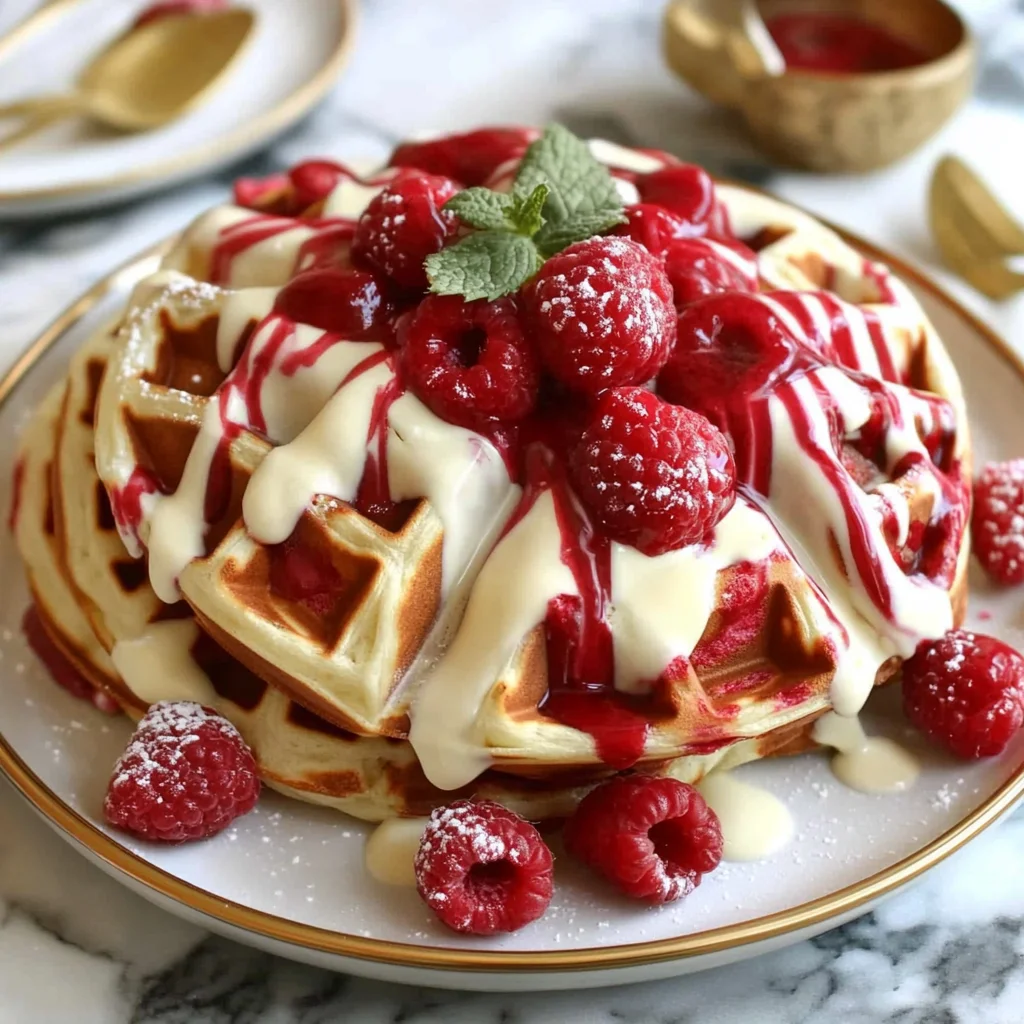
- Serve: As soon as they’re done, carefully remove them from the waffle iron. Serve these warm wonders with your favorite toppings. I love a dollop of whipped cream and some fresh berries, or a generous drizzle of maple syrup!
Substitutions & Additions
One of the best things about cooking is making a recipe your own! Here are some ideas to play with these Red Velvet Marble Waffles:
- Buttermilk Swap: No buttermilk on hand? No problem! You can make your own by adding 1 tablespoon of lemon juice or white vinegar to a measuring cup, then filling the rest with regular milk until it reaches 1 cup. Let it sit for 5-10 minutes until it slightly curdles.
- Flour Power: For a gluten-free option, you can typically substitute the all-purpose flour with a 1:1 gluten-free baking blend. Just be sure it contains xanthan gum.
- Chocolatey Swirls: For even more chocolate goodness, fold in a handful of white chocolate chips or mini chocolate chips into either batter before marbling.
- Cream Cheese Glaze: To really lean into that red velvet cake vibe, whip up a quick cream cheese glaze to drizzle over the top. Just mix softened cream cheese with powdered sugar, a splash of milk, and a little vanilla until smooth. It’s heavenly!
- Colorful Creations: While red velvet is classic, feel free to experiment with other food colorings! Imagine blue and white swirls for a patriotic breakfast, or green and white for a festive holiday morning.
- Sprinkle Fun: Before closing the waffle iron, sprinkle some festive sprinkles over the batter for an extra pop of color and fun!
Tips for Success
Want to make sure your Red Velvet Marble Waffles turn out absolutely perfect every time? Here are a few insider tips:
- Don’t Overmix the Batter: I really can’t stress this enough! Overmixing develops the gluten in the flour, leading to tough, chewy waffles instead of light and fluffy ones. Mix until just combined, even if there are a few lumps.
- Preheat Properly: A hot waffle iron is crucial for crispy exteriors. If your iron isn’t hot enough, your waffles will be soft and pale. Give it plenty of time to preheat, and look for that indicator light if your model has one.
- Don’t Overfill: It can be tempting to pour a lot of batter in, but overfilling your waffle iron can lead to messy overflows. Start with a little less than you think you need, and you can always add a tiny bit more if necessary.
- Oil Your Waffle Iron: Even if your waffle iron is non-stick, a light brush or spray of oil can help ensure the waffles release easily and get that beautiful golden crust.
- Keep Them Warm: If you’re making a big batch, you can keep cooked waffles warm and crisp by placing them on a wire rack set over a baking sheet in a 200°F (95°C) oven.
- Prep Ahead: You can whisk together your dry ingredients for both batters ahead of time and store them in airtight containers. You can also mix your wet ingredients (minus the food coloring until ready to use) and store them in the fridge overnight. Just give them a good whisk before combining with the dry!
How to Store Red Velvet Marble Waffles
If you’re lucky enough to have leftovers (which is a rare occurrence in my house!), storing these waffles is easy:
- Refrigeration: Cooked waffles can be stored in an airtight container in the refrigerator for up to 2-3 days.
- Freezing: For longer storage, let the waffles cool completely. Then, place them in a single layer on a baking sheet and freeze until solid (this prevents them from sticking together). Once frozen, transfer them to a freezer-safe bag or container for up to 2-3 months.
- Reheating: For best results, reheat frozen waffles directly in a toaster, toaster oven, or even a preheated oven (at 350°F/175°C for about 5-10 minutes) until crispy and heated through. This brings back their delicious texture!
FAQs
Q: What makes red velvet waffles taste like red velvet?
A: The distinctive red velvet flavor comes from a combination of cocoa powder (just a hint, not overwhelmingly chocolatey!), buttermilk, and vanilla. The buttermilk reacts with the cocoa and baking soda, creating that slight tang and helping to enhance the red color.
Q: Can I use regular milk instead of buttermilk?
A: Yes, you can! While buttermilk gives the best flavor and texture, you can create a substitute by adding 1 tablespoon of white vinegar or lemon juice to a liquid measuring cup, then filling the rest with regular milk to reach the required amount. Let it sit for 5-10 minutes before using.
Q: What are the best toppings for Red Velvet Marble Waffles?
A: My go-to toppings are whipped cream and fresh berries (strawberries or raspberries are perfect!), but maple syrup, powdered sugar, chocolate syrup, or even a cream cheese glaze would be absolutely delicious!
Q: Can I make the batter the night before?
A: While you can prep the dry and wet ingredients separately, I recommend mixing the batters right before you’re ready to cook. The leavening agents (baking powder and baking soda) start reacting once wet, so for the fluffiest waffles, it’s best to cook them shortly after mixing.
Looking for even more incredible dishes? Don’t forget to check out all our delicious recipes here on the blog!
For more delectable recipes and kitchen inspiration, be sure to follow us on Pinterest!
Red Velvet Marble Waffles
Ingredients
Equipment
Method
- Step 1: Prepare the Classic Waffle Batter: Grab a big mixing bowl and whisk together your dry ingredients for the classic batter: flour, sugar, baking powder, baking soda, and salt. In a separate bowl, whisk together the wet ingredients: buttermilk, eggs, melted butter, and vanilla extract. Now, pour those wet ingredients right into the dry ingredients. Mix gently until everything is just combined. A little lumpiness is okay! The key here is not to overmix, or your waffles might turn out tough.
- Step 2: Prepare the Red Velvet Batter: In another mixing bowl, whisk together the dry ingredients for your red velvet batter: flour, cocoa powder, sugar, baking powder, baking soda, and salt. In a third bowl, whisk together the buttermilk, egg, melted butter, vanilla extract, and, of course, that gorgeous red food coloring. Pour the wet ingredients into the dry ingredients and mix until just combined. Again, resist the urge to overmix!
- Step 3: Preheat the Waffle Iron: Get your trusty waffle iron fired up! Follow the manufacturer’s instructions for preheating. You want it nice and hot for perfectly crispy waffles.
- Step 4: Create the Marbled Effect: This is where the magic happens! Once your waffle iron is hot, lightly grease it if needed. Now, take a small amount of your classic waffle batter and dollop it onto the waffle iron. Then, add a small amount of the red velvet batter next to it. Don't cover the whole surface with one batter. Use a toothpick or a knife to gently swirl the two batters together. You're aiming for that beautiful, swirly marble effect, not a completely mixed color.
- Step 5: Cook the Waffles: Close the waffle iron and cook according to your manufacturer’s instructions. This usually takes a few minutes, until the waffles are beautifully golden brown and cooked through. They should be crisp on the outside and tender on the inside.
- Step 6: Serve: As soon as they're done, carefully remove them from the waffle iron. Serve these warm wonders with your favorite toppings. I love a dollop of whipped cream and some fresh berries, or a generous drizzle of maple syrup!