
Oh, friend, do you ever get that craving for something that’s just… different? You know, a dish that takes you by surprise, a little bit sweet, a little bit salty, and completely unforgettable? Well, buckle up, buttercup, because today we’re diving headfirst into a recipe that does exactly that. Forget everything you thought you knew about grilled cheese, because we’re about to turn it on its head with a delicious twist that combines the cozy comfort of a cinnamon roll with the smoky, savory goodness of BBQ bacon. It sounds wild, I know, but trust me, this BBQ Bacon Cinnamon Roll Grilled Cheese is an absolute game-changer. It’s so easy, so quick, and incredibly memorable – it’ll have everyone asking for your secret!
Why You’ll Love BBQ Bacon Cinnamon Roll Grilled Cheese
- Fast: Seriously, from prep to plate in under 15 minutes!
- Easy: Simple steps, simple ingredients, maximum flavor.
- Giftable: Not quite, but it’s definitely shareable and impressive!
- Crowd-pleasing: A unique combination that satisfies every palate.
Ingredients
Gather your simple treasures for this culinary adventure:
- 4 slices cinnamon roll bread: This is our sweet, soft foundation. If you can’t find specific “cinnamon roll” bread, a good quality brioche or challah bread with a hint of sweetness works beautifully. It’s truly the star that gives this grilled cheese its unique charm, almost like a cousin to a warm, homemade apple cinnamon roll.
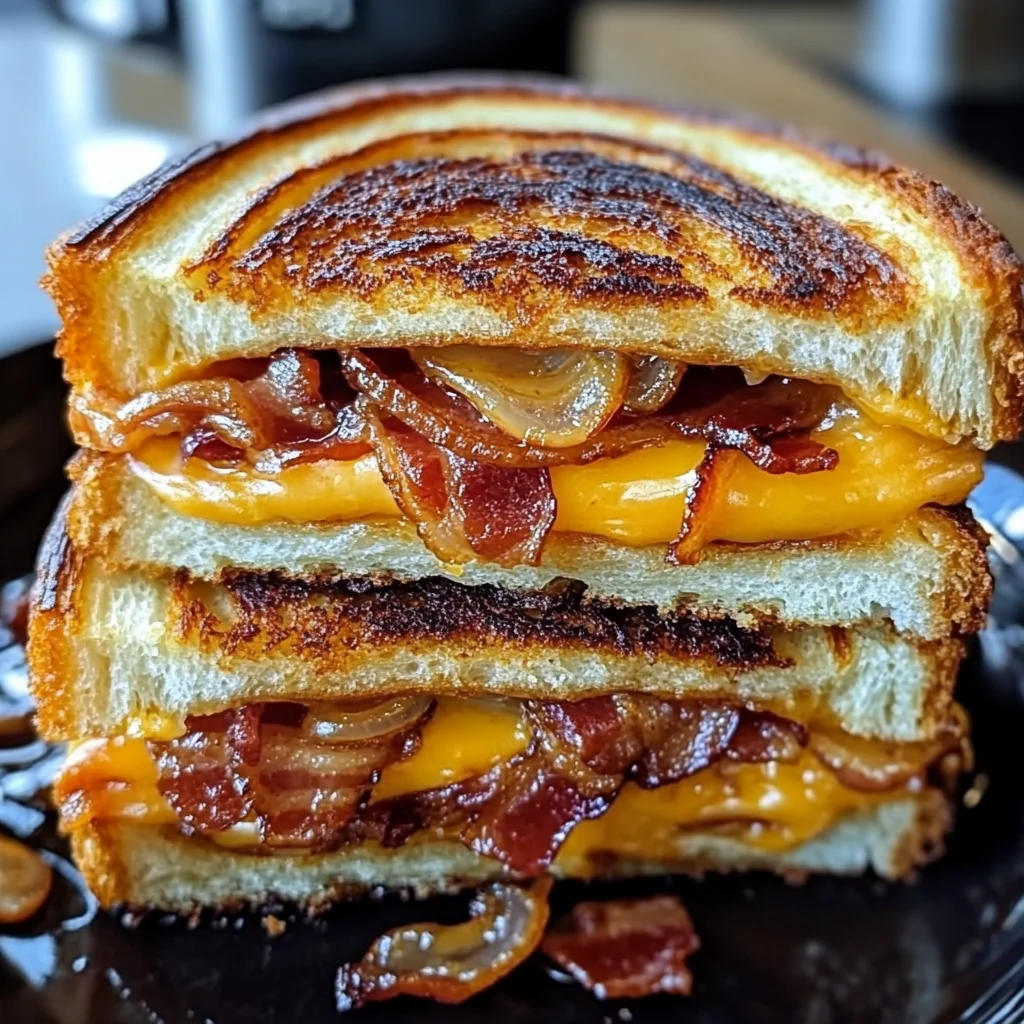
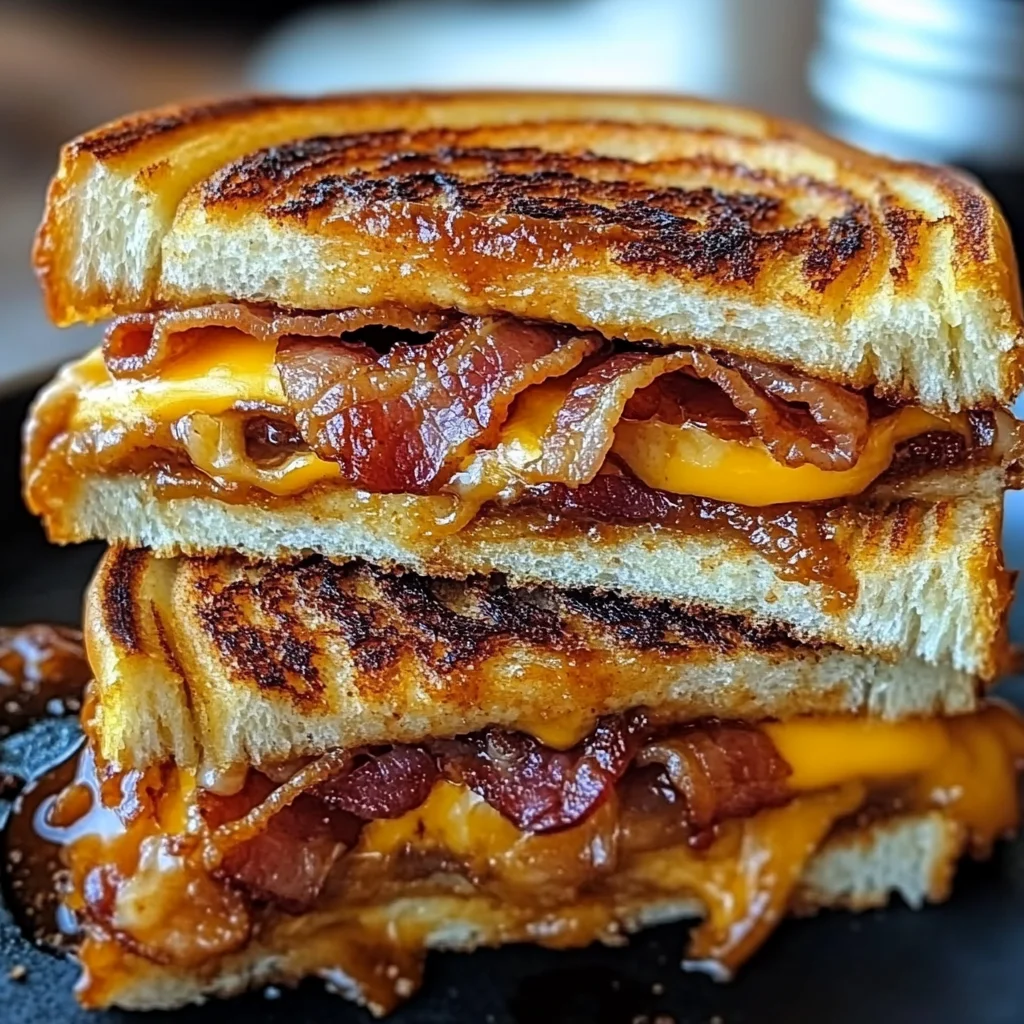
- 8 slices cooked bacon: Crispy is key here! You want that smoky, crunchy contrast. I like to cook mine in the oven for even crispiness with minimal fuss.
- 4 slices cheddar cheese: A classic for a reason! Its sharp tang cuts through the sweetness and melts like a dream.
- 4 tablespoons BBQ sauce: Your favorite kind! Whether you lean sweet, smoky, or a little spicy, this is where you customize your flavor profile.
- 2 tablespoons butter: For that perfectly golden, crispy crust we all adore on a grilled cheese.
How to Make BBQ Bacon Cinnamon Roll Grilled Cheese
Alright, let’s get cooking! This is where the magic happens, and you’ll see just how quickly this delicious creation comes to life.
- First things first, grab two slices of your wonderful cinnamon roll bread. Take about 1 tablespoon of your favorite BBQ sauce and generously spread it over one side of each of these two bread slices. You want a good, even layer to get that fantastic sweet-and-savory hit in every bite.
- Next, it’s bacon time! On top of that delicious BBQ sauce, carefully arrange 2 slices of your perfectly cooked, crispy bacon on each of those bread slices. Make sure they’re laid out nicely so you get bacon in every bite.
- Now for the cheese! Place one slice of cheddar cheese directly on top of the bacon on each of those bread slices. The cheese will act as a delicious glue and add that classic grilled cheese pull.
- Time to close up shop! Take your remaining two slices of cinnamon roll bread and gently place them on top, forming two beautiful sandwiches. You’re almost there!
- Heat a skillet over medium heat. This is important – you don’t want it too hot, or the bread will burn before the cheese melts. Once it’s warmed up, melt 1 tablespoon of butter in the skillet. Swirl it around so the entire surface is coated.
- Carefully place one sandwich into the hot skillet. Let it cook for about 3-4 minutes per side. You’re looking for a gorgeous golden-brown crust and cheese that’s bubbling and perfectly melted. Don’t rush it! A slow, steady heat is your friend for achieving that ideal grilled cheese toastiness, much like perfecting a hearty BBQ casserole.
- Once that first sandwich is done, remove it from the skillet and repeat the process with the second sandwich, melting another tablespoon of butter if needed.
- The grand finale! Once both sandwiches are cooked to perfection, carefully cut each one in half. Serve them immediately while they’re hot and the cheese is still wonderfully gooey.
Substitutions & Additions
Part of the fun of cooking is making a recipe your own! Here are some ideas to get your creative juices flowing:
- Cheese Swap: Not a cheddar fan? Try Monterey Jack, provolone, or even a smoked gouda for an extra layer of savory depth.
- Bacon Alternatives: If bacon isn’t your jam, crispy proscuitto, thinly sliced ham, or even a smoky turkey bacon could work.
- Sauce It Up: Experiment with different BBQ sauce styles – a sweet and spicy variety, a smoky chipotle, or even a maple-infused BBQ sauce could elevate this sandwich. For a super wild ride, try a drizzle of hot honey!
- Fruity Fun: Thinly sliced apple or pear could add an incredible fresh crunch and complementary sweetness.
- Herbaceous Twist: A sprinkle of fresh cilantro or chives could add a surprising savory brightness.
- Cream Cheese Dream: A thin layer of cream cheese spread on the non-BBQ sauce side of the bread before assembling could add an extra creamy dimension.
Tips for Success
Even though this recipe is super easy, a few tricks can make it absolutely perfect every time!
- Pre-Cook Your Bacon: Make sure your bacon is cooked to your desired crispiness before you start assembling. It won’t crisp up much more inside the sandwich.
- Medium Heat is Key: Resist the urge to crank up the heat! A medium heat ensures the bread gets beautifully golden and the cheese melts thoroughly without burning the outside. It’s the same patient approach you’d use to get that perfect crust on something like an easy pizza grilled cheese.
- Butter Both Sides: While I specified melting butter in the pan, you can also spread a thin layer of softened butter directly on the outside of your bread slices for an even more consistent golden crust.
- Cover for Melt: If your cheese isn’t melting fast enough, you can cover the skillet with a lid for a minute or two. This traps heat and helps the cheese get gooey faster.
- Don’t Over-Sauce: A tablespoon of BBQ sauce per slice is usually plenty. Too much can make the sandwich soggy.
How to Store BBQ Bacon Cinnamon Roll Grilled Cheese
This BBQ Bacon Cinnamon Roll Grilled Cheese is definitely best enjoyed hot and fresh from the skillet. The crispiness of the bread and the gooeyness of the cheese are at their peak then!
- Leftovers (if any!): If you do have leftovers, you can wrap them tightly in foil or plastic wrap and store them in the refrigerator for up to 2 days.
- Reheating: To reheat, I recommend popping them back into a skillet over medium-low heat for a few minutes per side until warmed through and re-crisped. An air fryer would also work wonders for re-crisping! The microwave will make it soft, which isn’t ideal for a grilled cheese.
FAQs
- Q: Can I use different types of bread?
- A: Absolutely! While cinnamon roll bread is unique, you could try brioche, challah, or even a thick-cut Texas toast for a different but still delicious result. Just keep in mind the sweetness factor.
- Q: What kind of BBQ sauce works best?
- A: This really comes down to personal preference! A classic sweet and smoky BBQ sauce is always a winner, but feel free to experiment with a spicier version for a kick, or a tangy mustard-based sauce for a different flavor profile.
- Q: Can I make this in an air fryer?
- A: Yes, you can! Preheat your air fryer to 375°F (190°C). Butter the outside of your assembled sandwich, then cook for 6-8 minutes, flipping halfway through, until golden and the cheese is melted. Keep an eye on it as air fryer times can vary.
- Q: Is this a breakfast, lunch, or dinner recipe?
- A: All of the above! It’s sweet enough for a decadent breakfast or brunch, savory enough for a quick and satisfying lunch, and unique enough to be a fun, easy dinner when you’re craving something out-of-the-box.
For more delicious and comforting recipes, be sure to follow us on Pinterest!

BBQ Bacon Cinnamon Roll Grilled Cheese
Ingredients
Equipment
Method
- Step 1: Grab two slices of cinnamon roll bread. Spread about 1 tablespoon of your favorite BBQ sauce generously over one side of each of these two bread slices.
- Step 2: On top of the BBQ sauce, carefully arrange 2 slices of your perfectly cooked, crispy bacon on each of those bread slices.
- Step 3: Place one slice of cheddar cheese directly on top of the bacon on each of those bread slices.
- Step 4: Take your remaining two slices of cinnamon roll bread and gently place them on top, forming two beautiful sandwiches.
- Step 5: Heat a skillet over medium heat. Melt 1 tablespoon of butter in the skillet, swirling it around to coat the surface.
- Step 6: Carefully place one sandwich into the hot skillet. Cook for about 3-4 minutes per side, until a gorgeous golden-brown crust forms and the cheese is bubbling and perfectly melted.
- Step 7: Once the first sandwich is done, remove it from the skillet and repeat the process with the second sandwich, melting another tablespoon of butter if needed.
- Step 8: Once both sandwiches are cooked to perfection, carefully cut each one in half. Serve them immediately while they’re hot and the cheese is still wonderfully gooey.


