Hey there, friend! Remember those dinners that just felt special, even on a regular Tuesday? The kind that smelled amazing while they cooked and made everyone gather around the table with happy anticipation? Well, get ready, because this Cheesy Garlic Butter Mushroom Stuffed Chicken is about to become one of those meals in your house.
This recipe takes simple ingredients and turns them into something truly magical. We’re talking tender chicken filled with a creamy, cheesy, garlicky mushroom mixture, all finished with a golden bake. It sounds fancy, right? But here’s the best part: it’s surprisingly easy! Seriously, if you can stuff a chicken breast, you can make this. It’s perfect for a cozy weeknight dinner, but impressive enough for when you have guests over. Let’s get cooking!
Why You’ll Love This Recipe
- Fast: Ready in under an hour!
- Easy: Simple steps, no complicated techniques.
- Delicious: Pure comfort food bliss in every bite.
- Crowd-pleasing: Who doesn’t love cheesy chicken?
- Impressive: Looks like you spent hours, but you didn’t!
Ingredients
Gather ’round the counter, here’s what you’ll need. Most of these are probably already staples in your kitchen!
- 4 boneless, skinless chicken breasts: The perfect canvas for our delicious filling. Choose ones that are roughly the same size for even cooking.
- 1 cup mushrooms, finely chopped: Any kind works! Cremini (baby bellas) or white button mushrooms are great here. Chopping them small ensures they blend beautifully into the filling.
- 1/2 cup cream cheese, softened: Make sure it’s nice and soft! Leave it on the counter for a bit before you start. This is what makes the filling wonderfully creamy.
- 1/2 cup shredded mozzarella cheese: For that classic, melty cheese pull!
- 3 tablespoons butter: Used for searing and adding that rich, buttery flavor.
- 3 cloves garlic, minced: Because garlic + butter + chicken + mushrooms is a match made in heaven. Don’t be shy with the garlic!
- 1 teaspoon dried thyme: Adds a lovely earthy, aromatic note that pairs so well with mushrooms.
- 1 teaspoon dried parsley: Brings a touch of freshness to the filling.
- Salt and pepper to taste: Essential for bringing out all those delicious flavors. Season generously!
- 1/4 cup grated Parmesan cheese: Sprinkled on top for a nutty, salty crust.
- Fresh parsley, for garnish: A little sprinkle at the end adds color and brightens everything up.
How to Make It
Okay, apron on? Let’s do this step-by-step! You’ve got this.
- First things first, let’s get the oven ready. Preheat your oven to a cozy 375°F (190°C). Grab a baking sheet and line it with parchment paper. If you don’t have parchment, a light grease will work too, but parchment makes cleanup a breeze!
- Now, let’s prep the chicken. Lay a chicken breast flat and carefully cut a pocket into the thickest side. You want to go almost all the way through, but leave about a half-inch connected on the sides and bottom. Imagine you’re making a little envelope for the filling! Be gentle and use a sharp knife.
- In a medium bowl, let’s make that glorious filling. Combine the finely chopped mushrooms, softened cream cheese, shredded mozzarella, minced garlic, dried thyme, dried parsley, and a good pinch of salt and pepper. Give it a good stir until everything is nicely mixed together.
- Time to stuff! Spoon that creamy, cheesy mushroom mixture into the pocket you cut in each chicken breast. Don’t worry if a little spills out, we’ll tuck it all in. Try to get a good amount in there!
- Next, grab a skillet that’s safe to go into the oven (or just a regular one if you plan to transfer). Melt the butter over medium heat.
- Carefully place the stuffed chicken breasts in the hot skillet. Sear them for about 3-4 minutes on each side until they are beautifully golden brown. This searing step isn’t just for looks; it locks in juices and adds amazing flavor!
- Once they’re golden, transfer the seared chicken breasts from the skillet to your prepared baking sheet.
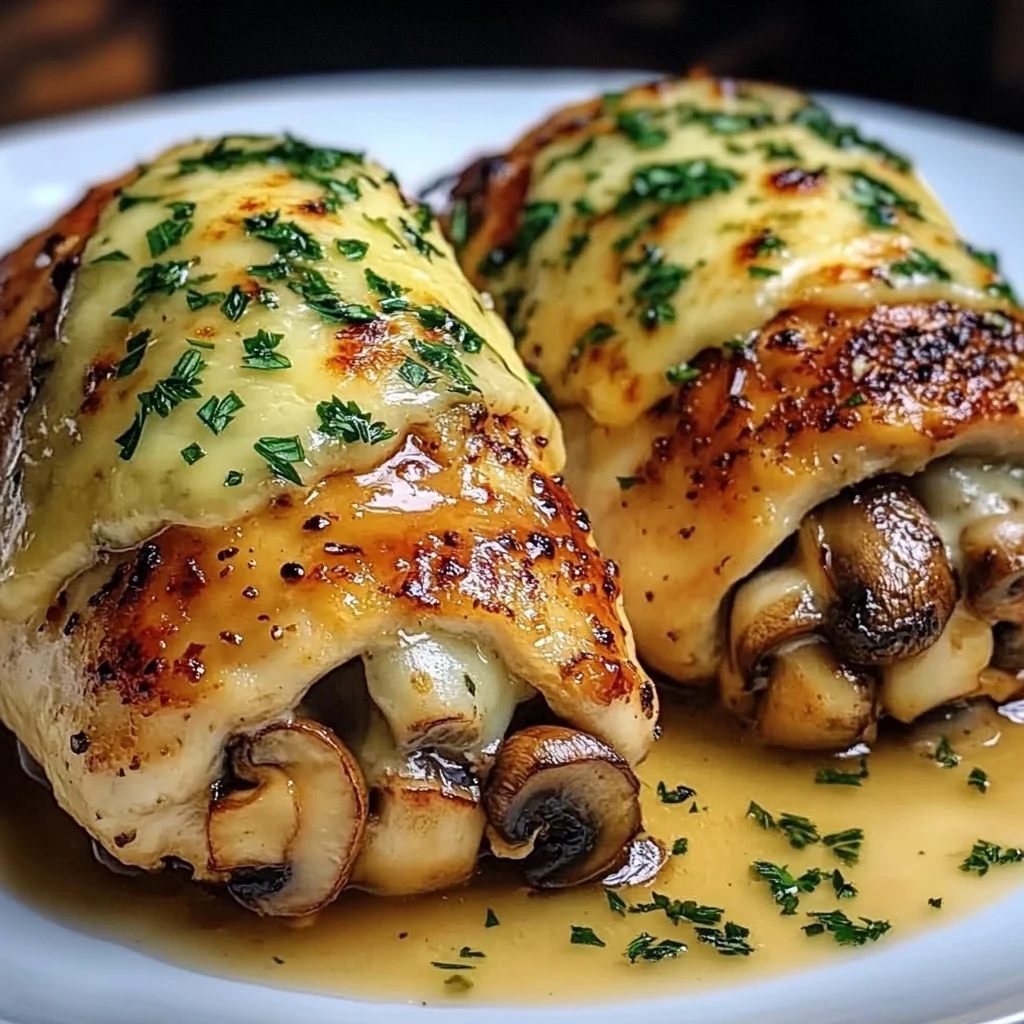
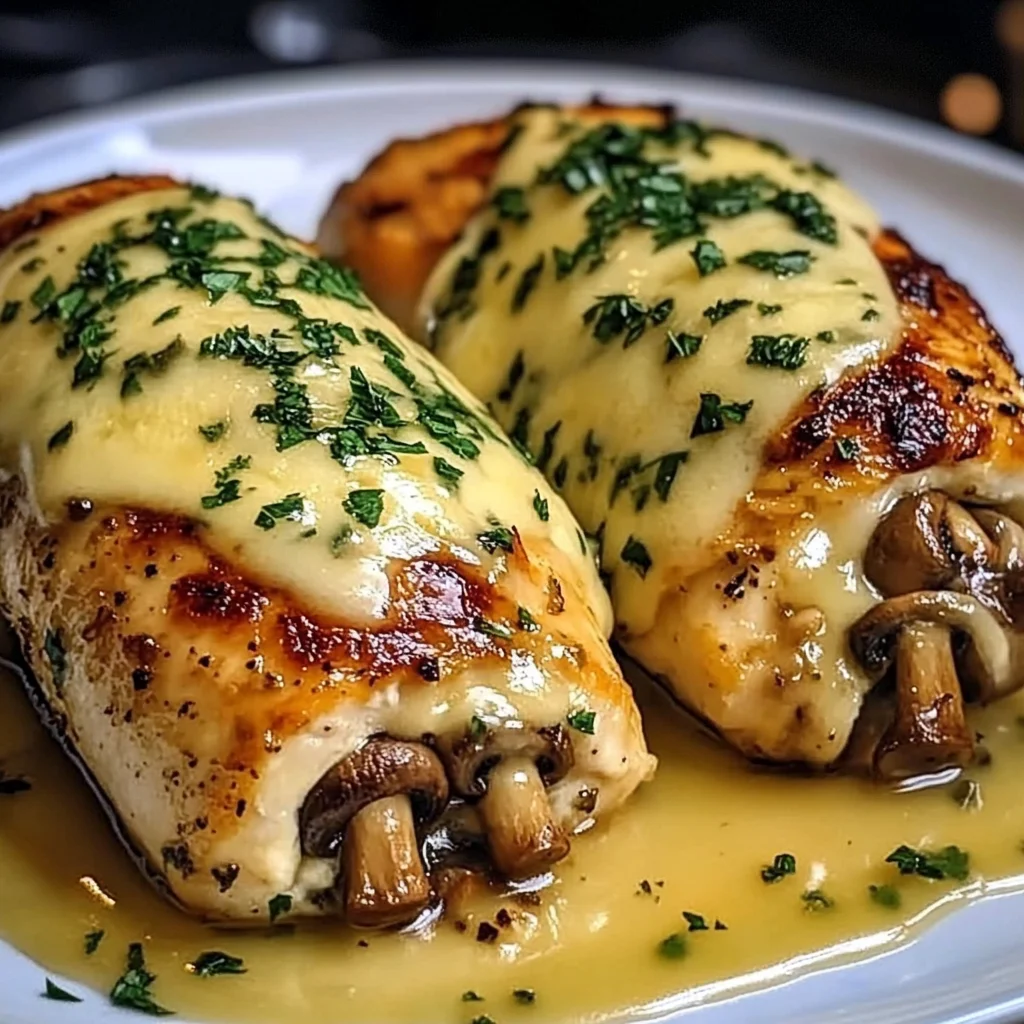
- Now for the final touch before the oven! Sprinkle the grated Parmesan cheese evenly over the top of each stuffed chicken breast. This will create a lovely, slightly crispy cheese crust as it bakes.
- Pop the baking sheet into your preheated oven. Bake for 20-25 minutes. How do you know it’s done? The chicken should be cooked through (no pink inside!), the cheese should be bubbly and melted, and the internal temperature of the thickest part of the chicken should reach 165°F (74°C) using a meat thermometer.
- Once they’re out of the oven, let them rest for a few minutes. This helps the juices redistribute, keeping the chicken nice and moist. Just before serving, chop some fresh parsley and sprinkle it over the top for a pop of color and freshness.
Substitutions & Additions
Want to shake things up or use what you have on hand? Here are a few ideas:
- Veggies: Sauté some spinach or sun-dried tomatoes and add them to the mushroom filling mixture.
- Cheese: Swap mozzarella for provolone, Gruyère, or a blend of your favorite melting cheeses. A little shredded cheddar can be fun too!
- Herbs: Fresh herbs like rosemary or sage can be used instead of or in addition to thyme and parsley. Use about three times the amount of fresh herbs compared to dried.
- Spice: Add a pinch of red pepper flakes to the filling for a little heat.
- Protein: While boneless, skinless chicken breasts work best for stuffing, you could adapt this concept for thicker chicken thighs, though cooking time might vary.
Tips for Success
A few little pointers I’ve learned along the way to make sure your stuffed chicken turns out perfectly:
- Don’t Cut All The Way: When making the pocket, go slow! You want to create a deep pocket but keep the bottom and sides intact so the filling stays put. A sharp knife is your best friend here.
- Soften That Cream Cheese: I know I mentioned it before, but it’s worth repeating! Cold cream cheese makes the filling hard to mix and stuff. Let it sit out or give it a quick zap in the microwave if you’re in a hurry (just a few seconds!).
- Don’t Overstuff: While tempting, jamming too much filling in can cause it to ooze out excessively during cooking. Fill them generously, but don’t force it.
- Check for Doneness: The best way to ensure juicy, perfectly cooked chicken is to use a meat thermometer. 165°F (74°C) is the magic number for food safety and deliciousness!
- Prep Ahead: You can mix the filling a day in advance and keep it covered in the fridge. You could also stuff the chicken breasts up to a few hours ahead and keep them covered in the fridge until you’re ready to sear and bake.
How to Store It
Got leftovers? Lucky you! This stuffed chicken is great the next day.
Store any leftover cooked chicken in an airtight container in the refrigerator for up to 3-4 days. To reheat, you can gently warm it in the microwave, but for best results (and to keep the chicken from drying out), I recommend reheating it in a preheated oven at 325°F (160°C) until warmed through. This helps the cheese stay gooey and the chicken tender.
Freezing: You can freeze cooked stuffed chicken. Let it cool completely, then wrap individual portions tightly in plastic wrap and place in a freezer-safe bag or container. It should keep for up to 2-3 months. Thaw overnight in the refrigerator and reheat as directed above.
FAQs
Quick answers to some common questions:
Q: Can I make this without searing?
A: Yes, you technically can skip the searing step and just bake it, but I strongly recommend searing! It adds so much flavor and creates a lovely crust. If you skip it, add a few minutes to the baking time and ensure the chicken is fully cooked.
Q: My filling oozed out! What did I do wrong?
A: Don’t worry, a little bit of oozing is totally normal and even delicious! It just means you have plenty of filling. Excessive oozing might mean the pocket wasn’t cut quite right (a hole on the bottom or side) or it was slightly overstuffed. It will still taste amazing!
Q: Can I use fresh garlic instead of minced?
A: The recipe calls for minced garlic, which is fresh garlic pressed or finely chopped. If you only have garlic powder, you could substitute, but fresh minced garlic offers the best flavor here. About 1/2 teaspoon of garlic powder could replace the 3 cloves, but adjust to your taste.
Q: What should I serve with this?
A: This stuffed chicken pairs beautifully with simple sides like roasted vegetables (broccoli, asparagus, green beans), mashed potatoes, rice pilaf, or a fresh green salad. A crusty bread is also great for soaking up any extra cheesy goodness!
Alright, friend, there you have it! I can’t wait for you to try this Easy Cheesy Garlic Butter Mushroom Stuffed Chicken. It’s truly a winner. Let me know how it turns out for you in the comments below!

Easy Cheesy Garlic Butter Mushroom Stuffed Chicken
Ingredients
Equipment
Method
- Step 1: Preheat your oven to 375°F (190°C). Line a baking sheet with parchment paper or lightly grease it.
- Step 2: Lay a chicken breast flat and carefully cut a pocket into the thickest side, going almost all the way through but leaving about a half-inch connected on the sides and bottom. Repeat with the remaining chicken breasts.
- Step 3: In a medium bowl, combine the finely chopped mushrooms, softened cream cheese, shredded mozzarella, minced garlic, dried thyme, dried parsley, and a good pinch of salt and pepper. Stir until nicely mixed.
- Step 4: Spoon the mushroom mixture into the pocket you cut in each chicken breast. Try to get a good amount in there!
- Step 5: Grab a skillet (oven-safe if you have one, otherwise use a regular one and plan to transfer). Melt the butter over medium heat.
- Step 6: Carefully place the stuffed chicken breasts in the hot skillet. Sear them for about 3-4 minutes on each side until they are beautifully golden brown.
- Step 7: Once they're golden, transfer the seared chicken breasts from the skillet to your prepared baking sheet.
- Step 8: Sprinkle the grated Parmesan cheese evenly over the top of each stuffed chicken breast.
- Step 9: Pop the baking sheet into your preheated oven. Bake for 20-25 minutes, or until the chicken is cooked through (no pink inside!) and the internal temperature reaches 165°F (74°C).
- Step 10: Once they're out of the oven, let them rest for a few minutes. Just before serving, chop some fresh parsley and sprinkle it over the top for a pop of color and freshness.