Oh, friend, do you remember those perfect potlucks and family gatherings? The ones where there was always that one dessert everyone flocked to? The one that was impossibly moist, bursting with tropical flavor, and just screamed “happy”? Well, get ready, because you’re about to meet your new favorite! This Juicy Pineapple Heaven Cake is exactly that kind of magic – it’s shockingly easy, incredibly quick to throw together, and trust me, it’s going to be the dessert everyone asks you to bring again and again. It’s pure sunshine in every single bite, and the best part? It takes hardly any effort, leaving you more time to enjoy those precious moments.
Why You’ll Love Juicy Pineapple Heaven Cake
- Fast: Seriously, this comes together in a flash, making it perfect for last-minute cravings or unexpected guests.
- Easy: If you can open a box and a can, you can make this cake! No fancy techniques or equipment needed.
- Giftable: Need a sweet treat for a neighbor, a thank-you gift, or a hostess present? This cake travels beautifully and always delights.
- Crowd-pleasing: The vibrant pineapple flavor and fluffy texture are universally loved, making it a guaranteed hit at any gathering.
Ingredients
Gathering your ingredients for this pineapple paradise is as simple as it gets. You probably have most of these in your pantry already!
- 1 box yellow cake mix: Your trusty shortcut to baking success. Any standard 15.25 oz box will do!
- 1 (20 oz) can crushed pineapple in juice, undrained (for the cake): This is the secret to ultimate moisture and flavor in the cake itself. Don’t drain it; the juice is precious!
- 3 large eggs: To bind it all together and give your cake structure.
- 1/2 cup vegetable oil: For that wonderfully tender crumb that makes this cake so irresistible.
For the Topping:
- 1 (8 oz) tub whipped topping: Think of it as a cloud of lightness. Make sure it’s thawed if frozen!
- 1 (3.4 oz) package instant vanilla pudding mix: This magical little box thickens our topping and adds a lovely vanilla boost.
- 1 (20 oz) can crushed pineapple in juice, undrained (for the topping): Yes, another can! This infuses the topping with even more juicy pineapple goodness.
How to Make Juicy Pineapple Heaven Cake
Alright, let’s get that kitchen smelling amazing! You’re just a few simple steps away from a slice of heaven.
- Prep Your Pan: First things first, preheat your oven to a cozy 350°F (175°C). While it’s warming up, grab a 9×13-inch baking dish and give it a good grease. You want to make sure your beautiful cake comes out easily!
- Mix the Cake Batter: In a large mixing bowl, combine the yellow cake mix, the first can of crushed pineapple (juice and all!), your eggs, and the vegetable oil. Now, here’s a little tip from me: beat it until everything is just well blended. Overmixing can make a cake tough, and we want this one perfectly tender!
- Bake to Golden Perfection: Pour your lovely batter into your prepared 9×13-inch pan. Pop it into the preheated oven and bake for 30 to 35 minutes. You’ll know it’s ready when a toothpick inserted right into the center comes out clean. Each oven is a little different, so keep an eye on it!
- Cool Down: This step is crucial, so don’t rush it! Let the cake cool completely in the pan on a wire rack. I know, the aroma is tempting, but a fully cooled cake means your topping won’t melt.
- Whip Up the Topping: While your cake is chilling out, grab a medium bowl. Gently fold together the thawed whipped topping, the instant vanilla pudding mix, and the remaining can of crushed pineapple with its juice. Keep folding until it’s wonderfully smooth and evenly combined.
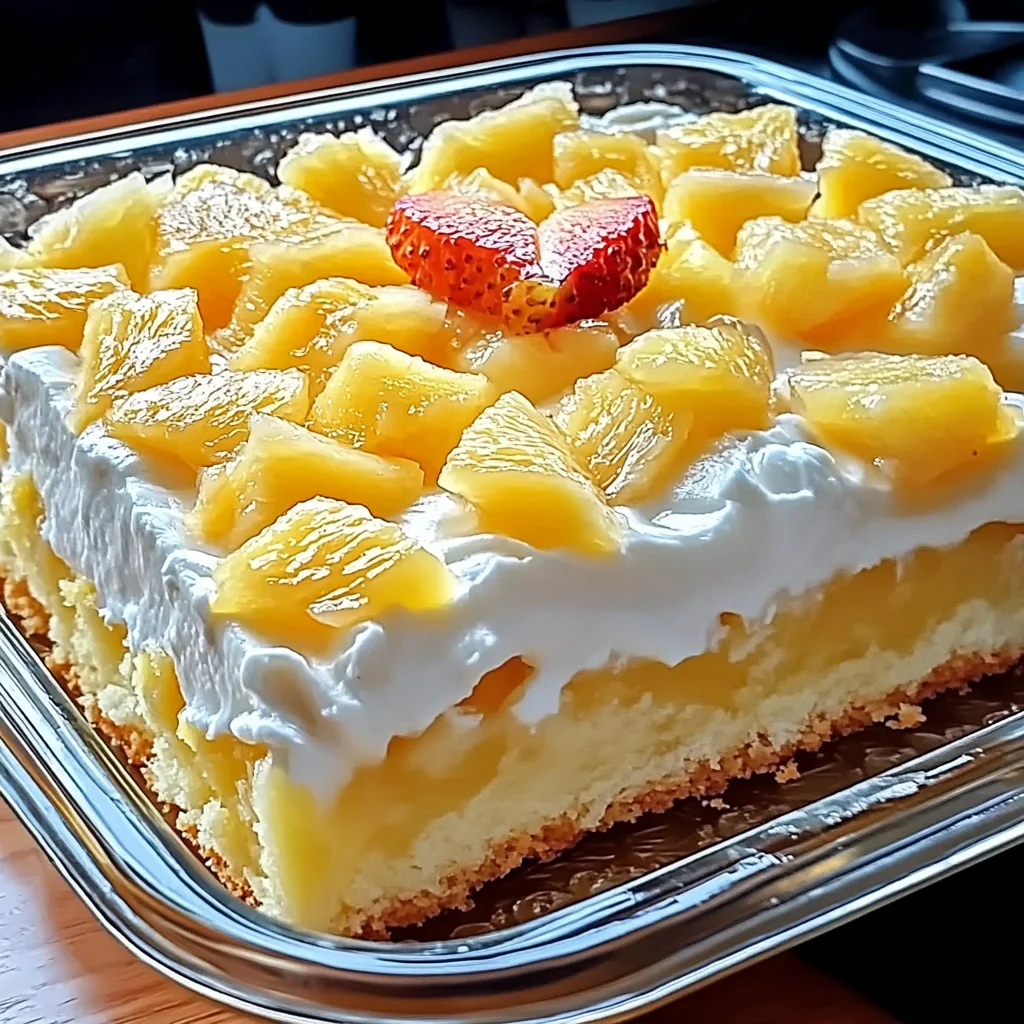
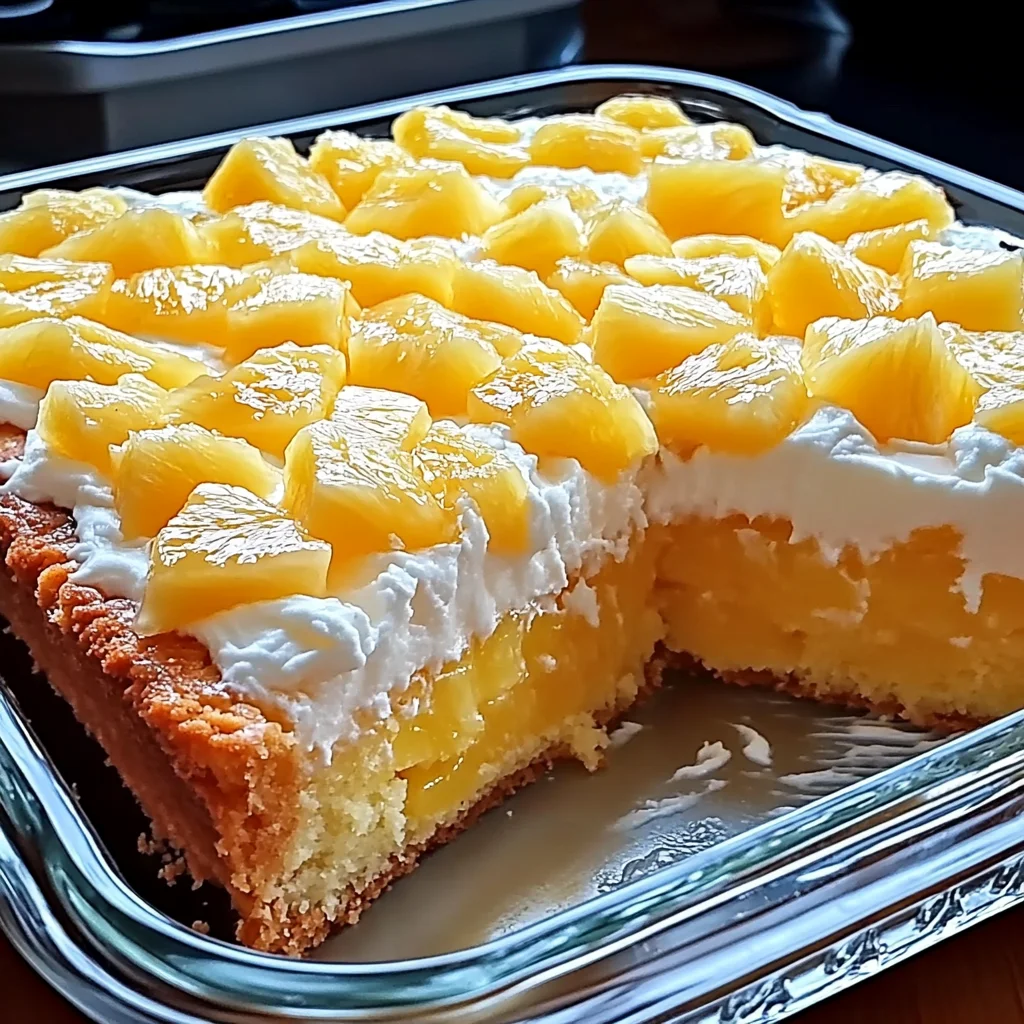
- Spread the Sunshine: Once your cake is totally cool (I mean totally cool!), spread that luscious pineapple topping generously over the entire surface. Make sure you get all the way to the edges!
- Chill Out: For the topping to set beautifully and for all those flavors to truly meld, refrigerate your Pineapple Heaven Cake for at least 1 hour before serving. This step makes all the difference in achieving that perfect juicy, fluffy texture.
Substitutions & Additions
One of the things I love most about this cake is how adaptable it is! Feel free to get creative and make it your own.
- Cake Mix Swaps: While yellow cake mix is classic, you could easily use a white cake mix for a slightly lighter flavor, or even a lemon cake mix for an extra citrusy kick!
- Pineapple Texture: If you want a bit more bite, try using pineapple tidbits instead of crushed pineapple in the topping.
- Topping Twists: For an even richer experience, consider folding in a block of softened cream cheese with the whipped topping and pudding for a creamier, cheesecake-like frosting. You could also sprinkle the top with toasted coconut flakes or a few maraschino cherries for a pop of color. If you’re a fan of tropical desserts, you might also enjoy our Easy 5-Ingredient Pineapple Ice Cream for another sweet, fruity treat!
- Nutty Crunch: A sprinkle of chopped pecans or walnuts on top before chilling adds a delightful crunch.
Tips for Success
Even though this cake is super easy, a few little pointers can ensure it’s absolutely perfect every time!
- Don’t Overmix the Cake Batter: I mentioned it in the instructions, but it’s worth repeating! Mixing too much develops the gluten, leading to a tougher cake. Mix just until combined.
- Cooling is Key: This is probably the most important tip. If your cake isn’t completely cool, the whipped topping will melt and you’ll have a runny mess instead of a fluffy dream. Patience, my friend!
- Chill Time for Topping: The hour in the fridge for the topping isn’t just a suggestion; it’s essential. It allows the pudding mix to set the whipped topping, giving it that perfect, stable consistency.
- Even Spreading: Use an offset spatula or the back of a spoon to spread the topping evenly for a beautiful presentation.
- Prep Ahead: You can bake the cake the day before, let it cool completely, cover it, and leave it on the counter. Then, whip up the topping and assemble it a few hours before you plan to serve. And if you’re looking for another classic, moist cake to impress with minimal fuss, be sure to check out The Ultimate Classic Carrot Cake!
How to Store Juicy Pineapple Heaven Cake
Because of the whipped topping, this cake needs to be kept cold. Store any leftovers (if there are any!) in an airtight container in the refrigerator. It will stay delicious for about 3-4 days. I don’t recommend freezing this cake, as the whipped topping can change texture once thawed.
FAQs
- Q: Can I use fresh pineapple instead of canned?
- A: For this specific recipe, canned crushed pineapple is highly recommended because of the moisture content and consistency it provides. Fresh pineapple can be a bit too acidic and might not give you the same results.
- Q: Can I make this in a different size pan?
- A: You can, but you’ll need to adjust the baking time. For example, a square 8×8 or 9×9-inch pan would require a longer baking time (and yield a thicker cake), while a larger sheet cake pan would bake faster and result in a thinner cake.
- Q: Is this cake very sweet?
- A: It’s definitely a sweet treat, but the natural tartness of the pineapple balances it out beautifully. It’s a delightful balance of sweet and tangy!
- Q: Can I make this gluten-free?
- A: Absolutely! Just swap out the regular yellow cake mix for your favorite gluten-free yellow cake mix. The rest of the ingredients are naturally gluten-free.
For more delicious and easy recipes, be sure to follow us on Pinterest!

Juicy Pineapple Heaven Cake
Ingredients
Equipment
Method
- Step 1: Preheat oven to 350°F (175°C). Grease a 9x13-inch baking dish.
- Step 2: In a large mixing bowl, combine yellow cake mix, the first can of undrained crushed pineapple, eggs, and vegetable oil. Beat until just well blended to ensure a tender cake.
- Step 3: Pour batter into the prepared pan and bake for 30 to 35 minutes, or until a toothpick inserted into the center comes out clean.
- Step 4: Let the cake cool completely in the pan on a wire rack before proceeding. This is crucial to prevent the topping from melting.
- Step 5: In a medium bowl, gently fold together the thawed whipped topping, instant vanilla pudding mix, and the remaining can of undrained crushed pineapple until smooth and evenly combined.
- Step 6: Once the cake is completely cool, spread the pineapple topping generously over the entire surface, covering all edges.
- Step 7: Refrigerate the cake for at least 1 hour before serving to allow the topping to set and flavors to meld.