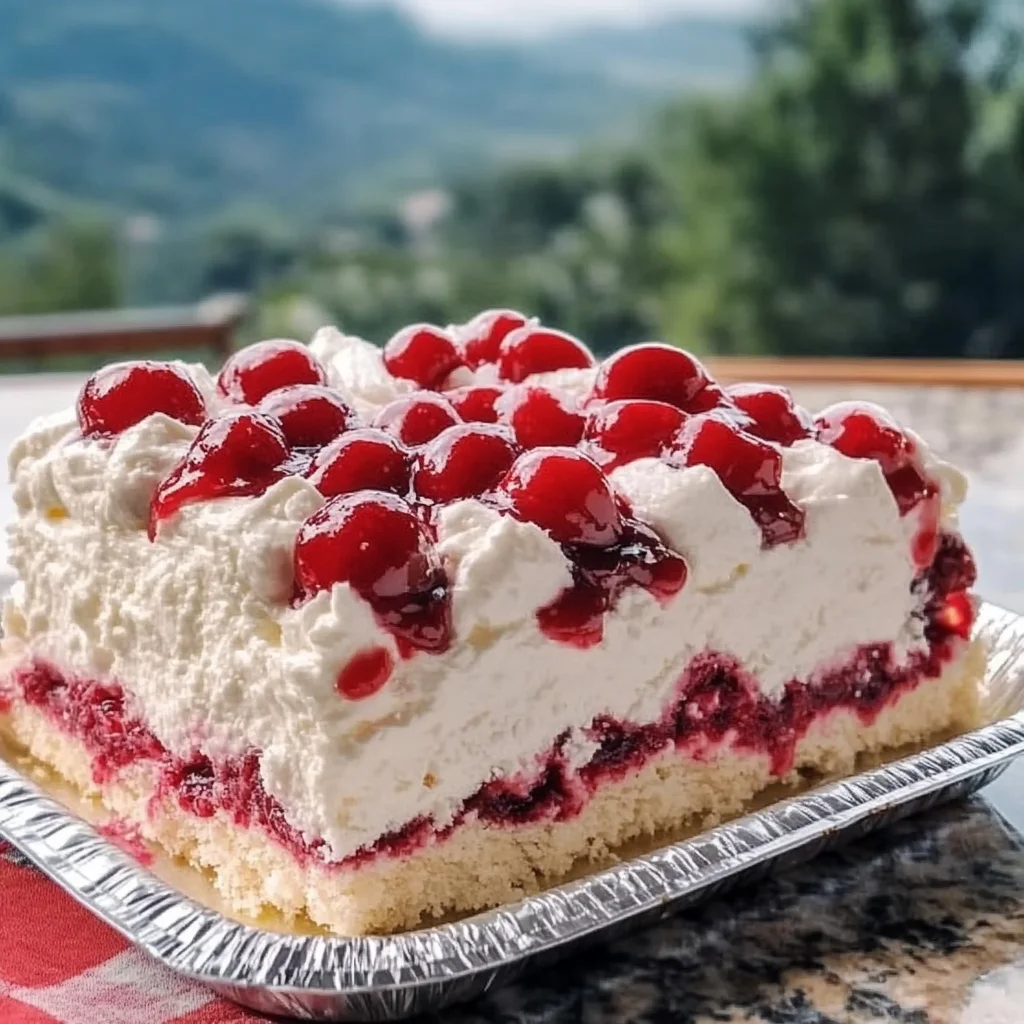
There’s something truly magical about desserts that remind you of simpler times—like those cozy afternoons spent in grandma’s kitchen, where the sweet aroma of freshly baked treats filled the air and everyone gathered ’round for a slice of happiness. If you’re looking for a dessert that’s as nostalgic as it is effortless, let me introduce you to the Cherry Angel Cloud Cake. This cake is like a fluffy, tender cloud kissed with juicy cherries and a dollop of creamy whipped topping. It’s the kind of dessert that brings smiles, memories, and a little sparkle to any table.
What’s even better? This recipe is incredibly quick and easy to make. With just a few ingredients and minimal steps, you’ll have a show-stopping dessert ready in no time. Whether you’re whipping it up for a family dinner, a holiday gathering, or just because you deserve a sweet treat, this cake will become your new go-to. So, grab your apron, and let’s create some kitchen magic together!
Why You’ll Love Cherry Angel Cloud Cake
- Fast: It comes together in less than an hour, perfect for last-minute plans.
- Easy: Minimal ingredients and simple steps make it a breeze for any skill level.
- Giftable: Wrapped up nicely, it makes a thoughtful homemade gift for friends or neighbors.
- Crowd-pleasing: Light, fluffy, and sweet—everyone asks for seconds!
Ingredients
Let’s talk about the stars of this recipe. You only need three main ingredients, but each one plays a key role in creating this delightful dessert:
- 1 box angel food cake mix: This is the foundation of your cloud-like cake. Angel food cake is known for its airy texture, which makes it a perfect canvas for the cherries and whipped topping. I recommend using a trusted brand you like, but feel free to try a gluten-free mix if that suits your dietary needs.
- 1 can cherry pie filling: The cherry pie filling adds a burst of sweet, juicy flavor and a bit of color contrast. It’s like little pockets of cherry goodness that complement the light cake perfectly. You can find this in most grocery stores, usually in the baking aisle.
- 1 tub whipped topping (thawed): This adds that creamy, fluffy finish that makes the cake irresistible. I love using whipped topping because it’s light and airy, echoing the texture of the cake itself. If you want to get fancy, you can swap this for freshly whipped cream, but the tub works great for a quick fix.
How to Make Cherry Angel Cloud Cake
Now for the fun part—baking your own slice of cloud heaven! Don’t worry, I’ll walk you through each step like we’re chatting over the kitchen counter:
- Preheat your oven: Follow the temperature instructions on your angel food cake mix box. This is usually around 350°F, but always double-check to be sure your cake bakes perfectly.
- Prepare the cake batter: Open your angel food cake mix and prepare it exactly as the package directs. This usually means mixing the dry ingredients with water and sometimes egg whites, but your box will have the precise method. I like to use a hand mixer to get the batter nice and smooth, but a whisk works if you don’t have one.
- Pour the batter into a Bundt pan: A Bundt pan gives the cake its lovely ring shape and helps it bake evenly. There’s no need to grease the pan since angel food cake batter is designed to cling to the sides, giving it that iconic rise and texture.
- Bake the cake: Pop your Bundt pan in the oven and bake according to the package instructions. Usually, it takes about 35-40 minutes. You’ll know it’s done when the top is golden and springs back when gently pressed.
- Cool completely: This part is crucial! Let the cake cool fully in the pan before you remove it. I like to invert the Bundt pan on a bottle or rack while cooling to keep its shape and prevent it from collapsing. Patience here pays off with a perfect texture.
- Remove from pan and decorate: Once cooled, carefully loosen the edges with a knife if needed and invert the cake onto a serving plate. Now comes the best part—spread the cherry pie filling evenly over the top, followed by a generous layer of whipped topping. You can create pretty swirls with a spatula or leave it simple and rustic.
- Serve and enjoy: Slice into this fluffy masterpiece and watch the smiles light up the room!
This cake pairs wonderfully with a cup of coffee or a tall glass of cold milk. It’s also a great finale to a summer BBQ or a casual Sunday dinner. If you’re looking for other quick and delicious desserts, you might enjoy browsing through the easy dessert recipes collection I’ve put together for busy home cooks.
Substitutions & Additions
One of the best things about the Cherry Angel Cloud Cake is how versatile it is. Feel free to make it your own with these ideas:
- Swap the cherry pie filling: If cherries aren’t your thing, try blueberry, strawberry, or mixed berry pie filling instead. Each one brings a new twist and flavor profile.
- Fresh fruit topping: For a fresher, less sweet option, top the cake with fresh cherries or berries and a drizzle of honey.
- Whipped cream alternative: Use homemade whipped cream with a touch of vanilla extract for extra flavor. Or try coconut whipped cream for a dairy-free version.
- Add a drizzle of chocolate or caramel: A little warm chocolate or caramel sauce over the top can elevate this cake into a decadent treat. It’s a fun idea if you want to impress guests.
- Nuts for crunch: Sprinkle chopped toasted almonds, pecans, or walnuts over the whipped topping for a delightful crunch contrast.
If you love cherry desserts, you might also want to check out the delightful Cherry Pie Bites Crescent Rolls for another quick cherry-filled treat!
Tips for Success
To make sure your Cherry Angel Cloud Cake turns out perfectly every time, here are some tips I’ve learned along the way:
- Don’t rush the cooling process: Angel food cake is delicate and needs to cool fully in the pan to keep its shape. Invert it on a bottle or rack to prevent collapsing.
- Use room temperature ingredients: If your cake mix calls for egg whites or water, make sure they’re at room temperature for the best rise and texture.
- Beat the batter gently: Avoid overmixing once you start folding in air. This helps keep the cake light and fluffy.
- Prep ahead: Bake the cake a day before serving to give it time to cool completely. Keep it covered in an airtight container to stay fresh.
- Chill before serving: After topping with cherry filling and whipped topping, pop the cake in the fridge for 30 minutes. This helps everything set and intensifies the flavors.
And if you’re interested in a lemony twist for your next dinner party dessert, the creamy lemon chicken recipe on the site pairs beautifully with lighter desserts like this cake to keep your meal balanced and fresh.
How to Store Cherry Angel Cloud Cake
Since this cake is topped with whipped topping and cherry pie filling, it’s best stored in the refrigerator. Here’s how to keep your Cherry Angel Cloud Cake fresh and delicious:
- Cover it well: Use plastic wrap or a cake dome to protect it from absorbing other fridge odors.
- Store for up to 3 days: The whipped topping might start to weep or lose its fluffiness after a few days, so it’s best enjoyed fresh.
- Freeze the plain cake: If you want to prep ahead, bake the cake and freeze it without toppings. Wrap it tightly in plastic wrap and foil. Thaw completely before adding the cherry filling and whipped topping.
Storing the components separately and assembling just before serving is my favorite way to maintain that fresh, airy texture. This is a handy trick I’ve used many times when planning for celebrations or holiday meals.
FAQs
Can I make this cake from scratch without a mix?
Absolutely! While the mix makes it super quick and foolproof, you can bake your own angel food cake from scratch if you’d like. Just make sure to follow a recipe that yields a light, fluffy texture to complement the cherry topping.
Is there a gluten-free option for this cake?
Yes! Many brands offer gluten-free angel food cake mixes. Just check the label to ensure it fits your needs, and prepare it the same way as the regular mix.
Can I use fresh cherries instead of canned pie filling?
You can! Fresh cherries will bring a brighter, less sweet flavor. You might want to cook them down slightly with a bit of sugar and lemon juice to mimic the pie filling consistency, or simply use them fresh for a lighter topping.
What’s the best way to serve this cake?
Serve it chilled or at room temperature. I like to slice it with a sharp serrated knife for clean cuts and pair it with coffee or a light dessert wine. It also makes a lovely afternoon treat with tea.
If you love easy, crowd-pleasing desserts like this, you might also want to try the no-bake peanut butter brownie cookies for a no-fuss sweet to keep on hand.
There you have it — a simple, stunning Cherry Angel Cloud Cake that’s sure to become a beloved staple in your dessert repertoire. Whether you bake it for a special occasion or a cozy night in, it’s a treat that feels like a warm hug from the inside out. Happy baking!
Don’t forget to follow me on Pinterest for more inspiring recipes and kitchen ideas.
Cherry Angel Cloud Cake
Ingredients
Equipment
Method
- Step 1: Preheat your oven according to the angel food cake mix box instructions, usually around 350°F.
- Step 2: Prepare the cake batter as directed on the box, using water and possibly egg whites. Use a hand mixer or whisk until smooth.
- Step 3: Pour the batter into an ungreased Bundt pan to maintain the cake’s rise and texture.
- Step 4: Bake the cake according to package instructions, about 35-40 minutes, until the top is golden and springs back when pressed.
- Step 5: Let the cake cool completely in the pan, inverted on a bottle or rack to keep its shape and prevent collapsing.
- Step 6: Carefully loosen the edges with a knife and invert the cake onto a serving plate.
- Step 7: Spread cherry pie filling evenly over the top of the cake.
- Step 8: Top with a generous layer of whipped topping, creating swirls with a spatula or keeping it rustic.
- Step 9: Chill the cake for 30 minutes before slicing and serving for best flavor and texture.