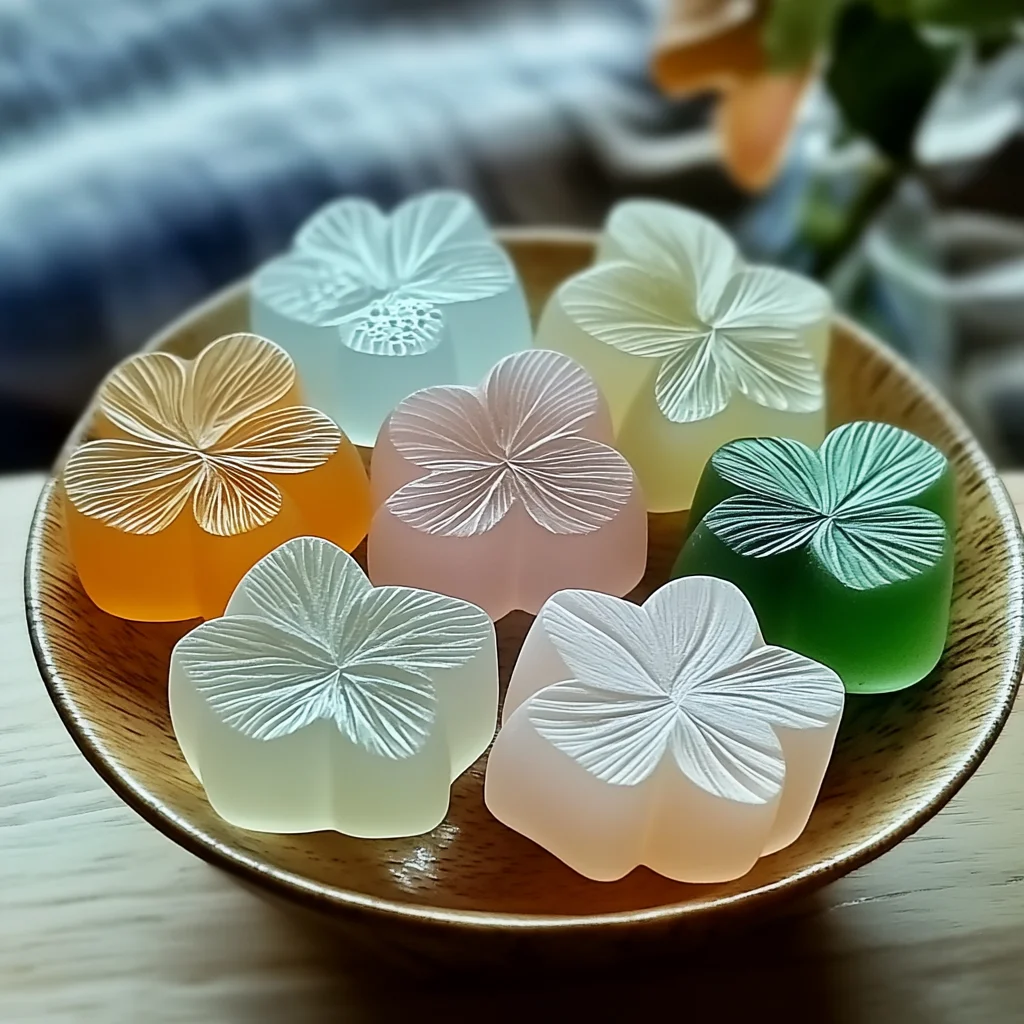
There’s something so comforting about filling your space with gentle, soothing scents. It reminds me of cozy afternoons curled up with a good book or those special moments when a certain fragrance instantly brings back a flood of happy memories. If you’ve ever wished you could create your own little scented treasures, I’ve got just the thing for you: DIY aroma stones. They’re quick, simple, and perfect for freshening up any corner of your home with a natural, lovely fragrance.
Whether you’re looking to make your closet smell like a fresh spring breeze or want a charming handmade gift, these aroma stones are an enjoyable project that anyone can tackle. Plus, they last a good while and don’t require any complicated equipment—just some baking soda, essential oils, and a little time!
Why You’ll Love DIY Aroma Stones
- Fast: You can whip up a batch in under 10 minutes.
- Easy: No fancy tools or ingredients needed, just basics you probably have around.
- Giftable: They make thoughtful gifts that feel personal and unique.
- Crowd-pleasing: Lovely scents that aren’t overpowering, perfect for any space.
Ingredients
Here’s what you’ll need for these charming scent stones:
- 1 cup baking soda: The base that absorbs odors and holds scent beautifully.
- 1/2 cup cornstarch: Adds a silky texture and helps the stones hold their shape.
- 1/3–1/2 cup water: Slowly mixed in to create a moldable dough.
- 10–20 drops essential oil: Your choice of scent – lavender for calm, lemon for freshness, or any favorite you like.
- Optional natural food coloring or mica powder: For a touch of color and sparkle, if you want your stones to be as pretty as they smell.
- Silicone molds or cookie cutters: To shape your aroma stones into cute or elegant designs.
- Airtight container or mesh sachets: For storing your finished stones and preserving their fragrance.
How to Make DIY Aroma Stones
Let’s get started! I’ll walk you through it step-by-step, so you feel confident every part of the way.
- First, grab a mixing bowl and whisk together the baking soda and cornstarch until they’re well combined. This is the base of your aroma stone dough.
- If you want to add a splash of color, now’s the time to sprinkle in a little natural food coloring or mica powder. Mix thoroughly so the color spreads evenly.
- Slowly add the water a little at a time while stirring. You want to create a thick, dough-like paste—not too wet but easy to mold.
- Add your essential oils next. Between 10 to 20 drops work well depending on how strong you want the scent to be. Knead the dough gently with your hands to spread the fragrance throughout.
- Press the dough firmly into silicone molds or use cookie cutters to shape them on a flat surface. Smooth out any rough edges or surfaces so they look neat and polished.
- Set your shaped stones aside to air dry at room temperature. This takes about 24 to 48 hours, so be patient! They should harden completely before you move on.
- Once dry, store your aroma stones in an airtight container or place them inside pretty mesh sachets to keep their wonderful scent locked in. Pop them in drawers, closets, or even your car for a lovely fragrance boost.
Substitutions & Additions
The beauty of this project is how flexible it is. Here are a few ways I like to switch things up or make these aroma stones extra special:
- Essential oil blends: Mix and match oils like eucalyptus and peppermint for an energizing scent, or try vanilla and cinnamon for cozy vibes.
- Different molds: Use cookie cutters in fun shapes depending on the season—hearts for Valentine’s or leaves in autumn.
- Natural colorants: Ground cinnamon, turmeric, or beetroot powder can add subtle earth-tone shades.
- Adding dried herbs or flowers: Embedding a little lavender bud or rose petal on top before drying adds charm and texture.
- If you enjoy crafting, you might also love learning how to make easy DIY suncatchers—another fun way to brighten your home!
Tips for Success
- Don’t rush the drying: Make sure your aroma stones feel completely dry and firm before storing or using, or they might crumble.
- Adjust water carefully: Add water gradually to avoid a sticky dough—it should be easy to mold but not soggy.
- Even scent distribution: Knead your dough well after adding essential oils for the best, longest-lasting fragrance.
- Prep ahead: These stones dry over a couple of days, so it’s great to press your molds and then let them dry overnight or while you’re doing another fun project—maybe something delicious like a no-bake peanut butter brownie cookies to enjoy afterward!
How to Store DIY Aroma Stones
After your stones have dried and hardened fully, storing them properly is key to keeping that wonderful scent fresh. I keep mine in airtight containers or little mesh bags that let the fragrance subtly waft out without losing it too quickly.
You can tuck these charming stones right inside dresser drawers, closets, or even tuck a few in your car’s cup holders. They generally last several weeks to a couple of months; once the scent fades, a fresh spritz of essential oil refreshes them nicely.
FAQs
- Can I use regular cookie cutters without silicone molds?
Absolutely! Just be gentle when removing your stones so they don’t break. Silicone molds just make it easier to pop them out. - How strong will the aroma stones smell?
The fragrance is usually subtle but pleasantly persistent. You can adjust the essential oil drops to your preferred scent strength. - Can kids make these?
Yes! It’s a safe and easy craft for older kids with a little supervision, especially when handling essential oils. - Can I add glitter?
I recommend using mica powder instead of regular glitter for a safe shimmer that won’t flake off.
Making DIY aroma stones is a simple yet rewarding project that adds a cozy, personalized touch to your home atmosphere. If you enjoy this craft, don’t be shy about exploring more kitchen-friendly creative outlets—you might find a new favorite alongside fantastic recipes like the creamy lemon chicken recipe or the delightful easy mini raspberry cheesecake bites for your next cozy evening in.
Happy crafting and scenting! Don’t forget to check out my full range of easy recipes and fun projects over at Crispy Kitchens’ recipe collection whenever you want to try something new.
For even more inspiration and crafty ideas, be sure to follow me on Pinterest!
DIY Aroma Stones
Ingredients
Equipment
Method
- Step 1: In a mixing bowl, whisk together baking soda and cornstarch until well combined.
- Step 2: Optionally add natural food coloring or mica powder and mix thoroughly to spread color evenly.
- Step 3: Slowly add water a little at a time while stirring until a thick, dough-like paste forms—moldable but not soggy.
- Step 4: Add 10–20 drops of essential oil and knead dough gently with your hands to evenly distribute fragrance.
- Step 5: Press dough firmly into silicone molds or shape with cookie cutters on a flat surface, smoothing edges.
- Step 6: Set shaped stones aside to air dry at room temperature for 24 to 48 hours until completely hardened.
- Step 7: Store fully dried stones in airtight containers or mesh sachets to preserve fragrance and place as desired.