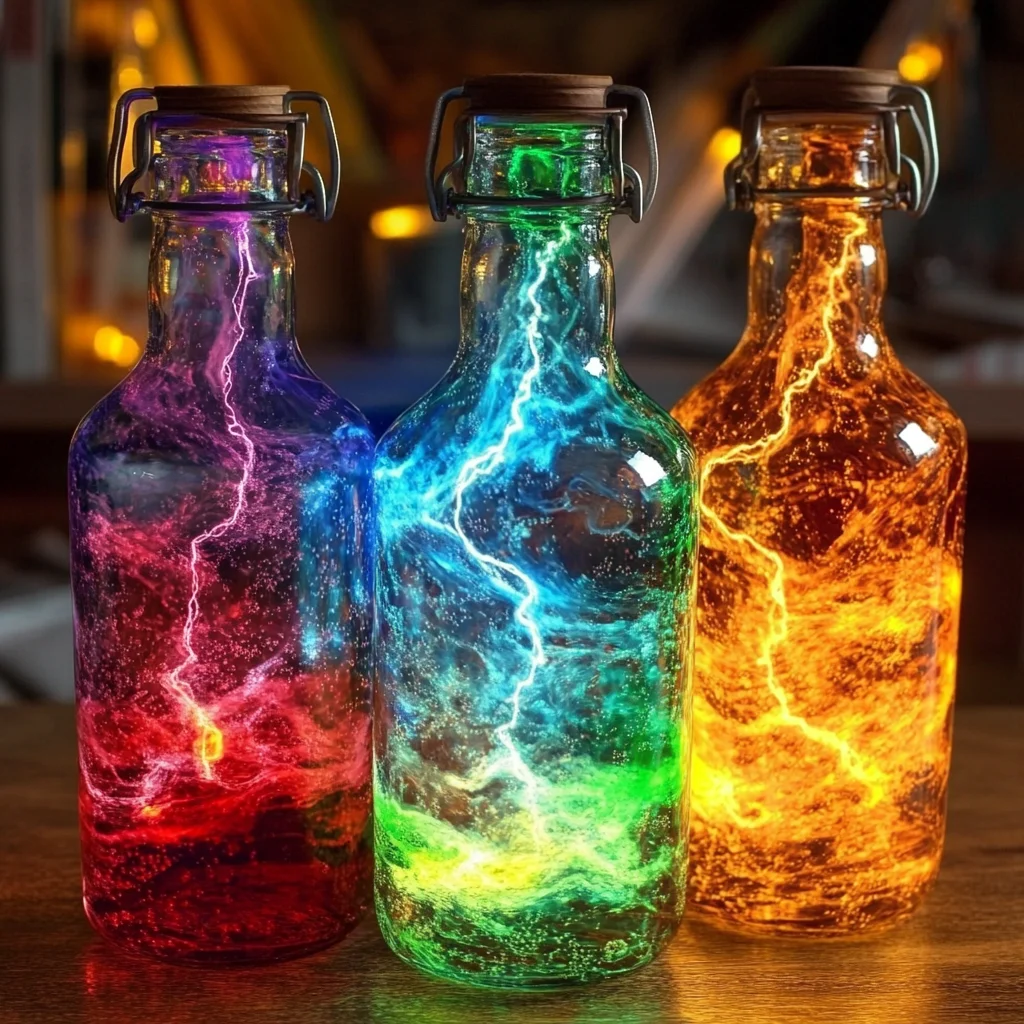
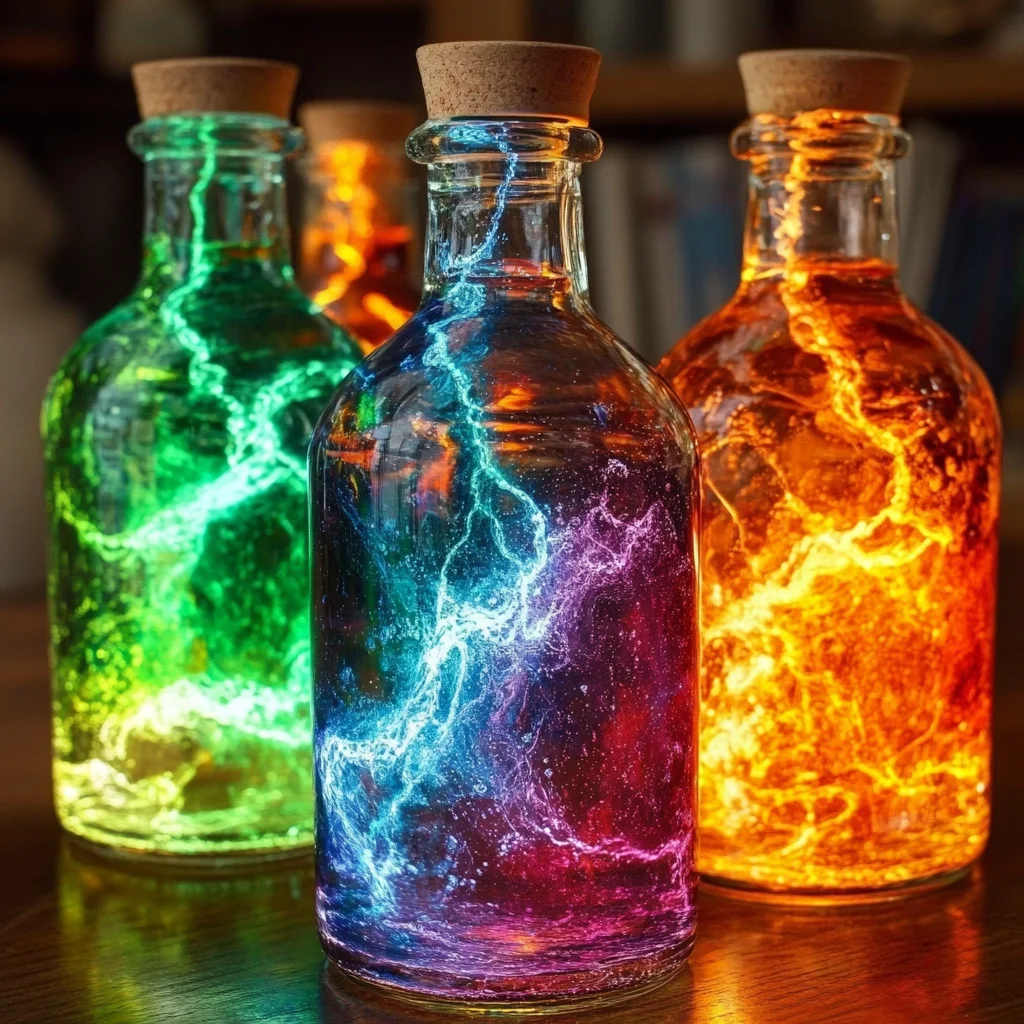
Remember those days as a kid, when a simple mix of ingredients felt like pure magic? The fizz, the color, the unexpected glow – it was like holding a secret universe in your hands. Well, get ready to rekindle that wonder, because today, I’m sharing a recipe (and yes, I call it a recipe, because it’s just as satisfying as baking, if not more, like whipping up a batch of easy chocolate chip cookie dough twists!) for something truly spectacular: Bubbling Rainbow Lightning Bottles. This isn’t just an activity; it’s a doorway to pure, unadulterated delight that’s incredibly easy, quick, and creates memories you’ll treasure. Imagine holding a tiny thunderstorm, glowing with all the colors of the rainbow – that’s what we’re making today, and trust me, it’s going to be a blast!
Why You’ll Love Bubbling Rainbow Lightning Bottles
- Fast: You’ll have these magical bottles ready in minutes!
- Easy: Simple household ingredients and steps make this a breeze.
- Giftable: What a unique, handmade gift or party favor for any age!
- Crowd-pleasing: Kids and adults alike will be absolutely mesmerized by the bubbly, glowing show.
Ingredients
- 2 clear plastic bottles with lids: These are your magical vessels. Make sure they’re clean and dry!
- 1/2 cup warm water: Helps everything dissolve beautifully and gets the reaction going.
- 1/4 cup vinegar: Our secret fizz activator! Any white vinegar will do.
- 1 tablespoon baking soda: The other half of our fizz-tastic duo.
- 1 teaspoon citric acid: This is the superstar for that super bubbly, long-lasting reaction. You can often find it in the baking aisle or for canning.
- 1 tablespoon rainbow glitter mix: For ultimate sparkle and pizzazz! Don’t be shy with the shimmer.
- 1 teaspoon glow-in-the-dark powder or paint: To make it truly glow, of course! This adds that extra layer of magic.
- A few drops each of red, yellow, blue, and green food coloring: To bring the rainbow to vibrant life. Feel free to use your favorite colors!
- 1 teaspoon dish soap: Creates those lovely, lasting bubbles that carry the glitter.
- 2 small glow sticks or waterproof LED lights: These are the “lightning” inside your bottle, giving it an internal light source.
- 1 spoon for mixing: Your trusty stirring companion.
How to Make Bubbling Rainbow Lightning Bottles
Get ready to unleash your inner scientist (or wizard, depending on how you look at it!).
-
Prepare the Glow Base: First things first, grab your two clear plastic bottles. Carefully place one glow stick or waterproof LED light into each bottle. This is what’s going to give your “lightning” its brilliant internal glow! If you’re using glow sticks, crack them now to activate them for maximum glow.
-
Mix the Rainbow Potion: Now, let’s get a little messy (the fun kind!). In a separate cup – I usually use a larger measuring cup for this – stir together your warm water, vinegar, a good squirt of dish soap, the glow powder (or paint if you’re using that), and a few drops of each food coloring. Give it a really good stir until everything is wonderfully combined and vibrant. You’ll want to see those colors swirling! Once it’s mixed, carefully divide and pour this colorful concoction into both of your prepared bottles, making sure not to fill them all the way to the top – you need room for the fizz!
-
Add the Sparkles: Time for the razzle-dazzle! Sprinkle a generous amount of that fabulous rainbow glitter into each bottle. Don’t be shy here; the more glitter, the more spectacular your “lightning” will be! I find that a mix of fine and chunky glitter gives the best effect.
-
Start the Bubbling: This is where the real magic begins! Add a tablespoon of baking soda to each bottle. Then, quickly, drop in a teaspoon of citric acid. Watch closely – you’ll see it start to fizz almost immediately!
-
Seal and Shake: As soon as you add the citric acid, quickly close the bottles tightly with their lids. Now, gently – and I mean gently – shake them. You’ll see an incredible reaction as the ingredients combine, creating a swirling, bubbling, glowing rainbow lightning storm right in your hands! It’s truly mesmerizing to watch the colors and bubbles dance.
Substitutions & Additions
Part of the fun of DIY projects is making them your own! Here are a few ideas to customize your Bubbling Rainbow Lightning Bottles:
- For the Glow: If you don’t have glow-in-the-dark powder, you can try using fluorescent paint (just make sure it’s non-toxic and water-soluble!). Waterproof LED lights offer a more controlled, reusable glow.
- For the Sparkle: Experiment with different types of glitter – chunky, fine, holographic, or even small sequins. You could also add confetti for a celebratory feel!
- Color Play: Use natural food dyes for softer, earthy hues, or even a few drops of liquid watercolor if you prefer.
- Alternative Fizz: While baking soda and citric acid give the best, most sustained fizz, you could try lemon juice (though it’s less potent) or even small pieces of Alka-Seltzer tablets for a quick burst of bubbles.
- Extra Wonders: Add small, lightweight plastic toys (like tiny plastic animals or beads) to float and swirl within the mixture. You could also include a few drops of essential oil for a calming scent, like lavender, or an invigorating one, like peppermint.
- Themed Bottles: Create themed bottles for holidays! Use red and green for Christmas with tiny bells, or get spooky with a Halloween theme, pairing perfectly with some fun easy Halloween cupcakes.
Tips for Success
- Clean Bottles Are Key: Start with impeccably clean and dry plastic bottles for the best results and clearest view of your lightning show.
- Lids, Lids, Lids: Double-check that your bottle lids seal tightly before you begin shaking. You don’t want your rainbow lightning escaping!
- Don’t Overfill: Leave a little headspace in your bottles after pouring the liquid mix. This gives the bubbles room to expand and fizz without overflowing.
- Mix Well: Ensure your colored potion is thoroughly mixed before adding it to the bottles, especially to evenly distribute the glow powder and food coloring.
- Speed is Your Friend: Once the baking soda and citric acid are in, act quickly to seal the bottle. The reaction starts fast!
- Prep Ahead: You can mix your colored liquid base (water, vinegar, soap, glow powder, food coloring, glitter) and store it in the bottles without the lid. When you’re ready for the magic, just add the baking soda and citric acid!
- Adult Supervision: While this is a fun activity, I always recommend adult supervision, especially for younger children, to ensure safe handling of ingredients and proper sealing of bottles.
- For a Lasting Glow: If you want a reusable glowing effect, waterproof LED lights are fantastic as they can be turned on and off. Glow sticks offer a one-time glow that fades over several hours.
How to Store Bubbling Rainbow Lightning Bottles
Once you’ve enjoyed the initial bubbly lightning show, your bottles can still be a wonderful sensory toy or decoration! Make sure the lids are screwed on extra tightly, especially if little hands will be playing with them. Store them upright and away from direct sunlight, which can sometimes fade the vibrant food coloring over time. While the amazing fizzing reaction is a one-time spectacular event, the shimmering glitter and swirling colors will remain a delight for a long, long time. If you used waterproof LED lights, you can turn them on whenever you want to rekindle that inner glow! These bottles are not meant for consumption, so always keep them sealed.
FAQs
Q: Can I reuse the bottles for more lightning?
A: Yes, absolutely! You can empty them, clean them thoroughly, and start fresh for another round of bubbling magic. The initial fizzing agents are a one-time use, but the bottles themselves are wonderfully reusable!
Q: Is this safe for young children?
A: While the ingredients are generally non-toxic, I always recommend adult supervision, especially with younger children, to ensure they don’t ingest the mixture or try to open the bottles once sealed. It’s primarily a visual and sensory activity.
Q: What if my bottle isn’t bubbling much?
A: The key is fresh baking soda and citric acid! Also, make sure your water is warm, as this helps kickstart the reaction. Adding the citric acid immediately after the baking soda, then quickly sealing and gently shaking, helps ensure a vigorous reaction. If you’re still not getting much fizz, ensure your bottle isn’t overfilled and there’s enough room for the gas to expand.
Q: Can I make these ahead of time?
A: You can definitely prep the colored liquid base and glitter in the bottles ahead of time. Just leave out the baking soda and citric acid until you’re ready to create the lightning show. That’s the exciting part you want to do fresh! After your lightning bottles have wowed everyone, why not try another creative kitchen adventure, like making easy mini raspberry cheesecake bites together?
For more dazzling recipes and creative ideas, make sure to follow us on Pinterest!

Bubbling Rainbow Lightning Bottles
Ingredients
Equipment
Method
- Step 1: Prepare the Glow Base: First things first, grab your two clear plastic bottles. Carefully place one glow stick or waterproof LED light into each bottle. This is what's going to give your "lightning" its brilliant internal glow! If you're using glow sticks, crack them now to activate them for maximum glow.
- Step 2: Mix the Rainbow Potion: Now, let's get a little messy (the fun kind!). In a separate cup – I usually use a larger measuring cup for this – stir together your warm water, vinegar, a good squirt of dish soap, the glow powder (or paint if you're using that), and a few drops of each food coloring. Give it a really good stir until everything is wonderfully combined and vibrant. You'll want to see those colors swirling! Once it’s mixed, carefully divide and pour this colorful concoction into both of your prepared bottles, making sure not to fill them all the way to the top – you need room for the fizz!
- Step 3: Add the Sparkles: Time for the razzle-dazzle! Sprinkle a generous amount of that fabulous rainbow glitter into each bottle. Don't be shy here; the more glitter, the more spectacular your "lightning" will be! I find that a mix of fine and chunky glitter gives the best effect.
- Step 4: Start the Bubbling: This is where the real magic begins! Add a tablespoon of baking soda to each bottle. Then, quickly, drop in a teaspoon of citric acid. Watch closely – you'll see it start to fizz almost immediately!
- Step 5: Seal and Shake: As soon as you add the citric acid, quickly close the bottles tightly with their lids. Now, gently – and I mean gently – shake them. You'll see an incredible reaction as the ingredients combine, creating a swirling, bubbling, glowing rainbow lightning storm right in your hands! It’s truly mesmerizing to watch the colors and bubbles dance.