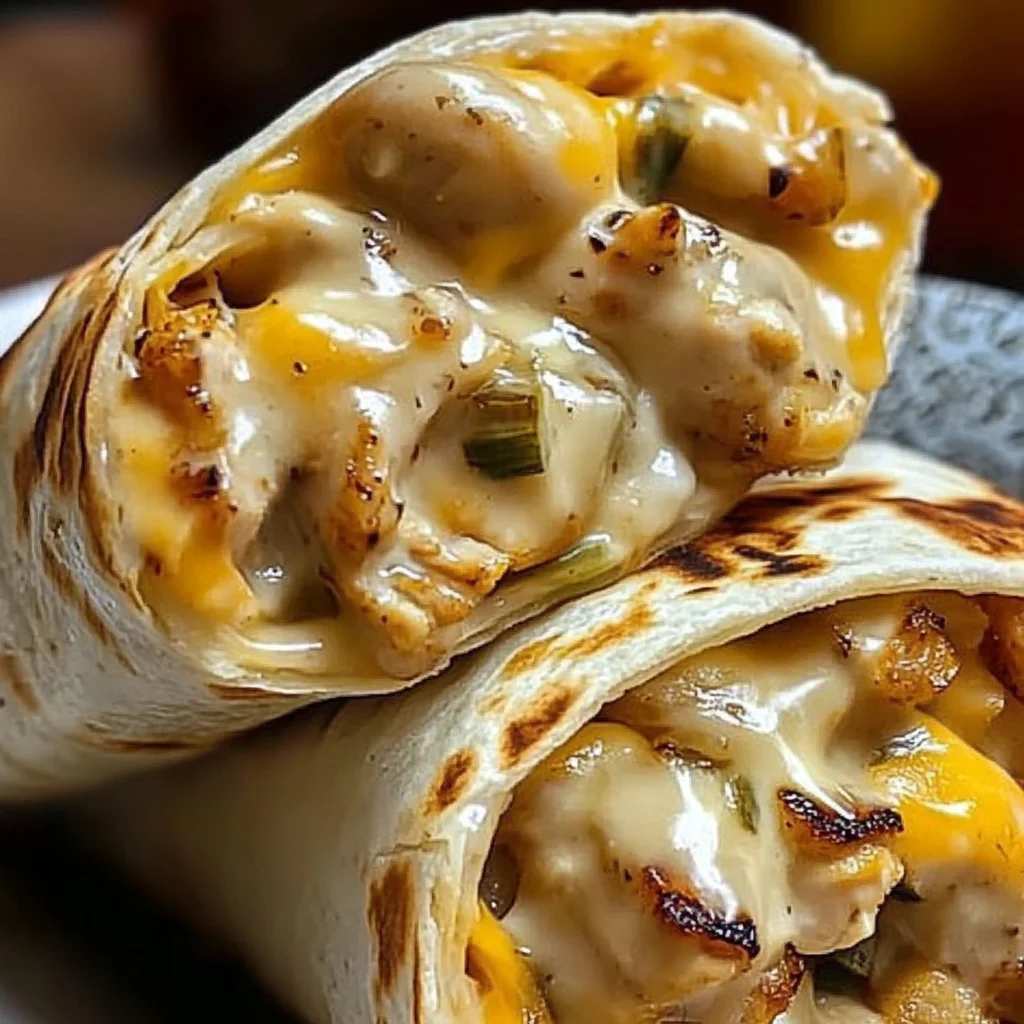
Hey there, friend! Ever have those days where you need something seriously delicious, super comforting, but also ready in a flash? Maybe you’re rushing between errands, packing lunches for the week, or just craving something warm and cheesy without a lot of fuss. I know I do! And let me tell you, these Cheesy Garlic Chicken Wraps are about to become your absolute best friend in the kitchen. They remind me of those simple, satisfying meals you grab on the go, but made right in your own kitchen with love. Plus, they’re so easy, it barely feels like cooking!
Why You’ll Love This Recipe
- Fast: Seriously, we’re talking minutes from start to finish, especially if you have cooked chicken ready.
- Easy: No fancy techniques here, just mixing and rolling! Perfect for beginners or busy pros.
- Giftable: Okay, maybe not gifting the raw ingredients, but assembled and maybe grilled, these are a hit at picnics or potlucks (if you can bear to share!).
- Crowd-pleasing: Who doesn’t love cheesy, garlicky chicken wrapped in a soft tortilla? Kids and adults gobble these up.
Ingredients
Here’s what you’ll need to whip up a batch of these magical wraps. Don’t worry, it’s a short and sweet list!
- 2 cups cooked, shredded chicken: This is your base! Rotisserie chicken from the grocery store is a lifesaver here. Or use leftover chicken from last night’s dinner. Just make sure it’s nice and shredded.
- 1 cup shredded mozzarella or cheddar cheese: Or use a blend! Mozzarella gives you that classic stringy pull, while cheddar adds a sharper flavor. Use your favorite or whatever you have on hand.
- 2 tbsp cream cheese: This is the secret weapon! It makes the filling wonderfully creamy and helps hold everything together. Make sure it’s softened slightly so it mixes easily.
- 1 teaspoon garlic powder: Ah, the “garlic” part of the name! Garlic powder is easy and mixes right in, giving that essential flavor boost without mincing fresh garlic.
- Wraps: Choose your favorite! Flour tortillas work great – look for medium or large size depending on how big you want your wraps. You could also use whole wheat, spinach, or gluten-free wraps.
How to Make It
Alright, let’s get rolling! Follow these simple steps and you’ll have delicious wraps in no time.
-
Get your filling ready: Grab a medium-sized bowl. Add your cooked, shredded chicken, the shredded mozzarella or cheddar cheese, the softened cream cheese, and the garlic powder. Now, get in there and mix it all up! A sturdy spoon or even your hands (clean, of course!) work well. You want everything really well combined so the cream cheese coats the chicken and cheese evenly. It should be a nice, scoopable mix.
-
Fill those wraps: Lay out your wraps on a clean surface. Divide the chicken mixture evenly among the wraps. Place the filling slightly off-center towards one edge – this makes rolling easier!
-
Roll ’em up tight: This is key! Fold the sides of the wrap in over the filling, then tightly roll the wrap from the filling edge all the way up. Roll as snugly as you can without tearing the wrap. A tight roll keeps all that cheesy goodness inside.
-
Slice and serve (or heat!): You can totally eat them cold like this, but I highly recommend slicing each rolled wrap in half on a slight diagonal. This makes them easy to handle and shows off that lovely filling.
-
Give them a little heat (optional but recommended!): To get that melted cheese perfection and slightly toasted tortilla, heat the rolled (or sliced) wraps briefly. You can do this in a dry skillet over medium heat for a couple of minutes per side until golden and warm, use a panini press, or even pop them in the microwave for 30-60 seconds. Getting that cheese melty takes them from good to amazing.
-
Serve warm: Enjoy your delicious, cheesy, garlicky chicken wraps right away! They are best when the cheese is still warm and gooey.

Substitutions & Additions
Want to mix things up? These wraps are super flexible! Here are a few ideas:
- Different Cheese: Try pepper jack for a little kick, Monterey Jack, or even a smoked gouda for something different.
- Add Veggies: Finely diced bell peppers, onions (caramelized or raw), spinach, or even corn would be delicious stirred into the filling. Make sure they are small enough not to poke through the wrap.
- Herbs & Spices: Add a pinch of dried Italian seasoning, paprika, onion powder, or even a little cayenne pepper if you like heat. Fresh chopped parsley or chives are also great additions.
- Different Protein: Cooked, shredded turkey or even canned tuna (drained well) could work in a pinch, though chicken is my favorite here.
- Make it Saucy: Stir in a tablespoon of your favorite hot sauce, ranch dressing, or even a little pesto into the filling mix for extra flavor.
Tips for Success
Keep these simple tips in mind, and your wraps will turn out perfectly every time!
- Use Cooked, Cooled Chicken: Make sure your chicken is already cooked and cooled slightly before mixing. Hot chicken can start melting the cheese too soon.
- Softened Cream Cheese is Key: Cold, hard cream cheese is a nightmare to mix. Let it sit out for 30 minutes or give it a quick 10-15 second zap in the microwave to soften it up.
- Don’t Overfill: It’s tempting to stuff them to the brim, but too much filling makes it hard to roll and can cause the wraps to split. Distribute the filling evenly but don’t go crazy.
- Roll Tightly: A tight roll helps the wraps hold their shape, especially if you plan to grill or heat them.
- Prep Ahead: You can make the chicken and cheese filling mixture up to a day in advance and store it in an airtight container in the fridge. This makes assembling the wraps lightning fast! You can also assemble the wraps a few hours ahead of time and keep them covered in the fridge before heating.
How to Store It
If you happen to have any leftovers (a rare occurrence in my house!), here’s how to keep them fresh:
- In the Fridge: Store leftover assembled wraps in an airtight container in the refrigerator for 2-3 days. If you’ve already heated them, they might be a little less crisp when reheated, but still tasty.
- Reheating: The best way to reheat assembled wraps is usually in a skillet over low-medium heat or in a panini press to warm them through and crisp up the outside again. The microwave works in a pinch, but the tortilla can get a bit soft.
- Can You Freeze Them? I haven’t personally tried freezing these assembled, as the texture of the cream cheese and wrap might change slightly upon thawing. It’s probably best to enjoy them fresh or keep them in the fridge for a couple of days.
FAQs
Got questions? I’ve got some quick answers for you!
Q: Can I use raw chicken?
A: No, the chicken must be fully cooked and shredded before you mix it with the cheese and cream cheese. This recipe assumes you are starting with pre-cooked chicken.
Q: What kind of wraps are best?
A: Medium or large flour tortillas are typically easiest to roll and most common, but feel free to use whole wheat, spinach, or gluten-free options! Just make sure they are pliable enough to roll without cracking.
Q: Can I bake these instead of grilling?
A: Absolutely! Place the assembled wraps (sliced or whole) on a baking sheet and bake at around 375°F (190°C) for 10-15 minutes, or until they are heated through and the tortillas are slightly golden and crisp. This is a great option if you’re making a big batch!
Q: I don’t have garlic powder, can I use fresh garlic?
A: You could, but mince it really finely (like, paste consistency) and only use a tiny amount (maybe 1/4 teaspoon) as raw fresh garlic can be quite strong. Garlic powder is easier to distribute evenly in this creamy filling.
See? So simple, so quick, and so incredibly satisfying. These Cheesy Garlic Chicken Wraps are perfect for a lightning-fast lunch, an after-school snack, or even a casual weeknight dinner. Give them a try, and let me know how you like them!

Easy Cheesy Garlic Chicken Wraps
Ingredients
Equipment
Method
- Step 1: Get your filling ready: Grab a medium-sized bowl. Add your cooked, shredded chicken, the shredded mozzarella or cheddar cheese, the softened cream cheese, and the garlic powder. Now, get in there and mix it all up! A sturdy spoon or even your hands (clean, of course!) work well. You want everything really well combined so the cream cheese coats the chicken and cheese evenly. It should be a nice, scoopable mix.
- Step 2: Fill those wraps: Lay out your wraps on a clean surface. Divide the chicken mixture evenly among the wraps. Place the filling slightly off-center towards one edge – this makes rolling easier!
- Step 3: Roll 'em up tight: This is key! Fold the sides of the wrap in over the filling, then tightly roll the wrap from the filling edge all the way up. Roll as snugly as you can without tearing the wrap. A tight roll keeps all that cheesy goodness inside.
- Step 4: Slice and serve (or heat!): You can totally eat them cold like this, but I highly recommend slicing each rolled wrap in half on a slight diagonal. This makes them easy to handle and shows off that lovely filling.
- Step 5: Give them a little heat (optional but recommended!): To get that melted cheese perfection and slightly toasted tortilla, heat the rolled (or sliced) wraps briefly. You can do this in a dry skillet over medium heat for a couple of minutes per side until golden and warm, use a panini press, or even pop them in the microwave for 30-60 seconds. Getting that cheese melty takes them from good to amazing.
- Step 6: Serve warm: Enjoy your delicious, cheesy, garlicky chicken wraps right away! They are best when the cheese is still warm and gooey.