Oh, friend, do you ever have those days when your sweet tooth is screaming, but your energy levels are whispering? Or maybe you just need a quick, impressive dessert for a potluck, a cozy family movie night, or just because it’s Tuesday and you deserve it? Well, let me tell you, this Chocolate Dump Cake is about to become your new best friend. It takes me right back to those childhood days when magic seemed to happen in the kitchen with minimal effort, resulting in maximum deliciousness. It’s truly one of those “dump, stir, and bake” recipes that feels almost too good to be true, but it delivers every single time. Get ready for an impossibly moist, rich, and utterly chocolatey treat that practically makes itself!
Why You’ll Love Chocolate Dump Cake
- Fast: Seriously, active prep time is just minutes!
- Easy: No fancy techniques, no complicated steps. Just layer and bake.
- Giftable: Bake it in a pretty dish, cover it, and bring pure joy to a friend or neighbor.
- Crowd-pleasing: Who doesn’t love rich, warm chocolate cake with a gooey center? It’s universally adored.
Ingredients

Here’s what you’ll need to whip up this chocolate dream. Chances are, most of these are already hanging out in your pantry!
- 15.25 ounces (432g) chocolate cake mix: Any standard chocolate cake mix will do. This is our magical base!
- 5.1 ounces (145g) instant chocolate pudding mix: The secret to that incredibly moist, almost custard-like texture. Don’t use the cook-and-serve kind!
- 2 ½ cups whole milk: This adds richness and helps create that wonderful, gooey consistency.
- ½ cup butter, melted: Butter makes everything better, right? It creates a glorious, crispy-chewy topping.
- 12 ounces (340g) semi-sweet chocolate chips: Because more chocolate is always a good idea! They melt into little pockets of heaven throughout the cake.
How to Make Chocolate Dump Cake
You won’t believe how simple this is. Let’s get baking!
- First things first, let’s get that oven ready. Preheat your oven to 350°F (175°C). Then, grab a 9×13-inch baking dish – that’s your trusty companion for this recipe – and give it a good spray with non-stick cooking spray. We want that chocolatey goodness to slide right out!
- Now, for the “dump” part! Pour the entire box of chocolate cake mix into the bottom of your prepared dish. Spread it out into a nice, even layer. Next, sprinkle the instant chocolate pudding mix right over the cake mix. Don’t stir it yet!
- Here’s where the magic begins: Pour the whole milk directly over the dry ingredients. Take a fork or a small whisk and gently, just gently, combine the milk with the dry mixes. You don’t need to be super thorough; a few lumps are totally fine and add to the charm of a dump cake. The goal is just to start dissolving those dry ingredients into a wonderfully rich batter.
- Time for the finishing touches! Drizzle that glorious melted butter evenly over the top of your cake mixture. Finally, scatter the semi-sweet chocolate chips generously all over. They’ll melt into dreamy pockets during baking!
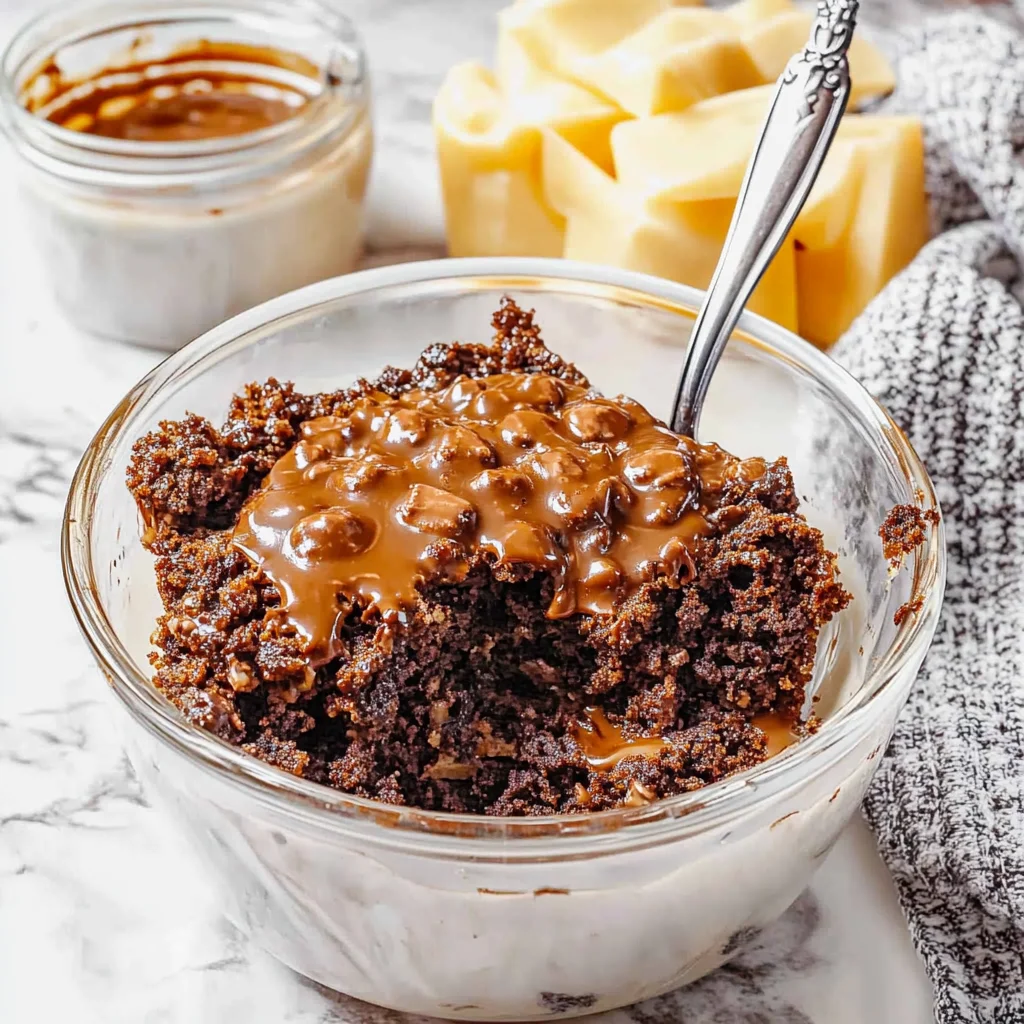
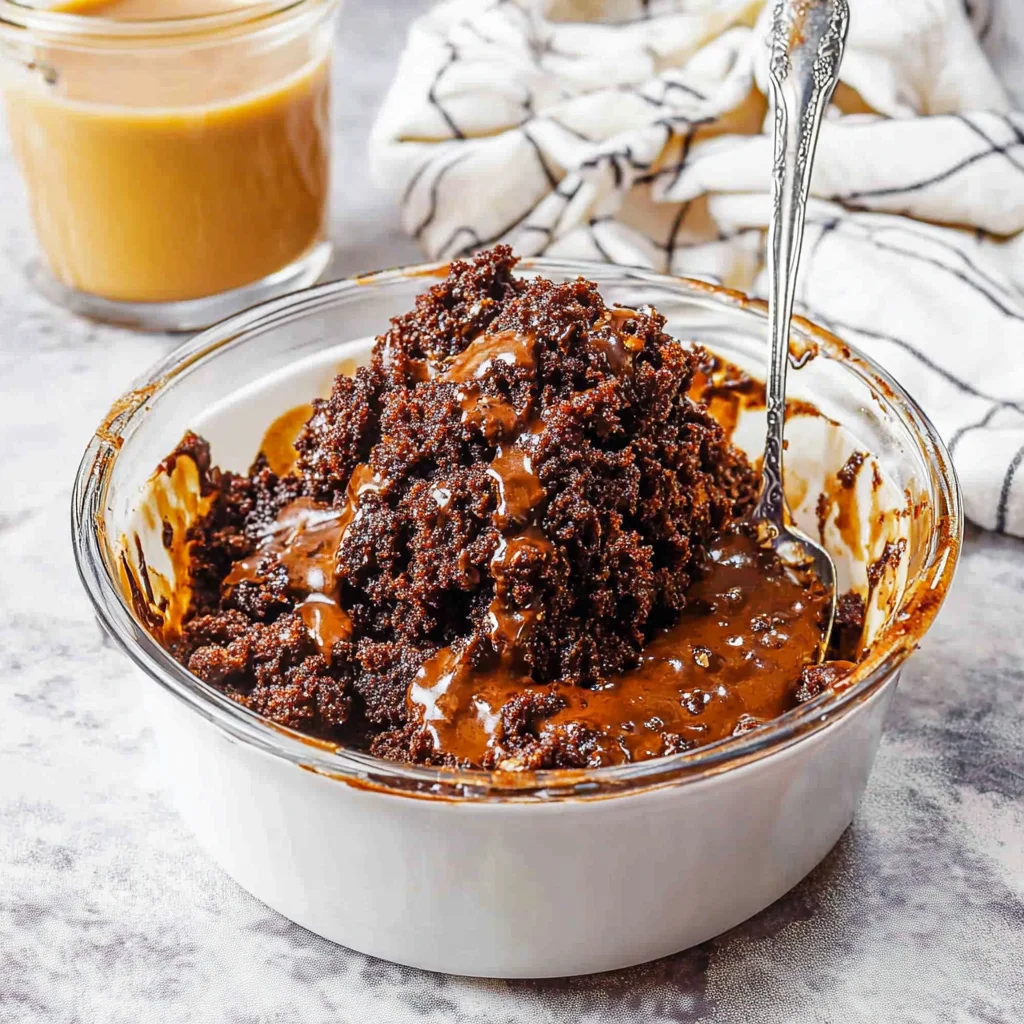
- Pop your dish into the preheated oven and bake for 40-45 minutes. You’re looking for the edges to be set, but the center will still be wonderfully soft and gooey. That’s the dump cake charm!
- Once it’s out of the oven, try to resist devouring it immediately! It’s best served warm, maybe with a scoop of vanilla ice cream or a dollop of whipped cream. Pure bliss!
Substitutions & Additions
This recipe is incredibly forgiving and easily adaptable! Here are some fun ways to make it your own:
- Cake Mix Swaps: Want a different flavor? Try yellow cake mix with vanilla pudding for a classic combination, or even a red velvet cake mix for a festive twist.
- Pudding Power: Vanilla, white chocolate, or even cheesecake flavored instant pudding mixes would be fantastic with a chocolate cake base.
- Nutty Notes: Stir in ½ cup of chopped pecans, walnuts, or almonds with the chocolate chips for some added crunch.
- Fruity Fun: A can of cherry pie filling or crushed pineapple (undrained) could be spread on the bottom before the cake mix for a fruit-and-chocolate fusion. Just reduce the milk slightly if you do this, to about 2 cups.
- Extra Indulgence: A swirl of caramel sauce or a sprinkle of toasted shredded coconut over the top before baking would be divine. If you’re a fan of the dump cake concept, you absolutely have to try our easy peanut butter cup dump cake for a different spin – it’s a crowd-pleaser for sure!
Tips for Success
Even though this cake is super simple, a few pointers can ensure it turns out perfectly every time:
- Don’t Over-Whisk: Remember, it’s a “dump” cake! A gentle whisk to just combine the milk and dry ingredients is all you need. Over-mixing can develop the gluten too much and make the cake less tender.
- Instant Pudding is Key: Make sure you’re using instant pudding, not the cook-and-serve variety. The instant kind has specific thickeners that work magic in this recipe without needing to be cooked beforehand.
- Check for Doneness: While the edges will be set, the center will be soft. If you insert a toothpick into the center, it might still come out with some moist crumbs, which is exactly what you want for that gooey texture. Avoid overbaking, or you’ll lose that signature fudgy consistency.
- Serving Temperature: This cake is truly best served warm, straight from the oven. That’s when it’s most gooey and indulgent!
- Cooling Time (if any): If you do let it cool slightly, the cake will firm up a bit, making it easier to slice into neat squares, but I promise you, the warm, messy scoops are where it’s at! If you loved the simplicity of this, you might also adore our easy no-bake caramel pretzel bars for another fuss-free treat.
How to Store Chocolate Dump Cake
If by some miracle you have leftovers (it’s rare, trust me!), here’s how to keep them fresh:
- Room Temperature: You can store it covered at room temperature for up to 1 day.
- Refrigerator: For longer storage, cover the baking dish tightly with plastic wrap or transfer leftovers to an airtight container and refrigerate for up to 3-4 days.
- Reheating: To enjoy that warm, gooey texture again, simply pop individual servings into the microwave for 20-30 seconds, or reheat the whole dish in a 300°F (150°C) oven until warmed through.
FAQs
Got questions? I’ve got answers!
Q: What exactly is a dump cake?
A: A dump cake is a super easy dessert where you literally “dump” all the ingredients into a baking dish without much mixing, and then bake it. The magic happens in the oven, creating distinct layers and a delightfully gooey outcome. This cake is all about that comforting, gooey center, much like our easy chocolate ooey gooey cake!
Q: Can I use sugar-free cake mix or pudding?
A: Yes, you can! Just be aware that the texture might be slightly different, and sometimes sugar-free products can leave a slight aftertaste. But if that’s your preference, go for it!
Q: My dump cake seems a bit runny in the middle, is that normal?
A: Absolutely! A true dump cake is known for its gooey, almost pudding-like center, especially when warm. It’s not meant to be a fully set, firm cake. If it seems excessively liquid, it might just need a few more minutes in the oven, but embrace the gooeyness!
Q: Can I make this ahead of time?
A: While it’s best warm, you can bake it a few hours ahead and keep it covered at room temperature. Reheat it gently before serving to bring back that delicious gooeyness.
For more delicious and easy recipes, be sure to follow us on Pinterest!
The Easiest, Most Decadent Chocolate Dump Cake
Ingredients
Equipment
Method
- Step 1: Preheat your oven to 350°F (175°C). Grab a 9x13-inch baking dish and give it a good spray with non-stick cooking spray.
- Step 2: Pour the entire box of chocolate cake mix into the bottom of your prepared dish. Spread it out into an even layer. Next, sprinkle the instant chocolate pudding mix right over the cake mix. Do not stir yet!
- Step 3: Pour the whole milk directly over the dry ingredients. Take a fork or a small whisk and gently combine the milk with the dry mixes. You don't need to be super thorough; a few lumps are fine.
- Step 4: Drizzle the melted butter evenly over the top of your cake mixture. Finally, scatter the semi-sweet chocolate chips generously all over.
- Step 5: Pop your dish into the preheated oven and bake for 40-45 minutes. You're looking for the edges to be set, but the center will still be wonderfully soft and gooey.
- Step 6: Once it’s out of the oven, it’s best served warm, perhaps with a scoop of vanilla ice cream or a dollop of whipped cream.