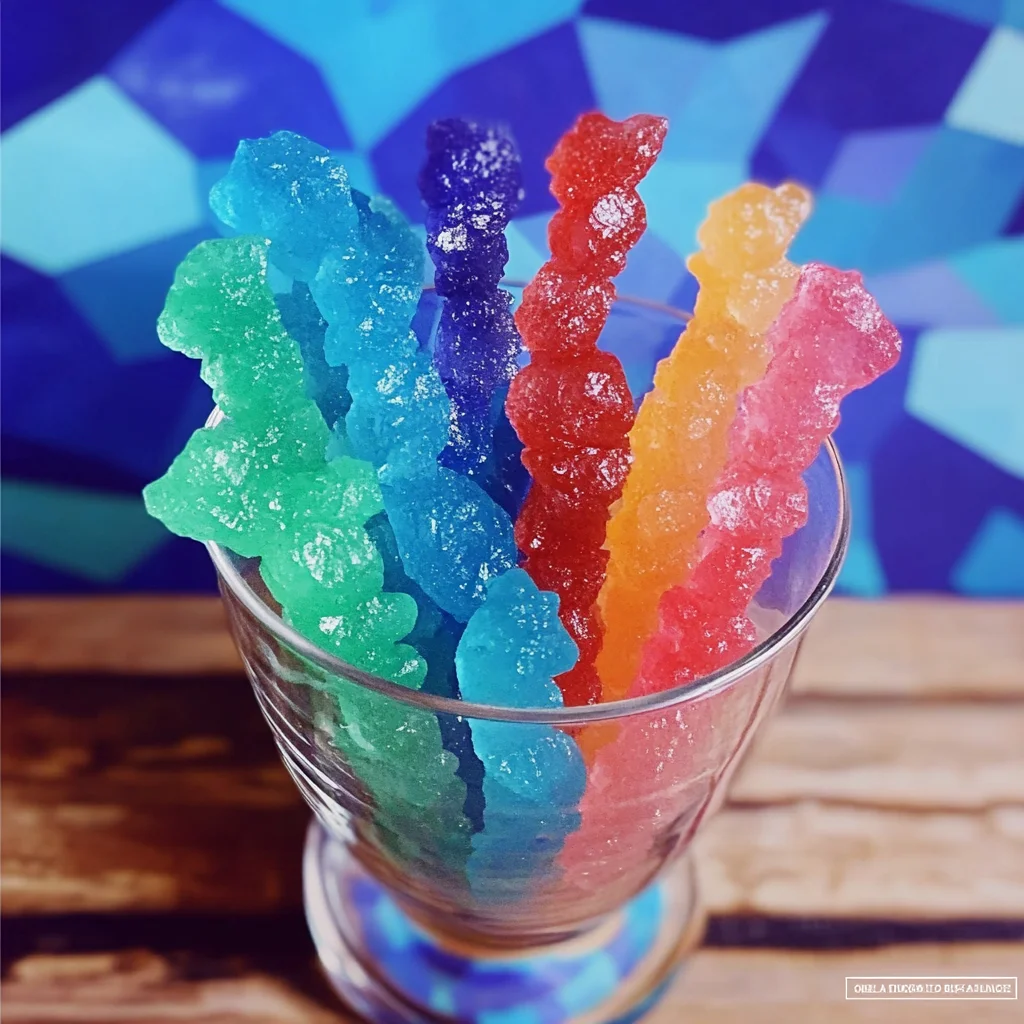
Remember those magical childhood moments when you’d unwrap a colorful, crystal-covered stick of rock candy and marvel at its sparkly sweetness? There’s something so simple and enchanting about watching sugar crystals grow right before your eyes. Making rock candy at home is not just a fun project—it’s a cozy, almost meditative experience that brings a little bit of kitchen science and old-fashioned charm together. Plus, it’s surprisingly easy and rewarding, even if you don’t consider yourself a candy-making pro.
This recipe for homemade rock candy is perfect if you want a sweet, crunchy treat that’s customizable, giftable, and absolutely delightful to make with friends or family. Whether you’re looking for a unique party favor, a fun kitchen experiment for the kids, or just a nostalgic snack, you’ll find making rock candy both quick and memorable. I love pairing this activity with a warm cup of tea or while prepping a batch of my favorite recipes from my cozy kitchen collection.
Why You’ll Love Rock Candy
- Fast: While it takes a few days to grow, the prep time is short and sweet.
- Easy: Just a few simple ingredients and steps make this a beginner-friendly project.
- Giftable: Homemade rock candy makes a charming gift that’s both pretty and tasty.
- Crowd-pleasing: Kids and adults alike love the shimmering crystals and customizable flavors.
Ingredients
Here’s what you’ll need to make your own dazzling rock candy at home. Each ingredient plays an important role in growing those beautiful crystals:
- 1 cup water: This forms the base of your sugar solution. It needs to be hot enough to dissolve the sugar completely.
- 3 cups granulated sugar: The star of the show! The sugar crystallizes to form those iconic crunchy crystals.
- Wooden lollipop sticks: These act as the structure for crystals to grow on. Make sure they’re clean and dry!
- Popsicle sticks and clothespins: Useful for suspending the candy sticks inside the jars without them touching the bottom.
- Quart-size wide-mouth mason jars: Perfect containers for the sugar solution and crystal growth.
- Food coloring (gel type preferred): Adds vibrant colors to your crystals. Gel coloring works best for vivid hues without watering down the solution.
- Flavor extract (optional): Vanilla, peppermint, or any favorite flavor can make your rock candy uniquely yours.
Don’t worry if you don’t have all the flavorings—it tastes pretty amazing just as sweet crystals alone. For a fun twist, try pairing your rock candy making day with some easy-to-make treats like these no-bake peanut butter brownie cookies to keep your sweet tooth satisfied.
How to Make Rock Candy
Ready to create your own sparkling sugar crystals? Follow these steps carefully, and you’ll have gorgeous rock candy sticks in no time. I always find the process soothing, almost like watching a slow-moving art project unfold.
- Prep your sticks: Start by dipping each wooden stick into water, then rolling it in granulated sugar. This gives the crystals a rough surface to cling to, which helps them grow beautifully. Lay the sticks flat on a clean surface and let them dry completely—don’t rush this step or the crystals might not form well.
- Make the sugar solution: In a large pot over medium heat, combine 1 cup of water and 3 cups of granulated sugar. Stir constantly until the sugar dissolves and the liquid comes to a rolling boil. This step is crucial—make sure all the sugar is dissolved for the best crystal growth!
- Add color and flavor: Once your sugar solution is boiling and clear, remove it from heat. Stir in your choice of gel food coloring and flavor extract if you’re using any. This is where you get to customize your candy’s look and taste.
- Cool down: Let the solution cool for about 20 minutes. This prevents the sticks from cooking the sugar too rapidly when you dip them in.
- Pour into jars: Carefully pour the cooled sugar solution into your mason jars, leaving some space at the top. This prevents overflow when you insert your sticks.
- Suspend the sticks: Lay a popsicle stick across the top of each jar. Attach a clothespin to your prepared lollipop stick and lower it into the jar so the sugared section is fully submerged but not touching the bottom. This helps your crystals form evenly.
- Wait patiently: Place your jars in a clean, undisturbed spot. Avoid moving or shaking them for about 5 days while the crystals slowly grow. This is the hardest part—patience truly pays off here!
- Finish up: After 5 days, gently break any sugar film on the surface and carefully remove the sticks. If some crystals are stuck to the jar sides, loosen them gently with a knife. Be careful removing from the bottom, as the crystals can break.
- Dry and store: Transfer your finished rock candy to a clean jar or stand the sticks upright in a cup to dry completely before enjoying or gifting.
Making rock candy reminds me a bit of baking a classic dessert like Grandma’s secret easy blueberry biscuits. Both require care, patience, and a little magic to get that perfect texture and look. I always keep a notebook nearby to jot down any tweaks or flavors I try for next time.
Substitutions & Additions
Rock candy is wonderfully flexible, so it’s easy to play around with flavors, colors, and even the sticks you use. Here are some fun ideas to make your rock candy uniquely yours:
- Flavor swaps: Instead of classic vanilla or peppermint, try lemon, almond, or even coconut extract to add a surprising twist. I once made cinnamon-flavored rock candy that was a hit during the holidays!
- Natural colorings: If you want to avoid artificial dyes, beet juice or turmeric powder can create soft pink or yellow hues, though they won’t be as vivid as gel food coloring.
- Different sticks: Wooden skewers or even clean paint sticks can work if you don’t have lollipop sticks on hand, just make sure they’re food-safe.
- Coating your candy: After drying, you can lightly brush your rock candy with edible glitter or dip it in melted chocolate for a fancy upgrade. These little touches can turn your candy sticks into gourmet gifts.
- Layered colors: For a rainbow effect, try growing one color first, then dipping the partially crystallized stick into a different colored sugar solution for another growth phase.
If you enjoy experimenting with sweet treats, you’ll love trying other creative recipes like the bakery-style rocky road cookies that combine crunchy, chewy, and chocolatey goodness in every bite.
Tips for Success
Making rock candy at home is a rewarding project, but a few common pitfalls can sneak in if you’re not careful. Here are my top tips for getting perfect, sparkly crystals every time:
- Don’t skip the sugar coating on sticks: This step is essential for crystals to latch on and form properly. Trust me, I once forgot it and ended up with a sad, crystal-free stick.
- Use clean jars and sticks: Any dust or oil can interfere with crystal formation, so keep everything spotless.
- Be patient: Crystal growth takes time. Avoid the temptation to move or shake the jars, or the crystals might not form beautifully.
- Control the temperature: Let your sugar solution cool before pouring, but don’t let it get cold. Warmth encourages crystal growth but too hot can dissolve the initial sugar coating on the sticks.
- Prep ahead: You can prepare the sticks a day in advance and store them in an airtight container until you’re ready to start the sugar solution.
- Keep jars covered loosely: Avoid dust settling in but allow some air flow to prevent mold or contamination.
If you’re in the mood for a cozy, sweet project that pairs wonderfully with a classic comfort meal, try whipping up my creamy lemon chicken recipe while your rock candy grows—it’s a perfect combo of savory and sweet to brighten your day.
How to Store Rock Candy
Once your rock candy is ready and fully dried, you’ll want to store it properly to keep those crystals crunchy and beautiful. Here’s what I recommend:
- Use airtight containers: Glass jars or plastic containers with tight lids work best to protect your candy from moisture.
- Keep in a cool, dry place: Avoid humid areas like bathrooms or kitchens near the stove, as moisture can cause your crystals to soften or dissolve.
- Shelf life: Properly stored rock candy can last for several weeks to months. Just keep an eye out for any sticky spots or discoloration.
- Display tips: If you want to showcase your candy sticks as part of a party setup, stand them upright in a decorative jar or mason jar filled with sugar or small beads to keep them stable.
By storing your rock candy well, you ensure every bite stays as crisp and sweet as the first. For other make-ahead treats that hold up wonderfully, check out some of my favorite no-bake desserts like these no-bake peanut butter brownie cookies.
FAQs
How long does it take for rock candy crystals to grow?
Typically, you’ll see crystals forming within 3 to 5 days. For the best size and texture, I recommend waiting the full 5 days without disturbing the jars.
Can I reuse the sugar solution to make another batch?
It’s best to make a fresh batch each time. The sugar solution becomes saturated and less effective after one use, which can result in poor crystal growth.
Why didn’t my crystals form on the sticks?
This usually happens if the sticks weren’t properly coated with sugar or if the jars were moved too much during the growing period. Make sure sticks are dry and coated before dipping and keep jars undisturbed.
Can I make rock candy without food coloring or flavoring?
Absolutely! Pure, clear rock candy is classic and delicious. Food coloring and flavor extracts are just fun ways to customize your candy.
Now that you’ve got the hang of making your own rock candy, why not explore more sweet adventures? From classic homemade desserts to cozy meals, there’s always something new to try in the kitchen. For inspiration, check out this creamy lemon chicken recipe—it’s a family favorite that pairs perfectly with an afternoon of candy making.
Happy candy crafting! For even more tasty ideas and kitchen inspiration, be sure to follow us on Pinterest.

Homemade Rock Candy
Ingredients
Equipment
Method
- Step 1: Dip each wooden stick into water, then roll in granulated sugar to coat. Lay sticks flat and let dry completely to help crystals cling.
- Step 2: In a large pot over medium heat, combine 1 cup water and 3 cups sugar. Stir constantly until sugar dissolves and the mixture boils.
- Step 3: Remove pot from heat. Stir in gel food coloring and flavor extract if using, to customize your candy.
- Step 4: Let sugar solution cool for about 20 minutes to prevent sticks from cooking the sugar too quickly.
- Step 5: Pour cooled solution into mason jars, leaving space at the top to prevent overflow.
- Step 6: Lay a popsicle stick across each jar’s top. Attach a clothespin to a prepared lollipop stick and lower it into the jar, sugar-coated section submerged but not touching the bottom.
- Step 7: Place jars in a clean, undisturbed spot. Avoid moving or shaking for about 5 days while crystals grow.
- Step 8: After 5 days, gently break surface sugar film and carefully remove sticks. Loosen any crystals stuck to jar sides with a knife.
- Step 9: Transfer finished rock candy to clean jars or stand upright in a cup to dry completely before enjoying or gifting.