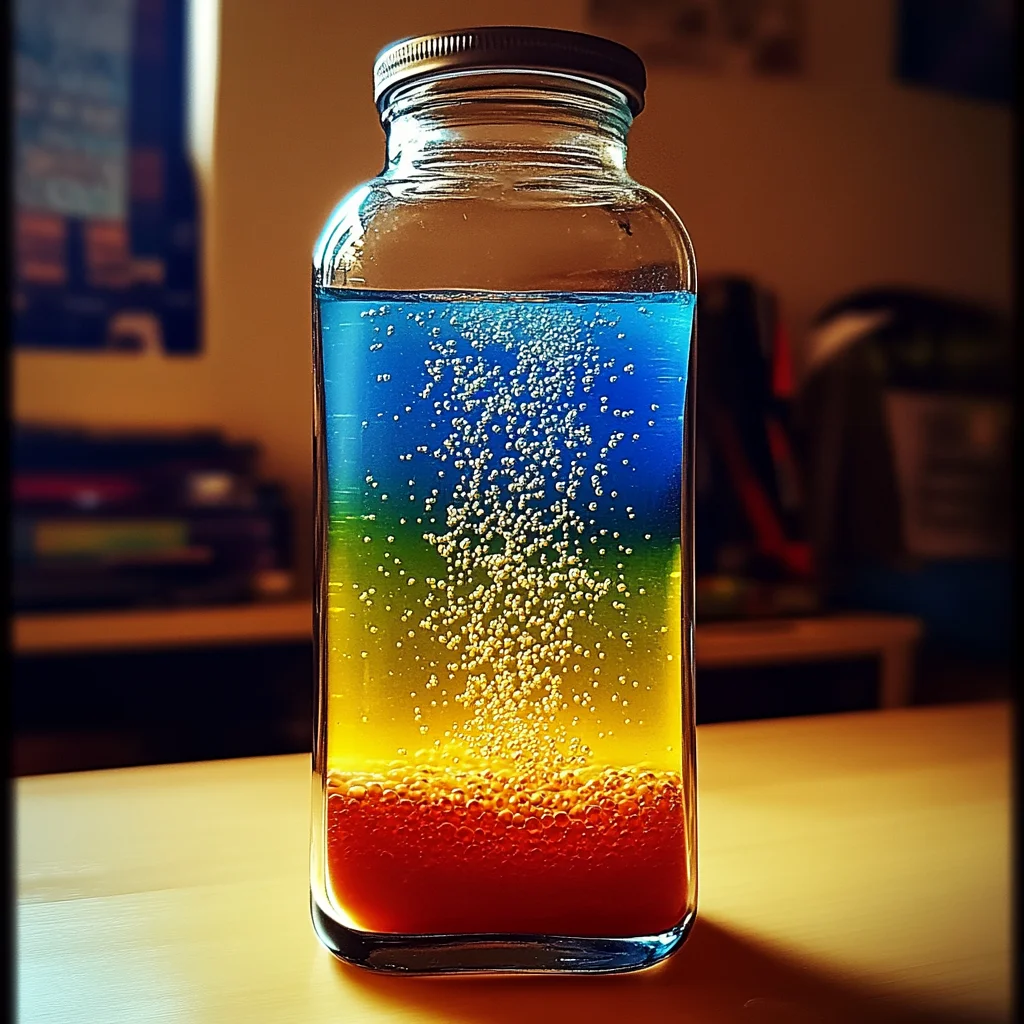
Remember those mesmerizing lava lamps from childhood? The way colorful blobs floated up and down, casting a cozy glow and sparking endless fascination? Well, you can recreate that magic right in your kitchen with a super simple DIY lava lamp project that’s fun, quick, and guaranteed to impress both kids and adults alike.
This DIY lava lamp recipe is not only a nostalgic blast but also a fantastic science experiment that doubles as a dazzling decoration. Whether you want to add a whimsical touch to a party, entertain the little ones on a rainy afternoon, or create a unique gift, this homemade lava lamp is your go-to project. And trust me, you don’t need any fancy gadgets—just a few household items you probably already have.
Why You’ll Love DIY Lava Lamp
- Fast: It takes just minutes to set up and see the bubbly magic happen.
- Easy: No complicated tools or ingredients; perfect if you want instant fun.
- Giftable: Makes a cool, creative present that stands out from the usual.
- Crowd-pleasing: Kids, friends, or family will be amazed by the colorful, bubbly action.
Ingredients
- Clean, empty water bottles: Sports bottles like Gatorade work great—you want a clear container to watch the reaction.
- Vegetable, canola, or olive oil: Oil creates the flowing blobs; any light-colored cooking oil will do.
- Clean water: Helps create the separation needed for the bubbles to dance.
- Food coloring: Adds vibrant color and turns your bottle into a mini lava lamp show.
- Antacid tablets (like Alka-Seltzer): The fizzing agent that makes the bubbles move and glow.
How to Make DIY Lava Lamp
Let’s get to the fun part! Follow these easy steps and watch your DIY lava lamp come to life:
- First, prepare a clean, flat workspace. I recommend laying down some newspaper or a plastic tablecloth to catch any spills. Make sure everything is close at hand, and if kids are involved, adult supervision is a must!
- Fill your clean bottle about three-quarters full with your chosen oil. The oil will float on top of the water and allow those colorful blobs to form.
- Slowly pour clean water into the bottle until it’s about two inches from the top. You’ll notice the oil and water form two distinct layers—that’s exactly what you want.
- Add 4–5 drops of food coloring. Pick your favorite color or mix a few to create your personalized lava lamp style.
- Break an antacid tablet in half (this helps you control the fizz) and drop one piece into the bottle. Immediately, you’ll see bubbles bursting through the oil and carrying colored blobs up and down, mimicking a real lava lamp!
- When the bubbling slows down, just add more antacid pieces for a fresh burst of bubbly action. It’s like the show never really ends.
Substitutions & Additions
Feel like getting creative? Here are some easy twists and swaps you can try:
- Swap water bottles: Use old clear jars or glass bottles for a more vintage lava lamp feel.
- Oil options: Vegetable and canola oils are neutral; olive oil adds a subtle tint but works just as well.
- Food coloring combos: Mix red and blue for purple, or green and yellow for a sunny vibe. Glitter drops also make for sparkly swirls!
- Fizz alternatives: While antacid tablets are perfect, baking soda and vinegar create a similar bubbly effect if you want to experiment outside this recipe.
- Layering fun: Try adding a few drops of liquid soap for extra bubble magic and thickness.
Tips for Success
- Make sure your bottles are clean and completely dry before starting; leftover residues can change how the bubbles form.
- Pour water slowly so the oil doesn’t mix into it—watch those layers stay separate for the best lava lamp effect.
- If your bubbles aren’t moving much, try using fresher antacid tablets or breaking them into smaller pieces for faster fizz.
- Don’t shake the bottle once assembled; that’ll mix the oil and water and spoil the effect temporarily.
- You can prep multiple bottles ahead for a fun science activity, just keep them sealed until use.
How to Store DIY Lava Lamp
If you want to enjoy your homemade lava lamp over several days, keep the bottle sealed tightly and store it at room temperature away from direct sunlight. The oil and water layers will stay separated, but to reactivate the bubble motion, you’ll need to add fresh antacid tablet pieces each time.
Over time, the food coloring might settle or fade, so shaking gently and adding more coloring will refresh the glow. This project isn’t something you’d store long-term like food, but with simple care, the bottles can shine for several days of fun.
FAQs
- Can I use any type of water bottle for this?
- Yes! Clear bottles work best so you can see the lava lamp effect, but avoid anything colored or opaque.
- What if my lava lamp doesn’t bubble?
- Check that your antacid tablets are fresh and try breaking them into smaller pieces. Also, be sure not to shake the bottle before adding the tablets.
- Is it safe for kids to make and use?
- Absolutely, but adult supervision is recommended, especially when handling tablets and pouring liquids to keep everything safe and spill-free.
- Can I reuse the oil and water mixture?
- You can, but after several uses, the mixture may get cloudy. It’s easy and inexpensive to swap out the liquid for a fresh batch.
If you’re looking for more fantastically fun projects and delicious recipes, be sure to browse through the wide range of creative ideas on Crispy Kitchens’ recipes page. And once you’re done, maybe treat yourself to something tasty like the no-bake peanut butter brownie cookies — they’re outrageously good and as easy to make as this lava lamp fun!
For a cozy indoor afternoon, pairing your bubbling lava lamp activity with a batch of easy mini raspberry cheesecake bites can bring a smile to anyone’s face. It’s all about blending fun and flavors!
Don’t forget to follow us on Pinterest for endless inspiration for your kitchen adventures and craft projects!
DIY Lava Lamp
Ingredients
Equipment
Method
- Step 1: Prepare a clean, flat workspace and gather all materials. If children are involved, ensure adult supervision.
- Step 2: Fill the clean bottle about three-quarters full with your chosen oil.
- Step 3: Slowly add clean water until the bottle is about two inches from the top, creating two separate layers of oil and water.
- Step 4: Add 4 to 5 drops of food coloring to the bottle to add vibrant colors to your lava lamp.
- Step 5: Break an antacid tablet in half and drop one piece into the bottle. Watch bubbles rise and colorful blobs move, mimicking a real lava lamp.
- Step 6: When bubbling slows, add more antacid pieces to restart the bubbly action as desired.