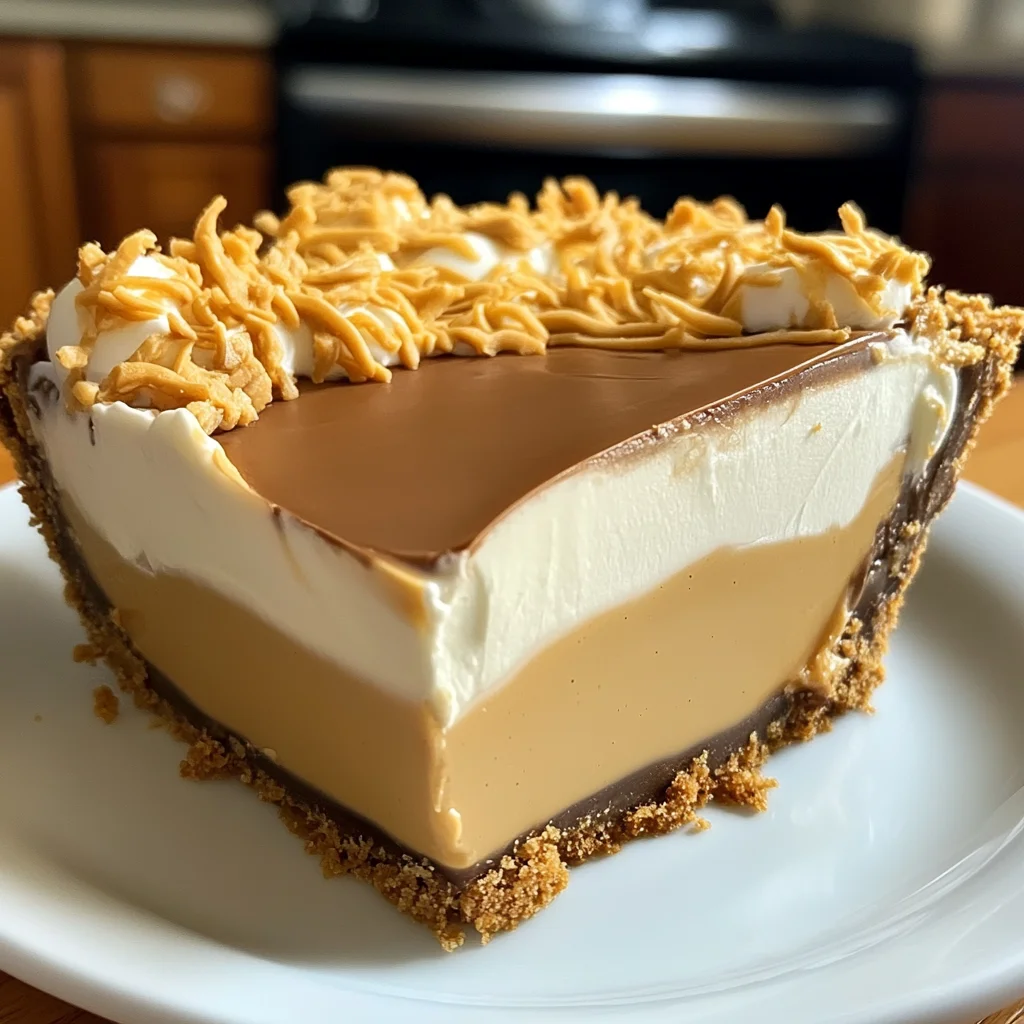
Oh, honey, let me tell you, there are some desserts that just whisper “home” to your soul, aren’t there? For me, it’s often something creamy, something sweet, and almost always, something wonderfully peanut buttery. There’s a magic in that rich, nutty flavor that instantly takes me back to simpler times, to grandma’s kitchen, or to happy family gatherings. Today, I’m absolutely thrilled to share a recipe that perfectly captures that feeling: an Amish Peanut Butter Cream Pie.
This isn’t just any pie; it’s a no-bake wonder that comes together in a flash, but tastes like you spent hours lovingly crafting it. It’s rich, it’s smooth, it’s gloriously peanut buttery, and oh-so-creamy. Trust me, once you try this incredibly easy and quick recipe, it’ll become a cherished family favorite, creating those sweet, memorable moments you’ll look back on for years to come. Get ready to fall in love!
Why You’ll Love Amish Peanut Butter Cream Pie
- Fast: Seriously, this pie comes together quicker than you can say “more please!”
- Easy: No oven required, just a few simple steps and you’re on your way to dessert heaven.
- Giftable: It’s so pretty and universally loved, it makes the perfect hostess gift or a treat for a neighbor.
- Crowd-pleasing: Who doesn’t love peanut butter? This pie is always a hit at potlucks, parties, or just a casual weeknight treat.
Ingredients
Gather your simple treasures, sweet friend. Here’s what you’ll need for this delicious journey:
- 1 pre-made graham cracker pie crust: Your ultimate shortcut to dessert bliss! No baking, no fuss.
- 1 cup creamy peanut butter: The star of our show! Make sure it’s creamy for that smooth, dreamy texture.
- 1 cup powdered sugar: For that melt-in-your-mouth sweetness without any graininess in our crumble.
- 8 ounces cream cheese, softened: Softened, please! This is absolutely key for a super smooth, lump-free filling.
- 1 cup granulated sugar: Just a touch more sweetness for our dreamy cream cheese layer.
- 2 cups heavy cream: Whipped to perfection, it creates that cloud-like, irresistible texture.
- 1 teaspoon vanilla extract: A little touch of warmth and classic dessert flavor.
- 1 cup milk: Your choice, but whole milk usually gives the creamiest, most luxurious result.
- 1 package (3.4 oz) instant vanilla pudding mix: Our secret ingredient for an effortlessly set and perfectly thick pie!
How to Make Amish Peanut Butter Cream Pie
Alright, apron on, and let’s get baking… or rather, no-baking! You’re going to be amazed at how simple this is.
- Whip Up That Crumbly Peanut Butter Topping: First things first, grab a medium bowl. Toss in your creamy peanut butter and powdered sugar. Now, get in there with a fork or a sturdy spoon and mix it all up until it forms a delightful, crumbly mixture. It’s going to look and smell amazing! We’re going to save about half of this goodness for the topping later, so roughly divide it and set one portion aside.
- Create the Creamy Dreamy Base: Next, grab your big mixing bowl – the one your electric mixer loves! Add the softened cream cheese and granulated sugar. Beat them together on medium speed until they’re perfectly smooth and lump-free. Seriously, no lumps allowed! Then, pour in the heavy cream and vanilla extract. Keep beating, scraping down the sides of the bowl as needed, until the mixture is beautifully light, fluffy, and looks like a cloud you could just dive into.
- Lay the Pie Crust Foundation: Now, take that pre-made graham cracker pie crust. Remember that first batch of peanut butter crumble you made in step 1? Evenly spread about half of it across the bottom of the crust. This is going to be your delicious surprise layer that adds a wonderful texture and extra peanut butter punch!
- Pudding Perfection: In a separate, clean medium bowl, whisk together the milk and instant vanilla pudding mix. Whisk, whisk, whisk until it starts to thicken up nicely. It won’t take long! Now, here’s where the magic happens: gently fold this thickened pudding mixture into your light and fluffy cream cheese mixture from step 2. You want it just combined, keeping that airy texture you worked so hard for!
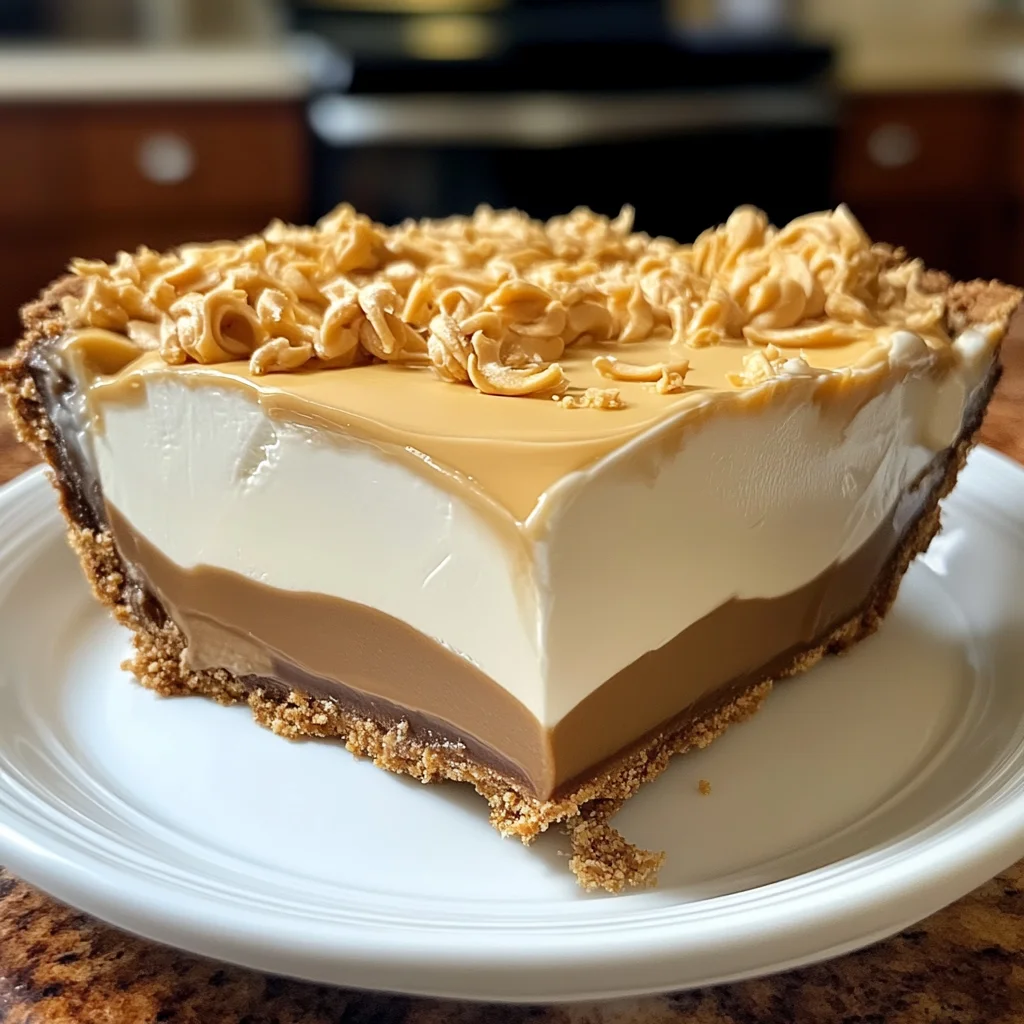
- Assemble Your Masterpiece: Pour this glorious, creamy filling over the peanut butter crumbles in your pie crust. Don’t be shy! Use a spatula to smooth it out evenly. Then, grab the remaining peanut butter crumble mixture you set aside earlier and sprinkle it generously and evenly over the top of the pie. Doesn’t that look incredible?
- Chill Out (The Hardest Part!): Now for the hardest part of any no-bake recipe: waiting! Pop your beautiful pie into the refrigerator and let it chill for at least 4 hours. This allows all those wonderful flavors to meld together beautifully and, crucially, for the pie to set up perfectly. I always find a good 6 hours or even chilling it overnight gives the best, firmest slices and the most delightful texture.
Substitutions & Additions
Part of the fun of cooking is making a recipe your own! Here are some ideas to get your creative juices flowing:
- Crust Choices: While a graham cracker crust is classic, feel free to swap it for a pre-made chocolate cookie crust for an extra layer of decadence, or even bake a homemade graham cracker crust if you’re feeling ambitious!
- Peanut Butter Power: If you love a bit of bite, go ahead and use crunchy peanut butter instead of creamy. It adds a lovely textural contrast to the smooth filling.
- Top It Off: Before serving, a dollop of fresh whipped cream, a sprinkle of mini chocolate chips, or even a drizzle of chocolate syrup can take this pie to the next level. Mini peanut butter cups chopped and sprinkled on top are also divine!
- Flavor Twist: For a “Buckeye” inspired pie, you could even add a tablespoon of unsweetened cocoa powder to the initial peanut butter crumble mixture. Yum!
If you’re as obsessed with easy, no-bake treats as I am, you might also love making some easy mini raspberry cheesecake bites for another fuss-free dessert option that’s just as delightful!
Tips for Success
Even though this pie is super easy, a few little pointers can make it absolutely perfect every time:
- Softened Cream Cheese is Non-Negotiable: I can’t stress this enough! If your cream cheese isn’t completely softened, you’ll end up with lumps in your filling, and nobody wants that. Take it out of the fridge at least an hour before you plan to start.
- Don’t Overmix the Pudding: When you whisk the instant pudding with the milk, mix it just until it thickens. Once you fold it into the cream cheese mixture, be gentle. Overmixing can deflate the lovely airy texture we’re aiming for.
- Chill Time is Your Best Friend: Seriously, resist the urge to cut into it early! The full chill time allows the pie to set up beautifully, ensuring clean, firm slices and the best flavor.
- Make-Ahead Marvel: This pie is an absolute dream for entertaining because you can make it a day ahead! In fact, I think it tastes even better after a full overnight chill.
If you’re a peanut butter fanatic like me and looking for more irresistible treats, you absolutely have to check out these no-bake peanut butter brownie cookies!
How to Store Amish Peanut Butter Cream Pie
Once you’ve devoured a slice (or two!), you’ll want to properly store the rest to keep it fresh and delicious.
- Refrigerator: Cover the pie tightly with plastic wrap or aluminum foil and store it in the refrigerator. It will stay wonderfully fresh for 3-4 days.
- Freezer: Yes, you can freeze this pie! For best results, I recommend slicing it first. Wrap individual slices tightly in plastic wrap, then place them in an airtight freezer-safe container or freezer bag. Thaw individual slices in the refrigerator for a few hours before enjoying. It should last in the freezer for up to 1 month.
FAQs
Here are a few common questions I get about this delightful pie:
Q: Can I use crunchy peanut butter instead of creamy?
A: Absolutely! While the recipe calls for creamy for that silky-smooth texture, using crunchy peanut butter will add a lovely textural element and an extra nutty bite. Go for it if that’s your preference!
Q: Can I make my own graham cracker crust from scratch?
A: You bet! Homemade crusts are always a treat. Just follow your favorite recipe for a 9-inch graham cracker crust, bake it if required, and let it cool completely before adding the filling.
Q: Is this pie very sweet?
A: It’s definitely a sweet treat! The combination of peanut butter, cream cheese, and pudding makes for a rich, indulgent dessert. The balance of the salty-sweet peanut butter helps keep it from being overly sweet, but it’s certainly a dessert meant to satisfy your sweet tooth!
If you’re looking for another show-stopping, yet simple, dessert to impress, you really can’t go wrong with an easy chocolate covered strawberry pie. It’s another no-fail winner!
For more delicious and easy recipes, be sure to follow us on Pinterest!
Dreamy & Easy No-Bake Amish Peanut Butter Cream Pie
Ingredients
Equipment
Method
- Step 1: Whip Up That Crumbly Peanut Butter Topping: In a medium bowl, combine creamy peanut butter and powdered sugar. Mix with a fork or sturdy spoon until a delightful, crumbly mixture forms. Set aside about half of this mixture for topping later.
- Step 2: Create the Creamy Dreamy Base: In a large mixing bowl, beat the softened cream cheese and granulated sugar with an electric mixer on medium speed until perfectly smooth and lump-free. Pour in the heavy cream and vanilla extract. Continue beating, scraping down the sides as needed, until the mixture is light, fluffy, and cloud-like.
- Step 3: Lay the Pie Crust Foundation: Evenly spread about half of the peanut butter crumble mixture (from Step 1) across the bottom of the pre-made graham cracker pie crust.
- Step 4: Pudding Perfection: In a separate, clean medium bowl, whisk together the milk and instant vanilla pudding mix until it thickens nicely. Gently fold this thickened pudding mixture into the light and fluffy cream cheese mixture from Step 2 until just combined, being careful to maintain the airy texture.
- Step 5: Assemble Your Masterpiece: Pour this glorious, creamy filling over the peanut butter crumbles in your pie crust. Use a spatula to smooth it out evenly. Grab the remaining peanut butter crumble mixture you set aside earlier and sprinkle it generously and evenly over the top of the pie.
- Step 6: Chill Out (The Hardest Part!): Pop your beautiful pie into the refrigerator and let it chill for at least 4 hours. This allows the flavors to meld and the pie to set up perfectly. For best results, chill for a good 6 hours or even overnight to ensure firm slices and a delightful texture.