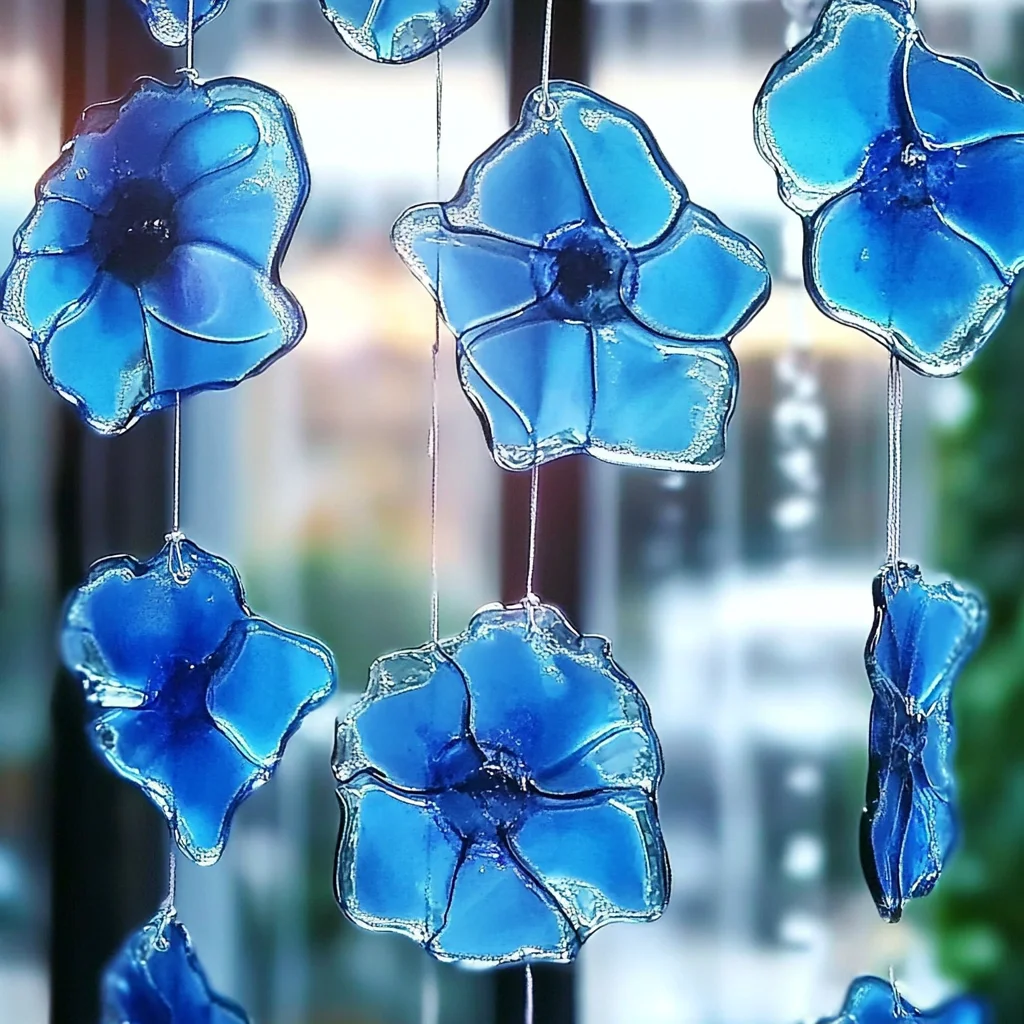
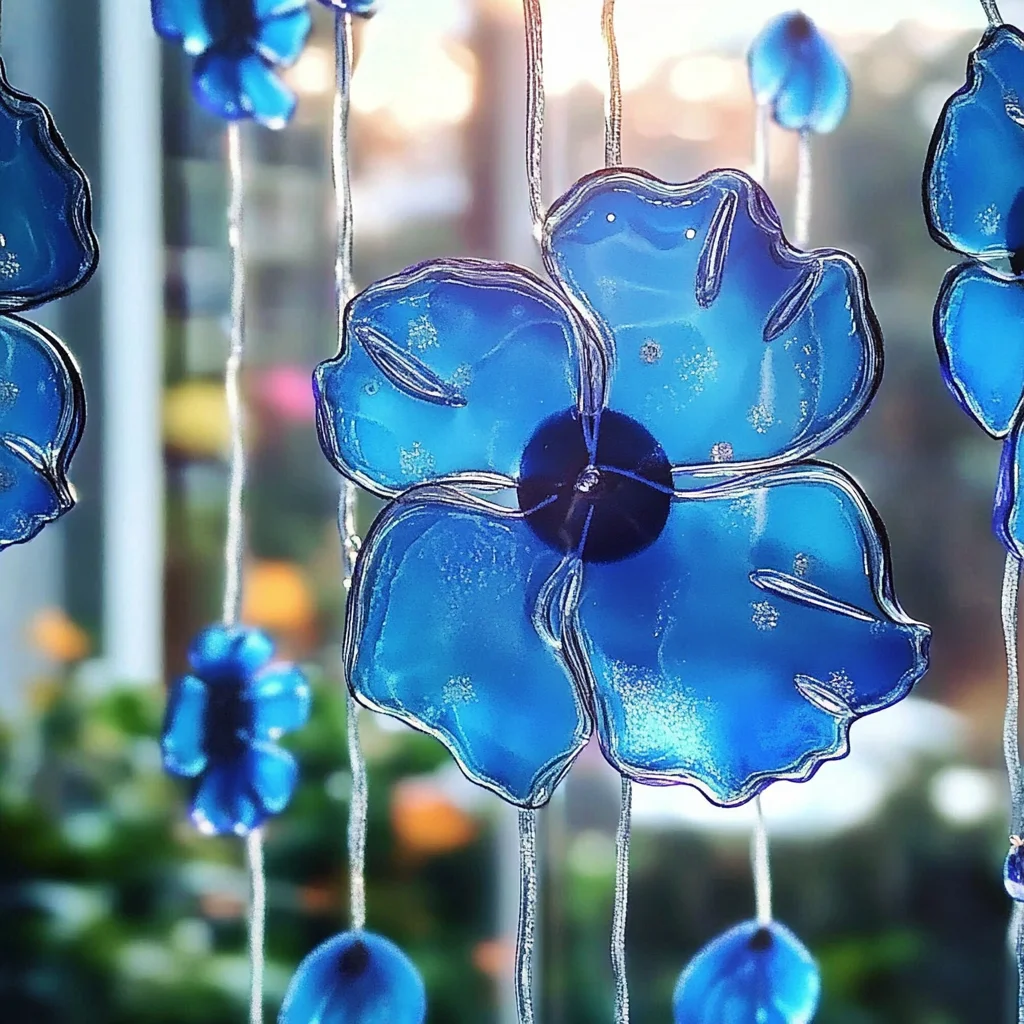
Oh, friend, there’s something truly magical about seeing sunlight stream through a window, isn’t there? It reminds me of lazy summer afternoons, the kind where time seems to slow down, and simple joys fill the air. Today, I’m so excited to share a little piece of that magic with you: Blue Crayon Suncatchers! This isn’t a recipe for your belly, but a recipe for your soul, a sweet craft that brings a burst of color and a whole lot of cheer to any space. It’s incredibly easy, surprisingly quick, and the results are just breathtaking. You’ll be amazed at how a few simple crayons can transform into a shimmering work of art!
Why You’ll Love Blue Crayon Suncatchers
- Fast
- Easy
- Giftable
- Crowd-pleasing
Ingredients
Gathering your supplies for these gorgeous suncatchers is half the fun! You probably have most of these lying around, especially if you have little artists in your life.
- Blue crayons: A variety of shades – think sky blue, navy, sapphire, even a hint of teal! Using different tones will give your suncatchers incredible depth and sparkle. Consider adding a white or silver crayon too, for a cool frosty effect.
- Waxed paper: You’ll need two sheets per suncatcher. This is the magic canvas that holds all your melted crayon goodness.
- Crayon or pencil sharpener: Any basic sharpener will do. We’re going for shavings, so don’t worry about getting a super fine point!
- Iron: This is where the magic happens! Just remember, this part is strictly for adults. Set it to its lowest heat, and make sure the steam setting is off.
- Scissors: For cutting out your beautiful shapes.
- Hole punch: To create a little spot for hanging.
- Embroidery floss, string, or thread: To hang your finished masterpieces in a sunny spot!
How to Make Blue Crayon Suncatchers
Alright, let’s get those hands busy and create some window-worthy art! You’ll be amazed at how quickly these come together.
- Get Peeling and Shaving: First things first, you’ll want to peel all the paper labels off your blue crayons. This can be a fun task for younger helpers if you have them! Once peeled, grab your crayon sharpener and start creating a lovely pile of crayon shavings. Don’t be afraid to make a mix – some fine, delicate shreds and some chunkier bits will give your finished suncatcher a really cool texture.
- Set the Scene: Lay one sheet of waxed paper flat on a protected surface. I like to put down an old towel or a few layers of newspaper, just in case. Now, evenly sprinkle your colorful crayon shavings onto the waxed paper. Try not to pile them too high in one spot; you want a nice, even spread for the best melting.
- Top it Off: Carefully place a second piece of waxed paper directly over the top of your crayon shavings. Gently press down on the edges to help align them and keep those shavings from escaping.
- Time to Melt (Adults Only!): This step is where an adult absolutely needs to take over. Plug in your iron and set it to its lowest heat setting – no steam, please! Once it’s warm, gently press the iron over the top sheet of waxed paper. You’ll see the crayons begin to melt right before your eyes, fusing the colors together.
- Swirl and Fuse: Continue ironing in small, gentle motions until all the crayon shavings have melted and blended into a beautiful, smooth, and swirly sheet of color. If you’re looking for more fun ways to get creative in the kitchen, or just need a delicious idea for dinner tonight, head over to our main recipe collection for some inspiration!
- Cool Down: Once you’re happy with your melted design, turn off the iron and let your waxed paper sheet cool down for a few minutes. It needs to be completely cool and firm before you move on to the next step.
- Shape It Up: Now for the creative part! Grab your scissors and either freehand sketch some fun shapes onto the cooled waxed paper or use cookie cutters as templates. Raindrops, stars, simple circles, or even a whimsical cloud shape would look amazing. Carefully cut out each suncatcher shape.
- Punch and Hang: Take your hole punch and make a small hole at the top of each cut-out suncatcher. Thread your string, embroidery floss, or thread through the hole. Tie a loop, and then find the perfect sunny window to display your gorgeous new creations! And speaking of quick and delightful, if you’re craving something truly special after all that crafting, you absolutely have to try our no-bake peanut butter brownie cookies for a sweet reward.
Substitutions & Additions
These suncatchers are incredibly versatile! Here are a few ideas to get your creative juices flowing:
- Rainbow Bright: Don’t limit yourself to just blue! Imagine a vibrant rainbow suncatcher, or ones themed for holidays like red and green for Christmas, or pastel shades for Easter.
- Glitter Glam: For extra sparkle, you can sprinkle a tiny bit of fine glitter onto the crayon shavings before you add the top layer of waxed paper. It will melt right in and add a magical shimmer!
- Leafy Impressions: Before melting, try placing small, thin leaves or even pressed flowers between the layers of crayon and waxed paper for a nature-inspired design.
- Cookie Cutter Fun: Instead of freehand cutting, you can use metal cookie cutters (carefully!) to press shapes while the wax is still warm, right after ironing. Just make sure the cookie cutter is clean and gently remove it once cooled.
Tips for Success
Even though this craft is super easy, a few little pointers can make all the difference:
- Iron Temperature is Key: Seriously, low heat is your best friend here. Too hot, and the wax paper can wrinkle or even scorch. Patience is a virtue when melting!
- Even Shaving Distribution: Try to sprinkle your crayon shavings as evenly as possible. This helps ensure a smooth, consistent melt and prevents thick, unmelted spots.
- Protect Your Surface: I always recommend laying down an old towel or several sheets of newspaper beneath your waxed paper before ironing. Wax can be a little messy if it gets on your ironing board!
- Let Them Cool Completely: Resist the urge to cut too soon! If the wax isn’t fully cooled and set, your shapes might distort or tear.
- Adult Supervision is a Must: As I mentioned before, the iron is hot and should only be handled by an adult. For younger crafters, they can help with peeling, sharpening, sprinkling, and cutting out shapes. These suncatchers bring so much joy, and you know what else brings joy? A sweet little treat! While your suncatchers are cooling, whip up some easy mini raspberry cheesecake bites for a delightful snack.
How to Store Blue Crayon Suncatchers
These suncatchers are quite durable, but they are made of wax, so they don’t do well with excessive heat!
- Keep Cool: Store them flat in a cool, dry place, away from direct sunlight or hot windows if you’re not hanging them immediately. A drawer or a shoebox works perfectly.
- Prevent Sticking: If stacking multiple suncatchers, place a sheet of parchment paper or waxed paper between each one to prevent them from sticking together.
- Shelf Life: These beautiful creations can last for years if stored properly! Just keep them away from anything that might scratch or melt them.
FAQs
Q: Can I use old, broken crayons for this?
A: Absolutely! This is a fantastic way to use up all those broken crayon bits and pieces. Just make sure to peel off any remaining paper labels.
Q: What if my crayons don’t melt evenly?
A: Try gently pressing the iron on those areas a bit longer. Sometimes uneven sprinkling of shavings or varying crayon densities can cause this. Just keep the heat low and move the iron slowly.
Q: Are these safe for outdoor display?
A: I wouldn’t recommend it for long periods, especially in direct sun during hot weather. The suncatchers are made of wax and will melt! They’re best enjoyed indoors in a sunny window.
Q: Can kids make these independently?
A: Kids can handle all the steps except for using the iron. That part is strictly for adult supervision to ensure safety. It’s a wonderful collaborative project!
Follow Crispy Kitchens on Pinterest for more delicious inspiration!
Shimmering Blue Crayon Suncatchers
Ingredients
Equipment
Method
- Step 1: Get Peeling and Shaving: First things first, you'll want to peel all the paper labels off your blue crayons. This can be a fun task for younger helpers if you have them! Once peeled, grab your crayon sharpener and start creating a lovely pile of crayon shavings. Don't be afraid to make a mix – some fine, delicate shreds and some chunkier bits will give your finished suncatcher a really cool texture.
- Step 2: Set the Scene: Lay one sheet of waxed paper flat on a protected surface. I like to put down an old towel or a few layers of newspaper, just in case. Now, evenly sprinkle your colorful crayon shavings onto the waxed paper. Try not to pile them too high in one spot; you want a nice, even spread for the best melting.
- Step 3: Top it Off: Carefully place a second piece of waxed paper directly over the top of your crayon shavings. Gently press down on the edges to help align them and keep those shavings from escaping.
- Step 4: Time to Melt (Adults Only!): This step is where an adult absolutely needs to take over. Plug in your iron and set it to its lowest heat setting – no steam, please! Once it's warm, gently press the iron over the top sheet of waxed paper. You'll see the crayons begin to melt right before your eyes, fusing the colors together.
- Step 5: Swirl and Fuse: Continue ironing in small, gentle motions until all the crayon shavings have melted and blended into a beautiful, smooth, and swirly sheet of color.
- Step 6: Cool Down: Once you're happy with your melted design, turn off the iron and let your waxed paper sheet cool down for a few minutes. It needs to be completely cool and firm before you move on to the next step.
- Step 7: Shape It Up: Now for the creative part! Grab your scissors and either freehand sketch some fun shapes onto the cooled waxed paper or use cookie cutters as templates. Raindrops, stars, simple circles, or even a whimsical cloud shape would look amazing. Carefully cut out each suncatcher shape.
- Step 8: Punch and Hang: Take your hole punch and make a small hole at the top of each cut-out suncatcher. Thread your string, embroidery floss, or thread through the hole. Tie a loop, and then find the perfect sunny window to display your gorgeous new creations!