There’s something so comforting about the smell of freshly baked cookies wafting through the house, isn’t there? Maybe it takes you back to childhood afternoons spent sneaking treats from the cookie jar or cozy winter evenings curled up with a warm drink and a plate full of homemade goodies. These Peanut Butter Butterfinger Cookies bring all that nostalgia and warmth right back, with an extra twist of candy bar crunch that makes them utterly unforgettable. If you love peanut butter and crave that perfect balance of chewy, soft, and crispy, this recipe is about to become your new kitchen favorite.
What’s even better? These cookies are super easy to whip up, don’t take hours in the oven, and make a perfect gift or party treat. I remember the first time I baked these for a holiday gathering — they vanished faster than I could blink! And I bet you’ll have the same reaction from your friends and family. So, get ready to dive into a baking adventure that’s as fun as it is delicious.
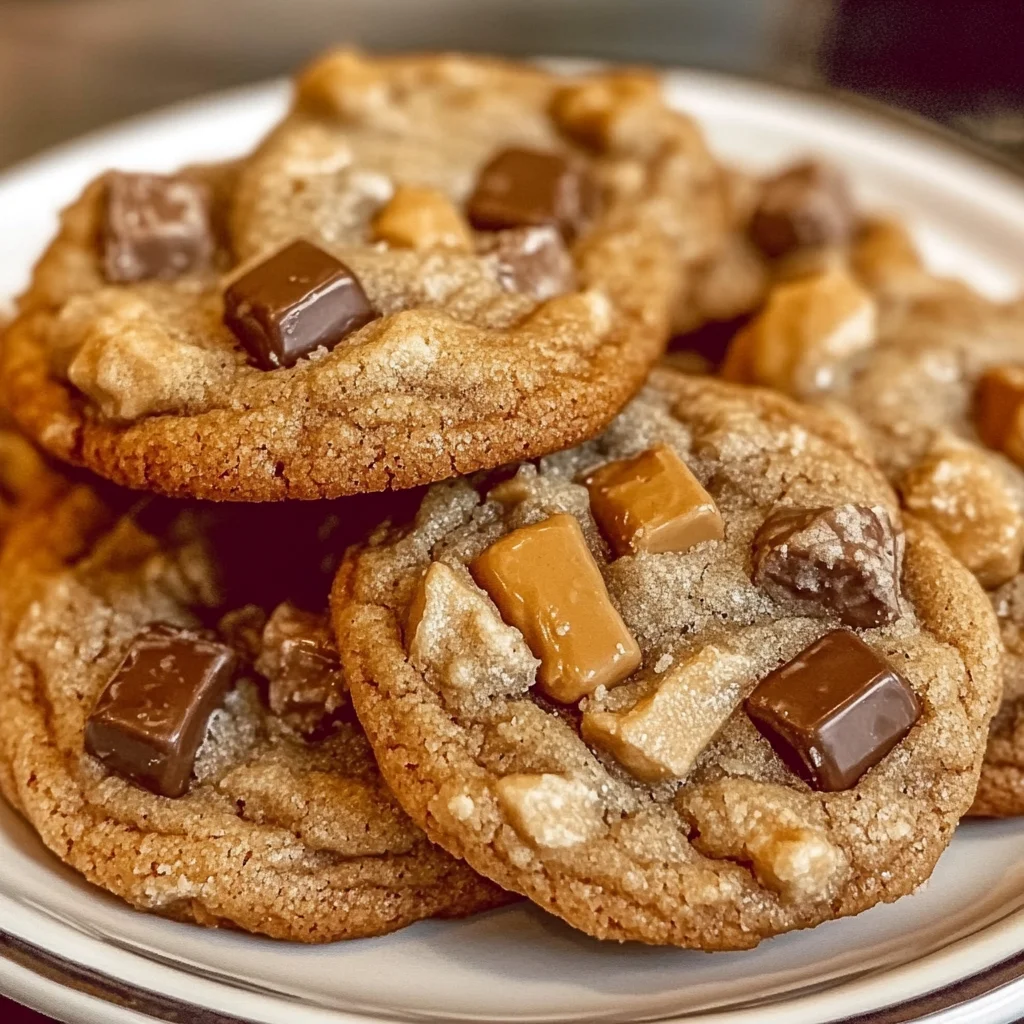
Why You’ll Love Peanut Butter Butterfinger Cookies
- Fast: From mixing to baking, these cookies come together in under an hour.
- Easy: Simple ingredients and straightforward steps, perfect for bakers of all levels.
- Giftable: Wrap them up in a cute tin or box, and you’ve got a thoughtful homemade gift.
- Crowd-pleasing: The combination of creamy peanut butter and crunchy Butterfinger candy is irresistible.
Ingredients
Let’s walk through what you’ll need to make these scrumptious cookies. The ingredient list is straightforward, but each item plays an important role in creating that perfect texture and flavor.
- ¾ cup unsalted butter, softened: Butter gives these cookies their tender crumb and rich, buttery flavor. Make sure it’s softened to room temperature so it blends smoothly with the sugars.
- ½ cup granulated sugar & ½ cup packed light brown sugar: The granulated sugar adds sweetness and helps the edges crisp up, while the brown sugar adds moisture and a hint of caramel flavor.
- 1 cup creamy peanut butter: Creamy peanut butter is the star here, lending a smooth, nutty richness that pairs beautifully with the candy pieces.
- 1 large egg: Acts as a binder and adds moisture for chewy cookies. Using a room temperature egg helps everything mix evenly.
- 1½ teaspoons pure vanilla extract: Vanilla enhances the flavors and adds warmth to the dough.
- 1½ cups all-purpose flour: The base of the cookie dough — spoon it into your measuring cup and level it off for accuracy.
- ½ teaspoon baking soda & ½ teaspoon baking powder: These leavening agents help the cookies rise just enough for a soft, tender bite without spreading too thin.
- ¼ teaspoon kosher salt or fine sea salt: Salt balances the sweetness and enhances the peanut butter flavor.
- 16 ounces Butterfinger, coarsely chopped: The secret weapon! These crunchy candy bar chunks add that addictive, crispy texture and a hit of chocolatey peanut butter crunch that’s pure magic.
How to Make Peanut Butter Butterfinger Cookies
Now, let’s get baking! I’ll guide you through each step so you feel confident and excited to make these cookies your own.
-
Start by beating the softened butter in a large bowl on medium speed until it’s smooth and creamy. This usually takes about a minute.
-
Add both the granulated sugar and brown sugar. Beat on medium-high speed for 2-3 minutes, scraping down the sides of the bowl as you go. You’re looking for the mixture to become light and fluffy — this is key to a tender cookie.
-
Next, beat in the creamy peanut butter until fully combined. It will look rich and velvety.
-
Crack in the room temperature egg and pour in the vanilla extract. Mix until everything is incorporated, making sure to scrape the bowl to get all the goodness mixed evenly.
-
Now here’s a little trick: add the flour to the bowl but don’t mix just yet. Sprinkle the baking soda, baking powder, and salt evenly over the flour. Use a fork to whisk those dry ingredients together gently right in the bowl. This ensures an even distribution without overworking the dough.
-
Mix on low speed just until you see a few streaks of flour left. Don’t overmix at this point — you want to keep the dough tender.
-
Gently fold in the chopped Butterfinger pieces. You can do this by hand or on low mixer speed for 5-10 seconds. The goal is to coat the candy bits evenly without breaking them down too much.
-
Using a large cookie scoop (about 3 tablespoons), scoop out dough balls. For the thickest, most luscious cookies, roll the dough tall rather than wide — think of shaping them into little towers instead of flat discs.
-
Place the dough balls on a parchment-lined baking sheet and chill them in the refrigerator for at least 30 minutes. This chilling step helps prevent the cookies from spreading too much in the oven.
-
Preheat your oven to 350°F (175°C). When ready, space the chilled dough balls at least 3 inches apart on parchment-lined baking sheets.
-
Bake for 10-13 minutes until the edges are set and lightly golden but the centers still look soft. This way, you’ll get that perfect chewy center with just the right crunch on the outside.
-
Right after you pull the cookies out of the oven, gently bang the baking sheet on the counter to deflate the cookies slightly. Then, use the edge of a large spoon or spatula to push the edges inward, which gives your cookies a thicker, more uniform round shape.
-
Let the cookies cool on the baking sheet for 10 minutes before transferring them to a wire rack to cool completely. This resting period allows the cookies to set beautifully without falling apart.
Substitutions & Additions
If you’re feeling creative or need to make some swaps, here are a few ideas to customize your Peanut Butter Butterfinger Cookies:
- Butterfinger Alternatives: If you can’t find Butterfinger bars, try chopped Heath bars or any crunchy peanut butter candy for a similar texture and flavor.
- Peanut Butter Swap: Creamy peanut butter works best for the smooth texture, but you can use natural peanut butter if you prefer a less sweet, more robust peanut flavor. Just note it might make the dough a bit softer.
- Nut-Free Version: Use sunflower seed butter instead of peanut butter and swap Butterfinger bars for a safe nut-free candy or chocolate chips.
- Add a Chocolate Drizzle: After cooling, drizzle melted chocolate over the cookies for an extra decadent touch.
- Mix in Nuts: For an extra crunch, toss in some chopped roasted peanuts or pecans along with the Butterfinger pieces.
- Try Brown Butter: For a nuttier depth of flavor, brown your butter before mixing it with the sugars. This adds a subtle toasted note that pairs wonderfully with peanut butter.
Tips for Success
Here are some of my tried-and-true tips to make sure your Peanut Butter Butterfinger Cookies turn out perfect every time:
- Soften Butter Properly: Softened butter should still be cool to the touch but easily indented with a finger. Avoid melting it, as that will make your cookies spread too thin.
- Chill the Dough: Don’t skip chilling the dough. It helps the cookies hold their shape and develop richer flavors.
- Measure Flour Correctly: Spoon and level your flour instead of scooping directly from the bag to avoid dense cookies.
- Don’t Overmix: When adding the dry ingredients and candy pieces, mix just until combined. Overmixing can lead to tough cookies.
- Use Parchment Paper or Silicone Mats: This prevents sticking and helps with even baking.
- Watch the Bake Time: Cookies continue to cook slightly after removing from the oven. Pull them out when edges are set but centers still look soft for that chewy texture.
- Shape Immediately After Baking: The technique of gently banging the baking sheet and pushing the edges inward right after baking is crucial for thick, bakery-style cookies.
- Prep Ahead: You can prepare the dough balls a day in advance and keep them covered in the fridge. Just bake when ready!
How to Store Peanut Butter Butterfinger Cookies
These cookies are just as wonderful the next day, making them ideal for baking ahead or gifting. Here’s how to store them so they stay fresh and delicious:
- Room Temperature: Store cooled cookies in an airtight container at room temperature for up to 4 days. Placing a slice of bread in the container helps keep them soft.
- Refrigerator: If your kitchen is warm, keeping them in the fridge can extend their freshness up to a week. Just bring them back to room temperature before serving to enjoy the best texture.
- Freezing: You can freeze baked cookies for up to 3 months. Freeze them in a single layer on a baking sheet, then transfer to a freezer-safe container or bag. Thaw at room temperature when ready to enjoy.
- Freeze Dough Balls: It’s also great to freeze the dough balls raw. When you want fresh cookies, bake straight from the freezer, adding a couple extra minutes to the bake time.
FAQs
Q: Can I use crunchy peanut butter instead of creamy?
A: You can, but creamy peanut butter is best for a smooth dough. Crunchy will add extra texture, which might be nice, but it can make mixing a little harder.
Q: What if I don’t have Butterfinger bars? Can I use candy pieces instead?
A: Absolutely! Chopped Heath bars, Snickers, or even peanut butter chips work well. Just choose something with a crunchy texture to mimic Butterfinger’s signature crisp.
Q: How do I make these cookies thicker?
A: The chilling step is key. Also, shaping the dough balls tall instead of flat before baking helps keep the cookies thick and chewy.
Q: Can I make these cookies vegan?
A: You’d need to substitute the butter with a vegan alternative, use a flax or chia egg instead of a chicken egg, and find a vegan candy bar with similar crunch. The texture might vary, but it’s definitely possible!
If you love this peanut butter treat, be sure to check out other delicious peanut butter desserts like these No Bake Peanut Butter Brownie Cookies for a quick and fudgy twist. And if you’re in the mood for more cookie inspiration, you might enjoy my take on Crumbl Peanut Butter Reese’s Copycat Cookies, which are another peanut butter dream come true.
When you want to switch gears to something savory after your sweet treat, I recommend trying the Creamy Lemon Chicken Recipe — it’s a bright, comforting dish that’s just as easy to make as these cookies!
So go ahead, gather your ingredients, and get ready to make some magic in the kitchen. These Peanut Butter Butterfinger Cookies are sure to become a beloved staple in your baking repertoire, perfect for whenever you need a little homemade happiness.
Don’t forget to follow us on Pinterest for more sweet inspiration and cozy recipes that make your kitchen the happiest place in your home!

Peanut Butter Butterfinger Cookies
Ingredients
Equipment
Method
- Step 1: Beat the softened butter in a large bowl on medium speed until smooth and creamy, about 1 minute.
- Step 2: Add granulated sugar and brown sugar. Beat on medium-high speed for 2-3 minutes until light and fluffy, scraping down the bowl as needed.
- Step 3: Beat in creamy peanut butter until fully combined and velvety.
- Step 4: Crack in the room temperature egg and pour in vanilla extract. Mix until incorporated, scraping the bowl to mix evenly.
- Step 5: Add flour to the bowl. Sprinkle baking soda, baking powder, and salt evenly over the flour. Whisk dry ingredients gently with a fork in the bowl for even distribution.
- Step 6: Mix on low speed just until a few streaks of flour remain. Do not overmix to keep dough tender.
- Step 7: Gently fold in the chopped Butterfinger pieces by hand or on low mixer speed for 5-10 seconds, coating candy evenly without breaking them down.
- Step 8: Using a large cookie scoop (~3 tablespoons), scoop dough balls. Roll dough tall rather than wide to create thick, luscious cookies.
- Step 9: Place dough balls on parchment-lined baking sheets and chill in the refrigerator for at least 30 minutes to prevent spreading.
- Step 10: Preheat oven to 350°F (175°C). Space chilled dough balls at least 3 inches apart on parchment-lined baking sheets.
- Step 11: Bake for 10-13 minutes until edges are set and lightly golden but centers remain soft for a chewy texture.
- Step 12: Immediately after removing from oven, gently bang baking sheet on counter to deflate cookies slightly. Use edge of large spoon or spatula to push edges inward, shaping cookies thick and round.
- Step 13: Let cookies cool on baking sheet for 10 minutes before transferring to a wire rack to cool completely, allowing them to set without falling apart.