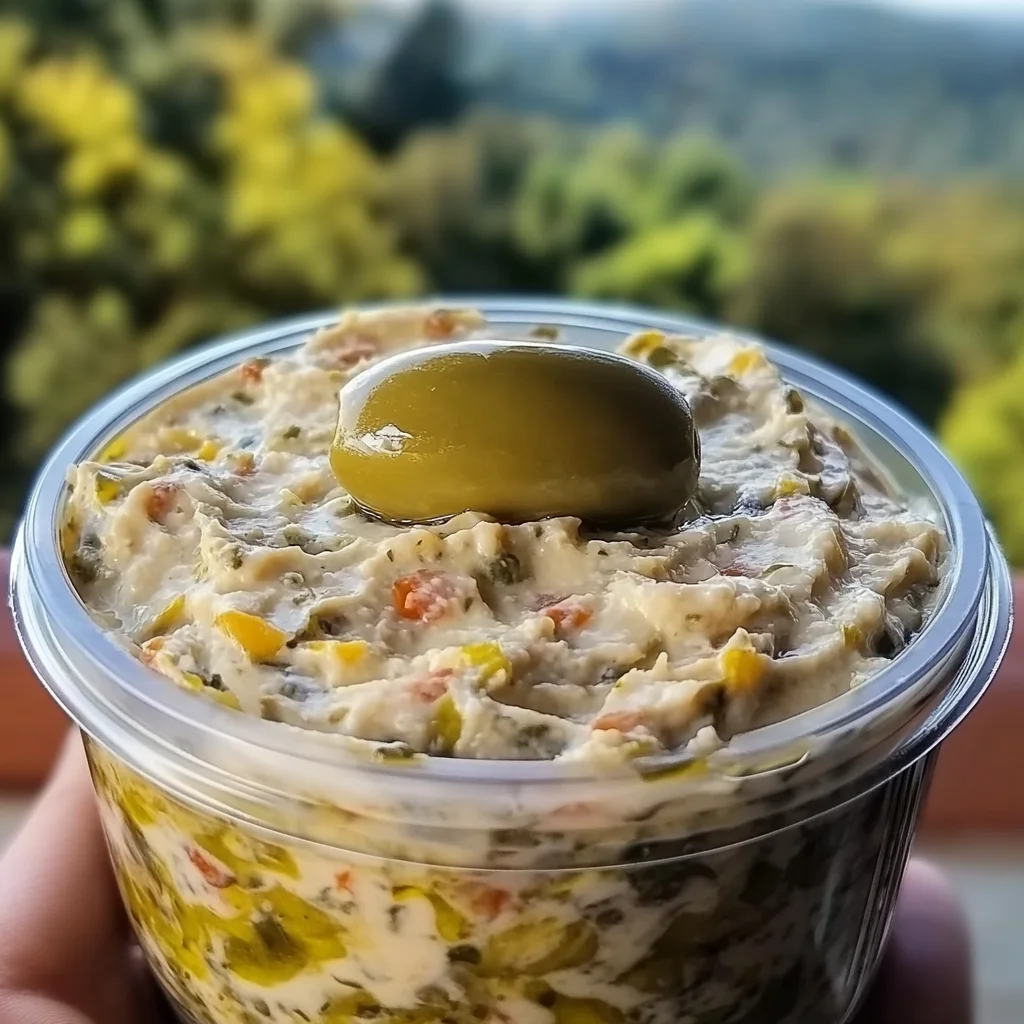
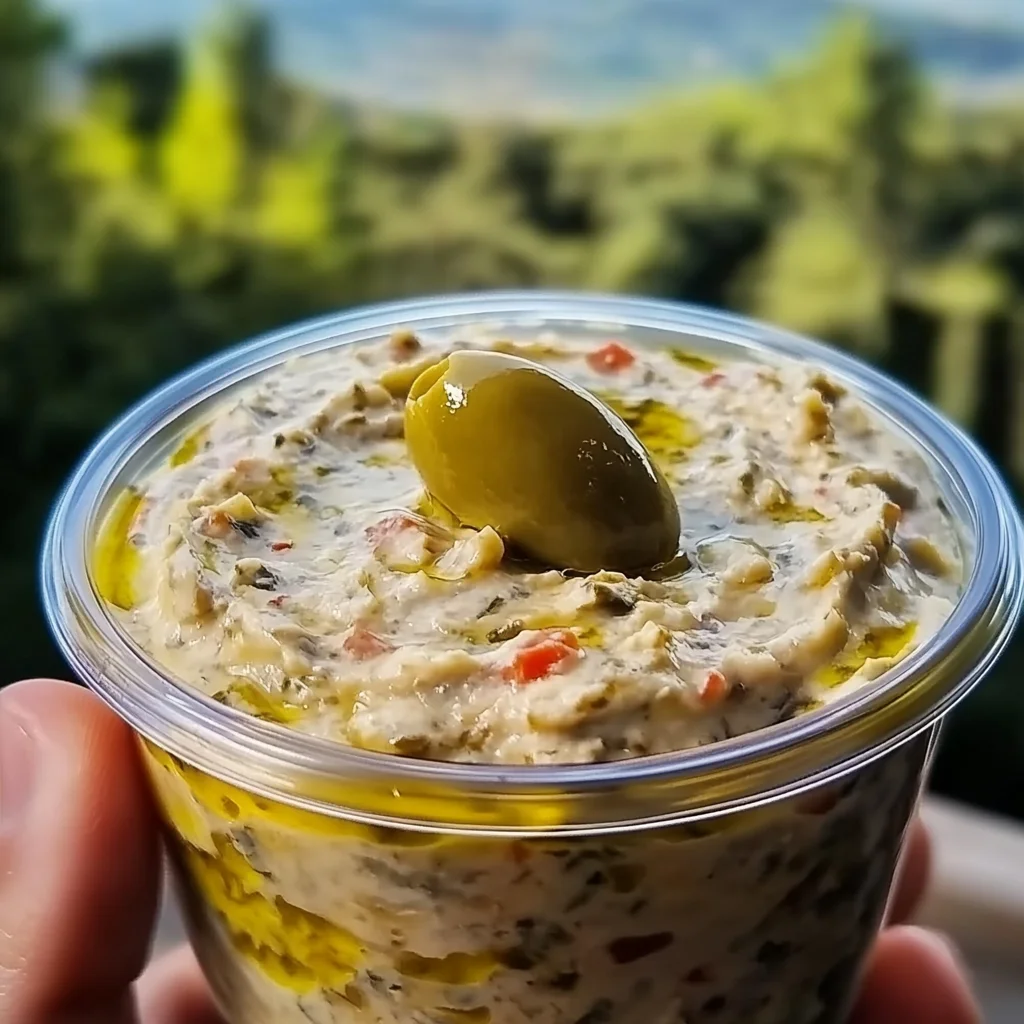
Remember those potlucks and holiday gatherings from when you were a kid? There was always that one dish that everyone gravitated towards, the one that disappeared first, leaving everyone wishing there was just a little bit more. For me, and for so many others, this creamy green olive dip is that dish. It’s got that nostalgic charm, that unmistakable savory kick, and it’s so unbelievably easy to whip up, you’ll wonder where it’s been all your life. Forget complicated recipes – this one is all about simple ingredients coming together to create something truly magical. It’s quick, it’s vibrant, and it’s about to become your secret weapon for every get-together!
Why You’ll Love Green Olive Dip
- Fast: Seriously, this dip comes together in minutes with the help of your food processor.
- Easy: No cooking required, just blend and chill!
- Giftable: Pack it in a pretty jar with some crackers, and you’ve got a delightful homemade gift.
- Crowd-pleasing: Olives are surprisingly popular, and combined with creamy goodness, it’s a guaranteed hit. If you’re looking for other crowd-pleasing snacks, you might also love our Easy Cheesy BBQ Bacon Bombs!
Ingredients

Gathering your ingredients for this green olive dip is a breeze. You probably have most of these staples in your pantry and fridge already!
- Two 8-ounce packages cream cheese, softened: This is the creamy heart of our dip! Make sure it’s good and soft so it blends smoothly without lumps.
- ½ cup mayonnaise: Adds that extra silky smooth texture and a touch of tangy richness.
- 1 teaspoon onion powder: A fantastic flavor booster that gives a subtle savory depth.
- ½ to 1 teaspoon garlic powder (to taste): Adjust this to your liking! I always lean towards the full teaspoon because, well, garlic!
- 6 ounces green olives with pimento, drained (reserve the brine): The star of the show! The pimentos add a lovely color and a little extra flavor. Don’t forget to save that brine – it’s our secret ingredient for perfect consistency.
- 3 tablespoons olive brine (optional, adjust for consistency): This is key to getting your dip to that perfect, dippable texture. We’ll start with a little and add more as needed.
How to Make Green Olive Dip
Get ready for the easiest dip recipe ever! Here’s how you’ll bring this deliciousness to life:
- First things first, grab your food processor. In its bowl, you’ll combine the softened cream cheese and the mayonnaise. Close it up and blend, blend, blend until everything is super smooth and there are no lumps in sight. This step is crucial for that luxurious, creamy texture we’re aiming for!
- Next, it’s time to add those savory seasonings. Sprinkle in the onion powder and your desired amount of garlic powder. Give it another quick blend to make sure those flavors are perfectly distributed throughout the creamy base.
- Now for the main event: toss in your drained green olives. Pulse the food processor until the olives are fully incorporated. Do you like a super smooth dip, or do you prefer a little chunkiness for texture? You’re in charge here! Just pulse until you reach your happy medium.
- Here’s where the reserved olive brine comes in handy. Start by adding just 1 tablespoon of that brine. Blend it again and check the consistency. If you’re looking for a thinner, more dippable texture, feel free to add more brine, up to a total of 3 tablespoons. Adjust it slowly until it’s just right for you.
- Once your dip is perfectly blended, transfer it to a serving bowl or an airtight container. Cover it up tightly and pop it in the fridge for at least 2 hours. This chilling time is super important because it allows all those amazing flavors to meld together and deepen, making your dip truly irresistible. I promise, the wait is worth it!
- Before you serve, give the dip a good stir. Then, gather your favorite crackers, slices of crusty bread, fresh veggie sticks, or even pretzel thins. Dive in and enjoy!
Substitutions & Additions
One of the best things about this green olive dip is how adaptable it is! Feel free to get creative and make it your own:
- Olives: While green pimento olives are classic here, you could try a mix of green and black olives, or even some Kalamata olives for a different kind of tang. Just make sure whatever olives you choose are pitted and drained well!
- Herbs: A sprinkle of fresh parsley, dill, or chives pulsed in with the olives would add a wonderful fresh note.
- Spice: For a little kick, a pinch of red pepper flakes or a dash of hot sauce could be fun.
- Cheese: Want extra cheesiness? A tablespoon or two of grated Parmesan cheese could be blended in for a salty, umami boost.
- Citrus: A tiny squeeze of fresh lemon juice or a hint of lemon zest would brighten up the flavors beautifully.
- Capers: For an extra briny punch, add a tablespoon of drained capers along with your olives.
Tips for Success
Making this dip is pretty foolproof, but here are a few pointers to ensure yours is absolutely perfect every time:
- Soften that Cream Cheese: This is probably the most important tip! Cold cream cheese will result in a lumpy dip. Plan ahead and let your cream cheese sit out on the counter for at least an hour before you start, or gently soften it in the microwave in short bursts (10-15 seconds) until it’s pliable.
- Taste and Adjust: Always taste your dip before chilling! You might want more garlic, a touch more onion powder, or a little extra brine for the perfect tang and consistency.
- Don’t Skip the Chill: I know it’s hard to wait, but the 2-hour chilling time is essential. It lets the flavors marry and the dip firm up to the ideal consistency.
- Prep Ahead: This dip is a superstar for making ahead! It tastes even better the next day, making it ideal for party planning. You can make it up to 2-3 days in advance.
How to Store Green Olive Dip
Once you’ve made your delicious dip, storing it properly will keep it fresh and tasty for days. Simply transfer any leftover dip into an airtight container and keep it in the refrigerator. It will stay fresh and flavorful for about 3-5 days. Just give it a good stir before serving any leftovers, as some separation can occur – that’s totally normal!
FAQs
Q: Can I make this dip without a food processor?
A: Yes, you can! You’ll just need a good old-fashioned bowl and a sturdy spoon or hand mixer. Make sure your cream cheese is extra soft, and you’ll need to finely chop the green olives by hand before adding them to the cream cheese and mayo mixture. It will take a little more elbow grease, but the results will still be delicious!
Q: What are the best dippers for Green Olive Dip?
A: The possibilities are endless! Crackers of all kinds (butter crackers, pita crackers, water crackers), toasted baguette slices, pretzel thins, and fresh vegetables like carrots, celery, bell peppers, and cucumber slices are all fantastic. It’s also great spread on sandwiches or wraps!
Q: Can I use different types of olives?
A: Absolutely! While green pimento olives give it that classic flavor, you could experiment with Kalamata, Castelvetrano, or even a mixed olive tapenade for a different twist. Just remember to drain them well!
Q: Is this dip freezer-friendly?
A: I don’t recommend freezing this dip. The dairy components, especially cream cheese and mayonnaise, can separate and become grainy once thawed, ruining that beautiful creamy texture we love so much.
For more delicious recipes and kitchen inspiration, be sure to follow us on Pinterest!
The Best Creamy Green Olive Dip
Ingredients
Equipment
Method
- Step 1: In the bowl of your food processor, combine the softened cream cheese and mayonnaise. Blend until super smooth and no lumps remain.
- Step 2: Add the onion powder and your desired amount of garlic powder. Blend again to ensure the flavors are perfectly distributed.
- Step 3: Toss in the drained green olives. Pulse the food processor until the olives are fully incorporated and you reach your desired level of chunkiness (from super smooth to a little chunky).
- Step 4: Start by adding 1 tablespoon of the reserved olive brine. Blend and check the consistency. If you desire a thinner, more dippable texture, add more brine, up to a total of 3 tablespoons, blending after each addition until it's just right.
- Step 5: Transfer the dip to a serving bowl or an airtight container. Cover tightly and refrigerate for at least 2 hours to allow the flavors to meld and deepen, and the dip to firm up.
- Step 6: Before serving, give the dip a good stir. Serve with your favorite crackers, slices of crusty bread, fresh veggie sticks, or pretzel thins.