Oh, friend, there’s just something magical about a welcoming scent, isn’t there? The way a familiar aroma can instantly transport you back to a cherished memory, or simply make a space feel utterly cozy and inviting. For me, it’s often the smell of fresh baking, but sometimes, I just want a gentle, lingering fragrance without firing up the oven. That’s where these incredible DIY Aroma Stones come in! Imagine filling your home with the calming scent of lavender, the uplifting zing of citrus, or the comforting notes of vanilla, all from a cute little stone you made yourself. And guess what? They’re so unbelievably easy to whip up, you’ll wonder why you haven’t been making them forever. Seriously, grab a cup of coffee, let’s chat, and then let’s get crafting! This is one of those projects that feels like a warm hug for your home, and it’s quick enough to do on a lazy afternoon.
Why You’ll Love Aroma Stones
- Fast
- Easy
- Giftable
- Crowd-pleasing
Ingredients
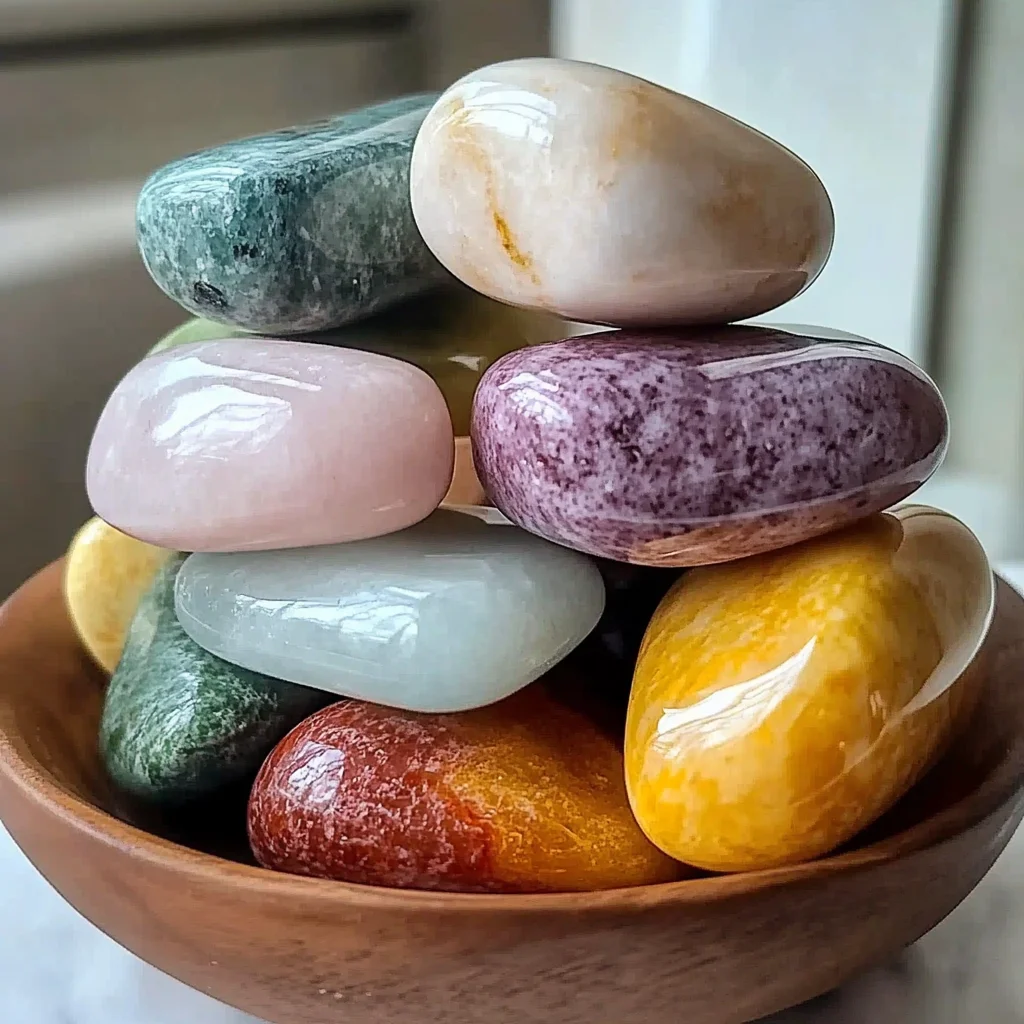
You’ll be surprised at how few humble ingredients it takes to create these little wonders. Most of these you probably already have in your pantry!
- 1 cup baking soda: This common kitchen staple is the foundation of our stones, giving them their solid structure.
- 1/2 cup cornstarch: Our secret ingredient for that silky-smooth texture and a helping hand in solidifying the stones.
- 1/2 cup water: Just plain old tap water does the trick! It brings everything together.
- 20-30 drops essential oils (of your choice): This is where the magic happens! Pick your favorite scents – lavender for relaxation, lemon for a clean boost, peppermint for an invigorating touch, or a blend for something truly unique.
- Food coloring (optional): Want to add a pop of color to match your decor or essential oil? Go for it! A few drops are all you need.
- Silicone molds (various shapes): The cuter the mold, the cuter your aroma stones! Think hearts, stars, flowers, or even mini muffin tins.
- Wax paper or parchment paper: Essential for protecting your surfaces and making cleanup a breeze.
How to Make Aroma Stones
Alright, let’s get our hands a little dirty (but in the best possible way!). Follow these simple steps and you’ll have beautiful, fragrant aroma stones in no time.
- First things first, grab a good-sized mixing bowl. You’ll want enough room to stir without making a mess. Now, measure out your baking soda and cornstarch and combine them thoroughly. You want them completely mixed before adding any liquid, so give it a good whisk!
- Next, slowly, and I mean slowly, pour in the water. Stir continuously as you add it. You’re aiming for a smooth, thick paste – almost like pancake batter, but a bit thicker. If it seems too dry, add a tiny bit more water, a teaspoon at a time. If it’s too wet, a sprinkle of more cornstarch will fix it right up.
- Now for the best part – adding your essential oils! Drip in 20-30 drops of your chosen scent. I love using lavender in the bedroom for a calming vibe, and a citrus blend in the kitchen to keep things fresh. Stir it really well to make sure that beautiful fragrance is evenly distributed throughout your mixture. Speaking of creating a cozy atmosphere, if you’re looking for another way to bring warmth into your home, you might love our easy pumpkin spice waffles! They fill the house with an unbeatable aroma.
- If you’re feeling colorful, now’s the time to add a few drops of food coloring. Start with just one or two and mix until you get the shade you desire. Remember, a little goes a long way!
- Lay out your silicone molds on a flat surface, perhaps on a piece of wax paper or parchment paper to protect your countertop.
- Carefully spoon or pour the mixture into your molds. Don’t overfill them! You can smooth the top with a small spatula or the back of a spoon to make them look neat and tidy.
- Once filled, gently tap the molds on the counter a few times. This helps release any pesky air bubbles hiding in the mixture, ensuring your stones come out smooth.
- Now, find a warm, dry spot in your home to let them do their thing. Covering them with a thin, breathable towel can help keep dust off while they dry.
- Patience is a virtue here! Allow them to dry for at least 24 hours. You want them completely hardened and dry to the touch before moving them. If they still feel a little soft or damp, give them more time.
- Finally, once they’re fully dry, carefully pop them out of the silicone molds. They should release easily!
And just like that, you have your very own custom aroma stones! If you’re loving this simple craft, you’ll find tons more inspiration and delicious ideas over on our main recipes page, perfect for cozy nights in.
Substitutions & Additions
One of the best things about DIY projects is making them truly your own! Here are a few ways to customize your aroma stones:
- Essential Oil Blends: Don’t be shy about mixing essential oils! Try lavender and chamomile for ultimate relaxation, orange and peppermint for an energizing boost, or cinnamon and clove for a festive feel.
- Dried Herbs & Flowers: For a beautiful visual touch, sprinkle a few dried lavender buds, rose petals, or tiny sprigs of rosemary into the molds before pouring in the mixture. They’ll look gorgeous and add a subtle natural fragrance.
- Mica Powder: Instead of food coloring, try a touch of cosmetic-grade mica powder for a lovely shimmer!
- Different Scent Carriers: While essential oils are fantastic, you could also experiment with fragrance oils (ensure they are skin-safe if you plan to touch the stones frequently) for different scent profiles.
Tips for Success
Even the easiest recipes have a few tricks to make them absolutely perfect every time!
- Mixing is Key: Ensure your dry ingredients are perfectly combined before adding water. This prevents lumps and helps create a uniform paste.
- Consistency Check: The mixture should be thick enough to hold its shape but smooth enough to pour. If it’s too crumbly, add water in tiny increments. If it’s too runny, add a bit more cornstarch.
- Patience with Drying: Don’t rush the drying process! If you unmold them too soon, they might crumble or break. A warm, well-ventilated area is ideal.
- Even Scent Distribution: Stir your essential oils thoroughly. This ensures that every part of your stone has that lovely scent.
- Make a Batch Ahead: You can mix the dry ingredients (baking soda and cornstarch) ahead of time and store them in an airtight container. When you’re ready to make stones, just add water and oils!
How to Store Aroma Stones
Once your aroma stones are perfectly dry, you’ll want to keep them fresh and fragrant!
- Airtight Container: If you’re making a batch to give as gifts or to use later, store them in an airtight container or a sealed jar. This helps preserve their scent and keeps them free from dust and humidity.
- Away from Humidity: Just like baked goods, these stones don’t love humidity. Keep them in a dry environment to prevent them from softening or attracting moisture.
- Shelf Life: The scent will naturally fade over time (usually a few weeks to a couple of months, depending on the oil). When it does, simply add a few more drops of your favorite essential oil directly onto the stone to refresh it!
FAQs
How long will the scent last on my aroma stones?
The lifespan of the scent depends on the quality of your essential oils and the environment they’re in, but typically they’ll retain a noticeable fragrance for a few weeks to a couple of months. You can easily refresh them by adding a few more drops of essential oil directly onto the stone.
Can I use these in my car?
Absolutely! Aroma stones make fantastic car air fresheners. Just place one in a small mesh bag or directly on your dashboard (ensure it won’t roll around) for a pleasant scent on the go.
Are these safe for homes with pets or small children?
While the ingredients themselves are generally safe, always exercise caution with essential oils around pets and small children. Some essential oils can be toxic to animals, and children might try to put the stones in their mouths. It’s best to place the aroma stones in areas out of reach.
My aroma stones are crumbling. What went wrong?
This usually happens if the mixture was too dry or if they were unmolded before being completely dry. Make sure your paste is smooth and pliable, and always give them ample drying time – sometimes even longer than 24 hours, especially in humid climates.
Don’t forget to follow us on Pinterest for more delightful recipes and DIY ideas!
DIY Essential Oil Aroma Stones: Create a Scent-sational & Cozy Home with Ease!
Oh, friend, there’s just something magical about a welcoming scent, isn’t there? The way a familiar aroma can instantly transport you back to a cherished memory, or simply make a space feel utterly cozy and inviting. For me, it’s often the smell of fresh baking, but sometimes, I just want a gentle, lingering fragrance without firing up the oven. That’s where these incredible DIY Aroma Stones come in! Imagine filling your home with the calming scent of lavender, the uplifting zing of citrus, or the comforting notes of vanilla, all from a cute little stone you made yourself. And guess what? They’re so unbelievably easy to whip up, you’ll wonder why you haven’t been making them forever. Seriously, grab a cup of coffee, let’s chat, and then let’s get crafting! This is one of those projects that feels like a warm hug for your home, and it’s quick enough to do on a lazy afternoon.
Why You’ll Love Aroma Stones
- Fast
- Easy
- Giftable
- Crowd-pleasing
Ingredients
You’ll be surprised at how few humble ingredients it takes to create these little wonders. Most of these you probably already have in your pantry!
- 1 cup baking soda: This common kitchen staple is the foundation of our stones, giving them their solid structure.
- 1/2 cup cornstarch: Our secret ingredient for that silky-smooth texture and a helping hand in solidifying the stones.
- 1/2 cup water: Just plain old tap water does the trick! It brings everything together.
- 20-30 drops essential oils (of your choice): This is where the magic happens! Pick your favorite scents – lavender for relaxation, lemon for a clean boost, peppermint for an invigorating touch, or a blend for something truly unique.
- Food coloring (optional): Want to add a pop of color to match your decor or essential oil? Go for it! A few drops are all you need.
- Silicone molds (various shapes): The cuter the mold, the cuter your aroma stones! Think hearts, stars, flowers, or even mini muffin tins.
- Wax paper or parchment paper: Essential for protecting your surfaces and making cleanup a breeze.
How to Make Aroma Stones
Alright, let’s get our hands a little dirty (but in the best possible way!). Follow these simple steps and you’ll have beautiful, fragrant aroma stones in no time.
- First things first, grab a good-sized mixing bowl. You’ll want enough room to stir without making a mess. Now, measure out your baking soda and cornstarch and combine them thoroughly. You want them completely mixed before adding any liquid, so give it a good whisk!
- Next, slowly, and I mean slowly, pour in the water. Stir continuously as you add it. You’re aiming for a smooth, thick paste – almost like pancake batter, but a bit thicker. If it seems too dry, add a tiny bit more water, a teaspoon at a time. If it’s too wet, a sprinkle of more cornstarch will fix it right up.
- Now for the best part – adding your essential oils! Drip in 20-30 drops of your chosen scent. I love using lavender in the bedroom for a calming vibe, and a citrus blend in the kitchen to keep things fresh. Stir it really well to make sure that beautiful fragrance is evenly distributed throughout your mixture. Speaking of creating a cozy atmosphere, if you’re looking for another way to bring warmth into your home, you might love our easy pumpkin spice waffles! They fill the house with an unbeatable aroma.
- If you’re feeling colorful, now’s the time to add a few drops of food coloring. Start with just one or two and mix until you get the shade you desire. Remember, a little goes a long way!
- Lay out your silicone molds on a flat surface, perhaps on a piece of wax paper or parchment paper to protect your countertop.
- Carefully spoon or pour the mixture into your molds. Don’t overfill them! You can smooth the top with a small spatula or the back of a spoon to make them look neat and tidy. These make incredible gifts, almost as delightful as whipping up a batch of easy mini raspberry cheesecake bites for friends!
- Once filled, gently tap the molds on the counter a few times. This helps release any pesky air bubbles hiding in the mixture, ensuring your stones come out smooth.
- Now, find a warm, dry spot in your home to let them do their thing. Covering them with a thin, breathable towel can help keep dust off while they dry.
- Patience is a virtue here! Allow them to dry for at least 24 hours. You want them completely hardened and dry to the touch before moving them. If they still feel a little soft or damp, give them more time.
- Finally, once they’re fully dry, carefully pop them out of the silicone molds. They should release easily!
And just like that, you have your very own custom aroma stones! If you’re loving this simple craft, you’ll find tons more inspiration and delicious ideas over on our main recipes page, perfect for cozy nights in.
Substitutions & Additions
One of the best things about DIY projects is making them truly your own! Here are a few ways to customize your aroma stones:
- Essential Oil Blends: Don’t be shy about mixing essential oils! Try lavender and chamomile for ultimate relaxation, orange and peppermint for an energizing boost, or cinnamon and clove for a festive feel.
- Dried Herbs & Flowers: For a beautiful visual touch, sprinkle a few dried lavender buds, rose petals, or tiny sprigs of rosemary into the molds before pouring in the mixture. They’ll look gorgeous and add a subtle natural fragrance.
- Mica Powder: Instead of food coloring, try a touch of cosmetic-grade mica powder for a lovely shimmer!
- Different Scent Carriers: While essential oils are fantastic, you could also experiment with fragrance oils (ensure they are skin-safe if you plan to touch the stones frequently) for different scent profiles.
Tips for Success
Even the easiest recipes have a few tricks to make them absolutely perfect every time!
- Mixing is Key: Ensure your dry ingredients are perfectly combined before adding water. This prevents lumps and helps create a uniform paste.
- Consistency Check: The mixture should be thick enough to hold its shape but smooth enough to pour. If it’s too crumbly, add water in tiny increments. If it’s too runny, add a bit more cornstarch.
- Patience with Drying: Don’t rush the drying process! If you unmold them too soon, they might crumble or break. A warm, well-ventilated area is ideal.
- Even Scent Distribution: Stir your essential oils thoroughly. This ensures that every part of your stone has that lovely scent.
- Make a Batch Ahead: You can mix the dry ingredients (baking soda and cornstarch) ahead of time and store them in an airtight container. When you’re ready to make stones, just add water and oils!
How to Store Aroma Stones
Once your aroma stones are perfectly dry, you’ll want to keep them fresh and fragrant!
- Airtight Container: If you’re making a batch to give as gifts or to use later, store them in an airtight container or a sealed jar. This helps preserve their scent and keeps them free from dust and humidity.
- Away from Humidity: Just like baked goods, these stones don’t love humidity. Keep them in a dry environment to prevent them from softening or attracting moisture.
- Shelf Life: The scent will naturally fade over time (usually a few weeks to a couple of months, depending on the oil). When it does, simply add a few more drops of your favorite essential oil directly onto the stone to refresh it!
FAQs
How long will the scent last on my aroma stones?
The lifespan of the scent depends on the quality of your essential oils and the environment they’re in, but typically they’ll retain a noticeable fragrance for a few weeks to a couple of months. You can easily refresh them by adding a few more drops of essential oil directly onto the stone.
Can I use these in my car?
Absolutely! Aroma stones make fantastic car air fresheners. Just place one in a small mesh bag or directly on your dashboard (ensure it won’t roll around) for a pleasant scent on the go.
Are these safe for homes with pets or small children?
While the ingredients themselves are generally safe, always exercise caution with essential oils around pets and small children. Some essential oils can be toxic to animals, and children might try to put the stones in their mouths. It’s best to place the aroma stones in areas out of reach.
My aroma stones are crumbling. What went wrong?
This usually happens if the mixture was too dry or if they were unmolded before being completely dry. Make sure your paste is smooth and pliable, and always give them ample drying time – sometimes even longer than 24 hours, especially in humid climates.
Don’t forget to follow us on Pinterest for more delightful recipes and DIY ideas!
DIY Essential Oil Aroma Stones
Ingredients
Equipment
Method
- Step 1: Grab a good-sized mixing bowl. Measure out your baking soda and cornstarch and combine them thoroughly. You want them completely mixed before adding any liquid, so give it a good whisk!
- Step 2: Slowly pour in the water, stirring continuously as you add it. You're aiming for a smooth, thick paste – almost like pancake batter, but a bit thicker. If it seems too dry, add a tiny bit more water, a teaspoon at a time. If it’s too wet, a sprinkle of more cornstarch will fix it right up.
- Step 3: Add 20-30 drops of your chosen essential oils. Stir it really well to make sure that beautiful fragrance is evenly distributed throughout your mixture.
- Step 4: If you’re feeling colorful, now’s the time to add a few drops of food coloring. Start with just one or two and mix until you get the shade you desire. Remember, a little goes a long way!
- Step 5: Lay out your silicone molds on a flat surface, perhaps on a piece of wax paper or parchment paper to protect your countertop.
- Step 6: Carefully spoon or pour the mixture into your molds. Don't overfill them! You can smooth the top with a small spatula or the back of a spoon to make them look neat and tidy.
- Step 7: Once filled, gently tap the molds on the counter a few times. This helps release any pesky air bubbles hiding in the mixture, ensuring your stones come out smooth.
- Step 8: Now, find a warm, dry spot in your home to let them do their thing. Covering them with a thin, breathable towel can help keep dust off while they dry.
- Step 9: Allow them to dry for at least 24 hours. You want them completely hardened and dry to the touch before moving them. If they still feel a little soft or damp, give them more time.
- Step 10: Finally, once they’re fully dry, carefully pop them out of the silicone molds. They should release easily!