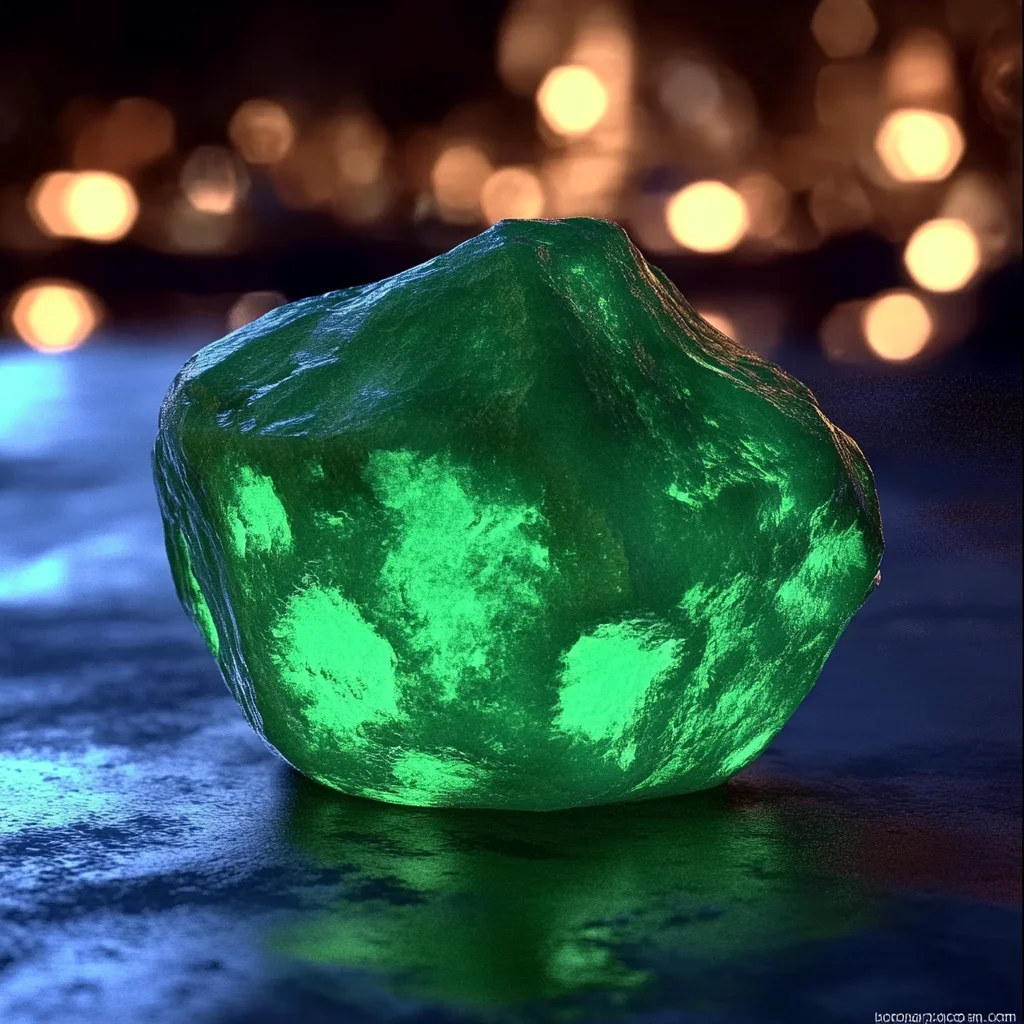
Do you remember those childhood nights when your imagination ran wild, and the dark was an invitation for adventure rather than something to fear? I still do. There’s something truly enchanting about glowing objects in the dark—like tiny stars you can hold in your hand. That’s exactly what inspired me to create these Glow in the Dark Moon Rocks, a simple, mesmerizing craft that feels like a little piece of magic you can make yourself. Whether you’re crafting with kids, looking for a unique party favor, or just want to add some glowing fun to your evening, these moon rocks are quick, easy, and unforgettable.
What I love most is how accessible this project is. No fancy tools, no complicated steps—just a handful of ingredients and a little patience while they dry. If you’re a fan of fun and easy DIY projects, this one will quickly become a favorite. Plus, they’re a perfect blend of creativity and science, sparking curiosity about light and glow while keeping things playful. So, let’s dive right in and get glowing!
Why You’ll Love Glow in the Dark Moon Rocks
- Fast: You can mix and mold these in under 10 minutes.
- Easy: Simple ingredients and no baking required.
- Giftable: Make them for birthdays, party favors, or just a sweet surprise.
- Crowd-pleasing: Kids and adults alike will be amazed by the glow!
Ingredients
Let’s break down what you’ll need for this glowing adventure. Each ingredient is easy to find and brings something special to your moon rocks:
- 1 cup baking soda: The base for your moon rocks, baking soda gives the right texture and hardness when it dries.
- ¼ cup water (more if needed): This helps bind everything together and creates that perfect damp sand consistency.
- Glow-in-the-dark non-toxic paint or glow pigment powder: The star of the show! Make sure you pick something kid-safe if you’re crafting with little ones. These paints or powders absorb light and emit a gentle glow in the dark.
- Optional: Glitter or food-safe coloring: For some extra sparkle or color, add a pinch of glitter or a drop of food coloring to customize your moon rocks.
- Optional: Small rocks or crumbled chalk: These can add texture and make your moon rocks feel even more authentic and tactile.
If you’re wondering where to get glow-in-the-dark paint or pigment, craft stores and online shops usually carry a variety of safe options. The pigment powder tends to give a more intense glow, but the paint is easier to mix and handle, especially with kids.
How to Make Glow in the Dark Moon Rocks
Ready to make some magic? Follow these simple steps, and you’ll have a tray full of glowing moon rocks in no time:
- Combine baking soda and glow pigment: In a mixing bowl, add your 1 cup of baking soda. Then, stir in a few teaspoons of your glow-in-the-dark paint or pigment powder. I usually start with about 2 teaspoons and adjust depending on how vibrant I want the glow. Mix thoroughly until the color or pigment is evenly distributed throughout the baking soda.
- Add water gradually: Slowly pour in about ¼ cup of water while stirring. You’re aiming for a damp sand-like texture—not too wet, not too dry. If it feels crumbly, add a tiny splash more water. If it’s too sticky, sprinkle in a bit more baking soda. This step is a little like making play dough, so don’t be afraid to get your hands in there and feel the texture.
- Optional additions: Now’s the time to mix in any extras! Sprinkle in some glitter for sparkle or a few drops of food-safe coloring if you want colored moon rocks. If you like, add small rocks or crumbled chalk pieces to give your moon rocks some interesting texture and weight.
- Shape your moon rocks: Take handfuls of the mixture and form them into small, uneven rocky shapes. The more irregular, the better—they’ll look more natural and moon-like. Don’t worry if they’re not perfect; that’s part of the charm.
- Dry overnight: Place your shaped moon rocks on a tray lined with parchment paper or a clean cloth. Let them air dry completely for at least 12 hours or overnight. They’ll harden nicely and be ready to glow.
- Charge and glow: To see your moon rocks shine, place them under a bright light source for a few minutes—sunlight or a strong lamp works wonders. Then turn off the lights and watch them glow softly, like little pieces of the night sky you can hold in your hands!
I love doing this step with kids—it’s like a little science experiment right in the kitchen. You can even make a game out of charging the rocks and turning off the lights to see whose glows the longest or brightest.
Substitutions & Additions
One of the best things about this recipe is how flexible it is. You can easily swap or add ingredients depending on what you have on hand or what look you’re going for.
- Substitute baking soda: If you don’t have baking soda, cornstarch can sometimes work, but I find baking soda gives the best hard and sandy texture. Avoid flour or other baking ingredients, as they won’t dry as well.
- Glow alternatives: If you can’t find glow-in-the-dark paint or pigment, you might try highlighters (the ink glows under black light) or phosphorescent powders from craft stores. Just be sure they’re non-toxic and safe for kids.
- Add scent: For a fun twist, add a few drops of essential oils like lavender or peppermint to make your moon rocks smell heavenly.
- Color variations: Mix in food coloring to give your moon rocks a celestial palette—think blues, purples, or even a galaxy-inspired swirl.
- Texture boost: Add small beads, sand, or tiny shells to create a more tactile and interesting feel.
If you enjoy this kind of creative kitchen fun, you might also love trying your hand at some no-bake treats like these No Bake Peanut Butter Brownie Cookies—they’re just as easy and a total crowd-pleaser!
Tips for Success
To make sure your Glow in the Dark Moon Rocks turn out perfectly every time, here are a few of my favorite tips and tricks from experience:
- Mix well: Ensure the glow pigment or paint is evenly mixed to avoid patches that don’t glow.
- Perfect texture: Aim for a damp sand consistency. Too wet, and they won’t dry properly; too dry, and they’ll crumble when shaping.
- Shape thoughtfully: Don’t overwork the dough—rough, uneven shapes look the most natural and fun.
- Dry thoroughly: Patience is key. If you try to handle them too soon, they’ll break. Overnight drying usually works well, but in humid climates, you might need a bit longer.
- Charge often: The glow effect fades after a while, so keep your moon rocks under a light source before showing them off.
- Prep ahead: You can mix the base (baking soda and pigment) a day ahead and add water before shaping. This saves time on craft day and keeps things less messy.
For an extra cozy treat while you’re crafting, try pairing this fun project with a batch of warm, comforting baked goods like these Grandma’s Secret Easy Blueberry Biscuits. They’re the perfect kitchen companion for a creative afternoon!
How to Store Glow in the Dark Moon Rocks
Once your moon rocks are fully dry and hardened, you’ll want to store them properly to keep their glow intact and prevent breakage. Here’s what I recommend:
- Keep dry: Store in an airtight container or resealable bag to protect from moisture, which can soften or ruin the texture.
- Handle gently: These rocks are sturdy but can chip or break if dropped.
- Shelf life: Stored well, they can last for several months. Just remember to “charge” them under light before each glow session.
- Avoid direct sunlight: While charging them is great, long-term exposure to sunlight can fade the glow effect over time.
These storage tips will help your moon rocks stay magical and ready for glowing fun whenever you want.
FAQs
Can I use regular paint instead of glow-in-the-dark paint?
Regular paint won’t glow in the dark, so for the glowing effect, you’ll want to use specifically glow-in-the-dark paint or pigment powder. These are designed to absorb and emit light safely.
Is this project safe for kids?
Absolutely! Just be sure to use non-toxic, kid-safe glow paints or pigments. Also, supervise younger children during mixing and shaping to avoid ingestion of any materials.
How long do the moon rocks glow for?
The glow typically lasts for about 10 to 30 minutes after charging under a strong light source, depending on the pigment quality. Charging them repeatedly can keep the fun going!
Can I paint over the moon rocks after they dry?
You can add extra layers of glow paint or even clear sealant to enhance durability, but be mindful not to cover the glow pigment too thickly as it might reduce the glowing effect.
If you’re curious about other creative, easy projects and recipes to try, be sure to explore the wide variety of delightful ideas on Crispy Kitchens’ recipes page. There’s something for every mood and moment!
Glow in the Dark Moon Rocks are such a fun way to bring a little wonder into your home. Whether you’re crafting with family, making party favors, or just indulging your inner child, these glowing gems are sure to brighten your night. So grab your supplies, get mixing, and let the magic begin!
For more inspiring ideas and beautiful photos, don’t forget to follow me on Pinterest where I share all kinds of creative recipes and DIY projects.

Glow in the Dark Moon Rocks
Ingredients
Method
- Step 1: In a mixing bowl, add 1 cup baking soda. Stir in about 2 teaspoons glow-in-the-dark paint or pigment powder until evenly distributed.
- Step 2: Slowly pour in 1/4 cup water while stirring to achieve a damp sand-like texture. Add more water or baking soda as needed.
- Step 3: Mix in optional glitter, food-safe coloring, small rocks, or crumbled chalk for sparkle and texture if desired.
- Step 4: Shape handfuls of the mixture into small, uneven rocky shapes for a natural look.
- Step 5: Place shaped moon rocks on parchment paper or a clean cloth and let dry completely for at least 12 hours or overnight.
- Step 6: Charge moon rocks under a bright light source for a few minutes, then turn off the lights to enjoy their soft glow.