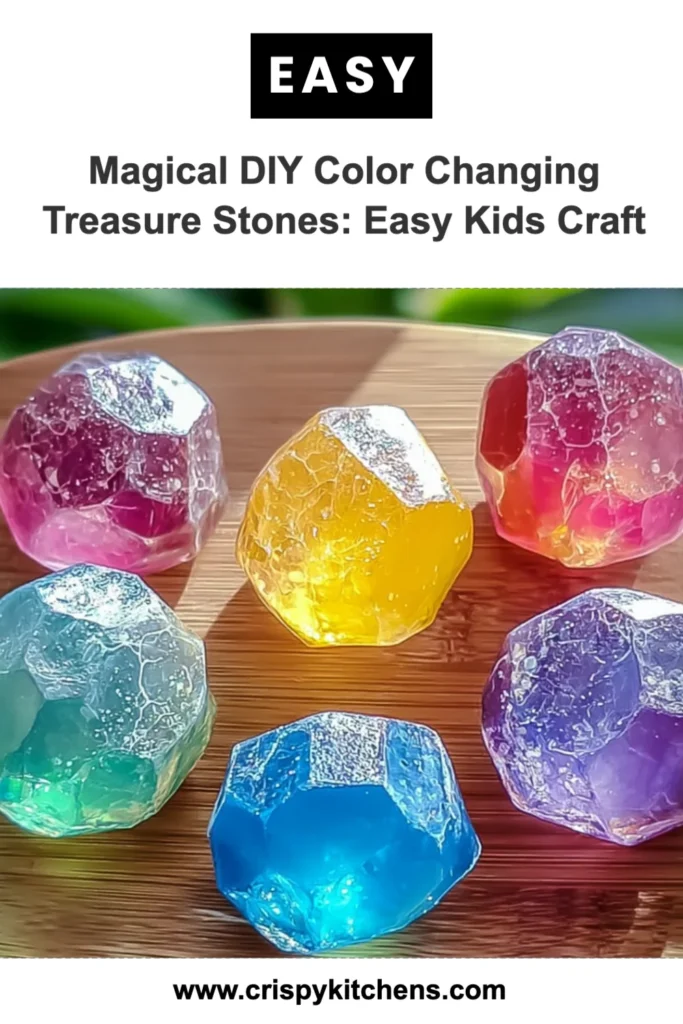
Do you remember the joy of discovering little treasures as a kid? Whether it was shiny rocks or colorful marbles, those small finds could spark endless imagination. Today, I want to rekindle that magic with a delightful craft project: Magical DIY Color Changing Treasure Stones! This easy and quick recipe will not only keep your little ones engaged but also let their creativity shine. Plus, these stones make wonderful gifts for friends or family!
Why You’ll Love Magical DIY Color Changing Treasure Stones: Easy Kids Craft
- Fast
- Easy
- Giftable
- Crowd-pleasing
Ingredients
- 1 cup baking soda: This is the base that will give your stones their fun texture.
- 1/2 cup white vinegar: This will create a fizzy reaction that helps bind everything together.
- 1 tablespoon corn syrup: This adds a touch of sweetness and helps keep the stones moist.
- Food coloring (various colors): The star of the show! Choose your favorite colors to make your stones pop.
- 1 teaspoon cornstarch: This helps stabilize the mixture.
- Silicone molds or baking tray: Use these to shape your stones into any fun form you like.
- Baking sheet: For drying the stones after they are formed.
- Paper towels: Useful for cleaning up any mess and wiping down your stones.
How to Make Magical DIY Color Changing Treasure Stones: Easy Kids Craft
- In a mixing bowl, combine the baking soda and cornstarch. This will be the foundation of your treasure stones.
- Slowly add the white vinegar to the dry ingredients, stirring continuously to prevent fizzing. Trust me, this part is super fun!
- Once the mixture is combined, add the corn syrup and stir until smooth. You’ll see it start to come together nicely.
- Divide the mixture into separate bowls based on the number of colors you want to use. This is where the magic begins!
- Add a few drops of food coloring to each bowl and mix well until the desired color is achieved. Feel free to experiment with mixing colors!
- Spoon the colored mixtures into silicone molds or a baking tray, filling each cavity evenly. Get creative with your shapes!
- Allow the molds to sit at room temperature for about 24 hours or until fully hardened. Patience pays off, my friend.
- Once dry, carefully remove the stones from the molds and place them on a baking sheet.
- Let the stones dry for an additional 2-3 hours, then wipe with paper towels to remove any excess powder.
- Your magical color changing treasure stones are ready to use! Enjoy the vibrant colors and the joy they bring.
Substitutions & Additions
If you want to switch things up, consider using glitter or metallic food coloring for a sparkling effect. You can also try different shapes by using cookie cutters in a baking tray instead of molds. The possibilities are endless!
Tips for Success
- Make sure to stir continuously when adding vinegar to avoid an overflow of fizz.
- If the mixture seems too dry, you can add a splash more vinegar.
- Prep your work area with newspaper or an old tablecloth to catch any spills.
- These stones can also be used for fun games or as decorative pieces around the house.
How to Store Magical DIY Color Changing Treasure Stones: Easy Kids Craft
These stones can be stored in a cool, dry place. If you find that they are getting a bit dusty, just wipe them down with a damp cloth. They can last for months, but the sooner you use them, the more vibrant they will be!
FAQs
- Can we use other types of molds? Yes! You can use any mold shapes you like, just ensure they are flexible for easy removal.
- What if I want to make them glow in the dark? You can try adding glow-in-the-dark paint to the mixture before pouring it into molds.
- How can I make these stones more durable? For a sturdier version, consider adding a small amount of epoxy resin after they have hardened.
Crafting these Magical DIY Color Changing Treasure Stones is a delightful experience that brings out the kid in all of us. For more delicious recipes, check out Banana S’mores Muffins or Easy Homemade Raspberry Sorbet for treats you will love!
Don’t forget to share your creative treasures with others! Follow us on Pinterest for more fun ideas and inspiration!